

I stood there, flashlight in hand, staring into the abyss of my bedroom closet. It is one of those classic deep reach-ins that looks spacious on paper but acts like a black hole in reality. Last Tuesday, I lost a good twenty minutes looking for my favorite linen blazer, only to find it crumpled at the very back, behind a stack of sweaters I have not worn since 2018. It was a moment of pure frustration. Why do we build closets that require a spelunking permit to navigate?
Stop Losing Your Clothes to the Closet Abyss
If you are nodding along, you know the struggle. We try to maximize space with innovative built-in solutions for small rooms, but if you cannot see the back 12 inches of your shelf, that space might as well not exist. Today, I am going to share how I finally conquered my deep-closet demons with seven slim pull-out fixes that actually work. We are not just talking about fancy gadgets; we are talking about structural changes that make your morning routine feel like a breeze instead of a chore. I will be honest: I haven’t always been the storage guru. Early on, I made the classic mistake of thinking I could just stack deeper. I loaded up heavy bins on a single long shelf. Not only was it a nightmare to get anything out, but I ended up with a massive dip in the middle. I learned the hard way why particle board shelves sag and the plywood solution is the only way to go for heavy-duty storage.
Will these pull-outs actually survive daily use?
I get it. You have probably seen those flimsy plastic drawers at the big-box stores that rattle and jam if you put more than three t-shirts in them. You are worried that installing something slim means sacrificing durability. But here is the secret: when you use the right hardware and a bit of clever engineering—similar to the way you would approach custom bedroom vanities and storage ideas—these systems can hold a surprising amount of weight without flinching. Research from the UCLA Center on Everyday Lives of Families has shown that physical clutter can actually spike cortisol levels in homeowners. It is not just about aesthetics; it is about your sanity. By installing slim pull-outs, you are literally removing a daily stressor from your life. Have you ever reached for a pair of jeans only to have the entire stack come tumbling down on your head? Tell me I am not the only one who has faced the closet avalanche!
Getting the Foundation Right for Slim Hardware
Before we dive into the specific fixes, we have to talk about support. You cannot just slap a heavy-duty slide onto a thin piece of MDF and expect it to hold. When I first tried to stop deep drawers from binding on carpet, I realized that the floor and the side walls need to be perfectly square. If your closet walls are wonky—and let’s be real, most are—you will need to shim your tracks to ensure the pull-out does not stick. [image_placeholder]
Pick the Right Slides Before You Cut a Single Board
The hardware you choose is the engine of your storage system. If you go cheap here, the whole project stalls. For these ultra-slim pull-outs, I recommend full-extension ball-bearing slides. Think of them like the suspension on a high-end mountain bike; they need to handle the weight while keeping the movement smooth. When I was first starting out, I tried to repurpose some old nylon roller tracks I found in the garage for a narrow spice-style rack in my closet. Within a week, the track jumped, and I spent an hour fishing out stray socks from the dark corner. It was a mess. Now, I always look for slides rated for at least 75 pounds, even for slim units. This ensures that even if you pack it with heavy denim, it won’t stutter. You can apply similar principles when you learn how to support extra-wide kitchen drawers without dragging to ensure long-term durability.
Build it Slim but Make it Sturdy
The biggest mistake people make with vertical pull-outs is using material that is too thick, which eats up your precious clearance, or too thin, which causes bowing. I’ve found that 1/2-inch Baltic birch plywood is the ‘Goldilocks’ of materials—strong enough to hold its shape but thin enough to maximize your six-inch-wide gap. If you are building a taller unit for things like cleaning supplies or long boots, you need to prevent the side walls from splaying. This is where the heavy-duty plywood gusset for wide closet shelves technique comes in handy; adding small triangular supports at the corners keeps the frame square without adding bulk. [image_placeholder]
The Secret to Slides That Do Not Stick
Alignment is the difference between a ‘dream closet’ and a daily headache. Even a sixteenth of an inch of ‘wonkiness’ will cause your pull-out to bind. I like to use a spacer block—a simple scrap piece of wood cut to the exact height where I want the slide to sit. This acts as a physical template, so I am not constantly fumbling with a tape measure inside a dark closet. If you find your drawers are already catching, you should check out this guide on why your drawer slides bind and the simple realignment. It saved me a ton of time during my last renovation when I realized my closet floor had a slight slope.
Give Your Hardware Room to Breathe
Many DIYers forget the ‘clearance’ rule. You need to account for the thickness of the slide itself—usually half an inch on each side. I remember building a beautiful mahogany tie rack that fit perfectly into the opening, only to realize I had zero room for the hardware. I had to plane down the entire unit by hand. It was a painful lesson in measuring twice. If you are moving from simple shelves to more complex cabinetry, following a step-by-step guide to vanity installation for beginners can help you understand how to manage these tight tolerances. Once the tracks are in, use a level on both the horizontal and vertical planes. If that pull-out is even slightly tilted, gravity will either pull it open or make it feel like you are tugging a lead weight every morning.
Now that we have covered the basics of hardware and materials, let us dig deeper into the myths that often lead to expensive mistakes. A common belief in home organization is that more depth equals better storage. I am here to tell you that depth is actually the enemy of accessibility. Unless you are utilizing active retrieval systems like the pull-outs we discussed, any shelf deeper than 24 inches becomes a cluttered grave where items go to be forgotten. A study by the National Association of Professional Organizers revealed that the average person spends 55 minutes a day looking for things they own but cannot find; deep, static shelves are the primary reason for this inefficiency. When looking at top trends in vanity designs you need to know in 2025, you will see a distinct shift toward shallower, high-efficiency units that prioritize visibility over raw volume.
Stop the Rot with an Exterior Wall Barrier
One of the biggest ‘oops’ factors I see in DIY installations is neglecting the environment behind the cabinet. If you are mounting a custom unit against an exterior wall, you are creating a temperature differential that invites condensation. Over time, this moisture can warp your wood and lead to mold. I always insist on using the moisture barrier trick for vanities against cold walls. It is a simple step that involves a thin layer of insulation or a vapor-resistant backing, but it makes the difference between a cabinet that lasts five years and one that lasts fifty. 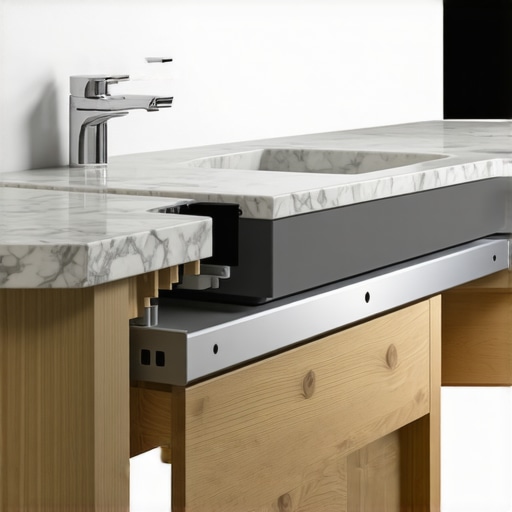
Can your standard wood frame actually handle that trendy quartz top?
This is the question that separates the pros from the weekend warriors. You might pick out a stunning, two-inch-thick slab of quartz for your custom vanity, assuming the standard box construction can bear the load. Often, it cannot. Without the hidden sub-frame move for supporting massive quartz top vanities, you risk a structural failure that could crack the stone or cause your drawers to bind. I recommend employing 7 tactics for supporting heavy quartz counters on standard wood vanities to ensure the weight is transferred directly to the floor rather than just the side panels.
Prevent the Gap When Your Home Settles
Finally, let’s talk about the ‘floating’ illusion. We all love the seamless look of floor-to-ceiling units, but why custom closets pull away from ceiling joists is a common horror story that usually starts with improper anchoring. As your home settles, the natural expansion and contraction of framing can create unsightly gaps. By using a floating cleat system or scribing your face frames to account for movement, you can keep that ‘built-in’ look permanent. Have you ever fallen into this trap where a ‘perfect’ install started showing gaps six months later? Let me know in the comments.
After the dust settles and the tools are put away, the real test of a DIY project begins. You want that drawer to glide just as easily in year five as it did on day one. I have learned that the secret is not just in the initial build; it is in the quarterly check-up. If you start to feel even a hint of resistance when pulling out your tie rack or shoe drawer, you need to stop drawer dragging with this under-mount slide adjustment before the hardware actually deforms. Over-tightening or ignoring a slight catch is the fastest way to strip your mounting holes.
How do I maintain these custom built-ins over time?
The biggest culprit for long-term failure is a combination of wood movement and hardware fatigue. Wood is a living material; it breathes with the seasons, expanding in the humid summer and shrinking in the dry winter. If you have followed my advice on the scribing secret for perfect built-ins, you have already accounted for initial wall wonkiness, but you still need to check your hinges and slides annually. Heavy doors are particularly notorious for shifting. I always recommend the three-hinge solution for sagging doors to distribute the load more effectively on tall, slim units.
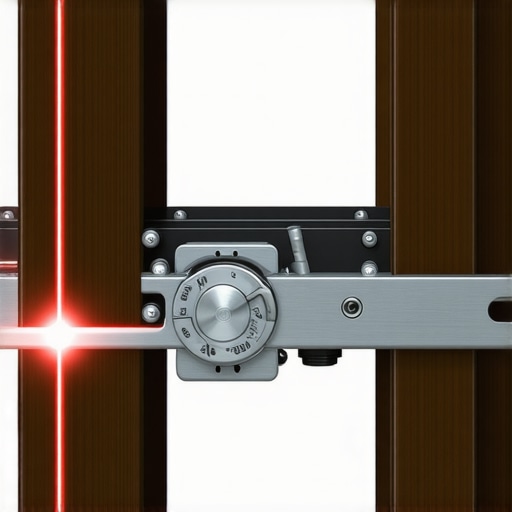
When it comes to the ‘pro’ toolkit, I do not go anywhere without my Bosch GLL25-10 cross-line laser. Trying to level a six-foot-tall vertical pull-out with a standard hand level is an exercise in madness. The laser gives you a constant, unmoving reference point across the entire closet footprint. Additionally, invest in a pack of composite shims. Unlike cedar or pine shims, composite versions will not compress under the weight of a fully loaded cabinet, ensuring your alignment stays true for decades. According to the Blum Technical Manual, even a 1mm deviation in track parallelism can increase the required opening force by 25%, which leads to premature wear on the ball bearings.
As we look toward the future, I see ‘responsive’ cabinetry becoming the new standard. We are moving beyond simple soft-close mechanisms into integrated weight-monitoring systems. Imagine a closet that sends a notification to your phone if a shelf is beginning to bow or if a drawer slide is reaching its load limit. It sounds like science fiction, but the sensor technology is already being piloted in high-end industrial storage. For now, mastering flawless vanity installation tricks will give you the foundational skills to handle whatever high-tech hardware comes next. My advanced tip for you today: two weeks after you finish any installation, go back and re-torque every mounting screw by hand. You will be surprised how much the structure settles once it is actually loaded with your wardrobe. Give those screws a quarter-turn this weekend and feel the difference.
The Hardest Lessons I Learned About Vertical Storage
Building thin vertical units taught me more about my house than any other project. I realized that my walls aren’t just slightly tilted; they’re practically leaning. One lightbulb moment was discovering that ‘perfect’ is the enemy of ‘functional.’ If you strive for a zero-gap fit, your drawer will never move; you need to embrace the reveal. I’ve also found that checking out expert design tips for custom vanities helped me understand how to balance weight distribution in tight spaces. Another realization? You can’t just rely on glue. For these high-stress narrow units, mechanical fasteners are your best friends to prevent the frame from racking over time. It is about building for the long haul, not just for the photos.
The Toolkit That Makes the Job Actually Enjoyable
I don’t believe in buying every gadget on the shelf, but three things made my closet transformation possible. First, the 1/2-inch Baltic birch plywood I mentioned earlier—it is incredibly stable and won’t warp as easily as cheaper alternatives. Second, I always keep a bottle of high-quality wood glue with a long open-time handy; it gives you a bit more wiggle room when you are fumbling with slides in a dark corner. [image_placeholder] Third, for those looking to expand these skills to other rooms, I highly recommend browsing innovative storage solutions to transform your bathroom to see how vertical pulls work around tight plumbing. Lastly, a simple set of magnetic nut drivers for your drill will save you from dropping screws into the floorboard abyss while you are reaching into deep recesses. You might even find some vanity installation hacks that save time also apply perfectly to narrow closet drawers.
Take the First Step Toward a Stress-Free Morning
It is easy to look at a cluttered closet and feel overwhelmed, but remember that even one slim pull-out can change the entire flow of your day. You do not need a massive budget or a professional crew; you just need the patience to measure twice and the willingness to try. By implementing these built-in storage ideas to declutter, you are investing in your own daily peace of mind. Your linen blazer should not be a casualty of a deep, forgotten shelf. Start with one unit, learn the rhythm of the hardware, and watch how quickly that black hole becomes your favorite part of the room. Which part of your closet currently feels like the biggest abyss where clothes go to die? Let me know in the comments below!