

It was 3:14 AM when the ‘wardrobe-pocalypse’ hit my house. A sound like a gunshot, followed by the slow, sickening slide of wood against drywall, echoed through the hall. I found my entire winter coat collection buried under a pile of splintered white laminate and bent wire. I’d trusted those flimsy plastic ‘easy-install’ clips that come in the box. Never again. If you’ve ever stared at a sagging shelf and wondered when—not if—it would give way, you’re in the right place. Today, I’m showing you the steel L-bracket hack that turned my precarious closet into a fortress.
Stop trusting those tiny plastic clips before they fail
Most ‘heavy-duty’ closet kits are lying to you. They rely on sheer luck and the hope that you don’t actually own more than three pairs of jeans. I learned this the hard way when I tried to support extra-long closet shelving without center studs using only the manufacturer’s hardware. It was a disaster. The brackets looked fine, but the moment I added a second row of shoes, the torque began pulling the anchors right out of the paper-thin gypsum. According to structural safety data from organizations like the International Association of Certified Home Inspectors, most standard drywall anchors are rated for static weight, but they fail miserably under the dynamic ‘tug and pull’ of daily closet use. I’ve spent years perfecting effortless storage solutions for a tidy, stylish home, and the one thing I’ve learned is that invisible strength beats visible ‘fancy’ hardware every time. You need a solution that bridges the gap between ‘aesthetic’ and ‘industrial.’ We are going to fix that lean once and for all. Have you ever walked into your closet and noticed that terrifying little gap between the shelf and the wall? Drop a comment and tell me if your shelving has started that slow-motion pull away from the drywall; I’ve been there, and I can help.
Is adding heavy steel actually worth the extra effort?
You might be thinking that this sounds like overkill. You’re worried your walk-in will end up looking like a warehouse or that you’ll accidentally drill into a water line. I made a huge mistake early on by using undersized 1-inch brackets that didn’t reach the wall studs. I ended up with more holes in my wall than I started with. But once you see how a 5-inch steel L-bracket can disappear under a particle board shelf to stop the sag, you’ll never go back to those plastic anchors again. We aren’t just making it look better; we’re making it bulletproof.
Hunt for the Studs Like Your Wardrobe Depends on It
The biggest mistake DIYers make isn’t the bracket choice; it’s the anchor point. Think of your wall studs like the chassis of a truck. If you try to tow a trailer by bolting it to the plastic bumper, you’re going to have a bad day. The same logic applies to your heavy winter coats. You must secure your hardware into the timber behind the drywall. If you can’t find a stud exactly where you need it, you might need to adapt some 6 tactics for mounting heavy garage racks without hitting a stud to distribute that weight effectively. I learned this lesson the hard way in my guest room, where I ‘eyeballed’ the studs and ended up with a wall that looked like a woodpecker had a field day. It was a mess of spackle and regret that could have been avoided with a twenty-dollar stud finder.
Swap Those Flimsy Clips for Heavy-Duty Steel
Throw away the plastic. To truly stop the sag, you need 5-inch steel L-brackets. These are the unsung heroes of the hardware aisle. When you install them, you’re creating a cantilevered support system that shifts the load from the horizontal plane of the shelf directly into the vertical strength of the wall frame. For those dealing with massive spans, I often recommend incorporating a heavy-duty plywood gusset for wide closet shelves to provide that extra lateral stability. 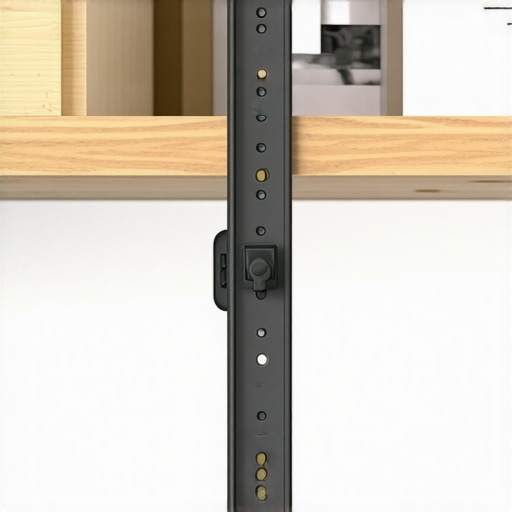 Placing these brackets every 32 inches—which is every other stud in most modern homes—is usually enough to hold even a library-sized collection of heavy boots and suitcases without a hint of bowing.
Don’t Skip the Pre-Drill or You’ll Regret It
Once you’ve marked your heights, use a drill bit slightly smaller than your lag bolts. This prevents the wood stud from splitting, which is a common cause of ‘silent’ structural failures where the screw stays in but the wood loses its grip. If you’ve ever followed an expert guide to flawless vanity installation, you know that precision at the start saves hours of leveling at the end. I remember installing my first set of reinforced shelves and skipping the pilot holes because I was in a rush. The sickening ‘crack’ I heard wasn’t the shelf—it was the stud splitting behind the drywall. I had to rip the whole thing out and move the entire system three inches to the left. Now, I always pre-drill. It’s the difference between a shelf that lasts a season and one that lasts a lifetime. This extra five minutes of prep ensures that even when dealing with why particle board shelves sag, your foundation remains completely rock solid.
Most DIY guides tell you that a few long screws into the studs are enough to hold a floating vanity. They’re wrong. In my experience, even if you hit every stud, the sheer weight of a stone top creates a rotational force that can actually crush the wood fibers of your cabinet back over time. This leads to that dreaded 2-degree tilt that makes your drawers stick. To combat this, I’ve started using how to stop floating vanities from dipping with steel plates. It’s a game-changer because it spreads the load across a larger surface area of the stud, rather than relying on a single point of failure. According to the National Kitchen & Bath Association (NKBA) installation standards, wall-hung units must be engineered to support the static weight of the fixture plus the dynamic load of a user leaning on it, which often exceeds 300 pounds. Have you ever fallen into this trap where your ‘perfect’ installation started to lean after six months? Let me know in the comments.
Is Your Wall Actually Strong Enough for a Massive Quartz Top?
The hidden nuance that most people miss is the internal racking of the cabinet. Most standard cabinets aren’t designed to handle 200 pounds of quartz without an internal skeleton. I always recommend implementing the hidden sub-frame move for supporting massive quartz top vanities for any floating design over 48 inches. If you skip this, the cabinet box will eventually ‘rack’—which is a fancy way of saying it will warp from a rectangle into a parallelogram. 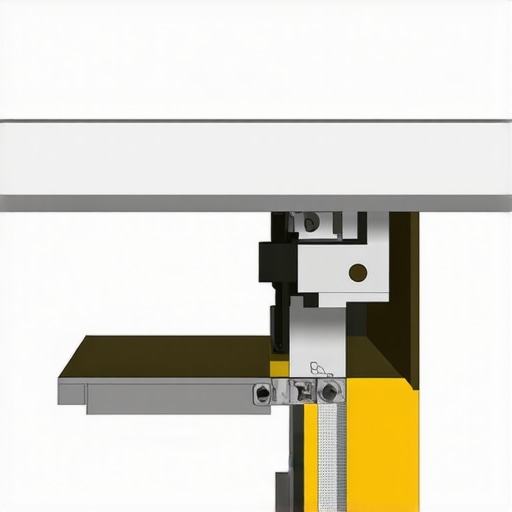 One major ‘oops’ factor I see constantly is ignoring the environmental physics of the room. If you’re installing a built-in against an exterior wall, you have to consider the moisture barrier rule for cabinets on cold outer walls. Without that small thermal break, condensation will form behind your beautiful new unit, leading to mold that you won’t see until it’s too late. It’s the same reason I prioritize the moisture barrier strategy for below-grade vanities in every basement project I touch. Finally, stop assuming your floors are level just because the house is ‘new.’ I’ve seen high-end custom units look like cheap junk because the installer didn’t use the leveling move for vanities on slanted bathroom floors. If the base isn’t perfect, the doors won’t hang straight, and your soft-close hinges will fight you every single time. If you’re struggling with a cabinet that feels ‘off’ even though your screws are tight, check how to fix wobbly vanity legs on uneven tile—sometimes the fix is as simple as a hidden shim and a bit of patience.Once the dust settles and your tools are put away, the real test of a DIY project begins: the test of time. I’ve seen gorgeous installations look like junk in eighteen months because the homeowner ignored the small signs of mechanical fatigue. If your drawers aren’t gliding like butter anymore, it’s usually not the wood—it’s the hardware. I’ve spent countless hours investigating why your soft-close drawers are slamming and the tension fix that actually works. Usually, it’s a simple matter of the hydraulic piston losing its seal or the track falling out of parallel. According to technical documentation from Blum, a leader in cabinetry hardware, high-quality drawer slides are rated for 100,000 cycles, but only if they are installed with zero racking. If you feel even a tiny bit of resistance, you need to check your alignment before the metal bearings begin to grind.
How do I keep my custom storage looking brand new for years?
Maintenance isn’t just about cleaning; it’s about structural vigilance. Every six months, I do a ‘stress walk’ through my house. I check the base of my bathroom units for any signs of swelling. If you catch moisture early, you can apply a quick fix like the moisture-proof base hack for mudroom lockers or vanities to prevent the wood from delaminating. For heavy-duty systems, you should also inspect your mounting points. If you have a massive pantry, check how to fix loose pull-out pantry tracks at the first sign of a wobble. I also recommend keeping a small ‘touch-up’ kit—a wax fill stick and a bottle of the original finish—hidden in the back of a cabinet. It sounds obsessive, but it’s the difference between a kitchen that looks ‘lived-in’ and one that looks ‘beaten-down.’ 
The Precision Tools I Never Leave at the Hardware Store
If you’re serious about scaling your storage, you need to stop guessing with a bubble level. My secret weapon is a 360-degree green beam laser level. It allows you to project a perfectly level line across all four walls of a room simultaneously. This is crucial when you’re trying the scribing move for flawless cabinet gaps on natural stone or uneven plaster. Without a laser, you’re just chasing your tail with a pencil. I also swear by impact drivers with adjustable torque settings; standard drills are too aggressive and often strip the heads of the specialized screws needed for the steel rail tactic for anchoring massive floor-to-ceiling pantries.
Where is the future of home storage heading?
Looking toward the next few years, I predict a massive shift toward ‘active’ storage. We are moving away from static boxes and toward modular, tech-integrated systems that can be reconfigured as your family grows. We are already seeing this in top trends in vanity designs you need to know in 2025, where internal power stations and adaptable shelving are becoming the standard rather than the exception. I encourage you to try one ‘over-engineered’ move on your next project—like using the internal torsion box move for long floating shelves—and see the difference it makes in stability. Don’t just build for today; build for a decade from now.
The Hardest Lesson I Learned About Structural Failure
Looking back at my first few projects, I realized I was obsessing over the wrong details. I worried about the paint finish when I should have been calculating the shear strength of my fasteners. Here are the three ‘lightbulb moments’ that changed my approach forever: First, never trust the weight rating on a box of drywall anchors; they don’t account for the constant vibration of a closet door closing or the weight of a heavy winter coat. Second, a 1/8-inch tilt at the wall becomes a noticeable 1-inch sag at the front of a deep shelf over time. Finally, the most expensive hardware in the world cannot save a shelf if it isn’t anchored into the timber core of your home. Embracing built-in storage ideas to declutter and enhance your home requires looking past the surface and prioritizing the skeleton of the build.
The Gear That Keeps My Sanity Intact
If you’re ready to move past the ‘basic’ DIY stage, you need a gear list that supports precision. Beyond the 360-degree laser level, I highly recommend investing in heavy-duty steel L-brackets that are rated for industrial use rather than just decorative purposes. I always keep a collection of effortless storage solutions for a tidy, stylish home in my project notes to ensure I am combining strength with a modern aesthetic. For any bathroom projects, I regularly use vanity installation hacks that save time and money to avoid common structural pitfalls. Lastly, don’t underestimate the power of a simple countersink bit; it hides your screws and prevents wood from splitting, which is vital for long-term durability.
Your Blueprint for a Sag-Free Future
You do not need a degree in structural engineering to build a closet that lasts for decades; you just need the patience to do the invisible steps correctly. Whether you are tackling a small reach-in or exploring the top trends in vanity designs you need to know in 2025, remember that a solid foundation is your best friend. Stop settling for wobbly shelves and start building with the confidence that your wardrobe—and your walls—can handle the load. If you find yourself facing a unique layout challenge, you can always contact us for expert guidance. Have you ever had a shelf collapse at the worst possible moment? Let me know in the comments below!