

I stood there, sweat dripping off my nose, staring at a three-quarter-inch gap between my brand-new shaker cabinets and the kitchen floor. In my head, I’d done everything right. I leveled the boxes perfectly. I shimmed the back against the wall. But the floor in this old 1920s bungalow had other plans. It didn’t just slope; it rolled like a gentle wave. If you’ve ever tried to ignore a gap like that by slapping on some chunky shoe molding, you know the heartbreak. It looks like a DIY disaster. Today, I’m taking you through the exact process of scribing built-ins so they sit flush against even the most rebellious slanted floors. We are going to turn that gap into a seamless fit that looks like it grew out of the subfloor. [image_placeholder]
Why You Can’t Just Trust Your Level Alone
Early in my career, I made the mistake of thinking a level was the only tool that mattered. I’d get the cabinet perfectly plumb, only to realize the toe kick looked like a wedge of Swiss cheese because the floor was dropping away toward the corner. I learned the hard way that achieving an expert guide to flawless vanity installation starts with understanding the floor’s “run.” According to the National Association of Home Builders, floor joists in older homes can deflect over time due to load and moisture, creating slopes that are often invisible to the naked eye until you put something perfectly straight against them. If you try to force the cabinet down to the floor, your doors won’t hang straight. If you keep it level, you get the gap. Scribing is the only way out of this paradox. It’s a technique I use for everything from kitchen bases to vanities on slanted bathroom floors to ensure the piece is both structurally sound and visually perfect.
Is Scribing Really Worth the Extra Two Hours?
You might be thinking, “Can’t I just hide the gap with a big piece of baseboard?” You can certainly try. But your eye will always catch that uneven line where the trim meets the floor. Scribing is the difference between a project that looks “home-made” and one that looks truly custom. Whether you are following a step-by-step guide to vanity installation or fitting a massive pantry, the technique involves transferring the floor’s specific “contour” onto the cabinet base using a simple compass or a dedicated scribing tool. This is also the secret to solving why most floor to ceiling cabinets gap at the top or bottom. It takes a little more time, but the results are permanent and professional. Have you ever spent hours leveling a cabinet only to find a massive, soul-crushing gap staring back at you from the floor? It’s a common frustration, but once you master the scribe, you’ll never fear a crooked floor again. Let’s get into the tools you’ll need to make this happen.
Level the Cabinet First and Forget the Floor Gaps
Before you reach for your pencil, you have to ignore what your eyes are telling you about the floor. Your priority is to get the cabinet box perfectly level and plumb in its final resting place. Use heavy-duty plastic shims to lift the low side until your bubble is dead-center. It feels counter-intuitive to create a bigger gap under the cabinet, but this is the foundation of vanity installation hacks that save time and money. If the box isn’t level, your doors will bind and your drawers will drift open. Once the unit is level, you’ll see the ‘true’ shape of the floor’s slope mirrored in that empty space below. I remember a job in an old Victorian bathroom where the floor dropped nearly two inches from left to right. By the time I had the vanity level, it looked like it was hovering in mid-air. It was terrifying to look at, but it was the only way to ensure the leveling move for vanities on slanted bathroom floors would actually work. If I had just pushed it to the floor, the marble top would have looked like a sliding board.
Set Your Compass to the Widest Point of the Void
Grab a standard school compass or a professional scribing tool. Find the widest part of the gap between the cabinet base and the floor. Adjust your compass so the distance between the metal point and the pencil lead matches that maximum gap exactly. This is the ‘magic number’ that will be transferred across the entire length of the piece. Place the metal point on the floor and the pencil tip on the cabinet’s toe kick or side panel. As you drag the compass horizontally, the point follows the bumps and dips of the floor, while the pencil replicates those exact movements onto your wood. This process is essential for creative built-ins for seamless storage and home aesthetics because it eliminates the need for bulky cover-up trim. If you skip this, you’ll likely end up wondering how to fix uneven gaps in custom built-in doors later on when the whole structure settles awkwardly. 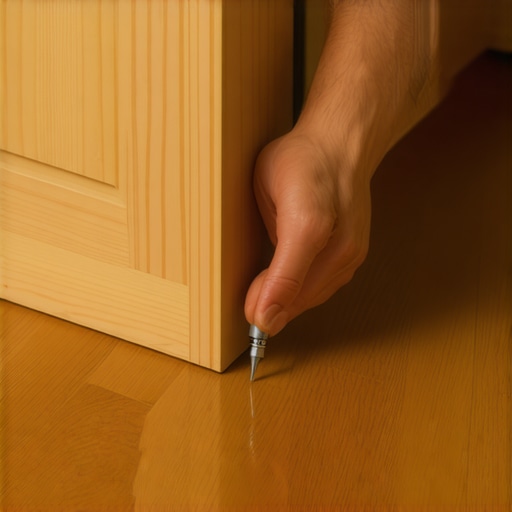
The Slow-Motion Secret to Cutting Your Scribe Line
Once your line is marked, it’s time to remove the material. Don’t just cut straight through. You want to ‘back-bevel’ your cut by angling your jigsaw or power plane at about 30 degrees toward the inside of the cabinet. This ensures that only the very front edge of the wood touches the floor, creating a razor-sharp transition. I once rushed this on a walnut vanity and didn’t back-bevel; the thick grain caught the blade and pushed the wood out, leaving a visible seam that I had to hide with caulk. It was a rookie mistake that cost me half a day in cleanup. When you back-bevel, you’re giving yourself a ‘cheater’s edge’ that makes the fit look tighter than it actually is. This technique is a lifesaver when you’re trying to figure out how to fix wobbly vanity legs on uneven tile or stone. If you over-cut, you’re in trouble, so always leave the pencil line visible on your first pass and use a belt sander to creep up on the final fit. Proper scribing prevents the tension that causes issues like why your built-in face frames are separating from the wall over time. Take it slow, check the fit often, and remember that you can always take more wood off, but you can’t put it back on.Most DIY guides suggest that if a cabinet feels loose, you simply need to drive a few more three-inch screws into the nearest stud. But here is where the pros differ: we do not just look for a ‘bite,’ we look for load distribution. Over-tightening fasteners without a proper sub-frame can actually warp the cabinet box, leading to those annoying door alignment issues everyone hates. I have seen homeowners try to compensate for a weak wall by using every anchor in the box, only to have the drywall fail because the shear force was too high. According to the Kitchen Cabinet Manufacturers Association (KCMA), standard cabinets are tested to hold 600 pounds, but that rating is entirely dependent on the integrity of the mounting surface. If you are working with heavy materials, you should be looking at the hidden sub-frame move for supporting massive quartz top vanities rather than just bigger screws.
Why Do So Many Floating Vanities Eventually Dip?
It is the question that keeps renovators up at night. The ‘oops’ factor usually is not the installation day; it is what happens six months later. Most people assume the wall studs are enough. However, in older homes with wide spacing, the lateral stress of a heavy stone top can cause the studs themselves to twist slightly. To combat this, I always recommend how to support quartz counters on custom floating vanities using internal steel reinforcement. If you skip the structural backing, no amount of shimming will save you. Have you ever fallen into this trap of trusting the studs too much? Let me know in the comments. 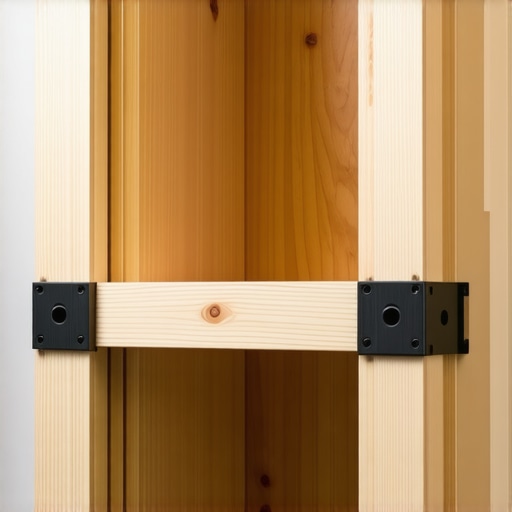 Another nuance people miss is the ‘micro-climate’ behind the wood. Even if you are not in a bathroom, cabinets pushed against an exterior wall face temperature swings that cause expansion and contraction. This is why the moisture-proof base tactic for basement built-ins is a literal lifesaver. Without a barrier, that expensive MDF or plywood will wick up ground moisture like a sponge, leading to base rot that you will not see until it is too late. When you maximize your space with custom vanities expert design tips, always account for that 1/8-inch expansion gap. Finally, let us talk about the ‘wobble’ that occurs in large shelving units. Most beginners try to fix this by learning how to fix wobbly built-ins with 4 hidden steel plate tactics. But the real pro move is checking for rack—the tendency of a box to become a trapezoid. If your scribe is perfect but your shelves are still vibrating, you likely have a geometry problem, not a fastening problem. Sophisticated storage requires a mix of rigid attachment and flexible tolerance.
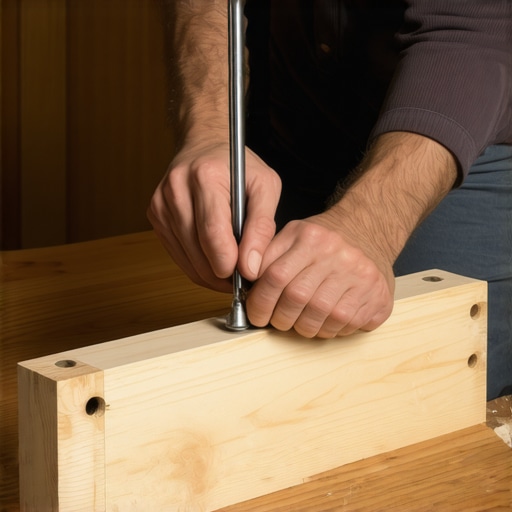
If you are still using a five-dollar school compass from the stationery aisle, you are fighting a losing battle against physics. The biggest leap in my work came when I switched to a dedicated offset scribing tool with a locking articulating head. Why? Because a standard compass flexes when you hit a knot in the wood or a bump in the plaster. That tiny 1/16th of an inch of flex is the difference between a hair-line fit and a gap you have to fill with caulk. When I’m performing the scribing move for flawless cabinet gaps on natural stone, I need the tool to be rigid enough to translate the texture of granite or slate without bouncing. I personally rely on the FastCap AccuScribe because it allows me to maintain a consistent angle even when I’m reaching into tight corners or working around a baseboard return.
Why Your School Compass is Ruining Your Scribes
Beyond the tool itself, the secret to a professional finish is the lead. I stop using standard HB pencils and switch to a hard 2H or 4H lead. A softer lead dulls quickly, widening your line as you drag it across the floor. By the time you reach the other side of a six-foot vanity, your line is twice as thick as it was when you started. Precision is everything when you want to maximize your space with custom vanities expert design tips. According to the Blum Technical Manual, even high-end soft-close hinges can only compensate for so much box racking; if your scribe is off and you force the cabinet into place, you exceed the 1/32-inch squareness tolerance required for those hinges to operate for their rated 200,000 cycles. This is how you avoid the headache of doors that never seem to stay adjusted.
How do I keep my custom built-ins perfectly aligned for years?
Maintenance starts with understanding that your house is a living, breathing thing. Wood expands and contracts with the seasons, and your floors will continue to settle. Once a year, I take a screwdriver to my hinge plates to nudge the doors back into alignment. If you did the work upfront to how to fix wobbly vanity legs on uneven tile by scribing the base rather than just piling up shims, this process takes minutes. If you relied on shims alone, you might find that as the house shifts, those shims compress or slip, causing the entire unit to tilt. Long-term results depend on that initial physical connection between the wood and the floor. I predict that in the next five years, we will see more DIYers adopting digital templating tools—apps that use LiDAR to create a cut-file for your base—but for now, a sharp pencil and a steady hand are still the gold standard for effortless storage solutions for a tidy stylish home.
My challenge for you on your next project is this: don’t just hide your mistakes behind a piece of quarter-round molding. Take the extra hour to back-bevel your scribe line with a jigsaw and a belt sander. Creating that ‘knife-edge’ fit where the cabinet appears to melt into the floor is the ultimate mark of craftsmanship. It transforms a simple storage box into a permanent architectural feature of your home.
The Brutal Truth About Shims and Long Term Settling
When I first started, I thought the bigger the shim, the better the support. I was wrong. Over time, those tall stacks of plastic or cedar shims can compress or even kick out if the house vibrates or settles. The real lightbulb moment for me was realizing that the cabinet itself needs to be the structural bridge to the floor. Scribing isn’t just about aesthetics; it’s about structural integrity. If you rely on shims to bridge a one-inch gap, you’re building on a shaky foundation. I once had a client call me back two years later because their doors were binding; the shims had shifted, and the box had sagged. Now, I use the stop wobbly custom built-ins with 4 hidden steel plate fixes strategy alongside a tight scribe to ensure that vanity never moves a millimeter. [image_placeholder_final]
The Three Small Tools That Save My Installations
If you want to move beyond the frustration of basic tools, you need a few specifics in your kit. First, a high-quality down-cut jigsaw blade is non-negotiable. Standard blades pull the wood fibers up, causing nasty chips on the finished face of your cabinet. A down-cut blade pushes the fibers down, leaving your scribe line crisp and clean. Second, I swear by 2-inch wide blue painter’s tape. Apply it to the cabinet base before you mark your line; it makes the pencil mark easier to see and provides extra protection against the jigsaw baseplate scratching your finish. Finally, for those looking to maximize your space with custom vanities expert design tips, a simple handheld belt sander is the best way to fine-tune a scribe line without over-cutting. These small tool investments save hours of sanding and touch-up work later.
Create a Permanent Architectural Feature in Your Home
You now have the knowledge to tackle the most rebellious floors in any old home. Don’t let the fear of a slanted subfloor stop you from creating the kitchen or bathroom of your dreams. Whether you’re researching smart storage solutions to optimize small bathroom spaces or installing a massive library unit, the scribe is your best friend. It takes a little more patience, but the pride you’ll feel when that base sits flush against the floor is worth every second. You aren’t just installing furniture; you’re creating effortless storage solutions for a tidy stylish home that looks like it was always meant to be there. Take that first cut with confidence, knowing that you’re building for the long haul. Have you ever tried to hide a floor gap with molding only to have it drive you crazy every time you walked by? Let me know your biggest installation headaches in the comments below!