

I still remember the sound of my first master bath upgrade hitting the floor at 3 AM. It wasn’t just a thud; it was the expensive, crystalline sound of five-millimeter glass shattering against porcelain. I’d used the little plastic plugs that came in the box. Big mistake. Huge. If you’ve ever stared at a beautiful, heavy mirrored cabinet and then at a wall with no studs in sight, you know that paralyzing fear of it pulling away. Today, I’m going to show you exactly how to avoid that catastrophe. We’re diving into the Toggle Bolt Trick—the only way I trust to hang heavy vanity storage when the framing doesn’t line up with your design dreams. This method is the backbone of innovative storage solutions to transform your bathroom, ensuring your mirrors stay where they belong. [IMAGE]
The Midnight Crash That Taught Me Everything
When I first started tinkering with my own home, I thought an anchor is an anchor. I figured if the manufacturer threw it in the box, it had to work. I was wrong. Standard plastic expansion anchors rely on friction, which is great for a picture frame, but a heavy mirrored cabinet is a different beast entirely. It creates leverage that pulls out as much as it pulls down. If you’ve seen why your heavy mirror cabinet is tilting, you’re already witnessing the slow-motion failure of a standard mount. I learned the hard way that when you’re dealing with weight and glass, you need mechanical interlock, not just a bit of plastic friction. Have you ever had a DIY project literally fall apart on you? It’s a gut punch, but it’s also the best teacher.
Can This Tiny Piece of Metal Really Hold 50 Pounds?
I get it. Looking at a toggle bolt—a long screw with a folding spring-loaded wing—it doesn’t look like much. You might wonder if it’s actually worth the extra effort of drilling a larger hole. According to data from the Gypsum Association, a 1/4-inch toggle bolt in 1/2-inch drywall can support a safe working load of roughly 90 pounds. That is massive compared to the measly 10 to 15 pounds you get from a basic screw-in anchor. By using the toggle bolt trick for hanging heavy mirrored cabinets, you’re shifting the stress from a tiny point in the drywall to a wide area behind the wall. It’s like the difference between standing on thin ice with sneakers versus snowshoes. We’re going to make sure your beautiful new cabinet stays rock-solid for years, not just until the humidity changes.
Stop Trusting Those Flimsy Plastic Wall Plugs
The secret to a professional-grade installation isn’t some expensive tool; it’s choosing the right fastener for the physics of the job. Most of us are taught to find a stud, and that’s great advice—if your studs aren’t hidden behind a stack of vent pipes or positioned three inches off-center from your sink. In the real world, you have to adapt. I’ll walk you through the prep, the drilling, and the clinch moment where the toggle snaps open behind the wall. It’s the most satisfying sound in home renovation. Ready to finally get that cabinet up without the 3 AM wake-up call?
The first rule of the toggle bolt is that you can’t wing it. Unlike a standard screw that you can just drive into a stud, this process requires a sequence that feels counter-intuitive until you see it in action. You start by holding your cabinet against the wall precisely where you want it. This is where a second pair of hands is non-negotiable. While your partner holds the weight, you’ll mark your mounting holes through the cabinet’s pre-drilled flange. If you’re working solo, I’ve found that a step-by-step guide to vanity installation for beginners usually suggests using a temporary ledger board to hold the weight, but for a mirrored cabinet, just grab a friend. Mark the holes, then set the cabinet aside.
Don’t Fear the Massive Drill Bit
This is the moment where most DIYers hesitate. To get a 1/4-inch toggle bolt through the wall, you usually need to drill a 5/8-inch hole. It looks like you’re destroying your drywall, but remember: the cabinet flange will hide this crater completely. If you are dealing with a particularly thick wall, like when you secure floating vanities to double layer drywall, make sure your toggle bolts are long enough to clear the total depth of the board plus the cabinet back. I once made the mistake of buying two-inch bolts for a deep-set cabinet on a double-layer wall. The wings never snapped open; they just sat there compressed inside the gypsum, and the cabinet started to lean within an hour. Now, I always go for at least three or four inches to ensure that satisfying snap behind the wall.
Thread the Needle Before the Snap
Here is the critical sequence: you must insert the bolt through the cabinet hole first, then thread the toggle wing onto the bolt on the other side. If you put the toggle in the wall first, you’ve just lost a piece of hardware to the void. Once the wings are on, fold them down and push them through the holes you drilled. This is where the magic happens. As soon as those wings clear the back of the drywall, they spring open like an umbrella in a gale. This creates the mechanical interlock that makes the toggle bolt method for anchoring heavy mirrored bathroom cabinets so effective. 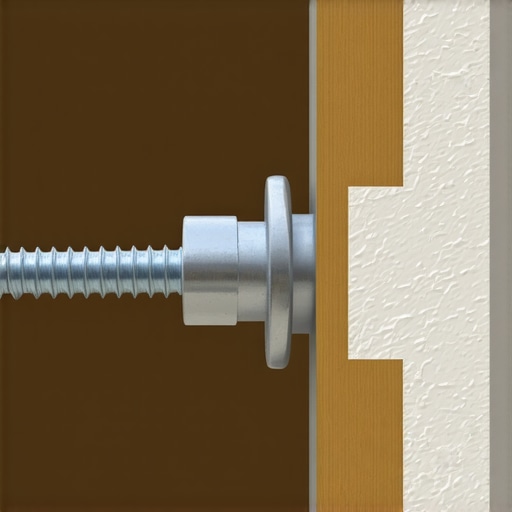
Pull Back to Create Tension
The most common fail point during the final tightening is letting the toggle wing spin freely inside the wall. To prevent this, you need to pull the cabinet toward you while you turn the screw. This creates friction between the wings and the back of the drywall, holding the wing in place so the bolt can actually thread through it. It’s like trying to tighten a nut on a bolt; if you don’t hold the nut, you’re just spinning in circles. I remember a humid July afternoon in a cramped powder room where I forgot this trick. I spent ten minutes sweating and swearing because the bolt wouldn’t tighten, only to realize the wing was just dancing in the dark. Once I pulled the cabinet back and created that tension, it cinched down in seconds. This tension is what makes the toggle bolt strategy for heavy bathroom mirrors so much more reliable than any plastic plug. You aren’t just hoping it stays; you are mechanically clamping the cabinet to the wall structure itself.
Check for Level Before the Final Turn
Before you give that last half-turn of the screwdriver, put your level across the top of the cabinet one last time. Because the holes for toggle bolts are slightly oversized, you have a tiny bit of play to wiggle the cabinet left, right, up, or down. This is actually a secret advantage. In vanity installation hacks that save time and money, we often talk about shims, but with toggle bolts, the hole size itself acts as your adjustment window. Once it’s perfectly level, crank it down until the cabinet back is snug against the wall. You want it tight enough that there is no movement, but don’t overdo it to the point of crushing the drywall core. When it feels like the wall and the cabinet have become one single unit, you know you’ve won.
But winning the installation isn’t the same as winning the long game. Most DIYers—and even some seasoned contractors—fall into what I call the ‘Static Load Trap.’ We assume that because a cabinet is rock-solid on Tuesday, it will stay that way for ten years. In reality, your bathroom is a living, breathing environment where the physics of fasteners change with every steamy shower. If you’ve been reading our expert guide to flawless vanity installation tricks and tips, you know that the environmental context matters just as much as the hardware itself.
Does Bathroom Humidity Actually Rot Your Drywall Anchors?
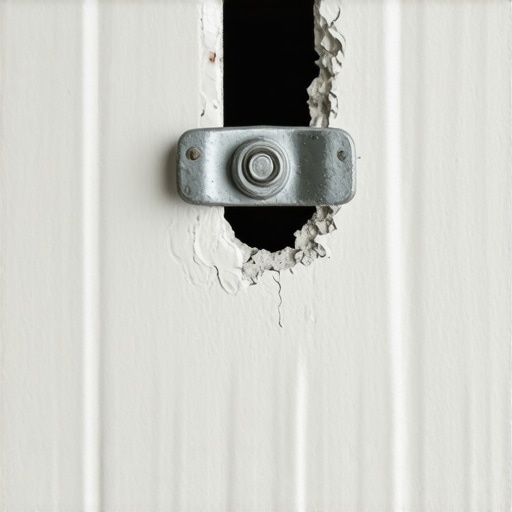
Common wisdom suggests that as long as you don’t have an active leak, your drywall is a stable substrate. That is a dangerous myth. Standard 1/2-inch gypsum board is highly hygroscopic, meaning it absorbs moisture directly from the air. Over months of use, the area around a high-tension fastener like a toggle bolt can soften as the gypsum core loses its crystalline rigidity. This subtle degradation is often why your built-in cabinets are pulling away from the ceiling or tilting forward. Professional installers often forget that the Gypsum Association’s GA-216 manual warns that the structural integrity of the drywall core is significantly compromised if the paper facing is broken by over-driven fasteners. When you combine high humidity with a crushed gypsum core, you aren’t just hanging a cabinet; you’re setting a timer for a failure.
Stop Assuming Your Walls Never Move
Here is a contrarian truth: many people believe adding more screws increases safety. In my experience, drilling ten holes in a small area actually weakens the wall through a ‘perforation effect,’ similar to the edge of a notebook page. Instead of Swiss-cheesing your drywall, focus on the quality of the ‘bite.’ I’ve seen beautiful creative storage solutions for vanities fail because the installer used six cheap plastic anchors instead of two well-placed, high-quality toggle bolts. The constant vibration of daily use—the opening and closing of heavy mirrored doors—creates a ‘working’ effect on the holes. If the mounting points are too close together, they eventually merge into one giant structural failure. One solid mechanical interlock is worth more than five friction-based plugs every single time.
The Deadly Mistake of the Over-Torqued Screw
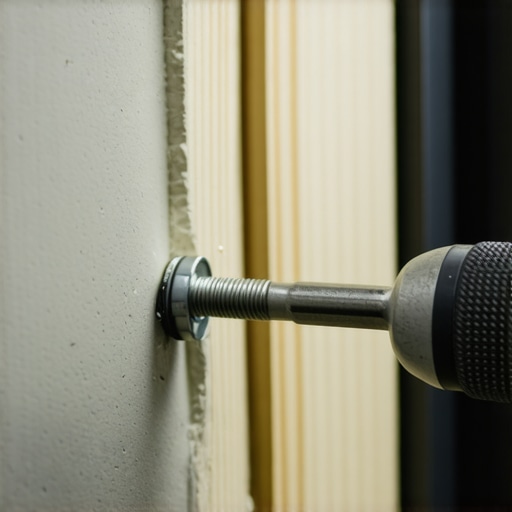
The most common ‘Oops’ factor usually happens in the final three seconds of the job. You’re feeling confident, you’ve got your impact driver on high torque, and you give the bolt one last ‘ugga-dugga’ for good measure. You just killed your anchor. By over-tightening a toggle bolt, you can actually snap the metal wing through the back paper of the drywall. Once that paper is gone, the anchor has no structural surface to pull against. If you later notice uneven gaps in custom built-in doors, it might not be a hinge problem; it could be the entire unit sagging because the internal wall structure was crushed during the ‘final’ tighten. Switch to a hand screwdriver for those last few turns. It is the only way to feel the resistance and ensure you aren’t destroying the very wall you’re relying on. Have you ever fallen into this trap of over-tightening until something went ‘pop’? Let me know in the comments.
Why You Should Re-Tighten Your Hardware Every Two Years
Maintenance isn’t just about cleaning mirrors; it’s about acknowledging that houses breathe. Wood expands in the summer and contracts in the winter. This cycle can slowly work even the best fasteners loose. I make it a habit to do a ‘torque check’ on my heavy installations every couple of years. This is especially true for smart storage solutions to optimize small bathroom spaces where every inch of wall tension is critical. If you feel even a tiny bit of play in your cabinet, don’t ignore it. That’s the drywall telling you it’s tired.
How do I keep my bathroom storage from sagging over time?
The secret to longevity is moisture management. Even if you use the toggle bolt trick, if steam is allowed to penetrate the raw edges of your cabinet or the wall behind it, you’re headed for trouble. I always recommend using the waterproof sealant move for vanity backsplashes to create a barrier that prevents humidity from reaching the mounting points. According to the NKBA (National Kitchen & Bath Association) Professional Resource Library, the standard for bathroom cabinetry installation emphasizes that “mechanical fasteners must be checked for integrity if the humidity levels consistently exceed 60%.” Ignoring this lead to the structural failures we all want to avoid.
The Tools That Saved My Sanity
You don’t need a truck full of gear, but you do need the right gear. For toggle bolts, I stopped using my high-powered impact driver for the final set. Instead, I switched to a Wera Kraftform Kompakt long-shaft screwdriver. It gives me the tactile feedback I need to feel exactly when the wing is snug against the back of the gypsum without over-torquing it. If you’re looking for more vanity installation hacks that save time and money, start by investing in a high-quality 24-inch box level. Cheap torpedo levels are great for pictures, but for a heavy mirrored cabinet, a fractional error at the base becomes a massive tilt at the top.
What’s Next for the Floating Vanity Trend?
Looking ahead, we are seeing a major shift toward internal steel sub-frames. Instead of relying purely on the back-rail of the cabinet, newer top trends in vanity designs you need to know in 2025 are moving toward integrated metal skeletons that bolt directly to the wall studs. This takes the guesswork out of the ‘toggle vs. stud’ debate. We’re also seeing more sleek built-in vanities for 2025 that incorporate hidden leveling feet within the wall cavity itself. It’s an exciting time to be a DIYer because the hardware is finally catching up to our design ambitions.
I want you to go to your bathroom right now, open that heavy mirrored cabinet, and give the mount a firm (but careful) pull. If it moves even a millimeter, grab a hand screwdriver and fix it before the 3 AM crash happens to you. Once you’ve secured the basics, you can start thinking about more expert guides to flawless vanity installation tricks and tips to level up the rest of your home.
Hard-Won Truths from My Years Behind the Drill
One major lightbulb moment was realizing that the ‘hollow’ sound of a wall isn’t a problem; it’s an opportunity. When you hear that echo, you know exactly where the toggle wing has room to breathe and expand. Another tip: always vacuum the drill dust out of the hole before inserting the anchor. Even a little bit of grit can interfere with the wing’s spring mechanism, causing a ‘short-snap’ that doesn’t fully lock. Lastly, if you’re working on creative built-ins for seamless storage and home aesthetics, remember that weight accumulates. Every heavy bottle of shampoo and spare towel adds to the static load, so I always over-engineer my anchor choice by at least 20% beyond the manufacturer’s rating. Trusting the ‘just enough’ approach is how I ended up with glass on the floor that one fateful night.
The Gear That Never Leaves My Toolbox
For those ready to build their own professional-grade installation kit, I recommend the Toggler Snaptoggle heavy-duty anchors. Unlike standard spring-loaded wings, these have a clever plastic strap system that keeps the metal channel from falling into the wall cavity if you ever need to remove the bolt to adjust the cabinet. I also suggest keeping an expert guide to flawless vanity installation tricks and tips bookmarked on your phone; it’s a lifesaver when you hit an unexpected pipe or wire. Finally, never underestimate the power of a Stabila 24-inch box level. A level cabinet distributes weight evenly across all your toggle bolts, preventing any single point from bearing the brunt of the tension.
Turning Your Bathroom Dreams into Solid Reality
Don’t let the fear of a 3 AM crash keep you from the bathroom of your dreams. By mastering the toggle bolt trick, you are gaining the confidence to install heavy, high-end storage exactly where you want it, regardless of where the builder decided to place the studs. When you are choosing the perfect vanity style for your bedroom or bath, you can now focus purely on the design and functionality you love, knowing you have the mechanical skills to keep it safe and secure. Go ahead, make that first mark on the wall—you have the tools and the knowledge to do this right. Have you ever had a heavy cabinet start to pull away or lean? Let me know your experiences in the comments below!