

I vividly remember the first time I tried to go “minimalist” in my kitchen. I wanted those thick, chunky floating shelves that look like they’re growing right out of the tile. I bought the most expensive wood, used what I thought were “beefy” hidden brackets, and felt like a master craftsman. Three weeks later, my wife pointed out that the salt shaker was slowly migrating toward the floor. The shelf wasn’t just sagging; it was surrendering. I realized then that a beautiful piece of timber is just a heavy lever if you don’t support it right. If you’ve ever looked at your floating shelf tilting down and wondered where it all went wrong, trust me, I have been in those exact, dusty shoes.
The Day My ‘Heavy Duty’ Shelf Turned Into a Slide
That failure taught me a painful lesson about leverage and center of gravity. I made the classic mistake of thinking thickness equaled strength. I used a solid slab of maple, which was so heavy on its own that the brackets were already at 80% capacity before I even put a coffee mug on it. It’s a common trap when you’re looking for effortless storage solutions. My mistake was ignoring the internal mechanics. I thought I could just screw a plate into the wall and call it a day. But the wall groaned, the wood bowed, and my ego took a hit. Today, we are going to fix that once and for all. I’m showing you how to stop floating shelf sag by building strength from the inside out using a torsion box.[image_placeholder_1]
Is this torsion box thing actually worth the extra effort?
You might be thinking, “Can’t I just buy a bigger bracket?” You could, but you’d still be fighting physics. The beauty of internal torsion box engineering is that it mimics the structural integrity used in aircraft wings and high-end hollow-core doors. According to structural engineering principles, a torsion box offers the highest strength-to-weight ratio of almost any wood-based construction. In fact, aerospace engineers rely on similar stressed-skin structures because they resist twisting better than solid materials. By using the internal torsion box trick for extra long floating shelves, we create a shelf that is incredibly stiff but weighs half as much as a solid board. This means your wall anchors spend their energy holding up your decor, not fighting the shelf’s own weight.
Why Your Current Shelves Are Probably Failing You
Most DIY floating shelves fail because they rely on a single point of contact with a metal rod. Even if the rod is strong, the wood fibers around it eventually compress under the constant load. It’s the same reason why sagging fireplace mantel shelves are such a headache. We are going to move away from that “rod-and-hole” nightmare and move toward a fully integrated sub-frame. Have you ever walked into a room and felt like the shelves were judging you with their downward slope? Drop a comment or send me a message—I want to hear about your most spectacular shelving “oops” moments. We’ve all had them, and honestly, they’re the best way to learn how to do it right. Let’s dive into how we build the internal skeleton that makes these shelves rock solid.
Build the Skeleton First
To start, think of your shelf as a hollow airplane wing rather than a solid piece of lumber. You are essentially building a “ladder” frame. I remember a specific job where I tried to shortcut this by using scrap 2x4s for the internal ribs. It was a disaster. The sheer weight of those 2x4s started pulling the lag bolts out of the wall before I even attached the top skin. Now, I exclusively use high-quality 3/4-inch plywood ripped into 2-inch strips for the frame. This lightweight core is the foundation for creative built-ins for seamless storage and home aesthetics that actually last decades.
The Back Cleat is Your Anchor
When you assemble this internal frame, the back cleat—the piece that sits flush against the wall—must be perfectly straight. If it has even a slight “crown” or “cup,” your shelf will never sit level, no matter how much you shim it. I learned the hard way when figuring out how to support extra long closet shelving without center studs: you must hit every single stud available with 3.5-inch structural screws. These aren’t your standard hardware store screws; they have the shear strength of a small tank and won’t snap under the leverage of a loaded shelf.
Why Skinning the Frame Changes Everything
Once your ladder frame is ready, you move to the “skins.” By gluing and pinning 1/4-inch or 1/2-inch plywood to the top and bottom of the frame, you create a rigid box that technically cannot bend or twist. It’s a similar logic used to stop wobbly custom built-ins with 4 hidden steel plate fixes, but applied horizontally. This process of “stressed-skin” construction turns flimsy individual components into a single, incredibly strong structural unit.
Scribe Your Way to a Gap-Free Finish
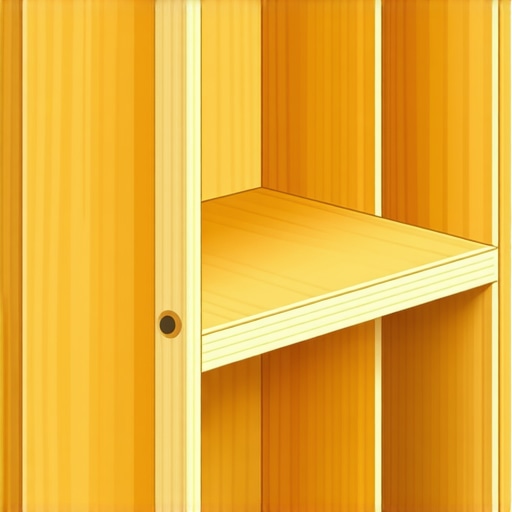
Even the most perfectly built shelf will look like a DIY fail if there’s a massive gap against the wall. Most walls are as wavy as the ocean, and a straight shelf will highlight every imperfection. This is why you need the scribing secret for perfect built-ins on rounded drywall corners. I usually leave my shelf skins about an eighth of an inch long, then I use a simple compass to trace the wall’s profile onto the wood. A quick pass with a block plane or a belt sander, and the shelf snaps into place with a fit so tight it looks like it was carved into the drywall.
Hide the Plywood Edges Like a Pro
Since you’ve built a box, you’re left with exposed plywood layers on the front and sides. To get that high-end solid timber look, I miter a solid wood face frame around the edges. This is the key to the internal torsion box trick for extra long floating shelves. I once used this exact method for a twelve-foot span in a client’s home library. They were terrified the shelf would buckle under their massive collection of encyclopedias, but because of the internal engineering, those shelves haven’t moved a millimeter in five years. You get all the visual weight of a heavy slab with none of the structural headache.
But here’s the thing that most ‘Pro’ guides won’t tell you: a shelf that is perfectly level during installation is a shelf that is destined to look crooked. Everyone says to grab a four-foot level and hit 0.0 degrees, but in my experience, that is a recipe for disappointment. Once you load that torsion box with heavy cookbooks or cast-iron decor, the slight play in the bracket and the natural compression of the wood fibers will cause the front edge to dip. To counter this, I always install with a 1/8-inch upward ‘pre-load’ pitch. It’s a nuanced trick that separates a weekend warrior from an expert. Have you ever fallen into the ‘it looks level now’ trap only to find a gap or a tilt a month later? Let me know in the comments.
Why a Perfectly Level Shelf is a Rookie Mistake
The physics of cabinetry is unforgiving. When we talk about creative built-ins for seamless storage and home aesthetics, we have to account for deflection. According to the Forest Products Laboratory Wood Handbook, the modulus of elasticity determines how much a horizontal member will bend under load. If you don’t build in a slight compensation for that gravity-induced sag, your shelf will perpetually look like it’s sliding off the wall. This is even more critical when you are dealing with moisture-heavy environments. If you’re figuring out how to anchor floating vanities to old brick bathroom walls, that slight pitch ensures that any stray water doesn’t pool against the wall, preventing long-term rot.
Does the thickness of your torsion box skin actually matter?
Many builders think they can save weight by using 1/8-inch skins, but this is a dangerous gamble. While a torsion box derives strength from the ‘stressed-skin’ principle, a skin that is too thin can buckle under localized pressure—like a heavy vase. I always recommend at least a 1/4-inch plywood skin for standard shelves and a 1/2-inch skin for anything intended for heavy storage. This prevents the ‘oil-canning’ effect where the wood physically ripples under the weight. This is the same logic we use for the hidden sub-frame move for supporting massive quartz top vanities. The skin isn’t just a cover; it’s a structural component that resists tension and compression.[image_placeholder_c]
Watch Out for the Hidden Wall Compression Trap
The biggest ‘oops’ factor I see isn’t in the shelf construction, but in the wall itself. You can build the strongest torsion box in the world, but if you are mounting it to soft, old drywall, the bottom edge of the shelf will eventually crush the gypsum core. This creates a pivot point that causes the shelf to tilt. When I’m performing an expert guide to flawless vanity installation, I often reinforce the wall behind the drywall with blocking or use a thin steel plate to distribute the compression force. It’s also why we have to be careful with internal components; for instance, I’ve seen countless DIYers fail because they didn’t realize how deep vanity drawers kept hitting plumbing due to the shelf or vanity shifting just a few millimeters downward. Always check your clearances after the load is applied, not before. Finally, if you’re adding tech to your setup, remember that smart bathroom vanity wiring hacks require you to route channels *inside* the torsion frame before you glue the skins on. Trying to fish wires through a finished torsion box is a nightmare you want to avoid.
Keep Your Built-ins From Moving an Inch
Even a perfectly engineered torsion box can’t fight the changing seasons without help. Wood is a living, breathing material, and your home is constantly shifting. I’ve seen beautiful installs where the homeowner forgot that winter air shrinks wood while summer humidity swells it. This movement is often why your built-in cabinets are pulling away from the wall. To combat this, I treat the junction between the shelf and the wall with a high-flexibility polymer caulk rather than rigid wood filler. It moves with the house, so you don’t get those hairline cracks that scream ‘amateur hour’ every February. If you’re tackling a larger project, like a step-by-step guide to vanity installation for beginners, you’ll find that these small expansion gaps are the difference between a lifetime of use and a cabinet that starts creaking after the first year.
The Tools That Actually Make a Difference
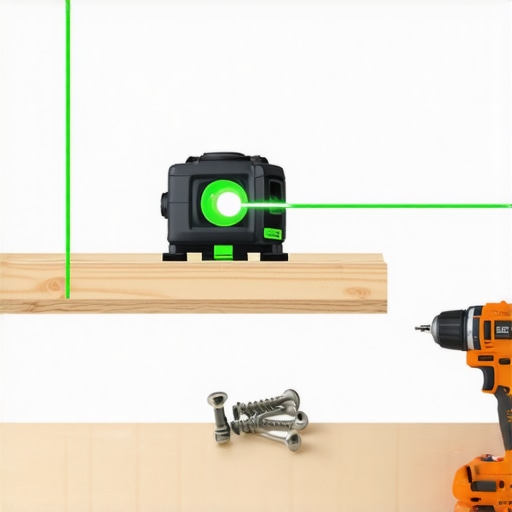
I’m often asked if you need a workshop full of industrial machinery to pull this off. The answer is no, but you do need a few ‘non-negotiables.’ I personally swear by structural GRK screws rather than standard zinc wood screws. According to the Architectural Woodwork Institute (AWI) Quality Standards, structural attachments in premium grade cabinetry must account for significant shear forces, and standard screws simply don’t have the tensile strength. I also recommend using a laser level—not because I’m lazy, but because a four-foot bubble level can be off by a cumulative 1/4 inch over a long run. When I was working on creative built-ins for seamless storage and home aesthetics, the laser allowed me to map the entire wall’s deviations before the first piece of wood even touched the drywall.
How do I maintain my shelving and vanities over time?
Maintenance isn’t just about dusting; it’s about a semi-annual ‘structural checkup.’ Every six months, I take a quick look at the bottom seam where the shelf meets the wall. If you see the caulk stretching, it’s a sign the wall is moving. For creative storage solutions for vanities, check the hinges and drawer slides. Heavy quartz tops can cause the carcass to settle slightly. Use a screwdriver to give your mounting bolts a quarter-turn if they feel loose. This prevents the ‘settling sag’ that leads to wobbly custom built-ins. A little bit of proactive tightening saves you from a massive tear-out later.
The Future of High-Strength Home Storage
I predict that in the next few years, we are going to see a massive shift toward carbon-fiber reinforced internal cores. We are already seeing high-end shops move away from heavy plywood internals toward lightweight honeycomb composites. This will make smart storage solutions to optimize small bathroom spaces even more accessible, as the weight of the furniture itself will become a non-factor. Imagine a ten-foot floating shelf that weighs five pounds but can hold a full set of encyclopedias. We aren’t quite there for the average DIYer yet, but the torsion box is the closest thing we have to that futuristic tech today. I challenge you to try the 1/8-inch upward pre-load on your next install; it’s the single best way to ensure your shelf looks perfect once the weight of real life hits it. If you run into a wall that just won’t cooperate, feel free to contact us for a bit of professional troubleshooting.
The Hardest Lessons Gravity Taught Me About Internal Bracing
Building with wood is a conversation between you and the tree, and sometimes the tree argues back. My biggest “aha!” moment came when I realized that the internal ribs of a torsion box don’t just provide support; they act as a web that distributes tension across the entire surface. If you’re looking for effortless storage solutions, don’t skimp on the glue. I used to think of wood glue as an accessory, but in a torsion box, it is the primary structural bond. When that glue cures, your shelf becomes a single, rigid monocoque structure.
Another vital takeaway: always test your wall’s integrity before the shelf goes up. I’ve seen beautiful creative storage solutions for vanities fail because the installer didn’t realize the studs were slightly bowed. Spend five minutes checking your mounting surface with a straightedge; it will save you five hours of shimming later. It is much easier to fix a wall before you hang a heavy shelf on it.
The Gear That Keeps My Projects From Sagging
If you want to move beyond basic DIY, you need to upgrade your fastener game. I’ve stopped using standard drywall screws for anything structural. Instead, I rely on GRK structural screws because they have a built-in washer head that won’t pull through the wood. For those tackling a step-by-step guide to vanity installation for beginners, a high-quality laser level is your best friend. It provides a continuous reference line that a bubble level simply can’t match over long distances, ensuring your layout is flawless from the start.
I also highly recommend digging into the Wood Handbook from the Forest Products Laboratory. It might seem dry, but understanding how different species react to humidity is the secret sauce behind smart storage solutions to optimize small bathroom spaces. Knowing that maple expands differently than oak can prevent your mitered edges from popping open in the winter. Knowledge of your materials is just as important as the tools in your hand.
Build Something You Can Be Proud Of
At the end of the day, there is a profound satisfaction in placing a heavy object on a shelf and seeing it stay perfectly level. Utilizing internal torsion box engineering isn’t just about over-building; it’s about building with intelligence. It’s the difference between a house that feels cluttered and one that feels curated. If you’re ready to level up your home, start with one small shelf and watch how your confidence grows. If you find yourself stuck on a tricky wall or a massive span, don’t hesitate to contact us for a bit of professional guidance.
Have you ever had a shelf look perfect during the install, only to find it tilting a month later? Let me know your biggest shelving frustrations in the comments below!