

I remember the cold sweat dripping off my nose as I lifted my first heavy oak vanity against the crimson-red brick of my 1920s fixer-upper. I had spent weeks choosing the perfect vanity style, dreaming of that sleek, floating look. But as I tightened the first screw, I heard it: a sickening, hollow crunch. A chunk of century-old mortar simply gave up, leaving my expensive cabinet dangling at a precarious angle. It was a heart-stopping realization that old masonry doesn’t play by the same rules as modern drywall and studs. If you are staring at a beautiful but crumbly brick wall and wondering how on earth it’s going to support fifty pounds of porcelain and stone, I have been exactly where you are. Today, we are going to walk through the heavy-duty reality of mounting these fixtures so they stay put forever.
The Day My DIY Vanity Dreams Met Reality
The biggest mistake I made early on was treating old brick like a solid, predictable block of granite. It isn’t. In fact, many historic bricks are surprisingly porous. According to the Brick Industry Association, historic lime-based mortars have a much lower compressive strength than modern Portland cement, which means your average plastic wall plug is going to fail you almost immediately. I learned the hard way that you need to bypass the mortar entirely and bite deep into the brick itself, or better yet, create a structural bridge. Before you even pick up a drill, you should check out this step-by-step guide to vanity installation to get the basics down, but keep in mind that brick requires a much more aggressive approach. We’re talking sleeve anchors and precision drilling, not just a prayer and a Phillips head screwdriver.
Is your old brick actually strong enough to hold that weight?
It’s the question that keeps every renovator up at night. The truth is, while the brick is strong, the way it’s assembled can be temperamental. I’ve seen people try to use vanity installation hacks meant for modern homes, only to have the vanity pull a layer of brick face right off the wall. You have to account for the unevenness of the surface too. I’ve found that using the scribing trick for cabinets against uneven masonry is the only way to get a flush fit that doesn’t put weird torque on your anchors. Have you ever felt that terrifying ‘wobble’ after you thought a cabinet was secure? Tell me about your most stressful bathroom install in the comments! For those dealing with particularly stubborn walls, I often recommend a technique similar to the concrete sleeve anchor move used for heavy tool cabinets. It’s about overkill—because ‘just enough’ support is how vanities end up on the floor in the middle of the night.
Map Your Bricks Before You Ever Pull the Trigger
Finding the “sweet spot” in a century-old wall is like playing a high-stakes game of Battleship. You want to hit the center of the brick, never the mortar. I learned this the hard way when I was installing a custom unit in a Brooklyn brownstone and thought “close enough” was fine for a mortar joint. Within two weeks, the weight of the marble top caused the whole thing to sag three degrees because the lime-rich mortar simply turned to dust. Now, I use a 1/8-inch masonry bit to “scout” the area first. If the drill sinks in like butter, you’ve hit a void or soft joint. If it fights back with a gritty, consistent resistance, you’ve found your anchor point. This is the foundation of an expert guide to flawless vanity installation tricks and tips—knowing when to stop and reposition before you commit to a massive hole.
Why Sleeve Anchors Beat Every Plastic Plug
In the world of old masonry, plastic expansion anchors are essentially useless. They rely on friction against a smooth surface, but old brick is often crumbly inside. You need mechanical expansion. You can use the concrete sleeve anchor move for wall-hung tool cabinets as your primary blueprint here. These anchors don’t just sit in the hole; they expand and bite into the brick’s internal structure like a clenched fist. When you tighten the nut, the sleeve pulls outward, creating a permanent bond that won’t vibrate loose when you’re slamming vanity drawers shut every morning. 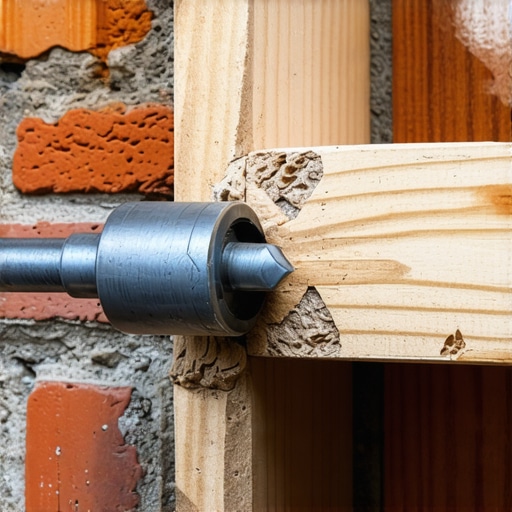
The Plywood Ledger Trick for Solo Installs
During one particularly brutal summer reno, I tried to skip the plywood ledger trick for heavy garage overhead racks while hanging a heavy bathroom cabinet. I thought I could balance the oak frame with one shoulder while tightening the bolt. The brick was slick, the cabinet slipped, and I spent the next hour patching a hole in the floor instead of admiring my work. Always screw a temporary, level 2×4 or plywood strip into the wall exactly where the bottom of the vanity will sit. This acts as a shelf, taking 100% of the weight while you focus on precision drilling and leveling. Once the anchors are torqued down, you simply unscrew the ledger and fill the small holes.
Scribing for a Flawless Masonry Fit
Never trust a brick wall to be flat. They bulge, dip, and lean. If you bolt a flat cabinet back against a wavy wall, you will rack the frame, making the doors go crooked. Use the scribing hack for perfect built-in gaps against uneven brick to trace the wall’s wonky profile onto your cabinet side using a compass or a simple block of wood. It’s the difference between a pro-level finish and a gap big enough to lose a toothbrush in. By shaving the cabinet to match the brick, the piece looks like it grew out of the wall rather than being slapped onto it.
Reinforce Early to Support Your Stone Top
If you are planning on a heavy quartz or granite surface, the cabinet box itself is rarely enough. I’ve seen standard wood frames buckle under the 150-pound weight of a stone slab. To prevent this, I always integrate the hidden sub-frame move for supporting massive quartz top vanities. This involves adding internal vertical supports that transfer the vertical load directly into the wall anchors. If you’re still worried about the front edge dipping, learning how to support quartz counters on custom floating vanities with hidden steel brackets will save you from a catastrophic crack in your countertop three years down the road.Let’s dig deeper into the one thing almost every DIYer—and even some “pros”—gets wrong: the obsession with level over plumb. Everyone says you must level your vanity, but in my experience, a perfectly level vanity against a wall that is out of plumb is a recipe for disaster. If your brick wall leans forward even half an inch, the top of your cabinet is essentially trying to peel itself away from the anchors. The Brick Industry Association (BIA) warns in their technical notes that eccentric loading on anchors in older masonry can lead to sudden shear failure because the weight isn’t pulling straight down. Instead of just leveling the top, I always check the vertical plumb first. If the wall is wonky, I use hidden leveling shims to ensure the cabinet back is perfectly vertical, even if it means a slightly larger gap at the bottom that I’ll have to scribe later. Treating the wall like a static, flat surface is the fastest way to experience anchor pull-out.
Avoid the Heartbreaking Collision of Drawers and Pipes
Then there is the “Oops” factor that stops a project dead in its tracks: the plumbing trap. You spend hours maximizing your space with custom vanities only to find that your beautiful new deep drawers hit the P-trap. I’ve seen people hack apart their brand-new drawer boxes with a jigsaw in a panic. Don’t do that. Before you drill a single hole in that brick, you need to map your internal clearances. I learned this when I fixed deep vanity drawers that kept hitting plumbing by relocating the wall stub-out—a pain, yes, but better than a ruined cabinet. It’s about more than just fitting the box; it’s about making sure the storage remains functional once the stone is on top. 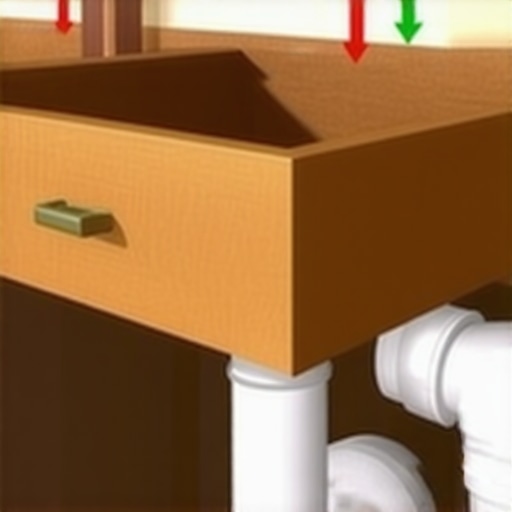
Why Your Level is Actually Lying to You
Many renovators believe that as long as the bubble is centered, the vanity is secure. However, a ‘level’ vanity that isn’t flush with the wall creates a lever effect. Every time you lean on that counter, you are multiplying the force on those masonry anchors. In my years of custom work, I’ve found that shimming the wall to match the vanity is far safer than forcing the vanity to match a crooked wall. This is a crucial nuance often missed in a step-by-step guide to vanity installation meant for modern drywall. If the back of the cabinet isn’t supported against the brick at every anchor point, the wood will eventually bow, causing those expensive soft-close glides to bind and fail.
Can you actually save a vanity when the brick is bowing outward?
This is the ultimate nightmare scenario. When the wall itself is “pregnant” or bowing, you cannot simply bolt a flat cabinet to it. If you try, you will rack the cabinet box, and your doors will never hang straight. For these cases, I move away from standard smart storage solutions and go straight to a structural sub-frame. By using the hidden sub-frame move for supporting massive quartz top vanities, you create a perfectly flat “false” mounting surface that bridges the bow in the brick. It’s an extra day of work, but it ensures that your creative built-ins don’t look like they were installed during an earthquake. This advanced bracing technique protects the stone from stress-cracking and keeps the drawer glides running smooth for decades. Have you ever fallen into this trap where the wall was so crooked it fought your installation every step of the way? Let me know in the comments!
Why a Standard Drill is Your Biggest Liability
I’ve watched too many DIYers burn through three titanium bits trying to penetrate old-growth brick with a standard cordless drill. If you want to succeed where others fail, you need an SDS-plus rotary hammer. Unlike a standard hammer drill that just vibrates, the rotary hammer uses a piston mechanism to strike the back of the bit, literally pulverizing the masonry as it turns. I personally use a Bosch Bulldog because it allows for a ‘rotation-only’ mode that is essential for the initial 1/8-inch pilot hole I mentioned earlier. This prevents the brick face from shattering before you commit to the larger anchor hole. When you are working on creative built-ins for seamless storage and home aesthetics, precision is everything; a wandering drill bit is the difference between a clean mount and a repair job.
How do I keep my heavy vanity from shifting after a year?
Maintaining the integrity of a masonry mount requires more than just ‘setting and forgetting.’ Masonry is porous, and bathroom humidity is relentless. Over time, the subtle expansion and contraction of the wood cabinet against the unyielding brick can cause minor shifts. I recommend checking the torque on your sleeve anchors six months after the initial install. If you notice the cabinet starting to pull away, it’s often because of moisture-related movement. This is why I always implement 5 moisture-proof bases for bathroom cabinets on wet floors to ensure the wood isn’t drinking up floor water, which swells the frame and puts immense stress on the wall anchors. Additionally, applying the waterproof sealant move for vanity backsplashes is non-negotiable; it prevents steam from getting behind the unit and softening the very mortar joints you worked so hard to avoid. According to the National Concrete Masonry Association (NCMA) TEK 12-01B, the allowable load for anchors in masonry is significantly reduced if the substrate is saturated, so keeping that wall bone-dry is a structural necessity, not just a cosmetic one. 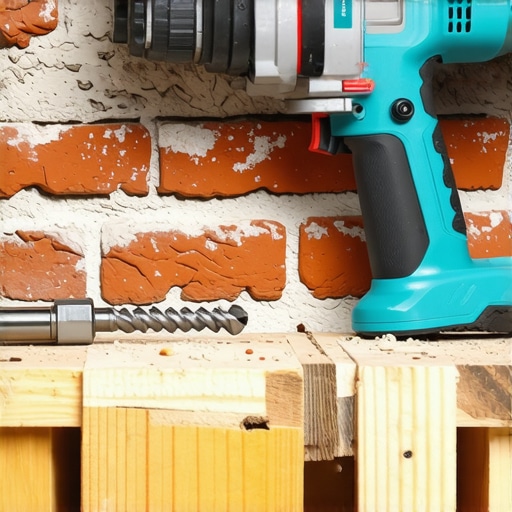
The Future of Smart Masonry Anchoring
Looking ahead to 2025 and beyond, we are seeing a shift toward modularity in top trends in vanity designs you need to know. We’re moving away from permanent chemical adhesives toward mechanical ‘track’ systems that allow you to slide a vanity off the wall for plumbing repairs without destroying the brick. I suspect we will soon see integrated moisture sensors built into the back of high-end units that alert your phone if a leak starts behind the masonry. For now, the best way to enhance your home with sleek built-in vanities is to stick to the fundamentals: heavy-duty steel and mechanical expansion. If you are dealing with a particularly heavy setup, I suggest you try the concrete sleeve anchor for wall-mounted tool chests technique for your bathroom—it’s the ultimate insurance policy. Don’t be afraid to go ‘over-spec.’ I’ve never seen a vanity fail because it was anchored too well, but I’ve seen plenty of bathroom floors ruined by a cabinet that decided to take a dive. Give those sleeve anchors an extra quarter-turn today and sleep better tonight.
The Hardest Lesson I Learned About Anchoring Heavy Built-ins
One thing I learned the hard way: your eyes will lie to you, but the drill never does. When you’re working on built-in storage ideas to declutter and enhance your home, you have to realize that old brick is a living thing. If you feel the drill bit suddenly ‘drop’ an inch, you haven’t found a secret treasure room—you’ve found a void. In those moments, I’ve learned to back out, fill the void with epoxy, and move the mount. Never compromise on the structural integrity of your anchor points just because you don’t want to drill a second hole.
I also discovered that the weight of the water in a full porcelain basin can add an extra 20 to 30 pounds that most people forget to calculate. This is why I always treat my bathroom projects with the same intensity as the concrete sleeve anchor move for wall-hung tool cabinets. Over-engineering is the only way to sleep soundly at night when you live in a historic home.
The Only Gear I Trust for a Rock-Solid Mount
Don’t send a boy to do a man’s job; use an SDS-plus rotary hammer rather than a standard drill. I also swear by 3/8-inch steel sleeve anchors specifically for their mechanical bite into the heart of the brick. If you are looking at top trends in vanity designs you need to know in 2025, you’ll see heavier, more ornate pieces that demand this level of security. I also keep a stash of high-quality shims and a long 4-foot level to verify that the wall isn’t trying to pull my work out of plumb.
Your Turn to Build Something That Lasts
Getting a heavy cabinet onto an old wall is a rite of passage for any serious DIYer. It’s about more than just storage; it’s about the peace of mind that comes with doing the job right. Whether you are tackling a simple remodel or complex vanity installation, remember that the prep work is where the battle is won. If you hit a wall—literally or figuratively—feel free to reach out to us for advice on your specific masonry mess. Go grab your rotary hammer and let’s get that vanity mounted for good.
Have you ever heard that terrifying crack while tightening a bolt into an old wall? Tell me your most stressful installation stories in the comments!