

I remember the sound vividly—a dull, dusty thud followed by the screech of metal sliding against wood. I ran into the bedroom to find my entire wardrobe in a heap, and two gaping, chalky craters where the closet rod used to be. My 1920s plaster walls had finally surrendered under the weight of three heavy wool coats. If you’ve ever tried to screw a standard bracket into old lath and plaster, you know the heartbreak. It’s like trying to anchor a boat to a pile of saltine crackers. Dust everywhere. A ruined weekend. But I eventually learned that you don’t have to live in fear of your closet collapsing. [image] Today, I’m going to show you exactly how to achieve effortless storage solutions for a tidy, stylish home even when your walls feel like they are actively disintegrating. We’ll skip the useless plastic plugs and focus on hardware that actually bites. Have you ever opened your closet door only to find your clothes in a pile on the floor? Tell me your ‘plaster horror stories’ in the comments!
Stop Your Closet Rod From Pulling Out the Wall
To fix this, you have to realize that plaster has almost no structural integrity once it starts to crumble. I learned this the hard way during my first renovation. I made the classic rookie mistake: I used those little yellow plastic expansion anchors. I thought if I just hammered them in tight, they’d hold. Instead, they acted like a drill bit, grinding the plaster into fine white dust until the hole was twice as big as it started. It was a mess. According to the National Park Service technical preservation briefs, historic plaster depends entirely on the ‘keys’—the bits of plaster that squeeze between the wooden lath strips—and once those break, a standard screw is useless. To get a real grip, you need to bridge the gap between the brittle surface and the structure behind it. This is why I always recommend the steel L-bracket hack for heavy closet organizers. It’s about distributing the load, not just poking a hole.
Does Anything Actually Grip When the Wall is This Brittle?
You might be skeptical. I certainly was after my third failed attempt at hanging a simple shelf. You’re probably wondering if you need to rip the whole wall down and put up drywall. The answer is no, but you do need to stop treating plaster like it’s modern wallboard. The secret is finding the lath or, better yet, the studs, and using specialized fasteners that spread the tension behind the wall. When I finally figured out how to anchor heavy closet organizers to crumbling plaster correctly, it changed my life. No more sagging rods. No more 2:00 AM crashes. We are going to look at the exact toggles and timber-cleat methods that turn a weak wall into a rock-solid storage unit.
Find the Skeleton Beneath the Skin
Traditional stud finders are a notorious joke when it comes to three-quarters of an inch of historic plaster and wood lath. They usually beep at everything or nothing at all, leaving you with a wall that looks like Swiss cheese. Instead of guessing, use a strong neodymium magnet to find the tiny nails that hold the lath to the studs. This is the essential first step in any expert guide to flawless vanity installation tricks and tips. Once you feel that magnetic tug, you’ve found your vertical strength. I remember trying to mount a heavy jewelry cabinet for a client in a 19th-century Victorian home where the walls were bowing. We couldn’t hit a single stud in the spot she wanted because of a hidden chimney flue. By using the magnet trick, we mapped out the entire internal structure without making a single unnecessary hole. We eventually utilized how to anchor jewelry cabinets to bedroom walls without studs techniques to ensure that cabinet didn’t come crashing down on her collection.
Why Toggle Bolts Beat Screws Every Time
If you can’t find a stud exactly where your closet bracket needs to sit, you have to rely on the lath itself. A standard wood screw will just strip the brittle fibers of that century-old cedar or pine. A toggle bolt, however, acts like an internal clamp. I’ve seen people try to hang 50-pound mirrors with finish nails—don’t be that person. I once installed a heavy shelving unit in a narrow hallway where the studs were spaced at a bizarre 24-inch interval. It was completely useless for standard hardware. I switched to the toggle bolt strategy for heavy walk-in pantry racks and it hasn’t budged a millimeter since. You drill a clean hole, push the spring-loaded metal wings through, and let them snap open against the back of the wood strips. It is essentially like an umbrella opening inside your wall, distributing the weight across multiple pieces of lath. 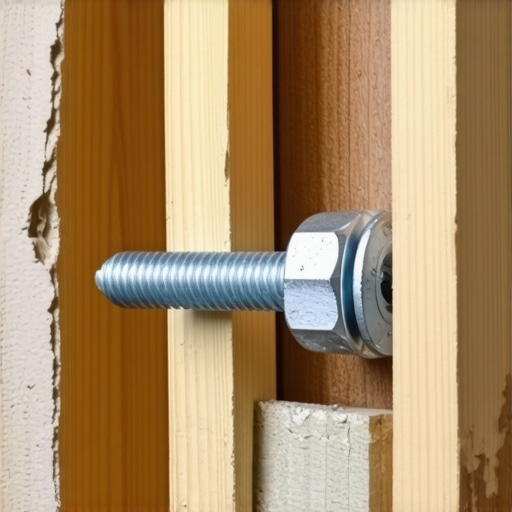
Spread the Load with a Plywood Ledger
When you are dealing with something truly massive, like a full closet system or a double vanity, you need to stop thinking about individual points of contact. You need a bridge. By screwing a 3/4-inch plywood strip, or a ‘ledger,’ into every stud you can find along the horizontal span of the wall, you create a new, rock-solid surface to mount your cabinets to. This is the same logic used in the sub-frame strategy for rock-solid entryway benches. You are essentially building a new, miniature wall on top of your old one. I once used this method to save a floating desk project that was sagging because the plaster was too soft to hold the brackets. By installing a hidden ledger first, we turned a ‘disintegrating’ wall into a structural powerhouse. This approach is a lifesaver when following a step-by-step guide to vanity installation for beginners, as it compensates for the imperfections and ‘waves’ found in old masonry. If you are struggling with a specific corner, always check out how to anchor heavy closet organizers to crumbling plaster to see which specific fastener gauge matches your project load. It is about working with the house, not fighting against its age.
Stop Believing the More Torque is Better Myth
Everyone tells you that if a cabinet is heavy, you just need to drive the screw in harder until it’s ‘snug.’ In the world of historic homes and brittle plaster, that is the fastest way to turn a weekend project into a structural repair. In my experience, over-tightening is actually what causes most failures. When you crank down a screw against old plaster, you aren’t just securing a bracket; you are creating a localized compression zone that eventually pulverizes the lime and sand into dust. Once that happens, the screw loses its lateral tension, and the whole system begins to sag. I’ve seen this happen dozens of times when people try to rush through vanity installation hacks that save time and money without respecting the material’s age. Instead of raw force, you need to use a depth-stop or a manual screwdriver to feel the exact moment the bracket meets the wall surface without crushing it. Have you ever accidentally ‘drilled’ a hole right through your wall just by over-tightening? Let me know in the comments!
The Plaster Sandwich Trap Most Pros Ignore
The biggest ‘oops’ factor I see with DIYers and even some ‘pro’ contractors is ignoring the air gap between the plaster and the lath. Over decades, the plaster can pull away from the wood strips, creating a hollow space. If you mount a heavy organizer over this gap, the weight of your clothes or supplies will eventually pull the plaster back toward the wood, causing massive spider-web cracks across your beautiful wall. To avoid this, I use a ‘stand-off’ technique or a small shim behind the bracket to bridge that gap. This is a level of detail usually reserved for a high-end expert guide to flawless vanity installation tricks and tips. Without this shim, you’re essentially building on a foundation of air. 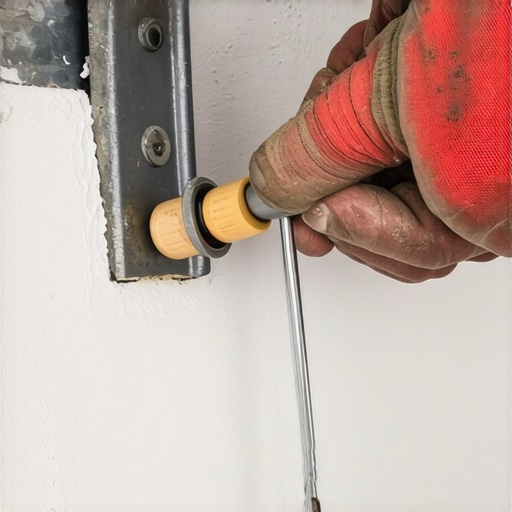
Can Your Wall Actually Handle a Modern Stone Countertop?
This is the question that keeps me up at night when working on 100-year-old homes. Many homeowners want to transform your bedroom with custom vanities top storage ideas for 2025 by adding heavy quartz or granite tops. However, modern stone is significantly denser than the wood or laminate tops these old houses were built to support. According to the USDA Forest Products Laboratory’s Wood Handbook, the withdrawal resistance of fasteners in historic framing depends heavily on the moisture content and species of the wood, which has often become brittle over a century. If you are mounting a floating unit, you must calculate the leverage. I always insist on knowing how to support quartz counters on custom floating vanities by using internal steel stiffeners or double-cleating. If you don’t, the cabinet might stay on the wall, but the frame will rack, leading to the dreaded scenario where your vanity plumbing is leaking into the cabinet base because the shifting wood has pulled the pipes out of alignment. If you’re still worried about your specific wall type, revisit my notes on how to anchor heavy closet organizers to crumbling plaster to ensure your hardware choice matches the weight of your luxury finishes.Once the dust settles, the real work begins—keeping everything where it belongs. These old houses aren’t static; they are living, breathing organisms that expand in the humid summers and shrink in the dry winters. If you don’t account for this movement, even the best anchors will eventually loosen. I make it a habit every six months to check the alignment of my doors and drawers. If you notice things are slightly off, you might need to learn how to fix drawer fronts that won’t stay aligned before the wood starts to bind and strip the hinges.
How do I maintain my storage units over the long haul?
Maintenance isn’t just about tightening screws; it’s about watching for the ‘creep’ of heavy loads. According to the American Wood Council’s National Design Specification (NDS) for Wood Construction, the ‘Load Duration Factor’ is a vital calculation; essentially, a fastener that holds a heavy load for ten years faces significantly different structural stresses than one holding it for ten minutes. This is why I always check the tension on my soft-close mechanisms. If they start acting up, it’s usually a sign of a slight shift in the cabinet box. You can usually resolve this by learning why your soft-close drawers are slamming and the tension fix that keeps the hardware from wearing out prematurely.
The Tool Kit You Actually Need for Old Wall Surgery
I’ve spent thousands on tools, but for working with crumbling plaster and heavy vanities, three things are non-negotiable. First, a self-leveling cross-line laser. Don’t trust a bubble level on a wall that hasn’t been straight since the Hoover administration. Second, a high-quality impact driver with a ‘delicate’ mode—you want the torque to drive the screw without the vibration that shatters the plaster keys. Finally, a set of cobalt drill bits specifically for pilot holes. 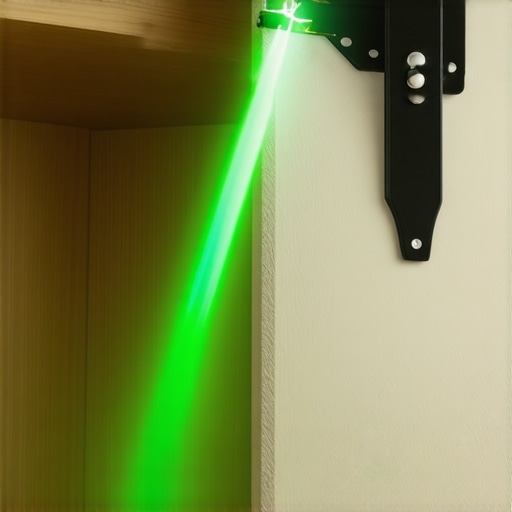 These tools are the backbone of any vanity installation hacks that save time and money because they prevent the ‘oops’ moments that lead to expensive repairs. If you are dealing with heavy sliding components, you also need to stop drawer bind on heavy pantry pull-outs by ensuring your rails are perfectly parallel, something only a laser can guarantee on a wonky wall. Looking toward the future, I predict we’ll see a shift toward modular carbon-fiber bracing that weighs nothing but can support hundreds of pounds, making our reliance on heavy steel brackets a thing of the past. For now, focus on the basics. If your vanity feels a little shaky on that old tile, check out my tips on how to fix wobbly vanity legs on uneven tile to ensure your base is as solid as your wall anchors. My big challenge for you this weekend: don’t just hang that shelf—install a hidden 1×2 ledger strip beneath it and see how much more confident you feel when loading it up with books.I remember the sound vividly—a dull, dusty thud followed by the screech of metal sliding against wood. I ran into the bedroom to find my entire wardrobe in a heap, and two gaping, chalky craters where the closet rod used to be. My 1920s plaster walls had finally surrendered under the weight of three heavy wool coats. If you’ve ever tried to screw a standard bracket into old lath and plaster, you know the heartbreak. It’s like trying to anchor a boat to a pile of saltine crackers. Dust everywhere. A ruined weekend. But I eventually learned that you don’t have to live in fear of your closet collapsing. [image] Today, I’m going to show you exactly how to achieve effortless storage solutions for a tidy, stylish home even when your walls feel like they are actively disintegrating. We’ll skip the useless plastic plugs and focus on hardware that actually bites. Have you ever opened your closet door only to find your clothes in a pile on the floor? Tell me your ‘plaster horror stories’ in the comments!
Stop Your Closet Rod From Pulling Out the Wall
To fix this, you have to realize that plaster has almost no structural integrity once it starts to crumble. I learned this the hard way during my first renovation. I made the classic rookie mistake: I used those little yellow plastic expansion anchors. I thought if I just hammered them in tight, they’d hold. Instead, they acted like a drill bit, grinding the plaster into fine white dust until the hole was twice as big as it started. It was a mess. According to the National Park Service technical preservation briefs, historic plaster depends entirely on the ‘keys’—the bits of plaster that squeeze between the wooden lath strips—and once those break, a standard screw is useless. To get a real grip, you need to bridge the gap between the brittle surface and the structure behind it. This is why I always recommend the steel L-bracket hack for heavy closet organizers. It’s about distributing the load, not just poking a hole.
Does Anything Actually Grip When the Wall is This Brittle?
You might be skeptical. I certainly was after my third failed attempt at hanging a simple shelf. You’re probably wondering if you need to rip the whole wall down and put up drywall. The answer is no, but you do need to stop treating plaster like it’s modern wallboard. The secret is finding the lath or, better yet, the studs, and using specialized fasteners that spread the tension behind the wall. When I finally figured out how to anchor heavy closet organizers to crumbling plaster correctly, it changed my life. No more sagging rods. No more 2:00 AM crashes. We are going to look at the exact toggles and timber-cleat methods that turn a weak wall into a rock-solid storage unit.
Find the Skeleton Beneath the Skin
Traditional stud finders are a notorious joke when it comes to three-quarters of an inch of historic plaster and wood lath. They usually beep at everything or nothing at all, leaving you with a wall that looks like Swiss cheese. Instead of guessing, use a strong neodymium magnet to find the tiny nails that hold the lath to the studs. This is the essential first step in any expert guide to flawless vanity installation tricks and tips. Once you feel that magnetic tug, you’ve found your vertical strength. I remember trying to mount a heavy jewelry cabinet for a client in a 19th-century Victorian home where the walls were bowing. We couldn’t hit a single stud in the spot she wanted because of a hidden chimney flue. By using the magnet trick, we mapped out the entire internal structure without making a single unnecessary hole. We eventually utilized how to anchor jewelry cabinets to bedroom walls without studs techniques to ensure that cabinet didn’t come crashing down on her collection.
Why Toggle Bolts Beat Screws Every Time
If you can’t find a stud exactly where your closet bracket needs to sit, you have to rely on the lath itself. A standard wood screw will just strip the brittle fibers of that century-old cedar or pine. A toggle bolt, however, acts like an internal clamp. I’ve seen people try to hang 50-pound mirrors with finish nails—don’t be that person. I once installed a heavy shelving unit in a narrow hallway where the studs were spaced at a bizarre 24-inch interval. It was completely useless for standard hardware. I switched to the toggle bolt strategy for heavy walk-in pantry racks and it hasn’t budged a millimeter since. You drill a clean hole, push the spring-loaded metal wings through, and let them snap open against the back of the wood strips. It is essentially like an umbrella opening inside your wall, distributing the weight across multiple pieces of lath.
Spread the Load with a Plywood Ledger
When you are dealing with something truly massive, like a full closet system or a double vanity, you need to stop thinking about individual points of contact. You need a bridge. By screwing a 3/4-inch plywood strip, or a ‘ledger,’ into every stud you can find along the horizontal span of the wall, you create a new, rock-solid surface to mount your cabinets to. This is the same logic used in the sub-frame strategy for rock-solid entryway benches. You are essentially building a new, miniature wall on top of your old one. I once used this method to save a floating desk project that was sagging because the plaster was too soft to hold the brackets. By installing a hidden ledger first, we turned a ‘disintegrating’ wall into a structural powerhouse. This approach is a lifesaver when following a step-by-step guide to vanity installation for beginners, as it compensates for the imperfections and ‘waves’ found in old masonry. If you are struggling with a specific corner, always check out how to anchor heavy closet organizers to crumbling plaster to see which specific fastener gauge matches your project load. It is about working with the house, not fighting against its age.
Stop Believing the More Torque is Better Myth
Everyone tells you that if a cabinet is heavy, you just need to drive the screw in harder until it’s ‘snug.’ In the world of historic homes and brittle plaster, that is the fastest way to turn a weekend project into a structural repair. In my experience, over-tightening is actually what causes most failures. When you crank down a screw against old plaster, you aren’t just securing a bracket; you are creating a localized compression zone that eventually pulverizes the lime and sand into dust. Once that happens, the screw loses its lateral tension, and the whole system begins to sag. I’ve seen this happen dozens of times when people try to rush through vanity installation hacks that save time and money without respecting the material’s age. Instead of raw force, you need to use a depth-stop or a manual screwdriver to feel the exact moment the bracket meets the wall surface without crushing it. Have you ever accidentally ‘drilled’ a hole right through your wall just by over-tightening? Let me know in the comments!
The Plaster Sandwich Trap Most Pros Ignore
The biggest ‘oops’ factor I see with DIYers and even some ‘pro’ contractors is ignoring the air gap between the plaster and the lath. Over decades, the plaster can pull away from the wood strips, creating a hollow space. If you mount a heavy organizer over this gap, the weight of your clothes or supplies will eventually pull the plaster back toward the wood, causing massive spider-web cracks across your beautiful wall. To avoid this, I use a ‘stand-off’ technique or a small shim behind the bracket to bridge that gap. This is a level of detail usually reserved for a high-end expert guide to flawless vanity installation tricks and tips. Without this shim, you’re essentially building on a foundation of air.
Can Your Wall Actually Handle a Modern Stone Countertop?
This is the question that keeps me up at night when working on 100-year-old homes. Many homeowners want to transform your bedroom with custom vanities top storage ideas for 2025 by adding heavy quartz or granite tops. However, modern stone is significantly denser than the wood or laminate tops these old houses were built to support. According to the USDA Forest Products Laboratory’s Wood Handbook, the withdrawal resistance of fasteners in historic framing depends heavily on the moisture content and species of the wood, which has often become brittle over a century. If you are mounting a floating unit, you must calculate the leverage. I always insist on knowing how to support quartz counters on custom floating vanities by using internal steel stiffeners or double-cleating. If you don’t, the cabinet might stay on the wall, but the frame will rack, leading to the dreaded scenario where your vanity plumbing is leaking into the cabinet base because the shifting wood has pulled the pipes out of alignment. If you’re still worried about your specific wall type, revisit my notes on how to anchor heavy closet organizers to crumbling plaster to ensure your hardware choice matches the weight of your luxury finishes.Once the dust settles, the real work begins—keeping everything where it belongs. These old houses aren’t static; they are living, breathing organisms that expand in the humid summers and shrink in the dry winters. If you don’t account for this movement, even the best anchors will eventually loosen. I make it a habit every six months to check the alignment of my doors and drawers. If you notice things are slightly off, you might need to learn how to fix drawer fronts that won’t stay aligned before the wood starts to bind and strip the hinges.
How do I maintain my storage units over the long haul?
Maintenance isn’t just about tightening screws; it’s about watching for the ‘creep’ of heavy loads. According to the American Wood Council’s National Design Specification (NDS) for Wood Construction, the ‘Load Duration Factor’ is a vital calculation; essentially, a fastener that holds a heavy load for ten years faces significantly different structural stresses than one holding it for ten minutes. This is why I always check the tension on my soft-close mechanisms. If they start acting up, it’s usually a sign of a slight shift in the cabinet box. You can usually resolve this by learning why your soft-close drawers are slamming and the tension fix that keeps the hardware from wearing out prematurely.
The Tool Kit You Actually Need for Old Wall Surgery
I’ve spent thousands on tools, but for working with crumbling plaster and heavy vanities, three things are non-negotiable. First, a self-leveling cross-line laser. Don’t trust a bubble level on a wall that hasn’t been straight since the Hoover administration. Second, a high-quality impact driver with a ‘delicate’ mode—you want the torque to drive the screw without the vibration that shatters the plaster keys. Finally, a set of cobalt drill bits specifically for pilot holes. These tools are the backbone of any vanity installation hacks that save time and money because they prevent the ‘oops’ moments that lead to expensive repairs. If you are dealing with heavy sliding components, you also need to stop drawer bind on heavy pantry pull-outs by ensuring your rails are perfectly parallel, something only a laser can guarantee on a wonky wall. Looking toward the future, I predict we’ll see a shift toward modular carbon-fiber bracing that weighs nothing but can support hundreds of pounds, making our reliance on heavy steel brackets a thing of the past. For now, focus on the basics. If your vanity feels a little shaky on that old tile, check out my tips on how to fix wobbly vanity legs on uneven tile to ensure your base is as solid as your wall anchors. My big challenge for you this weekend: don’t just hang that shelf—install a hidden 1×2 ledger strip beneath it and see how much more confident you feel when loading it up with books.
Lessons from the Lath and Plaster Trenches
After a decade of renovation, I’ve realized that plaster isn’t just a material; it’s a living record of the house’s movement. One thing I wish I knew earlier is that old plaster is incredibly abrasive. It will dull your standard wood bits in seconds, leading to heat buildup that actually chars the wooden lath behind it, weakening the very foundation you’re trying to anchor to. Always use a masonry bit for the initial plaster layer before switching to wood bits to preserve the lath’s integrity. Also, listen to the wall—if you hear a ‘crunch’ instead of a ‘thud’ when tightening, you’ve over-compressed the keys and need to back off immediately. This attention to detail is what separates a DIY disaster from creative built-ins for seamless storage and home aesthetics that actually stay put.
The Only Tools I Trust for Brittle Walls
If you’re serious about old-home surgery, stop using the cheap plastic kits from the big-box checkout lane. I personally swear by Toggler Snaptoggles; they are the gold standard for lath because they allow you to remove the bolt without losing the ‘wing’ inside the wall. For getting those perfect lines against a wavy wall, I always recommend learning how to scribe cabinets to heavily textured plaster walls. A simple compass and a belt sander are more valuable here than a $500 miter saw. Finally, the NPS Preservation Brief #21 is the ultimate ‘bible’ for understanding how these historic walls were engineered to support loads. For heavy mirrored units, I never skip the toggle bolt trick for hanging heavy mirrored cabinets as it provides the necessary pull-out resistance.
Build Your Dream Closet Without the Fear of Collapse
Your home might be old and its walls a bit tired, but that doesn’t mean you have to sacrifice the modern convenience of effortless storage solutions for a tidy, stylish home. By slowing down, using the right mechanical fasteners, and respecting the structure behind the surface, you can build something that lasts another hundred years. Don’t let a little crumbling dust stop you from creating the organized space you deserve. Have you ever had a heavy shelf or cabinet literally fall off the wall? Tell me your renovation ‘fails’ and how you fixed them in the comments below!