

I still remember the sound. It was Thanksgiving, 2019. My cousin Dave, a big guy, sat down on the custom mudroom bench I’d finished just forty-eight hours earlier. Creeeeeak. A sickening, splintering groan echoed through the hallway. My stomach dropped. I had spent days on the finish, but I’d ignored the skeleton. It wasn’t just embarrassing; it was a structural failure hiding behind a pretty coat of paint. That moment taught me that if you want a bench that handles boots, kids, and heavy groceries without flinching, you can’t just rely on a few screws and a prayer.
Build a Skeleton That Outlasts Your House
Most DIYers and even some pros make the mistake of treating an entryway bench like a floating shelf. They think a simple hidden ledger trick for rock-solid entryway seating is the whole story. While ledgers are great, a truly ‘forever’ bench requires an internal skeleton—a sub-frame. I used to think I could get away with just pocket holes and thin plywood. Big mistake. I ended up with a sagging mess that eventually started rocking and pulling away. Today, I’m going to show you how to build a sub-frame that could probably support a small car. We aren’t just talking about aesthetic creative built-ins for seamless storage. We are talking about the structural guts that make your furniture feel like a permanent part of the home. According to the Forest Products Laboratory, the structural integrity of wood-based assemblies depends heavily on the orientation of the frame members rather than just the number of fasteners used. If you ignore the physics of load-bearing, your beautiful project is just a countdown to a crack.
Does This Much Support Actually Matter?
I know what you’re thinking. ‘Why can’t I just use 3/4 inch plywood and call it a day?’ I thought the same thing until I had to fix wobbly built-ins for a client who nearly fell through their vanity. A sub-frame distributes weight directly to the floor or into the wall studs, rather than putting all the stress on the wood’s surface. Have you ever sat on a bench and felt that tiny, unsettling ‘give’? That’s the feeling of failure. My goal is to help you eliminate it. We’re going to combine techniques like the moisture proof base hack for mudroom lockers with a rigid internal grid. By the time we’re done, your bench won’t just look professional; it will feel like it was carved out of solid bedrock. Have you ever heard that ‘creak’ after finishing a project and felt your heart sink? Tell me about your most stressful ‘will it hold?’ moment.
Build a Foundation That Doesn’t Flinch
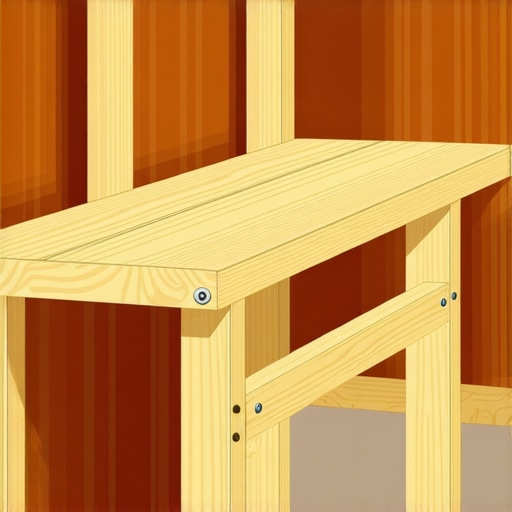
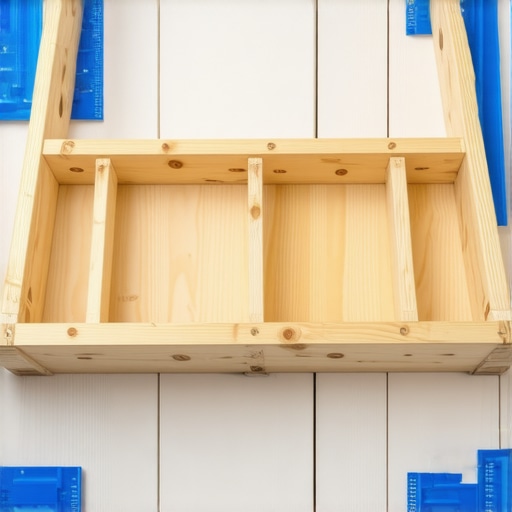
Think of your bench’s internal skeleton like the chassis of a heavy-duty truck. The exterior finish—that beautiful oak or pristine paint—is just the bodywork. If the chassis is flimsy, the whole thing eventually rattles apart. To avoid the heartbreak of a sagging seat, you must construct a internal ladder frame. Instead of just screwing boards together, you are creating a torsion-resistant grid. I learned this the hard way during a project in an old farmhouse where the floors sloped nearly two inches. I tried to just shim the base, but the moment anyone sat down, the bench groaned like a sinking ship. I had to rip the whole thing out and implement a leveled sub-base. Even if you aren’t using heavy stone, borrowing the hidden sub-frame move for supporting massive quartz top vanities ensures your wood seat won’t bow under the weight of three adults. You want 2×4 members spaced every 12 to 16 inches, joined with structural screws that won’t shear under pressure.
The Ladder Frame Technique for Maximum Rigidity
When you build this ladder, you aren’t just looking for vertical support; you’re fighting lateral force—the ‘wiggle’ that happens when someone scoots across the bench. I typically use a combination of construction adhesive and 3-inch structural screws to bond the ladder frame to the floor. To truly eliminate movement, you need to employ the hidden floor bolt strategy for wobble-free entryway benches. This prevents the entire unit from shifting forward over time, a common issue in high-traffic mudrooms. If you’re working in a modern condo with non-traditional framing, you’ll need to know how to secure built-in desks to thin metal studs because standard wood screws will simply strip out the metal, leaving your bench floating dangerously.
How to Lock the Structure into Your Wall Studs
A bench that only sits on the floor is only half-built. It needs to be fused to the wall. I always find the studs and drive heavy-duty fasteners through the back rail of my sub-frame. If the wall is particularly wonky, don’t just tighten the screws and hope the wood bends to fit; that puts immense tension on your joinery. Use shims to fill the gaps between the frame and the wall. Since boots inevitably bring in snow and rain, I always use the moisture proof base tactic for basement built-ins, even in an entryway, to keep the wood from wicking up water and rotting from the bottom up. This extra step of isolating the wood from the floor with a plastic or composite barrier is what separates a five-year bench from a fifty-year bench.
Why Your Joints Might Still Fail and How to Stop It
Even with a great frame, physics is a persistent enemy. If you still feel a slight vibration when you jump onto the seat, you can stop wobbly custom built-ins with 4 hidden steel plate fixes tucked behind the decorative face frame. These L-shaped steel reinforcements prevent the wood from ‘racking’ or tilting. I remember a specific install where the client wanted an extra-long 10-foot span without a middle leg. A standard wood frame would have turned into a literal trampoline. By integrating a few hidden steel plates and a double-layered plywood top, I made that bench feel as solid as a concrete curb. Never underestimate the power of over-engineering the parts of the project that no one will ever see.
Why More Screws Won’t Save Your Project
Common wisdom says if a bench feels a little shaky, just drive another five or six screws into it. I’m here to tell you that’s a recipe for disaster. In my years of fixing ‘pro’ installs, I’ve found that over-fastening is often what causes the wood to split and the joint to fail. According to the American Wood Council (AWC), improper fastener spacing and over-drilling can reduce the lateral load capacity of wood connections by nearly 50% because you’re essentially perforating the grain like a piece of notebook paper. Instead of a hail of screws, you need to focus on mechanical leverage. If you’re tackling a bathroom, don’t just wing it; you need an expert guide to flawless vanity installation tricks tips to ensure the weight is transferred to the floor, not just the drywall hooks.
Will Your Framing Hold Up When the Stone Shows Up?
One of the most expensive mistakes I see involves the transition from wood to stone. People build a beautiful wooden base, then drop a 200-pound slab of quartz on it and wonder why the doors start sticking a month later. The wood compresses, the frame shifts, and suddenly your ‘level’ install is a sloping mess. This is why the hidden sub-frame move for supporting massive quartz top vanities is so critical. You aren’t just building a box; you are building a bridge. If that bridge has a span longer than 36 inches without a center support, you are asking for trouble. I’ve seen 3/4-inch plywood bow under its own weight over time, which is exactly why your built-in desk is bowing and the middle leg fix becomes a necessity for any long-run cabinetry.
Stop Fighting the Natural Movement of Your Walls
The ‘Oops’ factor that bites most DIYers is the ‘Snug-Fit’ trap. You measure the alcove, you build the bench to the exact fraction of an inch, and you wedge it in there. Then winter comes, the house settles, the humidity drops, and your built-in literally tries to tear itself apart or cracks the surrounding drywall. You must leave room for the house to breathe. I always build my units about 1/2-inch smaller than the opening and use the ‘scribing’ method to cover the gap with trim. If things still feel loose after you’ve allowed for movement, you can how to fix wobbly built-ins with 4 hidden steel plate tactics 3 to add rigidity without losing that necessary expansion gap. Also, if you’re working in a damp area like a mudroom or basement, never forget the moisture proof base tactic for basement built-ins. Without that thermal break, the wood will swell at a different rate than the rest of the frame, leading to warped seats and popped joints. Have you ever fallen into the trap of building something too ‘perfectly’ only to have the house move on you? Let me know in the comments.
I’ve realized over a decade of builds that the ‘finish’ isn’t just about the paint you see on Sunday afternoon; it’s about the hardware you can’t see five years later. If you want your mudroom or bathroom to survive the daily grind, you need to stop buying the ‘multi-pack’ screws at the big-box store and start investing in structural fasteners. I personally swear by GRK RSS structural screws because their built-in washer head prevents the wood from pulling through, a common failure point when kids start jumping on benches. According to the National Design Specification (NDS) for Wood Construction, the specific gravity of your framing material—whether it’s kiln-dried Douglas Fir or dense Oak—drastically changes the withdrawal capacity of your fasteners. If you aren’t adjusting your torque for the wood species, you’re either stripping the hole or leaving the joint weak.
How do I keep my built-ins from aging prematurely?
Maintenance isn’t just dusting; it’s about managing the seasonal movement of your home. About once a year, I go through and check the hinges on every unit I’ve built. Heavy use is why cabinet doors sag and the three-hinge solution becomes your best friend for long-term alignment. If you’re dealing with wet environments, like a mudroom or a bathroom, you need to inspect the base. I always apply the waterproof sealant move for vanity backsplashes even on my entryway units where wet boots sit. This prevents that slow, creeping rot that destroys the bottom of your carcass. For those of you managing tight quarters, implementing creative storage solutions for vanities to declutter in style requires high-quality drawer slides. If a drawer starts to stick, don’t just pull harder; check the level of the cabinet box. Usually, a slight house shift has thrown the track out of parallel. 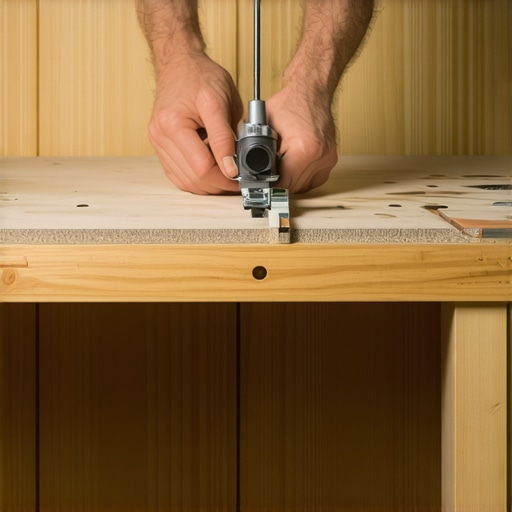
Pick Tools That Eliminate the Guesswork
I don’t believe in ‘eyeballing’ it. When I’m doing a complex install, I use a laser level for the initial ledger and then verify everything with a 4-foot Stabila. If your base isn’t dead-on, your crown molding will have gaps you can fit a coin through by the time you reach the ceiling. For those tricky bathroom setups, following vanity installation hacks that save time and money often boils down to having a high-quality scribing tool. A simple compass works, but a dedicated profiling tool allows you to trace the wonky curves of an old plaster wall perfectly. Looking ahead, I predict we are going to see a massive shift toward ‘active’ joinery—hardware that allows for tool-free micro-adjustments as houses settle and expand. We are moving away from permanent glue-ups and toward modular, adjustable skeletons that can be tuned like a piano. My challenge for you on your next project: stop trying to force a perfect fit. Instead, build your unit 1/2 inch small and use a professional scribing technique to bridge the gap. It feels like more work upfront, but it’s the only way to ensure your built-in doesn’t buckle when the seasons change.
Hard Truths from a Decade of Splintering Wood
Building furniture that lasts is rarely about the wood you see; it is about the physics you respect. If you want to move beyond basic DIY, you have to realize that screws are not a substitute for proper weight distribution. I have learned that the internal frame must act as a single, rigid unit before the first decorative panel is ever attached. If the bench wobbles without its ‘skin,’ it will eventually fail with it. Always prioritize mechanical support over cosmetic glue-ups. When you transition from simple benches to more complex tasks, using a step-by-step guide to vanity installation for beginners can help you apply these same structural principles to plumbing-heavy projects.
Gear That Keeps My Projects from Groaning
I don’t leave my reputation up to generic drywall screws. For anything holding human weight, I rely on GRK structural fasteners; their bite is unmatched and they won’t snap under lateral tension. I also never start a build without a high-quality scribing compass to ensure my units fuse to the wall without stress. If you are looking for effortless storage solutions for a tidy stylish home, your focus should be on the hardware. High-end soft-close slides and heavy-duty hinges transform a simple box into a piece of functional art. To truly maximize your space with custom vanities expert design tips, invest in a laser level—it is the only way to guarantee your framing is square in a world where walls never are.
#IMAGE_PLACEHOLDER_E#
Your Signature on the Next Fifty Years
There is a profound satisfaction in sitting on a bench you built and feeling zero movement—no creak, no sway, just solid permanence. By mastering the internal skeleton, you aren’t just making furniture; you are improving the bones of your home. Whether you decide to transform your bedroom with custom vanities top storage ideas for 2025 or stick to entryway upgrades, remember that the quality of your built-ins is defined by what is hidden. Stop fearing the heavy-duty fasteners and start building for the long haul. What is the one part of your framing that still keeps you up at night? Let me know below.