

I remember the exact moment I realized my fireplace mantel was losing its battle with gravity. It was Christmas Eve, and as I stepped back to admire the heavy garland, the heirloom brass candlesticks, and the stockings stuffed to the brim, I saw it—a distinct, heart-sinking tilt. I’d used the standard mounting kits, thinking they’d hold up to the holiday spirit, but I was dead wrong. It’s a common mistake; we focus so much on the aesthetics of the reclaimed wood or the custom finish that we forget the cold, hard physics of leverage. I actually tried to “fix” it once by just driving longer screws at an upward angle, and let me tell you, watching a gorgeous piece of oak slowly pull a chunk of drywall and masonry dust with it is a lesson you only want to learn once. That’s why I’m obsessed with the steel plate method now. It’s the only way to get that rock-solid, “built for a century” feel without visible, ugly brackets ruining the clean lines of your hearth.
The Day My Fireplace Mantel Almost Met the Floor
When I first installed my custom mantel, I felt like a pro. I followed the instructions on the box and used the “best” anchors the hardware store offered. But just a few months later, the shelf was leaning like it had spent too much time at the local pub. It reminded me of the time I struggled with why your floating shelf is tilting down and the wall fix, realizing that gravity never takes a day off. The fundamental problem is leverage. A mantel is essentially a giant lever trying to pry itself out of your wall with every ounce of weight it carries. Today, we are going to dive into the steel plate strategy that stops that rotation dead in its tracks. I’ll show you how to reinforce your setup so you can pile on the decor without a second thought. Have you ever walked into your living room and noticed your mantel just wasn’t as level as it used to be?
Is a hidden steel plate actually worth the extra effort?
I get the skepticism. You’re probably thinking, “Can’t I just use more heavy-duty toggles?” or “Isn’t machining steel a bit much for a home DIY project?” Trust me, I was in that same boat. I once spent an entire Saturday trying to shim a sagging unit with scraps of cedar, only to have it start dipping again before the month was out. It was every bit as frustrating as dealing with wobbly built-ins that need hidden steel plate tactics. The reality is that standard fasteners concentrate all the mechanical stress on a tiny, singular point in the wall. A steel plate, however, acts as a rigid backbone, distributing that downward load across a much larger surface area. According to structural engineering principles often highlighted by the American Institute of Steel Construction, the rigidity of steel provides a modulus of elasticity that far exceeds any timber or plastic anchor, effectively preventing the “creep” or material fatigue that causes heavy mantels to sag over time. This isn’t just about overkill; it’s about creating a foundation that won’t budge regardless of how many heavy books or seasonal decorations you pile on top.
Why Traditional Mounting Kits Fail the Gravity Test
Most people reach for bigger L-brackets when a shelf sags, but unless you want your living room looking like a warehouse, that’s rarely the look we’re after. We want that clean, floating appearance that makes a room feel high-end. It’s a similar challenge to when homeowners ask about how to support quartz counters on custom floating vanities—you need massive hidden strength. My early failure taught me that if you don’t address the internal structure of the mount, you’re just putting a band-aid on a structural issue. To get it right, we need to bridge the gap between the studs and the mantel itself using a material that won’t flex under a hundred pounds of weight. This is where hidden steel plate fixes come into play, providing a level of security that standard hardware simply can’t match. In the following sections, I’m going to walk you through the specific gauge of steel I use and exactly how to prepare the back of your mantel so the plate disappears completely. We’re going to turn that sagging shelf into a permanent structural feature that’s as tough as it is beautiful.
Carve Out a Home for Your New Backbone
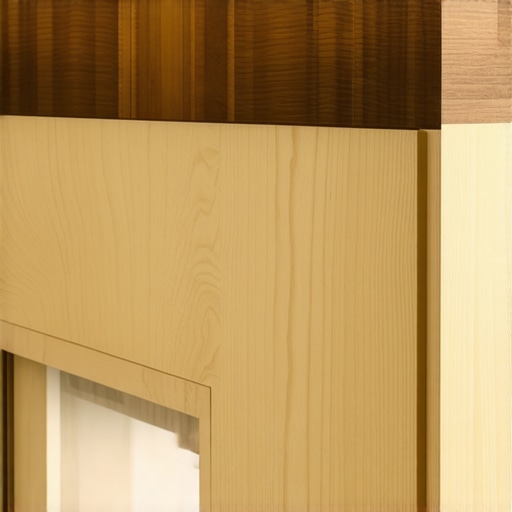
Before you even touch a drill, you have to prepare the back of your mantel to accept the steel plate. This isn’t just about making a hole; it’s about creating a flush, seamless fit so the wood sits tight against the wall. Think of this plate like a prosthetic spine—it provides the rigidity the wood lacks. I learned this the hard way when I tried to ‘surface mount’ a plate on a cherry mantel. The gap it left against the drywall was an absolute eyesore, looking more like a mistake than a design choice. Now, I use a plunge router with a straight-cut bit to carve a recess exactly the depth of the steel. It is a similar level of precision you would need for the hidden internal bracing trick for extra deep kitchen sink bases. If you do not have a router, you can use a hammer and chisel, but be prepared for some serious patience.
The Messy Reality of Routing the Back Channel
I remember a time I skipped using a guide rail for this step. I thought I had a steady hand, but the router caught a knot in the oak and kicked back, gouging a jagged trench right where the plate was supposed to sit. I had to fill the mess with epoxy and sawdust just to get a level surface again. The lesson? Always use a jig. You want that steel plate to sit perfectly flat. This ensures that when you apply tension, the load is distributed evenly across the timber, much like how you would stop wobbly custom built-ins with 4 hidden steel plate fixes 3. Once your channel is cut, dry-fit the plate to make sure it does not sit proud of the wood surface. If it sticks out even a hair, your mantel will never sit flush against the masonry or drywall.
Bolt the Plate Directly Into the Studs
Now comes the part where we actually fight gravity. You are not just looking for any stud; you are looking for the exact center of every stud the mantel spans. If you are working with a particularly heavy piece of reclaimed timber, you might even consider how to secure floating vanities to double layer drywall 2 techniques if your wall has extra thickness. Use 3/8-inch lag bolts that are at least four inches long. You want at least two and a half inches of thread biting into the solid meat of the 2x4s. It is the same logic used for the hidden steel bracket for massive bookshelf spans—if the anchor is not deep enough, the weight of the mantel acts as a pry bar, slowly pulling the bolt out over months of seasonal humidity changes. When you tighten those lags, the steel plate should pull tight against the wall, compressing the drywall slightly for a friction-fit that is nearly impossible to budge.
Ensure Your Setup Stays Level Under Pressure
One trick I always use is to slightly over-compensate for the weight. When you are bolting the plate, use a long level to ensure it is horizontal, but if your mantel is exceptionally deep, I sometimes shim the bottom of the plate just a fraction of a degree upward. This way, when the full weight of the wood and your heavy decor is added, it settles into a perfect 90-degree angle. It is a nuanced move, similar to what you might find in an expert guide to flawless vanity installation tricks tips. Without this ‘pre-load’ strategy, even the strongest steel can have a microscopic amount of flex that translates to a visible dip at the edge of a deep shelf. You want the peace of mind that comes from knowing your heirloom pieces are sitting on a foundation as solid as the house itself.
Let’s dig deeper into why even “professional” installs often fail after a single change of seasons. The most common myth I see in DIY circles is that “more anchors equal more strength.” People assume if three lag bolts are good, six must be invincible. But here’s the contrarian truth: overloading a single stud or placing anchors too close together can actually compromise the structural integrity of your framing. You are essentially turning your wall studs into Swiss cheese. I’ve seen homeowners wondering why your built-in face frames are separating from the wall only to find they’ve riddled their studs with so many holes that the wood fibers have split under the tension.
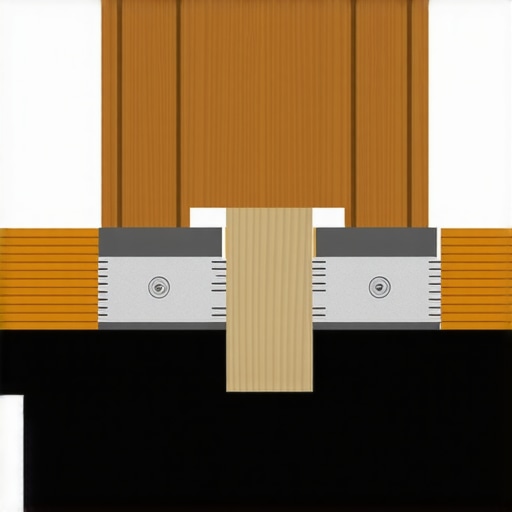
The real “oops” factor most people miss is material creep. According to research from the USDA Forest Products Laboratory, wood is a viscoelastic material, meaning it deforms over time under a constant load, especially when moisture levels fluctuate. If you rely solely on wood-to-wood contact for a heavy shelf, that wood will eventually “give” just a few millimeters. That tiny gap is all gravity needs to start the downward tilt. This is why you need to stop floating shelf sag with internal torsion box engineering 3 or use a rigid steel sub-frame for high-load areas. It provides a non-compressible backbone that ignores humidity changes.
Why does your heavy-duty mantel still sag despite being bolted into every stud?
It usually comes down to the “moment arm”—the distance from the wall to the leading edge of the mantel. When you’re planning built-in storage ideas to declutter and enhance your home, you have to realize that the leverage exerted on those bolts is massive. If your steel plate isn’t thick enough to resist bending, the plate itself will flex before the bolts even budge. This is why I always recommend at least 1/4-inch cold-rolled steel for deep mantels. Have you ever fallen into this trap where you thought you overbuilt something, only to see it lean six months later? Let me know in the comments!
Another nuance is the transition between materials. When you’re following an expert guide to flawless vanity installation tricks tips, you must account for how different materials settle. Using the internal brace move for extra long floating shelves 2 ensures that the weight is transferred through the steel and directly into the center of the vertical studs, bypassing the compression-prone drywall altogether. It is the secret difference between a project that looks good on reveal day and one that remains level for decades.
Once you’ve successfully anchored that steel plate, your job isn’t quite done. You need to think about the long game. Houses breathe—literally. I’ve seen perfectly level installs shift just enough to be annoying because of foundation settling or seasonal expansion. This is especially true if you are looking at top trends in vanity designs you need to know in 2025 where floating elements are king. To keep things perfect, I rely on a few specific tools that are worth their weight in gold. First, toss those plastic levels. I only use a Starrett 98 precision machinist’s level when I’m setting steel plates. Why? Because a standard bubble level can be off by a fraction of a degree, which translates to a half-inch dip on a deep mantel. According to L.S. Starrett Co. technical documentation, their precision levels are accurate to 0.005 inches per foot, providing the tolerances required when fighting massive leverage.
How do I keep my heavy built-ins level as the house settles?
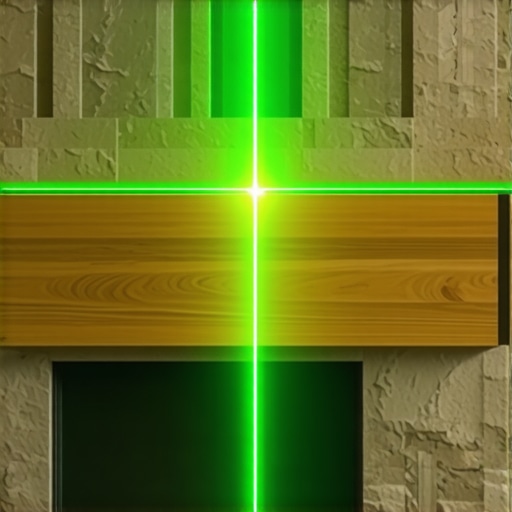
The secret isn’t just in the initial bolt; it’s in the seasonal check-up. Every year, during the transition from humid summer to dry winter, I take five minutes to inspect my heavy installs. If you notice why your soft-close drawers are slamming and the tension fix might be necessary, it’s often a sign that the cabinet box has slightly racked due to minor wall shifts. I use a long-range laser level—specifically the Bosch GLL3-330CG—to throw a green line across my built-ins. If the line doesn’t track perfectly with the top edge, I know it’s time to tweak the mounting tension. This kind of proactive maintenance is what separates a temporary DIY project from a permanent architectural feature.
I’m also a huge proponent of specialized cobalt drill bits when working with these steel plates. Standard high-speed steel bits will dull or snap before you even get through a 1/4-inch plate of cold-rolled steel. I use Milwaukee Red Helix Cobalt bits because they handle the heat much better, preventing that frustrating scenario where you are just burning wood and metal. If you’re planning creative storage solutions for vanities declutter in style, you’ll likely encounter similar hardware challenges where precision is non-negotiable. Looking ahead, I see the trend of invisible strength only getting bigger. By 2025, we’re going to see more integrated carbon fiber supports that allow for even slimmer profiles. But for now, the steel plate remains the king of the workshop. If you’re struggling with how to fix uneven gaps in custom built-in doors, check your foundation first. Often, it’s not the hinge that’s the problem; it’s the wall mount that’s subtly shifted. I challenge you to grab a high-quality machinist’s level for your next project. It changes the way you see straight lines forever. If you’re working against a stone fireplace, don’t forget the scribing trick for cabinets against uneven masonry to make that steel-reinforced unit look like it grew right out of the wall.
What My Falling Mantel Taught Me
After years of trial and error, I’ve realized that the sturdiness of a piece of wood is often an illusion if the connection to the framing is weak. Here are the lightbulb moments that changed my approach to every heavy install I tackle now:
- Wood moves, but steel doesn’t: I used to rely on thick lag screws alone, but wood fibers compress over time. The steel plate creates a permanent, non-compressible interface that keeps the mantel from ever beginning that first millimeter of tilt.
- The leverage trap: A 12-inch deep mantel exerts four times the prying force of a 6-inch shelf. Never underestimate the math of the moment arm; the deeper your shelf, the thicker your steel plate needs to be.
- Hidden rot: Especially with reclaimed beams, the exterior might look great while the interior is punky. Always drill a test hole to ensure your fasteners are biting into solid material rather than dust.
The Gear That Never Leaves My Truck
I’ve wasted enough money on subpar tools to know what actually stands up to a professional-grade install. If you are serious about fighting gravity, these are the three things I never head to a job site without:
- Starrett 98 Machinist’s Level: Standard levels are fine for hanging pictures, but when you are dealing with heavy leverage, you need precision that measures in thousandths of an inch. I trust it more than my own eyes.
- Milwaukee Cobalt Bits: Don’t even try to drill through 1/4-inch steel with standard black oxide bits. You’ll just burn your wood and ruin your drill. Cobalt handles the heat without dulling.
- Bosch Green Beam Laser: It is significantly easier to see against a dark masonry fireplace than a red laser, which is vital for aligning long spans perfectly across a living room.
#IMAGE_PLACEHOLDER_E#
Build Something That Outlasts the Seasons
There is a unique kind of peace that comes from knowing your home is structurally sound. Whether you are looking for built-in storage ideas to declutter and enhance your home or just trying to save a sentimental heirloom from a slow-motion collapse, the extra effort of a steel plate is always worth it. Don’t settle for a good enough install that you’ll have to redo in two years when the humidity changes. Take the time to follow an expert guide to flawless vanity installation tricks tips for inspiration on precision, and apply those same high standards to your fireplace mantel. You’ve got the skills and the strategy now—it is time to make that hearth rock-solid and beautiful for decades to come.
Have you ever looked at your mantel from across the room and realized it was leaning just a bit too much? Let me know your biggest installation struggle in the comments below!