

I’ll never forget the sound of my favorite ceramic vase shattering at 3 AM. I had just finished installing a massive, eight-foot floating shelf in our living room and spent the entire afternoon styling it with books and heirlooms. By midnight, gravity won. I thought a few long screws and some standard brackets would be enough, but I was wrong. It’s a gut-wrenching feeling to see your hard work literally pulling the drywall apart. That failure sent me down a rabbit hole of structural engineering, where I discovered what I now call the Internal Brace Move. If you’ve been dreaming of those sleek, spanning shelves but are terrified they’ll end up on the floor, you’re in the right place. We’re going to fix that today.
The Night My Dream Shelf Became a Liability
I’ve made every mistake in the book when it comes to creative built-ins for seamless storage. Early on, I ignored the sheer leverage a deep shelf puts on a wall stud. I once tried to install a massive span using only basic anchors, and it didn’t just sag; it bowed so badly that anything round would roll right off the front edge. It looked amateur, and frankly, it was dangerous. That’s why fixing a tilting floating shelf starts way before you even pick up a level. You need to think about what is happening inside the wood. If your shelf isn’t built with an internal skeleton, you are basically asking a piece of lumber to perform a miracle.
Is This Internal Bracing Actually Worth the Extra Effort?
You might be wondering if you can just buy a thicker piece of wood and call it a day. The short answer is a hard no. In fact, heavier wood often makes the problem worse by adding more dead load for the wall to support. The Internal Brace Move is about creating a skeleton—usually a mix of a structural header and internal ribs—that distributes weight back into the studs rather than pulling away from them. It turns the shelf from a simple plank into a rigid torsion box.
Why Your Current Setup is Probably Failing
Most DIY enthusiasts treat a shelf like a diving board. The further it sticks out, the more it wants to snap at the base. According to engineering research from the Forest Products Laboratory, the structural integrity of a horizontal span is significantly improved by internal torsion box engineering rather than sheer mass. This is the same logic used in airplane wings. When I finally started using internal torsion box engineering, the difference was night and day. My shelves stopped being decorative only and started being functional furniture that could hold a full set of encyclopedias without budging a millimeter. Have you ever noticed your shelves starting to gap at the top where they meet the wall? Tell me about your most frustrating shelving fail in the comments—I’ve probably been there too. We are going to ensure that never happens again by focusing on the hidden frame that makes the magic happen.
Forget Studs Alone You Need a Sub-Frame
To build a shelf that actually stays level, you have to stop thinking about the shelf as a piece of wood and start thinking about it as a structural extension of the wall. The first step I take now is what I call the sub-frame strategy. Instead of just driving a few screws through a backboard, you want to create a recessed mounting cleat. I remember a kitchen remodel I did three years ago where the homeowner wanted a massive pantry pull-out that felt like part of the wall. I used creative built-ins for seamless storage techniques to hide a 2×4 frame behind the finish maple. It felt like I was building a tiny house inside a cabinet. When you use the structural header move for wide alcove shelving, you are effectively shifting the center of gravity. By anchoring a heavy-duty cleat directly into the center of the studs with 4-inch lag bolts, you create a foundation that won’t pivot. If you skip this and just use 3-inch deck screws, you’re essentially waiting for the wood fibers in your studs to crush under the pressure.
Why the Torsion Box Skeleton Always Wins
Once your wall cleat is set, you need to build the ‘ribs.’ This is where stop floating shelf sag with internal torsion box engineering comes into play. Think of it like a hollow-core door but much stronger. You sandwich internal spacers between two thin layers of plywood. This creates a structure that is incredibly stiff but very light. The mistake most people make is using solid 2x10s for floating shelves. That 2×10 is heavy before you even put a single book on it. By using a torsion box, you’re using the physics of a beam to resist bending. I once applied this to a 10-foot long library project. We used 4 internal steel stiffeners that stop massive bookcase shelves from bowing, and even with a full set of law books, the middle didn’t dip a fraction of an inch. 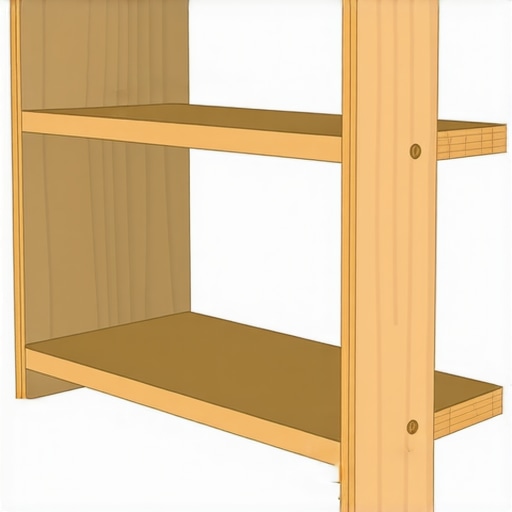
Handling the Weight of Quartz and Stone
Things get even more complex when you move from wooden shelves to heavy stone surfaces. If you are planning a floating bathroom look, you have to account for the dead weight of the countertop. I learned this the hard way when a vanity I installed started to pull the drywall tape right off the corner. Now, I always employ the hidden sub-frame move for supporting massive quartz top vanities. This involves using steel L-brackets that are routed into the side of the cabinetry or hidden behind the face frame. You want the weight of the stone to transfer directly down into the floor-to-wall junction. When you combine this with an expert guide to flawless vanity installation tricks tips, you realize that the ‘magic’ of a floating look is actually just very clever metalwork hidden behind the wood. Always pre-drill your holes in the internal frame to avoid splitting the grain; a split in your internal brace is a ticking time bomb for a sagging shelf.Everyone tells you to buy the heaviest plywood you can find, thinking mass equals strength. I call BS on that. In my experience, over-building with heavy materials is the fastest way to pull your wall down. A standard 3/4-inch sheet of birch weighs about 60 pounds; by the time you build a full-height unit, you’ve added 300 pounds of dead weight before a single book is added. The pro move isn’t about mass; it’s about mechanical advantage and using maximize your space with custom vanities expert design tips to keep the profile slim but the structure rigid.
Stop Over-Engineering for Weight and Start Engineering for Physics
Most DIYers think a ‘sturdy’ cabinet is one you can’t lift. That’s a dangerous myth. In reality, the more mass you add, the more you fight gravity. I’ve seen beautiful oak built-ins literally peel away from the studs because the builder didn’t account for the ‘lever arm’ effect. According to the Architectural Woodwork Institute (AWI), the structural integrity of a cabinet depends on the shear strength of the fasteners and the squareness of the box, not the thickness of the carcass. If you’re trying to enhance your home with sleek built-in vanities design tips for 2025, focus on high-quality 1/2-inch Baltic birch with a 3/4-inch face frame. This creates a ‘beam’ effect that is lighter and stronger than a solid 3/4-inch box.
How do you handle a vanity when the floor is doing its own thing?
This is the most common advanced question I get. If your bathroom floor slopes even a quarter-inch, and you bolt your vanity level to the wall, you’ve created a gap at the floor that will eventually cause the vanity to rack. I always use tactics for leveling vanities on sloping tile floors to ensure the weight is transferred to the floor, not just the wall screws. If you don’t shim properly, you’ll find yourself looking for how to fix uneven gaps in custom built-in doors because the whole frame has twisted. 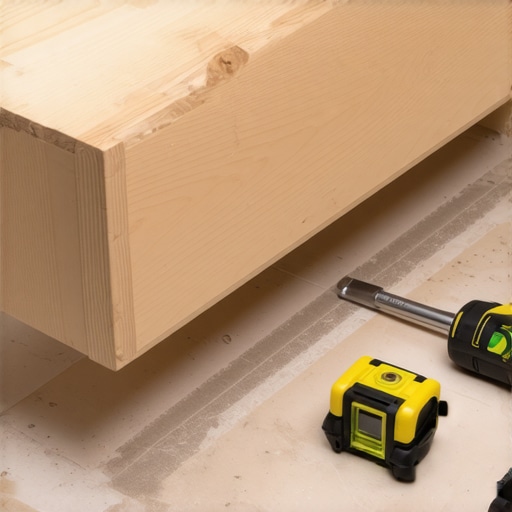
The Silent Killer of Custom Cabinetry: Moisture Wicking
The biggest ‘oops’ factor I see in bathroom projects isn’t the plumbing—it’s the lack of a thermal break. If you’re installing on a concrete subfloor or over cold tile, the wood will suck up moisture like a straw. You absolutely need the moisture barrier strategy for below grade vanities. This simple step of adding a plastic or composite riser prevents your expensive custom work from rotting from the bottom up. Even with an expert guide to flawless vanity installation tricks tips, if you ignore the floor-to-cabinet transition, your project has an expiration date. Another trap is the pantry pull-out. People fill them with 50 cans of soup and wonder why your integrated pantry pull-out is catching. It’s almost always because the slides weren’t mounted with a sub-frame to prevent the side walls from bowing outward under load. Have you ever fallen into this trap where you built something too heavy for its own good? Let me know in the comments.
I have spent thousands on tools over the years, but I’ve learned that the most expensive gear isn’t always what saves your project. The two items that never leave my bag are a high-quality green-beam laser level and a dedicated scribing jig. I personally use the Bosch GLL3-330CG because 1/8-inch accuracy at 30 feet isn’t a luxury when you are installing a 12-foot vanity; it’s a necessity. If your level is even slightly off, your whole torsion box skeleton will fight against the wall studs instead of working with them. When you are trying to maximize your space with custom vanities expert design tips, the precision of your initial layout determines whether those drawers will still glide smoothly in five years.
The Gear That Actually Saved My Back and My Projects
Beyond the laser, you need to master the art of the scribe. Houses aren’t square, and your built-ins shouldn’t pretend they are. I use an Accu-Scribe to transfer the wonky curves of a plaster wall directly onto my finish panels. It’s the difference between a gap you can fit a coin through and a seamless transition that looks like it grew out of the wall. This is especially vital when you follow an expert guide to flawless vanity installation tricks tips. Without a tight scribe, the weight distribution of the unit can become uneven, leading to those dreaded structural failures I mentioned earlier.

According to the Blum Technical Specification Manual, soft-close hardware requires a mounting tolerance of within 1.5mm to maintain its hydraulic integrity. If your cabinet box racks even slightly because the wall was uneven, you’ll find yourself looking for why your soft-close drawers are slamming and the tension fix sooner than you think. Precision in the beginning saves hours of frustration during the finish phase.
Stop Your Built-ins From Aging Before They Should
Maintenance is the part of the DIY process most people ignore until something starts to squeak. I recommend a ‘torque check’ every six months for floating units. Just a quick check on the primary lag bolts ensures that house settling hasn’t loosened your connection to the studs. If you’ve implemented built-in storage ideas to declutter and enhance your home, don’t let a loose screw ruin the aesthetic. I’ve seen 100-pound shelves start to droop simply because the homeowner ignored a hairline gap forming at the top edge. Catching it early with a quick tightening of the internal frame can save the entire unit.
How do I maintain these heavy-duty storage systems for decades?
Environmental control is your best friend. Wood is a living material that breathes. In high-humidity areas, I always double down on the moisture barrier strategy for below grade vanities to prevent the wood from swelling and binding. If your doors start to stick, you might need to learn how to fix uneven gaps in custom built-in doors using the hinge adjustment screws. Looking ahead, I predict we will see more integrated sensors in high-end cabinetry that alert you to moisture buildup or structural shifts before they are visible to the eye. For now, stay proactive. I challenge you to go grab a scribe tool this weekend and try it on a small scrap piece—once you see that perfect fit against a wall, you’ll never go back to using caulk to hide your gaps.
The Three Brutal Lessons Gravity Taught Me
- Thickness is a trap: I used to think a 2-inch solid oak slab was inherently strong. In reality, it is just heavy. True structural stability comes from the internal geometry of a torsion box, not the weight or density of the lumber you choose.
- The leverage of a deep shelf is unforgiving: For every extra inch your shelf sticks out from the wall, the downward force on your mounting fasteners multiplies. This is why vanity installation hacks that save time and money focus almost entirely on the quality of the wall connection rather than the cabinet itself.
- Silence is often a warning: If your built-ins stop making minor settling noises but start showing a hairline gap at the ceiling line, the wood hasn’t finished settling—it is likely pulling the drywall away from the studs.
The Gear I Trust to Beat the Bow
You do not need a shop full of industrial machinery, but you do need absolute precision. Beyond my standard laser level, I always keep a dedicated scribing tool and a set of composite shims in my bag. If you are currently choosing the perfect vanity style for your bedroom or bath, do not ignore the physical reality of your walls. For those working in tight quarters, these smart storage solutions to optimize small bathroom spaces provide the perfect blueprints for combining internal strength with a minimal footprint. I also suggest checking out effortless storage solutions for a tidy stylish home to see how professional-grade internal frames allow for much thinner, more modern aesthetics.
#IMAGE_PLACEHOLDER_E#
Don’t Let Structural Fear Keep Your Walls Empty
It is easy to feel overwhelmed by the math of shear strength and torsion box engineering, but remember that every master carpenter started with a shelf that eventually sagged. The real secret is not perfection on your first attempt; it is learning to trust the physics of the internal frame. Once you master the Internal Brace Move, you can confidently install creative built-ins for seamless storage that look like they are floating on air while remaining the most stable structures in your house. Have you ever had a shelf fail months after you thought the project was finished? Let me know in the comments—I’d love to help you troubleshoot the fix.