

I stood there, sweat dripping down my forehead, looking at a three-quarter-inch gap that made my brand-new vanity look like a total amateur job. My wife called it ‘character,’ but I knew the truth: I’d failed the plaster wall test. We’ve all been there, haven’t we? You spend weeks picking the perfect wood, hours on the assembly, and then the final boss appears—a wavy, lumpy, 1940s-style plaster wall that refuses to be straight. Today, I’m going to show you how to stop fighting your house and start making your cabinets look like they grew right out of the wall.
Your Plaster Walls Are Lying to You
People think walls are flat. They aren’t. Especially if you live in a home with some history, those textured plaster surfaces are more like a topographical map of the Swiss Alps than a vertical plane. When I first started out, I made the mistake of thinking I could just push the cabinet tight and fill the rest with ‘magic’ (also known as a gallon of caulk). It looked terrible. The caulk cracked within a month because plaster and wood move at different rates. That’s why learning how to scribe cabinets to heavily textured plaster walls is the single most important skill for a clean finish. It’s the difference between a DIY project and a professional installation that adds real value to your home. Have you ever tried to hide a massive gap with trim and ended up making it look even worse?
Is a Specialized Scribing Tool Actually Worth the Extra Effort?
You might be thinking that a simple compass from a school geometry kit will do the trick. I used to think that, too, until the needle slipped and I gouged a deep scratch into a finished maple face frame. A dedicated scribing tool offers stability that a cheap compass just can’t match, allowing you to follow the peaks and valleys of textured plaster with pinpoint accuracy. According to the Architectural Woodwork Institute, professional-grade installations should ideally maintain gaps of less than 1/16th of an inch, a standard that’s nearly impossible to reach on lumpy walls without a precise scribe. When you’re working on creative built-ins for seamless storage, that precision is what makes the unit look built-in rather than just pushed in. By using these vanity installation hacks, you’ll save yourself the headache of wasted material and the embarrassment of wavy gaps. Let’s look at how to actually set this tool up so you don’t repeat my early-career disasters.
Set Your Cabinet Exactly Where It Belongs
Before you even think about marking a line, you have to get the cabinet into its final, perfectly level position. If the cabinet isn’t plumb and level, your scribe line will be a total lie. I use 7 tactics for leveling vanities on sloping tile floors to ensure the base is rock solid before the face frame touches the wall. Shim the bottom until the box is perfectly vertical. If you’re working on creative built-ins for seamless storage, this is where most amateurs fail. They assume the wall is the reference point, but the level is the only thing that matters. Push the cabinet as close to the wall as it will go without forcing it. You’ll see the gaps immediately—this is your ‘map’ for the scribe. Think of the gap as a puzzle piece that hasn’t been cut yet; your job is to find the negative space.
Adjust Your Scribe Tool to Match the Wall’s Chaos
Now, grab your scribing tool. Set the distance between the point and the pencil to match the widest gap between the cabinet and the wall. Think of this tool as a bridge between two worlds: the straight, rigid world of your cabinetry and the chaotic, organic world of 1940s plaster. Keep the tool perfectly perpendicular to the wall as you drag it down. If you tilt it up or down, the line will shift, and you’ll end up with a gap that looks like a lightning bolt across your finished wood. I always apply blue painter’s tape to the face frame first. Not only does this protect the finish, but it makes the pencil line stand out like a neon sign against the wood grain. 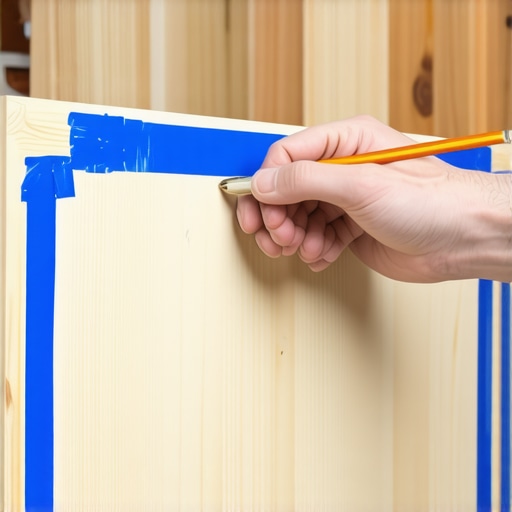
The Down-and-Dirty Method for a Perfect Cut
Once you have your line, it’s time for the high-stakes part: the cut. When utilizing expert guide to flawless vanity installation tricks tips, the secret is back-beveling. Don’t cut the wood straight at a 90-degree angle. Angle your jigsaw or power plane at about 5 or 10 degrees so you’re removing more material from the back of the frame than the front. This creates a sharp edge that touches the wall first, making it much easier to sand down for a micro-fit. I remember a specific job where I forgot to back-bevel a cherry wood vanity. The thick edge of the wood hit a high spot in the plaster and prevented the rest of the frame from sitting flush. I spent three hours with a hand rasp trying to fix a mistake that a 10-degree tilt of the saw would have prevented. This is one of those essential vanity installation hacks that separates a clean install from a messy one.
Protect Your Work Against Future House Movement
Plaster is brittle and wood is essentially a sponge that breathes. They will fight each other as the seasons change. When you’re learning how to scribe cabinets to heavily textured plaster walls, you aren’t just making it look good for today; you’re accounting for the house shifting. If you cut the scribe too tight, the expanding wood might actually crack the plaster. I aim for a fit so close you can’t slide a business card into the gap, but I never force the cabinet into place with heavy screws until I’m sure there’s no tension. If the wall has extreme texture, a tiny bead of paintable caulk that matches the wall—not the cabinet—will hide the final microscopic imperfections. This attention to detail is what makes high-end flawless vanity installation look like the cabinetry was born in the room.
Forget What You’ve Heard About ‘Perfect’ Gaps
There is a dangerous obsession in the DIY world with zero-tolerance fits. You’ll see influencers on Instagram sliding a single piece of paper into a scribe and calling it perfection. I’m here to tell you that’s a recipe for a structural crack in two years. Everyone says the tighter the better, but in my experience, a ‘zero-clearance’ fit on a heavy built-in often leads to the wood expanding and literally prying your face frames off the wall or cracking your delicate plaster. According to the National Kitchen & Bath Association (NKBA), cabinetry must be installed with consideration for the environment’s hygroscopic movement. Wood is alive; it breathes. If you don’t leave a hair’s breadth for that movement, the house will make that space for itself, usually by ruining your paint job. Have you ever noticed your built-in face frames are separating from the wall during the winter? That’s not a bad scribe; it’s a failure to account for seasonal contraction.
Why Does Your Built-In Face Frame Keep Separating From the Wall?
The most common trap I see—and I’ve fallen into it myself—is relying on the face frame to do the structural heavy lifting. The face frame is the ‘pretty face’ of the project, but the internal box and the ledger are the muscles. If you’re working on custom vanities and expert design, you have to understand that the weight of a stone top changes everything. Many pros forget that heavy quartz can actually crack the cabinet frame if the load isn’t transferred directly to the floor or a secondary support system. I once saw a beautiful mahogany vanity literally buckle because the installer didn’t use proper support for quartz counters. They spent ten hours on the scribe and zero minutes on the internal bracing. It’s a classic case of prioritizing aesthetics over engineering.
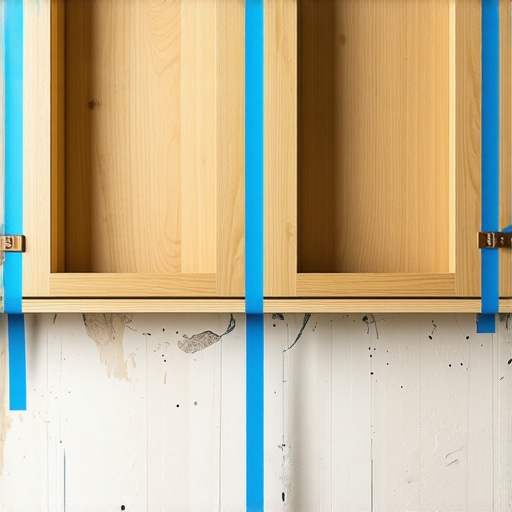
When you transition to creative built-ins for seamless storage, the ‘oops’ factor usually comes from the wall itself. People assume that hitting a stud with a 3-inch screw is enough. But on those old plaster walls we talked about, the ‘stud’ might be a piece of 100-year-old pine that’s as brittle as a toothpick. This is why I swear by mounting heavy floating vanities on old lath and plaster using a distributed load strategy rather than just point-loading a few screws. If you don’t spread that weight, you’ll hear a sickening ‘crunch’ the first time someone leans on the vanity. I’ve seen entire sections of plaster pull away because the installer ignored the structural integrity of the substrate.
The Pro Move for Hidden Stability
If you want to step up your game, stop looking at the vanity as a box and start seeing it as a bridge. Use these flawless vanity installation tricks to create hidden sub-frames. By building a small plywood ‘ladder’ behind the cabinet, you can anchor to multiple points in the wall and then hang your cabinet on that ladder. This ensures your beautiful scribe job stays beautiful because the cabinet isn’t sagging or pulling under its own weight. It’s the difference between a project that lasts five years and one that lasts fifty. Have you ever fallen into this trap of making it look good but forgetting the weight? Let me know in the comments—I’d love to hear your ‘near-miss’ stories or how you solved a sagging cabinet issue.
Even after you’ve achieved that hair-thin gap, the work isn’t done. The real test of a pro-level installation is how it looks three years from now when the humidity has fluctuated twenty times. I’ve seen beautiful creative storage solutions for vanities get stuck because the carcass shifted just enough to throw the drawer slides out of alignment. If you notice your built-in face frames are separating from the wall, it’s usually time for a small adjustment to the mounting tension rather than reaching for the caulk gun again. Dealing with the natural expansion and contraction of timber is part of the craft, not a failure of it.
How do I keep my cabinetry looking new for a decade?
Maintenance is often overlooked in the rush to finish a project. According to the USDA Forest Service’s ‘Wood Handbook’, wood can change up to 1% in dimension for every 4% change in moisture content. This means a 30-inch vanity can technically grow or shrink by nearly a quarter-inch depending on your local climate. To combat this, I recommend checking your hinge tension every six months. Using high-quality soft-close hinges allows you to compensate for this minor ‘breathing’ without rebuilding the unit. If you’ve implemented smart storage solutions to optimize small bathroom spaces, ensure that your internal racks aren’t being overloaded, which can bow the side panels and ruin those perfectly scribed external lines.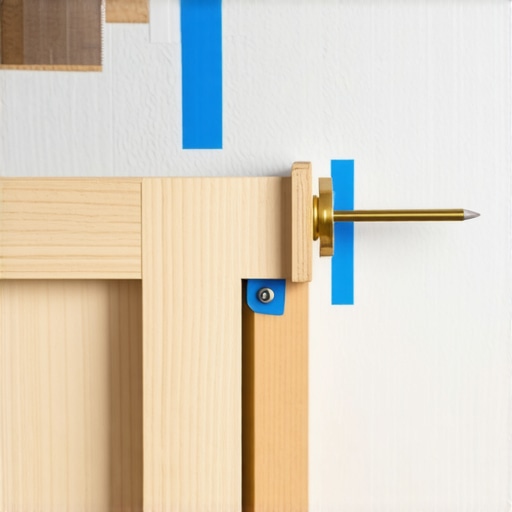
The Gear That Actually Makes Scribing Easy
I don’t leave my shop without my FastCap AccuScribe. It’s not just a fancy compass; it’s an offset tool that allows for consistent pressure against the wall, which is vital when you’re following a wavy plaster surface. When I’m setting up effortless storage solutions for a tidy stylish home, I also lean heavily on a self-leveling green-beam cross-line laser. If you’re trying to level a six-foot-tall pantry on a floor that slants toward a floor drain, a bubble level is a guessing game. A laser gives you a reference line that stays constant, allowing you to focus entirely on the scribe rather than second-guessing your plumb.
Digital Mapping Is the Future of the Perfect Fit
We are rapidly moving away from manual scribing as the only solution. In the next few years, I expect to see more mid-range installers using LIDAR technology on their smartphones to create a digital ‘point cloud’ of a room. You’ll be able to feed that data directly into CAD software and have a scribe line pre-cut via CNC before the cabinet even leaves the shop. Until that becomes the standard, my best advice is to embrace the hidden structural methods we’ve discussed. It is the ultimate insurance policy against time. On your next project, I want you to try building a dedicated internal plywood ladder for your wall-hung units. It’ll change the way you think about structural integrity and give you the confidence to tackle even the heaviest stone countertops.
Hard-Won Lessons from Decades of Dust
After twenty years of chasing plumb lines in crooked houses, I’ve realized that the most beautiful scribe isn’t the one that’s tightest—it’s the one that respects the house. Here are a few lightbulb moments from my journey:
- The Sacrifice Rule: Always build your face frames with an extra 1/2 inch of width. You can always trim wood away, but you can’t glue wood back on if the wall bows deeper than you expected.
- Tape is Your Best Friend: Applying blue painter’s tape to the wood before marking prevents graphite from staining the open grain. It also makes your cut line much easier to see under dim construction lights.
- Seasonal Breathing: A ‘zero-clearance’ fit in July might cause the wood to buckle the plaster in February. Aim for a ‘snug’ fit that allows for the natural expansion mentioned in our step-by-step guide to vanity installation for beginners.
The Gear I Carry to Every Job Site
You don’t need a truck full of gadgets, but these three things are non-negotiable for a professional result. I personally swear by the FastCap AccuScribe; unlike a cheap school compass, it locks tight and doesn’t wander when it hits a lumpy section of plaster. For keeping things level on those tricky, sloping floors, a self-leveling cross-line laser is worth its weight in gold—it provides a constant reference point that a bubble level simply can’t match. If you’re dealing with damp conditions in a laundry or basement, don’t forget the moisture barrier fix for vanities to protect your hard work from ground-up rot.
Build Something That Outlasts the House
Taking the time to learn how to scribe cabinets to heavily textured plaster walls transforms a standard renovation into a piece of craftsmanship. It’s about more than just aesthetics; it’s about structural integrity and the pride of knowing that the unit is rock solid. By implementing a sub-frame strategy for your heavier units, you ensure that your beautiful scribe work won’t be ruined by sagging or wall pulling over time. Your house might not be perfect, but your installation certainly can be. What’s the biggest gap you’ve ever had to bridge with a scribe line? Let me know in the comments below!