

I’ll never forget the sound of my favorite ceramic vase shattering on the hardwood floor because I trusted a couple of 3-inch screws to hold up a forty-pound walnut console. I thought I was being a pro by “hitting the studs,” but I completely ignored the physics of leverage. That leaning gap between the cabinet and the wall wasn’t just an eyesore; it was a warning. Since that midnight cleanup, I’ve perfected a method I call the Plywood Backing Strategy. It’s the difference between a unit that looks like it’s hovering and one that’s actually destined to stay there. Today, I’m going to walk you through exactly why this extra step is the only way to sleep soundly, even if you’re mounting a massive entertainment center.
Stop Relying on Studs Alone if You Value Your Electronics
The biggest mistake I made early on—and one I see neighbors make every single weekend—is assuming that two or three points of contact are enough for a wide cabinet. When you have a floating unit, the weight isn’t just pulling down; it’s pulling out from the top. I’ve learned the hard way that why your floating media unit is pulling away usually comes down to the lack of a continuous mounting surface. By installing a recessed plywood plate, you create a “cleat” effect that spans the entire width of the unit. This is similar to the hidden support rail for extra wide media centers that professional installers swear by. According to structural guidelines from the Gypsum Association, standard drywall offers almost zero structural support for cantilevered loads, meaning your screws are doing 100% of the work under immense stress. If you don’t distribute that load, you’re just waiting for the drywall to crumble.
Is This Plywood Strategy Really Worth the Extra Work?
You might be thinking, “Can’t I just use better anchors?” I used to think the same thing until I saw a high-end toggle bolt rip a silver-dollar-sized hole right through a client’s wall. Whether you are dealing with built in storage ideas to declutter or a simple TV shelf, the plywood backing acts as a bridge. It turns your entire wall section into a singular, rigid anchor point. I’ve even applied these same principles when helping friends with reinforcement tactics for wall hung bedroom vanities, because the physics of a heavy vanity and a media console are identical. Have you ever noticed a slight sag in your floating furniture and just tried to tighten the screws, only to find they keep spinning? Tell me in the comments if you’ve faced that “spinning screw” nightmare—it’s usually the first sign of a total mounting failure. Let’s get into the nitty-gritty of how we actually prep the wall for a rock-solid finish.
Master the Recessed Plywood Cutout
To get started, you need to think of your wall as a skeleton. The drywall is just the skin; it’s pretty, but it has no muscle. To build something that lasts, you have to get to the bones. I remember a project in a 1950s ranch where the owner wanted a 10-foot floating media console. The wall was slightly bowed, and standard studs were spaced unevenly. If I had just used brackets, that unit would have looked like a wet noodle within a month. Instead, I used a technique similar to the hidden wall plate strategy for floating media shelves. By cutting out a section of drywall and replacing it with 3/4-inch plywood screwed directly into the studs, I created a solid ‘mounting zone’ where I could drive a screw anywhere, not just every 16 inches.
Find the Studs and Mark Your Perimeter
First, use a high-quality stud finder to locate the exact centers of at least three studs. Mark the area where your cabinet will sit, then move inward by about two inches on all sides. This ensures the plywood remains completely hidden behind the unit once it’s mounted. You’re essentially creating a sub-frame. If you’ve ever looked into expert guide to flawless vanity installation tricks tips, you know that a level starting point is everything. I once rushed this part on a mudroom bench and ended up with a unit that was perfectly level but looked crooked because it didn’t align with the floor line. Take your time with the pencil.
Cut the Drywall Without Fear
Using a utility knife or a drywall saw, cut along your marks. Don’t go too deep—you want to avoid any hidden Romex or plumbing lines. Once the drywall is out, you’ll see the studs exposed. This is your chance to beef up the structure. If the studs look flimsy, you can add 6 heavy duty L-brackets for reinforcing custom built in units to the sides of the studs themselves for extra lateral stability. 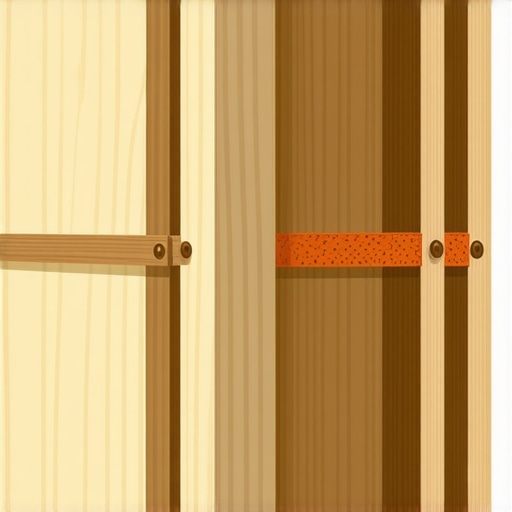
Anchor the Plywood Directly to the Framing
Cut a piece of 3/4-inch ACX plywood to fit the hole you just made. Fasten this plywood directly to the studs using 3-inch construction screws. This plywood now acts as a bridge. It’s the same logic used in reinforcement tactics for wall hung bedroom vanities: you are distributing the weight across the entire wooden structure of the house rather than relying on a few points of contact. When I did this for that 10-foot console, I was able to literally stand on the unit once it was hung. That is the kind of peace of mind you want. If your unit is particularly heavy, consider why your floating shelf is tilting down and the wall fix, which often involves checking if the studs themselves are twisting under the load. By tying the studs together with a plywood plate, you prevent that twist entirely.
Mechanical Leverage is the Silent Killer of Floating Cabinets
While the plywood backing I mentioned earlier is a game-changer, there is a nuance most DIYers—and even some contractors—completely overlook. They assume the ‘pulling force’ is strictly downward gravity. It isn’t. It is a rotational force, or a moment arm. The deeper your cabinet, the more leverage it has to literally pry the top screws out of the wall. I have seen people spend a fortune on high-end toggle bolts, thinking they have solved the weight problem, only to find the drywall at the bottom edge of the cabinet compressed and crushed, while the top edge develops a massive gap. According to the National Kitchen & Bath Association (NKBA) installation standards, the static load is only half the battle; the depth-to-height ratio of the unit determines the actual stress on your anchors. If you are working with extra-deep units, you should consider internal torsion box engineering within the cabinet itself to prevent the box from racking. Have you ever fallen into this trap where the wall held but the cabinet itself started to pull apart? Let me know in the comments.
Does Your Vanity Actually Need Floor Support?
Many homeowners believe that a ‘floating’ look requires the unit to be 100% wall-dependent. For a lightweight medicine cabinet, that is fine. But once you introduce a 3cm quartz or marble slab, you are playing a dangerous game with physics. When I provide custom vanities expert design tips, I always emphasize that stone weight requires more than just a few framing screws. If you do not account for the vertical load, you will eventually need a mid-span fix for the cabinet base or, worse, you will see your P-trap connections leak as the unit subtly shifts downward. 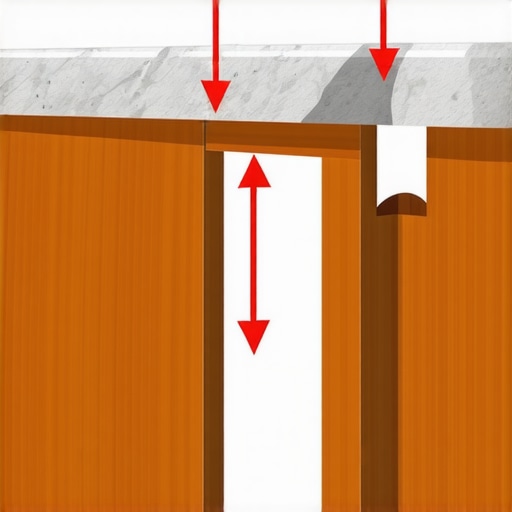 For these heavy-hitters, I suggest supporting quartz counters on custom floating vanities by using hidden steel ‘L’ brackets that bypass the wooden cabinet and tie directly into the studs. This moves the stress from the cabinet’s joinery to the structural steel. It is one of those vanity installation hacks that save time and money because you are preventing a catastrophic failure of the stone or the plumbing. Most people think they can just ‘over-screw’ the cabinet to the wall, but without that secondary support, the wood eventually fibers and gives way under the constant tension of the heavy countertop.I’ve spent years chasing that ‘perfect’ fit, only to realize that the wall is almost always the enemy. Even with your plywood backing in place, if the cabinet isn’t perfectly scribed to the wall’s imperfections, it will look like an afterthought. I swear by my Stabila laser level and a dedicated scribing tool because the human eye can spot a 1/16th-inch gap from across the room. Using the scribing tool for cabinets against textured plaster walls has saved me more times than I can count. It’s about more than just aesthetics; it’s about making sure the weight is transferred directly into the framing without any air gaps that allow for shifting. If you have a gap behind a heavy unit, the unit will eventually try to fill that gap under load, which is exactly how those pesky cracks start in your drywall.
Ditch the Tape Measure for a Precision Laser
Precision is the bedrock of effortless storage solutions for a tidy stylish home. When I’m setting up a massive bank of cabinets, I don’t trust a bubble level. I use a 360-degree green beam laser. It allows me to see the ‘high point’ of the floor and the ‘out-of-plumb’ nature of the wall simultaneously. This level of detail is one of those vanity installation hacks that save time and money because you only lift the heavy box once. I remember trying to shim a vanity by hand while my brother-in-law held the other end; we were both exhausted and it still ended up crooked. Now, I set the laser line, scribe the cabinet to the floor or wall, and it slides in like a glove. 
How do I keep my heavy built-ins from shifting over time?
Maintenance isn’t just about dusting; it’s about mechanical checks. Every six months, I recommend opening your cabinets and checking the mounting points. Look for ‘dust trails’ around the screws—this is often pulverized drywall and a sign that the unit is moving. Also, keep an eye on your hardware. For drawer systems, refer to Blum’s technical documentation, specifically their TANDEM runners which specify a dynamic load capacity of 30kg to 65kg. If you overload your drawers, you aren’t just hurting the tracks; you are putting asymmetrical stress on the entire cabinet box. If you notice things are out of alignment, it might be why your vanity plumbing is leaking into the cabinet base. A sagging cabinet pulls on the P-trap, slowly loosening the nuts until you have a damp mess.
Prepare Your Home for the Next Wave of Smart Cabinetry
Looking ahead, the industry is moving toward ‘active’ built-ins. According to the top trends in vanity designs you need to know in 2025, we are seeing a massive shift toward integrated power stations and climate-controlled drawers for skincare. This means your installation now involves more than just a drill; you’ll need to coordinate with electricians to ensure the framing supports wire runs without compromising structural integrity. We are moving away from static furniture and toward creative built ins for seamless storage that acts as an extension of the home’s smart system. I challenge you to skip the decorative trim on your next install and try a true scribe—it’s the mark of a master and will ensure your project stands the test of time.
Lessons from the Wall that Taught Me Everything
After years of mounting everything from tiny spice racks to massive library walls, I’ve realized that the ‘standard’ way is often the shortcut to a repair bill. Here are the lightbulb moments that changed my approach:
- Drywall is a sponge, not a support: Never trust the compressive strength of gypsum. Even if your anchor holds, the drywall behind the cabinet will eventually crush, leading to that dreaded tilt.
- Hardware quality is non-negotiable: I stopped buying big-box store screws. I only use high-grade structural fasteners because their shear strength is documented and reliable.
- The ‘Silent Creep’ is real: Houses settle and wood expands. If you don’t account for this with a creative built-in strategy, your miters will eventually open up.
#IMAGE_PLACEHOLDER_E#
The Tools I Use to Sleep Better at Night
When you’re hanging thousands of dollars of cabinetry, your toolkit shouldn’t be the weak link. I personally swear by these essentials for any expert vanity installation. I use a 360-Degree Green Beam Laser because it’s the only way to ensure your plywood backing is perfectly flush across a long span. For the actual mounting, structural screws with built-in washers are my go-to; they won’t pull through the plywood under tension. Lastly, I always keep composite shims on hand. Unlike wood, they won’t rot or compress if you’re working on vanity styles in high-moisture areas. For those just starting out, checking a step-by-step guide to vanity installation can help you visualize how these tools fit the workflow.
Go Build Something That Lasts a Lifetime
There is a unique kind of pride that comes from leaning against a floating cabinet and knowing it won’t move an inch. By moving past basic stud-finding and embracing the physics of structural backing, you aren’t just installing furniture—you’re improving the architecture of your home. Whether you’re tackling a small bathroom or a massive media center, take the extra hour to prep the wall correctly. You’ll thank yourself five years from now when everything is still perfectly level. What’s the heaviest thing you’ve ever tried to hang on a wall, and did it stay put? Let me know your triumphs and disasters in the comments below!