

It happened on a Tuesday. I was sitting on my sofa, admiring my handiwork, when I noticed that my ‘pride and joy’ library wall was looking a bit… curvy. And not in a good way. The heavy art books I had spent years collecting were literally winning a tug-of-war against my 3/4-inch plywood. That was my first big mistake. I assumed that if I used expensive wood, the laws of physics would somehow look the other way. I was wrong. Between you and me, seeing your hard work start to ‘smile’ at you because the middle is dipping is a gut punch. If you have ever invested time into [creative built-ins for seamless storage and home aesthetics](https://customcabinetrypro.com/creative-built-ins-for-seamless-storage-and-home-aesthetics), you know exactly that sinking feeling I am talking about. Today, I am going to show you how to stop that sag in its tracks and why a mid-span fix is the secret weapon you didn’t know you needed.
Why Your ‘Sturdy’ Shelves Are Giving Up the Ghost
Look, we all want those long, clean lines in our living rooms. But when we design shelves that span more than 30 inches without some serious help, we are asking for trouble. Most people think they just need thicker wood, but even the best materials have a limit. According to the engineering principles behind the Sagulator, a widely respected tool among professional woodworkers, even a slight increase in span length exponentially increases the likelihood of a visible bow under load. When I first started out, I ignored this. I thought I could just screw the back of the shelf into the plywood backing and call it a day. I didn’t realize that without a proper [lateral support move for tall library bookcases](https://customcabinetrypro.com/the-lateral-support-move-for-tall-library-bookcases-2), the center of that shelf is basically floating in no-man’s land.
Is a DIY reinforcement really going to save my cabinets?
It is natural to be skeptical. You might think that once a shelf starts to dip, the only answer is to rip it out and start over. I have been there, staring at a warped board and wondering if I should just buy a chainsaw. But the truth is, you can actually reverse the ‘smile’ and prevent it from ever coming back without a total demo. By using [4 internal steel stiffeners that stop massive bookcase shelves](https://customcabinetrypro.com/4-internal-steel-stiffeners-that-stop-massive-bookcase-shelves-3), or even a well-placed [hidden steel bracket for massive bookshelf spans](https://customcabinetrypro.com/the-hidden-steel-bracket-for-massive-bookshelf-spans), you can restore that crisp, level look that makes custom work so special. Have you ever looked at your shelving and realized it is slowly turning into a U-shape?
The Hidden Tension Killing Your Storage
Physics is a silent roommate that never pays rent. In every bookcase, there is a constant battle between the weight of your items and the structural integrity of the horizontal span. When the span is too long, the wood fibers on the bottom of the shelf are being stretched, while the ones on top are being compressed. Over time, this leads to ‘creep’—a permanent deformation that won’t go away even if you take the books off. This is why we need to talk about the mid-span fix. It isn’t just about ‘holding it up’; it is about redistributing that tension so the wood can actually do its job. We are going to dive into the specific ways you can brace these spans invisibly so your home stays looking sharp and professional.To actually fix a shelf that has already started to bow, or better yet, to prevent it in a new build, you have to think like a bridge engineer. You cannot just rely on the vertical grain of the wood. One of the most effective methods I have found is the ‘secret spine.’ This involves creating a channel inside the shelf itself to house high-strength material. It is like giving your built-in a skeleton. I remember a project last summer—a massive 50-inch wide media unit for a client who owned more vinyl records than a radio station. I initially thought 1-inch thick oak would hold. I was wrong. Within days, the center was dipping. I had to pull it apart and use 4 internal steel stiffeners that stop massive bookcase shelves to regain that crisp, level line.
Give Your Shelves a Hidden Backbone
The first step is to stop thinking about the shelf as a simple flat board and start seeing it as a hollowed-out beam. You need to create a slot in the back edge or the underside. If you use a router to cut a deep, narrow groove, you can insert a piece of cold-rolled steel flat bar. This bar acts as a ‘stiffener’ that resists the bending force. You want to epoxy this bar into place so it becomes one with the wood. It is a bit messy, and you will likely get adhesive on your workbench, but the result is a shelf that can hold a literal encyclopedia set without flinching. This is a far more elegant solution than a bulky wooden cleat that screams DIY repair. 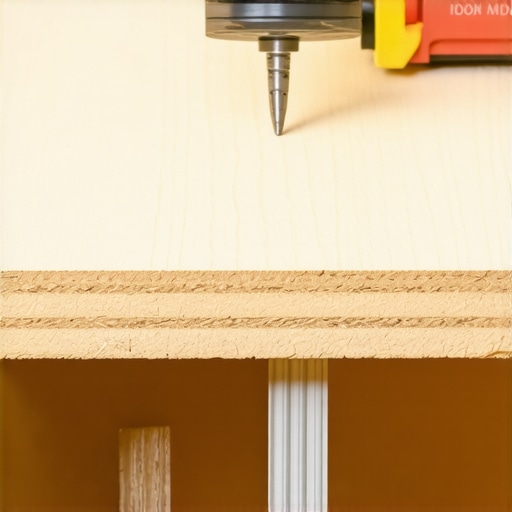
Route Your Way to a Level Surface
When you are working with creative built-ins for seamless storage and home aesthetics, the goal is always to keep the hardware invisible. I suggest using a 1/4-inch straight bit on your router. Set the depth so the steel bar sits just below the surface of the wood. Once it is epoxied in, you can skin the shelf with a thin veneer or even just wood filler and paint. If you are dealing with an extra-wide span, you might need to look into the hidden steel bracket for massive bookshelf spans which bolts directly into the wall studs before the shelf is even slid into place. It is the difference between a shelf that ‘looks’ strong and one that actually is.
Why Steel Is the Secret to Long Spans
Think of wood like a bundle of drinking straws. They are strong when you stand them up vertically, but if you lay them across two points and press down, they bend easily. Steel does not have that directional weakness in the same way. By combining the two, you create a composite material that beats the physics of ‘creep.’ I once spent three days trying to fix a ‘smile’ in a library wall using only 6 heavy-duty L-brackets for reinforcing custom built-in units. While they helped at the corners, the middle still felt soft. It was not until I added the lateral support move for tall library bookcases combined with internal bracing that the structure felt rock solid. You are not just adding parts; you are changing how the weight travels from the books down to the floor.
Stop the Sag with Internal Torsion Box Engineering
For those of you building truly massive floating units, you might want to stop floating shelf sag with internal torsion box engineering 3. This is where you build a ribbed internal frame and sandwich it between two thin layers of plywood. It is how airplane wings are built. It is incredibly light but virtually impossible to bend. I used this technique for a kitchen vanity once when the client insisted on a 6-foot span with no legs. It felt like a gamble at the time, but years later, it is still as level as the day I installed it. If your storage is already sagging, do not panic. Take the weight off, use a jack to slightly over-correct the bow by pushing it slightly upward, and then install your hidden stiffeners.
One of the biggest myths I encounter in the workshop is that solid hardwood is always the superior choice for every high-end storage project. While it sounds prestigious, using solid oak or maple in a high-humidity environment like a bathroom is often a recipe for a warped disaster. Wood is essentially a bundle of straws designed to transport moisture. According to technical data from the Forest Products Laboratory (FPL), wood can change dimensions significantly based on relative humidity, sometimes expanding or contracting by 1/8th of an inch across a standard 12-inch board. In a tight-fitting expert guide to flawless vanity installation tricks tips, that expansion can literally blow your miter joints apart or cause your drawers to seize up during the summer months. Professionals often prefer high-grade moisture-resistant MDF or plywood for the box construction because it offers the stability that natural wood simply cannot guarantee in a steam-filled room.
Your Trim is Telling on You
The biggest ‘oops’ factor I see in DIY and mid-tier installations is the reliance on chunky molding to hide gaps. Most people assume their walls are perfectly flat, but if you put a 4-foot level against your drywall, you will likely see light peeking through the middle. Instead of filling those gaps with caulk that will eventually crack, a real pro uses the scribing hack for perfect built-in gaps against uneven brick 2. You actually shave the side of the cabinet to follow the specific ‘wave’ of your wall. It is the difference between a unit that looks like it was bought at a big-box store and one that looks like it grew out of the architecture of your home.

How can I stop my heavy stone vanity from ripping out of the wall?
This is where the engineering gets serious. I have seen beautiful bathrooms ruined because a homeowner didn’t realize why your heavy quartz vanity is cracking the cabinet frame. Most standard cabinet carcasses are not designed to support the sheer weight of a 3cm quartz or marble slab, especially if it is a floating design. You cannot just screw into the studs and hope for the best. You need a structural sub-frame. If you are working in a basement or a ground floor, you also have to consider how to fix wobbly vanity legs on uneven tile or even the moisture barrier strategy for below grade vanities to prevent rot from the bottom up.
The Real Cost of Ignoring the Subfloor
Gravity is patient, but it always wins. If your floor has a slight pitch—common in older homes or tiled bathrooms—your built-in will eventually lean, putting massive stress on the door hinges and drawer glides. You might think a few shims are enough, but over time, those shims can compress or shift. Always use adjustable leveling legs or a solid, leveled plinth base before the cabinets even touch the room. Have you ever fallen into this trap where you thought ‘good enough’ would last, only to see gaps opening up a year later? Let me know in the comments below, because these are the nuances that define a truly professional finish. Let’s dig deeper into how we can seal these units for a lifetime of use.
To get that level of permanence, you need more than just a hammer and a prayer. I never step onto a job site without my Bosch GLL laser level. A bubble level is fine for a picture frame, but for a 12-foot library, a laser line ensures every shelf is perfectly indexed to the next. I also swear by GRK Cabinet screws; their star-drive heads mean I never strip a screw while reaching into the back of a deep unit, which is a lifesaver when you are trying to execute flawless vanity installation tricks in tight quarters. If you are serious about this, invest in a dedicated scribing tool like the Starrett 505. It is significantly more accurate than a pair of compasses and ensures your built-in gaps against uneven brick are nonexistent. 
The Specialized Gear That Saves My Sanity
Beyond the fancy lasers, the real secret is the hardware you cannot see. When I am installing a massive unit, I rely on 6 stealth steel cleats for large living room entertainment centers. They allow me to hang sections that weigh hundreds of pounds without visible support. This is how you achieve that ‘floating’ look without the unit eventually crashing into your baseboards. Using high-strength fasteners is non-negotiable; I have seen too many DIY jobs fail because someone used drywall screws for a load-bearing pantry. Drywall screws are brittle and will snap under the shear force of a heavy cabinet, whereas structural screws are designed to bend and hold.
How do I keep my custom units working for decades?
Maintenance isn’t just about dusting; it is about mechanical upkeep. Wood moves, and houses settle. Every year, I recommend checking the tension on your hinges and drawer glides. If you notice your doors are drooping or your hardware is making noise, you need to know why your soft-close drawers are slamming and the tension fix. According to the Kitchen Cabinet Manufacturers Association (KCMA) standards (ANSI/KCMA A161.1), quality units are tested for 25,000 swing cycles and specific weight capacities. To hit that longevity at home, a drop of silicone-based lubricant on the hinge pivot and a quick pass with a screwdriver to tighten the mounting plates is all it takes. Also, for anything near water, always refresh the waterproof sealant move for vanity backsplashes every few years to prevent moisture from sneaking into the substrate.
Modular Tensions and the Future of Storage
Looking ahead, I see a massive shift toward hybrid materials. We are already seeing high-end builders moving away from pure wood frames in favor of carbon-fiber reinforced spans and aluminum honeycombs. This allows for those impossibly thin, minimalist shelves that can still hold a 50-pound marble bust without a hint of deflection. We are entering an era where creative built-ins for seamless storage and home aesthetics will be more about advanced engineering than just traditional carpentry. I challenge you to try the ‘secret spine’ method on your very next shelving project. It is the single most satisfying way to transform a standard board into a structural powerhouse that won’t bow, sag, or ‘smile’ back at you twenty years from now.
The Hardest Lessons I Learned the Expensive Way
Over the years, I have realized that the most expensive wood in the world cannot compensate for a lack of structural planning. One major lightbulb moment for me was discovering that mechanical fasteners like screws are really just temporary clamps while the wood glue does the heavy lifting for the next fifty years. If you skip the glue in your joinery, you are essentially building a ticking clock. I also learned that you should always design for 1.5 times the expected weight. If a client tells me they are putting paperbacks on a shelf, I build it to hold a set of heavy law journals. This margin for error is what separates a weekend project from a legacy piece. Finally, remember that wood movement is not a theory; it is an inevitability. If you do not account for expansion, even the most beautiful [expert guide to flawless vanity installation tricks tips](https://customcabinetrypro.com/expert-guide-to-flawless-vanity-installation-tricks-tips) won’t save your drawers from sticking in August.
The Tools That Turned My Work Professional
I didn’t start getting ‘pro’ results until I stopped guessing and started measuring. For anyone serious about these projects, I recommend the Sagulator, which is an online load-limiting calculator that helps you predict deflection before you even buy your lumber. For physical tools, the Starrett 505 protractor is my go-to for ensuring [vanity installation hacks that save time and money](https://customcabinetrypro.com/vanity-installation-hacks-that-save-time-and-money) actually work when walls are out of square. I also rely heavily on Titebond III glue; its longer open time and moisture resistance make it essential for bathroom projects or kitchen units. These aren’t just gadgets; they are the foundation of a workflow that removes the stress of ‘hoping’ something stays level.
Build a Home That Stands the Test of Time
Stepping into the world of [creative built-ins for seamless storage and home aesthetics](https://customcabinetrypro.com/creative-built-ins-for-seamless-storage-and-home-aesthetics) is about more than just organization—it is about taking control of your environment. Whether you are wondering [why your built-in desk is bowing and the middle leg fix](https://customcabinetrypro.com/why-your-built-in-desk-is-bowing-and-the-middle-leg-fix) or you are applying these structural principles to [smart storage solutions to optimize small bathroom spaces](https://customcabinetrypro.com/smart-storage-solutions-to-optimize-small-bathroom-spaces), the goal is the same. You are building something that is meant to be lived in and relied upon. Don’t be afraid to over-engineer those spans or spend an extra hour scribing a cabinet to a wavy wall. The peace of mind you get from a rock-solid installation is worth every minute spent in the workshop. Have you ever seen a shelf start to ‘smile’ at you after just a few months? Let me know in the comments below how you handled it!