

It started at 2:14 AM. A tiny, rhythmic click-clack that sounded like a woodpecker with a grudge was nesting in my bedroom. I sat up, heart racing, only to realize it wasn’t a bird—it was my expensive, custom sliding closet doors vibrating every time the HVAC kicked on. There is nothing quite like the irony of spending thousands on a sleek storage solution only to have it keep you awake like a cheap motel sign. I tried shoving a sock in the track. I tried yelling at it. Nothing worked. If you’ve ever found yourself staring at your beautiful built-ins while contemplating taking a sledgehammer to the tracks, you aren’t alone.
That Midnight Rattle is Enough to Drive Anyone Wild
The problem with many built-in storage ideas to declutter is that we often focus on the aesthetics and forget about the physics of daily use. Sliding doors are notorious for this. They sit on tracks that, if even a millimeter out of alignment, become echo chambers for vibration. I remember my first big mistake: I thought more lubrication was the answer. I sprayed a thick coat of grease on the rollers, thinking I was a genius. Within a week, the track had collected enough pet hair and dust to create a literal speed bump, making the rattle even worse.
Is it really worth tinkering with custom tracks myself?
I get the hesitation. When you have high-end slim pull-out fixes or custom reach-in systems, the last thing you want to do is snap a proprietary plastic clip. But here’s the truth: most closet hardware is surprisingly simple once you look past the trim. According to data from the National Association of Home Builders (NAHB), interior door hardware is among the most frequent maintenance items homeowners deal with as a house settles. You don’t need a contractor’s license to fix a shimmy; you just need to know where the tension is failing.
The Day I Realized Tape Isn’t a Permanent Fix
We’ve all been there—trying to use weatherstripping or duct tape to silence a gap. While it might work for a night, it usually ends up peeling and gumming up the works. The real culprit is usually a combination of floor settling and loose guide brackets. If you’ve noticed how to fix uneven gaps in custom built-in doors, you’re already halfway to solving the rattle. The door isn’t just noisy; it’s telling you it’s no longer sitting square in its home. Have you ever felt like your closet was literally talking back to you in the middle of the night? Today, we’re going to walk through the exact steps to tighten those tolerances and finally get some peace and quiet. We’re moving beyond the temporary fixes and into real, lasting mechanical adjustments.The first thing you need to do is ditch the spray lubricant. I know it feels like the universal fix, but in the world of custom cabinetry, grease is a magnet for disaster. Instead, grab a vacuum with a crevice tool. Most rattles start because a tiny pebble or a stray piece of grit has turned the track into a literal rumble strip. After vacuuming, use a damp microfiber cloth to wipe the track bone-dry. If the door still resists, you aren’t looking for more slip; you’re looking for better alignment. This is often where homeowners get stuck, but it’s just a matter of physics.
Clear the Tracks Before You Touch the Tools
A clean track is the foundation of a silent door. I learned this the hard way when I spent an entire Saturday morning trying to ‘re-level’ a wardrobe that was perfectly square, only to find a flattened penny wedged in the rear channel. If you have 6-hidden-pull-out-fixes-for-deeper-custom-kitchen-cabinets-4, you know that even the smallest obstruction can throw the entire weight distribution off. Once the track is spotless, check the rollers. If they are plastic and have flat spots from years of dragging, no amount of cleaning will save them—they need to be replaced. But if they’re intact, we move to the height adjustment screws.
Dialing in the Perfect Roller Height
Every sliding door has a small adjustment screw, usually hidden behind a plastic cap or near the bottom edge. Turning this screw is like tuning a guitar string; too loose and the door wobbles, too tight and it grinds. I remember over-tightening a roller once until the door wouldn’t budge at all. The sweet spot is when the door sits just high enough to clear the bottom track without rubbing, but low enough that the top guides stay securely in their channel. If you’ve been struggling with how to fix uneven gaps in custom built-in doors, this is your primary weapon. Small, quarter-turn adjustments are all it takes to shift the door back into a silent, parallel state.
Stop the Sway with a Solid Floor Guide
If your doors are swinging back and forth like a pendulum every time you touch them, your floor guide has likely failed. These small plastic clips are the unsung heroes of a quiet closet. They keep the door on a linear path so it doesn’t vibrate against the face frame. When these guides get loose or break, the door starts to ‘chatter’ against the metal track. I’ve seen people try to use felt pads to cushion the blow, but that just creates friction. You need to ensure the guide is screwed directly into the floor or the cabinet base. For those dealing with 7-slim-pull-out-fixes-for-deep-reach-in-bedroom-closets-4, ensuring that the floor guides are perfectly centered is the difference between a smooth glide and a clattering mess.
When the Problem is Structural Rather Than Mechanical
Sometimes the noise isn’t the door at all—it’s the entire cabinet box shifting. If the wall anchors have loosened over time, the frame can twist, putting pressure on the tracks that they weren’t designed to handle. Think of it like a house settling; if the foundation moves, the windows stick. You might need to look into how to fix wobbly built-ins with 4-hidden-steel-plate-tactics-3 to provide the rigid support necessary to keep those tracks perfectly straight. In my old apartment, the rattle was actually caused by the back panel of the closet vibrating because it wasn’t nailed in properly. A few well-placed brads and some internal support stopped the ‘ghost’ in the machine instantly. If you notice the shelves are bowing as well, it’s a sign that you should stop drawer sag in bedroom closets with internal bracing to keep the entire unit from putting weight on the door headers.Let’s dig deeper into the mechanics of why these storage issues persist. Most DIYers—and even some contractors—fall into the trap of thinking that a ‘heavy-duty’ anchor is a magic fix for everything. In my experience, the opposite is often true. When you’re trying to stabilize a unit, the sheer number of fasteners is less important than the distribution of the load. Everyone says you just need more toggles, but over-drilling into a single stud or a small patch of drywall actually turns your wall into Swiss cheese, compromising the structural integrity of the entire installation. If you’re moving from simple closet tracks to more complex setups, you need an expert guide to flawless vanity installation tricks tips to avoid the ‘wall-grinder’ effect where your anchors actually eat the plaster they are supposed to grip.
Stop Assuming More Screws Equal More Strength
The biggest nuance people miss is the leverage factor. A floor-to-ceiling built-in exerts a different kind of pressure than a floating unit. When you hang a massive piece without a floor base, the top anchors are fighting a constant ‘pull-out’ force, while the bottom is pushing into the wall. If you haven’t accounted for this, you’ll see why your floating shelf is tilting down and the wall fix is rarely just ‘adding another screw.’ You have to create a torsion box or use a ledger board to redirect that force. I once saw a beautiful bathroom remodel where the homeowner used premium brass hardware, only to find the next morning that the weight of the stone had bowed the cabinet floor. This is a classic case of why your heavy quartz vanity is cracking the cabinet frame—the cabinet wasn’t built to be a structural bridge; it was just meant to be a box. 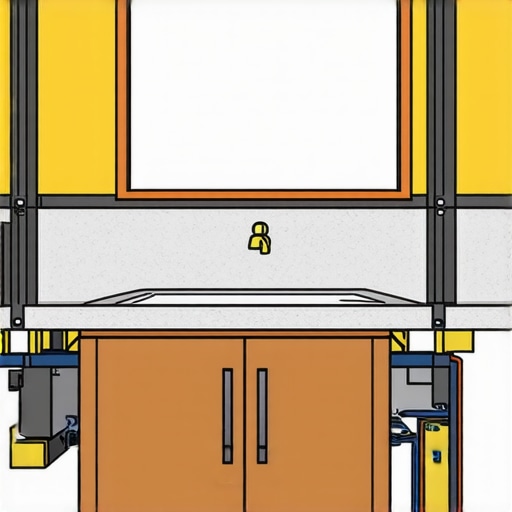
Is your wall framing actually ready for a stone countertop?
This is the question that separates the pros from the amateurs. According to the National Kitchen & Bath Association (NKBA), the standard dead load for cabinetry and countertops can easily exceed 200 pounds for a standard 36-inch vanity. If you are mounting to modern metal studs or aging plaster, a standard wood screw isn’t going to cut it. You might need to learn how to secure floating vanities to double layer drywall or even open the wall to add structural blocking. It’s a lot of work upfront, but it beats having a quartz slab shatter on your toes at 3 AM. Have you ever fallen into this trap where you thought you were done, only to hear a ‘crack’ from the other room? Let me know in the comments. We need to move beyond the ‘aesthetics first’ mindset and start treating our storage like the heavy machinery it actually is.
Ditch the Guesswork with a Digital Level
I’ve realized that the ‘set it and forget it’ mentality is the death of high-end craftsmanship. If you want your home to stay pristine, you need to think like a mechanic, not just a decorator. This means moving beyond the occasional dusting and actually checking the torque on your mounting bolts. I swear by my digital level; it’s the only way to catch a settling wall before it snaps a dovetail joint. If you are aiming for effortless storage solutions for a tidy stylish home, you have to respect the seasonal shift of your house. I personally keep a log of my cabinet gaps. It sounds obsessive, but when you’ve invested in custom work, a 2mm shift is the difference between a drawer that glides and one that grinds.
Fight the Invisible Enemy of Wood: Humidity
Moisture is the primary reason custom installations fail over time. In bathrooms, the steam from your shower is a constant assault on your vanity’s finish and its structural integrity. This is why I always recommend 7 moisture barriers for vanities in high humidity bathrooms before the first drop of water even touches the sink. According to the Architectural Woodwork Institute (AWI) Standards, maintaining a stable relative humidity between 25% and 55% is critical to prevent joint separation and finish cracking in custom built-ins. If you ignore this, no amount of screws will keep your face frames from pulling away. You should also be proactive with the waterproof sealant move for vanity backsplashes to ensure water doesn’t seep into the substrate and cause rot from the inside out. 
How can I ensure my high-end storage stays functional for decades?
The secret isn’t in the initial install; it’s in the ‘tune-up’ you perform every year. Think of it like a car. Every twelve months, you should go through and tighten every hinge plate and check the tension on your soft-close mechanisms. If you start hearing a click, your hardware is telling you it’s out of alignment. If you have complex setups, using the scribing tool for cabinets against textured plaster walls during your initial setup makes these later adjustments much easier because the unit isn’t fighting the wall’s natural curves.
Why Your Hardware Needs a Yearly Tune-up
We often overlook the slides and hinges because they are hidden, but these are the high-wear components. I use a dry PTFE spray on my slides once a year—never use WD-40, as it attracts the very grit that destroys ball bearings. Looking ahead, I predict we will soon see ‘smart’ storage systems with integrated load sensors. Imagine your closet sending an alert to your phone because the hanging rod is reaching its maximum weight capacity or because a leak has been detected under the vanity base. Until then, we have to be the sensors. Advanced Tip: Grab a set of digital calipers and measure the ‘reveal’ (the gap) around your cabinet doors. If you notice a consistent increase in the gap at the top, your unit is likely sagging, and you need to check your wall anchors before the damage becomes permanent. Don’t wait for the rattle to return; stay ahead of the physics.
The Hard Truth About My Failed DIY Fixes
After years of wrestling with sliding tracks and shifting cabinets, I’ve realized that the most expensive mistakes aren’t the ones you pay a pro to fix; they’re the ones you cause yourself by over-thinking a simple problem.
- Precision Beats Pressure: I used to think a tighter screw meant a more stable cabinet. In reality, over-torquing leads to stripped wood and misaligned tracks. I’ve learned to back off a quarter turn once the hardware feels snug.
- Cleanliness is the Real Lubricant: Most people reach for the grease when a door squeaks. I’ve found that 90% of the time, a thorough vacuuming of the track solves the issue without attracting the dust that leads to future clogs.
- Listen to the House: Your home is alive and moves with the seasons. If you check your creative built-ins for seamless storage and home aesthetics twice a year, you catch the minor shifts before they become structural cracks.
The Tools I Keep in My Kitchen Drawer
You don’t need a massive workshop to maintain high-end cabinetry; you just need a few specific items that catch problems before they scale. First, a high-quality set of digital calipers. Using these to measure the gaps in your doors allows you to detect a sag long before your eye can see it. Second, always keep a can of dry PTFE lubricant nearby; it provides the ‘slip’ without the sticky residue. I also recommend looking into a step-by-step guide to vanity installation for beginners if you are just starting out, as it helps you understand how weight is actually anchored. Knowledge is the most important tool you have.
Take Control of Your Storage Space
A quiet, well-functioning home isn’t a luxury—it’s the result of consistent, thoughtful care. When you apply these maximize your space with custom vanities expert design tips, you’re not just fixing a rattle; you’re protecting the sanctuary you’ve built. Don’t let a minor vibration keep you up at night or lead to a frustrated sledgehammer moment. If you ever find yourself stuck on a tricky custom project, remember you can always reach out to us at contact-us-2. Your built-in storage ideas to declutter should simplify your life, not add to the noise. Have you ever had a specific door or drawer that seemed impossible to silence? Let me know below and let’s solve it together!