

I will never forget the sound of splintering drywall at 3 AM. It sounded like a small tree limb snapping right next to my ear. I reached over in the dark, only to find my brand-new, beautifully minimalist floating nightstand resting at a sad, thirty-degree angle, my morning coffee mug shattered on the hardwood. I had followed the manufacturer’s ‘easy’ drywall anchor instructions to a T. That night, I learned a hard truth: standard wall anchors are a recipe for disaster when it comes to cantilevered furniture. If you are tired of wobbly bedside tables or terrified of leaning on your sleek new bedroom upgrade, you are in the right place. Today, we are going to fix this once and for all by ditching those cheap plastic anchors and mastering the ultimate hidden cleat installation technique.
My Multi-Year Battle with Drooping Floating Furniture
I used to think installing floating units was straightforward. During my early DIY years, I made the classic mistake of relying solely on the studs I could easily find, without considering how a cantilevered box multiplies down-force weight. I once mounted a gorgeous bedside unit only to watch it slowly bow forward over six months because I didn’t provide enough rigid, continuous internal support. Whether you are dealing with bedside drawers, trying to figure out how to tackle a vanity installation, or attempting to secure heavy bedroom custom vanities, standard mounting brackets often fail to distribute weight evenly. According to structural engineering principles, a cantilevered load (like a floating nightstand) exerts up to four times its physical weight in pulling force on the top wall fasteners. That is why a simple French cleat, hidden deep within the carcass of the cabinet, is the absolute gold standard for a rock-solid hold.
Is the Hidden Cleat Move Actually Worth the Extra Effort?
You might be wondering if you really need to go through the trouble of building and recessing a custom wooden cleat system just for a small nightstand. Yes, it absolutely is. The hidden cleat system works by locking the entire back of the nightstand to a continuous wooden runner anchored directly into multiple wall studs with heavy-duty structural screws. This completely eliminates the forward-tipping leverage that pulls standard brackets straight out of the wall. Have you ever woken up to the sound of your own shelving or nightstands creaking and pulling away from the drywall? It is a stressful, annoying problem that ruins both your walls and your peace of mind. By recessing the cleat inside the cabinet frame, you get that perfectly flush, gravity-defying look without sacrificing an ounce of strength. Next, we will dive into the exact tools and steps needed to execute this clean, fail-proof mounting method in your own bedroom.
Step-by-Step Anatomy of a Fail-Proof Cleat Mount
To pull off this trick, you need to think of the wall cleat and the cabinet carcass as two interlocking puzzle pieces. Instead of hanging the nightstand on the wall, you are actually sliding the nightstand over a structural extension of the wall itself. The key is using a 45-degree bevel cut on both the wall-mounted cleat and the matching internal receiver inside the cabinet back. When these two bevels meet, gravity naturally pulls the cabinet tight against the drywall, lock-pressing it into place without relying on fragile brackets.
I will never forget the time I rushed this step while installing some heavy bedroom drawers. I cut the bevels at a sloppy angle and forgot to check the back recess depth. When I hung the unit, it sat a quarter-inch proud of the drywall, rocking back and forth like a loose tooth every time the drawer opened. I had to rip the entire system down, recut the timber, and start over. That messy afternoon taught me that precision in your recess measurements is non-negotiable.
Find the Studs and Prep Your Timber
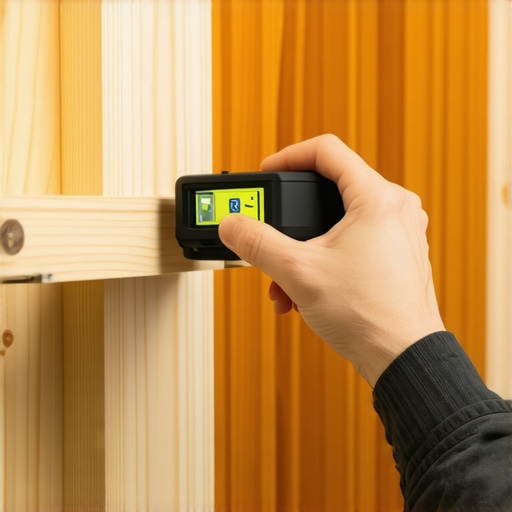
First, locate your wall studs using a high-quality magnetic stud finder. Mark the center of each stud clearly with a pencil. Since we are dealing with cantilevered force, you must secure your wall cleat to at least two studs; single-stud mounting will eventually cause the wood to twist under load. Cut a piece of 3/4-inch hardwood plywood to match the interior width of your nightstand carcass. Avoid using cheap particle board or MDF for the cleat, as these materials can crumble under shear stress. Rip this piece down the middle on your table saw with the blade set to a precise 45-degree angle. You now have two interlocking halves: the wall cleat and the cabinet receiver.
Recess the Receiver Inside the Cabinet
To keep the furniture flush against the wall, you must mount the receiving half of the cleat inside the back of the cabinet frame. Measure the exact thickness of your cleat. You will need to inset the back panel of your nightstand by this exact dimension, plus an extra 1/16th of an inch for wiggle room. Secure the receiving cleat to the top-back stretchers of your cabinet using pocket screws and wood glue. If you are dealing with heavier setups, such as securing wall-hung bedroom vanities, you will need to supplement this connection with internal metal brackets to prevent the wood from splitting over time.
Level and Lock the Wall Cleat Home
Now, mount the mating cleat directly to the wall with the bevel pointing upward and facing toward the room. Use a long spirit level to ensure the cleat is perfectly level. Even a microscopic tilt over a 12-inch span will translate to a glaring, crooked gap once the nightstand is hung. Pre-drill through the cleat directly into the center of the studs, and drive 3-inch structural cabinet screws home. If your walls are seriously out of plumb, you will need to master scribing cabinets to out-of-plumb walls to keep everything flush. Once the wall cleat is locked in, lift your nightstand and slide it down onto the cleat. Finish the installation by driving two safety screws through the internal cleat directly into the wall cleat from inside the cabinet to lock the unit in place permanently.
The Great Drywall Illusion: Why Studs Alone Aren’t Saving Your Furniture
Everyone in the DIY space tells you that as long as you find the studs, you are golden. But in my experience, relying solely on standard stud-mounting for highly cantilevered units is a dangerous half-truth. When you sit or lean on floating furniture, you aren’t just dealing with gravity; you are dealing with rotational torque. If you only drive fasteners straight through the back of a cabinet into a stud, the top edge of that cabinet acts as a pivot point, slowly pulling the screws outward. Over time, this microscopic flexing wallows out the wood grain and drywall core, leading to that inevitable, depressing sag.
The real culprit behind most failures isn’t a lack of studs; it is the failure to reinforce the cabinet’s inner structure. If you are installing heavier bedroom projects, you might want to look into reinforcement tactics for wall-hung bedroom vanities or read up on how to fix floating vanities that move when leaned on. Without addressing the internal tension of the wood joint itself, even the beefiest structural screws can pull clean through a weak cabinet back panel.
Why Are Your Deep Storage Drawers Binding After Just a Few Weeks?
Here is an advanced trap that catches even seasoned woodworkers: neglecting wood movement and settling under load. According to structural testing guidelines from the Architectural Woodwork Institute (AWI), a cantilevered cabinet box can deflect up to 1/8 of an inch at its outermost edge when fully loaded with daily essentials. If your interior frame lacks lateral stiffening, this subtle deflection will twist your cabinet carcass just enough to bind your drawer glides. You might blame the cheap hardware, but the reality is that your entire cabinet is flexing out of square because the wall connection lacks rigid, distributed tension.
To solve this, I always use an internal web frame or a solid 3/4-inch plywood backing panel to keep the carcass perfectly square under weight. If you are working on custom projects, integrating smart design is key, such as exploring creative storage solutions for vanities or utilizing smart storage solutions to optimize small spaces. When you build with structural integrity in mind, your doors and drawers will glide smoothly for decades without rubbing. Have you ever fallen into this trap and watched your beautiful drawers start sticking? Let me know in the comments below!
How Do I Maintain Floating Units and Ensure Their Long-Term Stability?
Once you have executed a flawless installation, the real work of preservation begins. Gravity is patient, and wooden components are organic materials that adapt to their environment. Over time, seasonal humidity swings can cause wood fibers to swell and contract. I recommend performing a quick check of your mounting hardware six months after your initial installation. Check to make sure that the internal locking safety screws haven’t backed out even a millimeter due to daily vibrations, such as slamming bedroom doors or heavy drawer usage. If you notice any tiny gaps forming between the cabinet carcass and the drywall, it is time to address it before structural shifting ruins your hard work.
For heavier installations, keeping an eye on the internal joints is vital. If you find your doors sticking or notice the cabinet front dipping, you might be dealing with structural fatigue. For those managing more substantial installations, understanding why deep storage drawers bind under heavy loads can help you diagnose and prevent irreversible sagging before it damages your custom cabinetry.
The Specialized Precision Tools That Saved My DIY Career
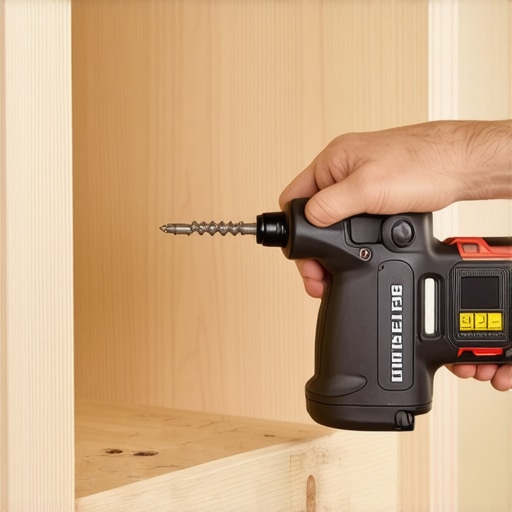
You cannot achieve professional results with basic, budget-level tools. Over the last decade of installing custom built-ins and cantilevered furniture, I have curated a highly specific toolkit that eliminates guesswork. First, ditch the standard plastic bubble level. I now rely strictly on a 24-inch digital box level, which displays angles to the decimal point; this is absolutely vital because even a 0.1-degree error over a wide span will cause drawers to drift open on their own. Second, invest in structural cabinet screws rather than standard drywall or wood screws. I exclusively use GRK Cabinet Screws because their integrated washer heads distribute pulling force across a larger surface area, preventing the screw from sinking too deep or splitting your internal cleat.
Finally, stop using cheap electronic stud finders that beep at random static charges. I strictly use a magnetic stud ball finder to pinpoint the exact locations of drywall screws. By finding where the drywall is physically nailed to the timber, you find the dead-center of the stud every single time. If you are dealing with challenging walls that aren’t flat, mastering the scribing hack for fitting vanities against out-of-plumb walls will save you hours of sanding and frustrating trial-and-error.
What the Future Holds for Floating Furniture Engineering
Looking ahead, the demand for seamless, hardware-free floating aesthetics is driving incredible engineering innovations. According to technical documentation from the Architectural Woodwork Institute (AWI), we are moving rapidly away from traditional wooden cleats toward ultra-slim, high-tensile steel bracket systems that can be adjusted in three dimensions even after the cabinet is hung. These micro-adjustable steel plates allow you to dial in the level and depth with a simple turn of an Allen wrench, completely bypassing the need for wooden shims. If you want to elevate your bedroom design with these cutting-edge looks, check out how you can transform your bedroom with custom vanities using top storage ideas for 2025 to keep your living space looking clean, modern, and structurally sound for decades.
If you are planning your next project, my challenge to you is to skip the cheap plastic anchors entirely on your next build. Grab some quality 3/4-inch hardwood plywood, build a recessed hidden cleat system, and feel the incredible difference of a rock-solid, professional-grade mount!
What Experts Won’t Tell You About Floating Bedroom Furniture
Over the years, I have seen too many homeowners make the costly mistake of assuming that any wooden block will serve as an effective mounting cleat. The truth is that timber grain direction and moisture content play a massive role in whether your bedside table stays level. If you cut your French cleat from cheap, construction-grade pine that hasn’t fully seasoned, it will slowly warp inside your warm bedroom, throwing the entire cabinet out of alignment. Always choose a stable, multi-layered hardwood plywood. Another hidden reality is that drywall itself compresses over time. Under the constant downward torque of a cantilevered drawer, even a perfectly installed unit can compress the gypsum core behind the bottom edge, resulting in a microscopic lean. Putting a thin band of structural veneer on the lower rear edge of the cabinet frame distributes this focal pressure and keeps your walls pristine.
My Essential Toolkit for Rock-Solid Installations
You do not need a workshop full of industrial machinery to achieve professional-grade stability, but you do need to move past basic household tools. Here is the exact gear list I rely on to make sure my built-ins and floating installations survive the test of time:
- GRK Structural Cabinet Screws: Unlike standard drywall screws which have brittle shafts that can snap under shear load, these fasteners act like steel lag bolts but install with the speed of a standard wood screw.
- A 24-Inch Digital Level: Bubble levels leave too much room for visual error. A digital level ensures that your installation is accurate down to the tenth of a degree, which is vital for preventing drawers from drifting open.
- Magnetic Stud Ball Finder: Traditional electronic finders are notorious for false positives. Spotting the exact location of the drywall screws holding your wall board to the framing guarantees you hit the absolute center of your timber studs.
- High-Quality Wooden Shims: Walls are rarely flat. Having a pack of moisture-resistant shims on hand allows you to compensate for bowing drywall. When executing a vanity installation, mastering the shim secret for perfectly flush built-in doors will save you hours of frustrating hardware adjustments later.
Bring Your Dream Bedroom to Life Without the Worry
It is time to stop looking at minimalist, modern bedrooms on social media and wishing you could have the same clean, floor-free look without the fear of a structural failure. By shifting your approach from fragile plastic drywall anchors to the heavy-duty hidden cleat method, you are building furniture that is fundamentally integrated with your home’s structural framing. Whether you are tackling a small nightstand or aiming to enhance your home with sleek built-in vanities, the same engineering principles of weight distribution and rigid internal backing apply. Take your time, locate your studs with precision, and build your bedroom upgrades to last a lifetime.
Have you ever had a floating shelf or a wall-mounted nightstand pull away from the wall after a few months? Let me know about your DIY triumphs or disasters in the comments below!