

I’ll never forget the sinking feeling in my gut when I slid my first custom vanity into place. On the level floor, it looked like a masterpiece. But once it touched the drywall, I saw it: a tapering gap that started at a sliver and widened to nearly half an inch by the time it reached the backsplash. My house, like yours and most others built before last Tuesday, has walls that are about as straight as a wet noodle. I tried to ignore it. I even tried to fill it with three tubes of white caulk, which ended up looking like a marshmallow had exploded behind the sink. It was a mess. That was the day I realized that if I wanted my work to look professional, I had to stop wishing for straight walls and start learning how to hug the crooked ones. Today, I’m going to show you the scribing trick that turns a frustrating gap into a seamless, high-end finish.
Your Walls are Lying to You
If you’ve spent any time reading an expert guide to flawless vanity installation, you know that the secret isn’t in the screws—it’s in the prep. We often assume that because a house is made of studs and sheets, everything must be square. However, the National Association of Home Builders (NAHB) points out that while there are standards for ‘plumb and level,’ factors like wood shrinkage and foundation settling make a perfectly vertical wall a rare beast in the wild. When you try to force a perfectly rectangular box (your vanity) against a wavy wall, the wall wins every time. You’re left with gaps that collect dust, moisture, and the judgmental glares of houseguests. Scribing is the process of transferring the exact ‘wiggle’ of your wall onto the side of your cabinet so you can trim it for a custom fit. It sounds intimidating, but once you see the result, you’ll never go back to the ‘caulk and pray’ method.
Is Scribing Actually Worth the Extra Effort?
I get this question all the time from neighbors who just want to get their bathroom back in working order. They see the extra hour of measuring and sanding and wonder if it’s just for show. Trust me, it’s not. A tight fit prevents the cabinet from racking and ensures your countertop sits where it should. Plus, it’s one of those vanity installation hacks that save time in the long run because you aren’t fighting to hide mistakes later with trim or molding. Have you ever stood back from a project only to realize the wall was so out of whack it made your whole cabinet look crooked? Drop a comment and tell me about your worst ‘gap’ nightmare! I’ve been there, and I promise, we can fix it. Before we grab the tools, make sure you’ve also checked out how to handle the base with a leveling leg move to ensure your foundation is as solid as your wall-fit will be.
Stop Guessing and Start Tracing Your Walls
Before you ever touch a saw, you have to find your ‘zero point.’ I learned this the hard way while working on creative built-ins for seamless storage and home aesthetics in an old Victorian home. I thought I could just hold the cabinet up and eyeball the gap, but because I hadn’t leveled the unit first, my scribe line was completely useless. To do this right, slide your vanity into its approximate final position and use shims to get it perfectly plumb and level. It doesn’t matter if there is a massive gap behind it right now; what matters is that the cabinet itself is square to the world. If you skip this, your doors will never hang straight. If you are dealing with a floor that is just as wonky as the walls, you might also need to learn how to scribe built-in cabinets to slanted kitchen floors to get that bottom edge sitting flush before you worry about the vertical sides.
How to Use Your Scribing Tool Like a Surgeon
Once the vanity is level, grab a simple carpenter’s compass. This is the scribing tool for cabinets against textured plaster walls that every pro keeps in their vest. Find the widest point of the gap between the cabinet and the wall. Set your compass points to that exact width. Now, place the metal point against the wall and the pencil point against the side of your vanity. Drag the compass down the entire length of the cabinet, keeping it perfectly horizontal. The metal point follows the ‘waves’ of your drywall, and the pencil transfers that exact topography onto your wood. 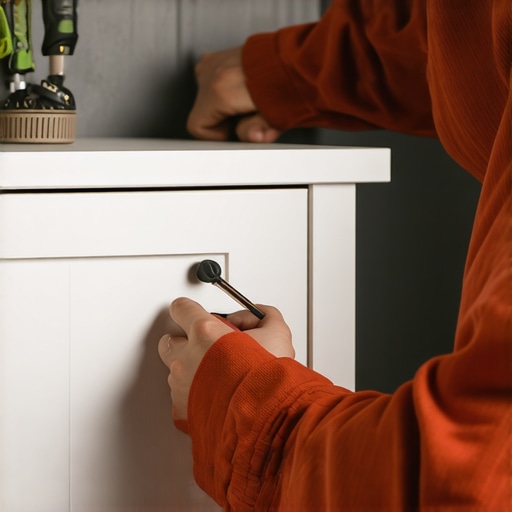
Trim Back to the Line with Surgical Precision
Now comes the part that makes most beginners sweat: removing the wood. You are essentially custom-shaping the side of your cabinet to match the ‘wiggle’ of your house. For most step-by-step guide to vanity installation for beginners projects, a jigsaw with a fine-tooth down-cut blade is your best friend. But here is the secret: don’t cut straight through. You want to ‘back-bevel’ the cut. Tilt your saw blade at a slight 5-degree angle so you are removing more material from the back of the wood than the front. This creates a sharp, thin leading edge that will press tightly against the wall. I remember a particularly difficult install involving maximizing space with innovative built-in solutions for small rooms where the wall was so textured it looked like a stucco ceiling. By back-beveling the scribe, I was able to get the cabinet to ‘bite’ into the high spots of the plaster for a gap-free finish. If the line is very subtle, you can even use a belt sander to ‘sneak up’ on the pencil mark. This is especially helpful when you have to scribe cabinets to heavily textured plaster walls where a saw might chip the finish. Always leave the line; you can always sand more away, but you can’t put the wood back once it’s gone.Most DIY tutorials suggest that a ‘tight’ fit is achieved by the sheer force of your impact driver. In my years of custom work, I’ve found the opposite to be true: the most professional installs are actually the ones with the least amount of internal tension. If you drive a three-inch screw through the back of a cabinet into a stud without filling the air gap behind it with a shim, you aren’t securing the vanity—you’re warping it. This is why so many people struggle to fix uneven gaps in custom built-in doors. When the cabinet box is pulled out of its square, 90-degree geometry to meet a wavy wall, the doors will never hang straight, no matter how much you adjust the hinges.
Stop Pulling the Wood Toward the Wall
The Architectural Woodwork Institute (AWI) standards are very clear on this: cabinetry must be installed in a ‘stress-free condition.’ This means the unit should be level, plumb, and shimmed so that it rests naturally against its support points without the fasteners needing to ‘pull’ the wood. If you have to use a screw to close a gap, you’re introducing a preload of stress into the wood fibers. Over time, as your home expands and contracts with the seasons, that tension leads to hairline cracks in the paint or failure of the joinery. This nuance is a pillar of any expert guide to flawless vanity installation tricks tips that separates a weekend hobbyist from a master carpenter.
Why Is Your Heavy Quartz Top Cracking the Cabinet Frame?
We all love the look of a thick stone edge, but few people consider the load-bearing physics of built-in storage ideas to declutter and enhance your home. If your vanity isn’t perfectly level and shimmed, the hundreds of pounds of stone will focus all that pressure on a single high point. I’ve been called to numerous jobs to investigate why your heavy quartz vanity is cracking the cabinet frame, and the culprit is almost always a lack of internal reinforcement or a ‘floating’ corner that the installer thought would be ‘fine’ once the caulk dried. 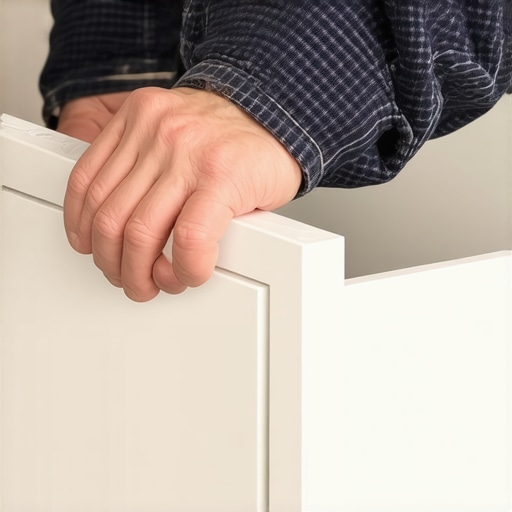 To prevent this, you often need more than just the cabinet walls; consider using 6 heavy-duty L-brackets for reinforcing custom built-in units to bridge the gap between the studs and the heavy countertop weight. Have you ever fallen into this trap of assuming the wood was stronger than the stone? Let me know in the comments.
Balance the Load Instead of Forcing the Fit
When selecting shims, avoid the cheap, brittle cedar ones found in bulk bins if you’re installing high-end custom work. They compress too easily under the weight of a stone-topped cabinet. Instead, look for composite or plastic shims that won’t rot and provide a much more stable ‘zero-point’ for your screws. It’s a small detail, but when you’re building creative built-ins for seamless storage and home aesthetics, these choices matter. If the shim isn’t solid, the cabinet will eventually shift, and you’ll find yourself wondering why the once-perfect scribe line now has a hairline gap. By shifting your focus from ‘fastening’ to ‘balancing,’ you ensure that your smart storage solutions to optimize small bathroom spaces don’t just look good on day one, but stay functional for a decade. It’s the difference between a project that feels like a quick fix and one that feels like it was built with the house itself.Once your cabinet is perfectly scribed and fastened, the real test begins: time. I’ve seen beautiful installs fall apart in eighteen months because the builder ignored the environmental reality of a bathroom. Moisture is the silent killer of joinery. If you’ve spent weeks on creative built-ins for seamless storage and home aesthetics, you owe it to yourself to protect that investment. In my shop, I never install a base cabinet without a specialized barrier. According to the Hardwood Plywood and Veneer Association (HPVA), wood panels can expand significantly when exposed to consistent humidity above 60 percent. To combat this, I always implement a waterproof sealant move for vanity backsplashes and bottom edges that seals the end-grain of the wood from rising damp.
How do I keep my custom built-ins looking new for years?
Maintenance isn’t just about cleaning the surfaces; it’s about monitoring the hardware. Over time, the weight of the doors and the settling of the house will shift your alignment. I make it a habit to check the hinge tension every six months. If you notice your hardware acting up, you might need to investigate why your soft-close drawers are slamming and the tension fix that brings them back to a silent glide. Also, keep a close eye on the silicone bead between the vanity and the wall. If it starts to pull away, it means the house is moving, and you need to re-seal it immediately to prevent water from reaching the raw wood behind the scribe. For those looking ahead, top trends in vanity designs you need to know in 2025 suggest a shift toward integrated LIDAR-scanned templates. I’m already experimenting with phone-based apps that create a digital 3D model of a room’s wonky walls before I even cut a single piece of plywood. It’s the future of effortless storage solutions for a tidy, stylish home.  To get that high-end look yourself, I recommend investing in an AccuScribe Pro. It’s more stable than a standard compass and allows for consistent offsets that make the back-beveling process much more predictable. If you’re ready to stop making excuses for your crooked walls, grab a scrap piece of 1×4 and practice your first scribe line today—you’ll be amazed at how quickly your skills level up.
Hard-Earned Truths from the Dust of My Workshop
Over the years, I’ve realized that the difference between a ‘good’ DIY job and a professional installation usually comes down to about a sixteenth of an inch. Here are a few lightbulb moments that changed how I approach every bathroom project and transformed the way I look at walls.
- The Tape Measure is a Liar: In the world of scribing, numbers matter less than shapes. Trust your compass over your ruler every single time because a wall can be out of plumb in ways a tape measure simply cannot communicate.
- Tape Before You Trace: Always run a strip of blue painter’s tape along the edge of your cabinet before scribing. It prevents the pencil from staining the wood and, more importantly, keeps your jigsaw from splintering the finish on your custom vanity style.
- The Back-Bevel Secret: If you cut straight through, the back of the wood might hit a bump in the wall before the front does. Angling your saw to remove more material from the rear ensures a razor-thin, perfect fit on the visible edge.
- Humidity is Your Boss: Even a perfect scribe can fail if the wood swells. That’s why I always recommend looking into 7 moisture barriers for vanities in high humidity bathrooms to keep that fit tight year-round.
The Cabinetmaker’s Essential Survival Kit
I don’t believe in buying every gadget on the shelf, but these few items are non-negotiable for a professional-grade result. They are the same tools I use when designing innovative storage solutions to transform your bathroom from cluttered to custom.
- AccuScribe Pro: It is far more rigid than a school compass, meaning your line won’t ‘drift’ as you drag it across textured drywall.
- Down-Cut Jigsaw Blades: These teeth point downward, which means they push the wood fibers down rather than pulling them up, preventing unsightly chips on your vanity face.
- 80-Grit Sanding Block: Sometimes the saw is too aggressive. A coarse sanding block lets you ‘sneak up’ on your scribe line for a fit so tight you couldn’t slide a business card into it.
- Bright LED Headlamp: You can’t scribe what you can’t see. A headlamp reveals the shadows in the gaps that overhead bathroom lighting often hides.
Start Your Journey Toward a Seamless Finish
#IMAGE_PLACEHOLDER_E#
There is a unique kind of pride that comes from sliding a vanity into place and seeing it hug a crooked wall perfectly. It’s the hallmark of a home that has been cared for, rather than just assembled. As you move forward with your expert design tips for custom vanities, remember that every gap you close is a lesson learned in patience and precision. Don’t be afraid to make a mistake on a scrap piece of wood first; once you master the scribe, you’ll never look at a ‘straight’ wall the same way again. Mastering these small details is what truly helps to create effortless storage solutions for a tidy, stylish home. Have you ever finished an installation only to realize the wall was waving at you from behind the backsplash? Let me know your biggest ‘gap’ horror stories in the comments below!