

I still remember standing in my freshly remodeled kitchen, holding a warm mug of coffee, and staring up at what was supposed to be my dream setup. Instead of feeling pure joy, my eyes locked onto a dark, uneven, dusty black hole. Yes, I am talking about that awkward two-inch gap between the top of my gorgeous new built-in cabinets and the drywall above. It felt like a monument to unfinished work. I tried to ignore it, but every single morning, that shadow stared back at me, collecting dust and mocking my DIY pride. It is a incredibly common design flaw that ruins the high-end look of otherwise beautiful creative built-ins for seamless storage. If you are currently staring at a similar void in your kitchen, hallway, or bathroom, I promise you do not have to live with it. Today, we are going to walk through how to seal that gap permanently so your cabinets actually look like they were custom-crafted for your exact space.
The Mistake That Cost Me Hours of Dusting and Regret
When I first tackled this issue years ago, I made the ultimate rookie mistake. I thought, how hard could it be to just fill it in? I grabbed a couple of cheap pine boards, slapped some white paint on them, and tried to nail them directly into the cabinet face frame. It looked absolutely terrible. The wood warped within a month, the paint did not match, and because my ceiling was sloped—as almost all ceilings are—the gap varied from one inch on the left to nearly two inches on the right. I ended up with a crooked trim piece that looked worse than the empty space. That failure taught me that homes naturally settle and ceilings are never truly flat. In fact, professional architectural standards from organizations like the Architectural Woodwork Quality Standards point out that ceiling deflection and floor settling can cause up to a half-inch of variance across a single wall run. To get a high-end finish, you have to use a technique called scribing to custom-fit your trim to those imperfections. Understanding how to handle these uneven lines is just as critical as knowing why your integrated wardrobe is pulling away from the ceiling when things start to shift.
Is a ceiling gap really worth the extra effort to fix?
Some people will tell you to just leave it alone and call it “shadow line styling.” But let’s be honest: unless you have extremely minimalist, modern European cabinetry designed specifically for that look, an open gap just looks unfinished. Beyond the aesthetics, it is a massive grease and dust trap that is nearly impossible to clean without a ladder. Closing that gap instantly elevates your room, making your ceilings feel taller and your home look incredibly cohesive. If you have spent time choosing the perfect layout or investing in custom upgrades like sleek built-in vanities, leaving the top unfinished is like wearing a tuxedo with running shoes. Have you ever stood in your kitchen and found yourself staring at that exact same gap, wondering if anyone else notices it? (Trust me, they do, and you deserve a seamless finish!) Let’s get into the step-by-step process of how we can fix this once and for all using simple molding and a scribing tool.
The Scribing Technique to Erase Uneven Ceiling Gaps
To achieve a flawless, high-end look that mimics expensive custom woodwork, you must use a method known as scribing. Trying to force a straight piece of molding against an uneven ceiling is like trying to put a square peg in a round hole; it highlights every dip and wave. Instead, we use a simple compass tool to transfer the exact wave of your ceiling directly onto your wood filler strip. Years ago, I attempted to skip this step while installing a set of creative built-ins for seamless storage in my living room. I cut the crown molding completely straight and pinned it up. The resulting gaps were so wide in the center that I could slide my entire hand through them. I ended up tearing down eighty dollars worth of finished trim and starting over. Scribing is the only way to avoid that frustration and guarantee a professional, airtight fit.
Step 1: Mount the Backer Cleat Behind the Cabinet Face
Before you can attach any finished trim, you need a solid foundation to nail it to. Measure the distance from the top of your cabinet frame to the ceiling. Cut a scrap block of plywood—often called a backer cleat—and mount it flush behind the top edge of your cabinet face frame. Think of this backer cleat as the anchor holding your trim steady. Secure it using pocket screws or wood glue and pocket hole joints. If you are working with bathroom layouts, this step is just as critical as securing the frame when you learn vanity installation for beginners; without a solid wooden backing, your finished trim will eventually pull away or sag due to house settling.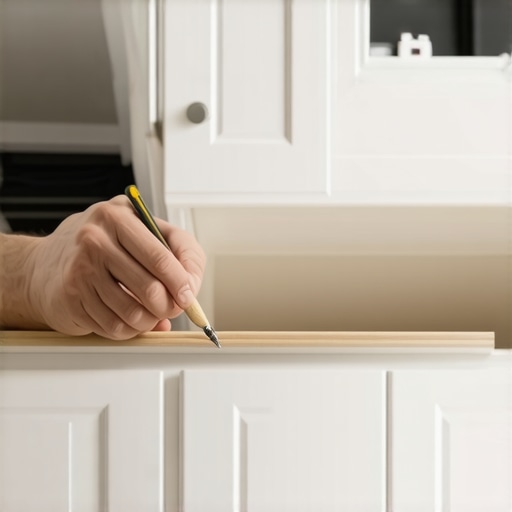
Step 2: Trace the Ceiling Contour onto Your Wood Filler Strip
Rip a piece of matching wood filler strip that is slightly wider than your largest gap. Hold this strip perfectly level against your cabinet top, pushing it up until it touches the lowest point of your ceiling. Now, grab a standard carpenter\’s compass. Set the point of the compass to the exact width of the widest gap. Place the metal point against the ceiling and the pencil tip on your wood strip. Drag the compass slowly from left to right along the entire length of the cabinet. The pencil will draw an exact replica of your ceiling’s wave onto the wood strip. This is the exact same strategy master carpenters use for fitting vanities against out-of-plumb walls during complex bathroom renovations.
Step 3: Cut the Scribe Line with a Back Bevel
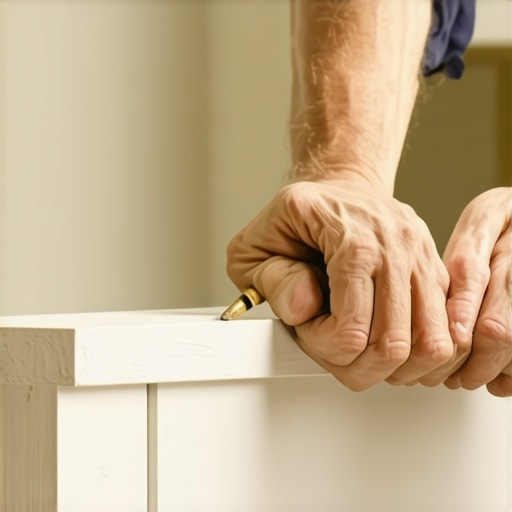
Once your line is marked, take the wood filler strip to your workbench. Do not cut directly on the line with a straight jigsaw blade. Instead, tilt your jigsaw blade to a 5-degree angle to create a back bevel. By cutting away more wood from the back of the strip than the front, you create a sharp, feather-thin front edge. This ensures that only the very front surface of the wood makes contact with the ceiling, giving you an ultra-tight, seamless joint even if your plaster has slight texture. After cutting, lightly sand the edge with 120-grit sandpaper to remove any splinters. This attention to detail is what transforms standard cabinets into stunning built-in storage ideas to declutter and enhance your home.
Step 4: Pin the Scribed Strip into Place
Slide your newly scribed wood strip into the gap. It should hug the ceiling contour perfectly without any forced pressure. If there are any high spots holding it down, shave them off gently with a hand plane. Once the fit is seamless, use an 18-gauge brad nailer to shoot nails through the face of the strip into the backer cleat you installed in step one. Since the nail holes will be filled and painted, you won\’t see any hardware. This technique keeps everything locked down tight, preventing the wood from shifting or warping over time.
Why Traditional Scribing Often Fails on Modern Hardwood
Many seasoned DIYers believe that a standard scribing tool and a steady hand are all it takes to get a flawless fit. However, this traditional approach overlooks how modern, kiln-dried hardwoods react to humidity. Everyone says that scribing to a perfect zero-clearance fit is the gold standard, but in my experience, leaving a tiny, controlled micro-gap of about one-sixteenth of an inch works much better. When you wedge a filler strip tightly between a rigid cabinet carcass and a plaster ceiling, you create a structural pressure point. As your home swells during humid summer months, that pressure has nowhere to go. The result? Your cabinet doors will start binding, or worse, you will notice your integrated wardrobe pulling away from the ceiling. This pressure can warp the face frame over time, turning a pristine installation into a structural nightmare. To combat this, professional installers often rely on a small expansion reveal rather than a dead-flush fit, allowing the wood room to breathe. This subtle allowance is backed by the wood movement calculators and standards from the Woodworkers Institute, which warn that even kiln-dried timber can expand significantly across its grain.
Should you glue your scribed filler strips directly to the drywall?
The short answer is absolutely not. This is a massive “oops” trap that many homeowners fall into. They assume that running a thick bead of construction adhesive along the top of the filler strip will seal the gap permanently. Instead, when the ceiling joists naturally deflect under snow loads or attic storage, the drywall will pull the filler strip upward, cracking your delicate cabinet face joints. Instead of adhesive, rely solely on mechanical fasteners driven into your backer cleats, allowing the ceiling to move independently of your built-ins. If you are dealing with moisture-prone areas, like installing smart storage solutions to optimize small bathroom spaces, this mechanical-only fastening method is crucial to prevent structural warping. Have you ever fallen into this trap or noticed your cabinet trim cracking after a change in seasons? Let me know in the comments below! If you want to elevate your entire room’s aesthetic, combining these tight trim techniques with creative built-ins for seamless storage will make your home look like a professional designer’s masterpiece.
My Personal Toolkit for Seamless Carpentry and Scribing
Over the years, I have learned that the secret to a flawless, professional finish lies less in raw talent and more in using the exact right tools for the job. When I first started working on custom built-ins, I used a cheap school compass and a hand saw. It was slow, frustrating, and inaccurate. Today, my go-to setup is a dedicated precision brass scribing tool with an adjustable locking nut. I pair this with an 18-volt cordless barrel-grip jigsaw because it gives me unmatched control when cutting complex back bevels. For sanding those fine edges, nothing beats a micro-profile sander, which allows me to smooth out tight curves without rounding over the crisp front face of my filler strip. Using the right gear is just as critical as selecting the proper structural fasteners, whether you are sealing a ceiling gap or applying a step-by-step guide to vanity installation for beginners.
How do I maintain scribed cabinet gaps over time?
The real test of your craftsmanship comes when the seasons change. Wood is a living material that expands and contracts with fluctuations in indoor humidity. To keep your ceiling joints looking sharp year after year, you must perform basic annual maintenance. I recommend inspecting the joint every spring and autumn. If you notice microscopic hairline separations where the wood meets the plaster, do not slather them with cheap painter’s caulk. Instead, use a high-flexibility elastomeric sealant that can stretch up to 300% without cracking. If you have painted cabinets, apply a microscopic bead of this flexible sealant using a wet finger, then touch it up with your matching cabinet paint using a fine-tipped artist’s brush. This proactive care prevents moisture from creeping into the raw wood edges, which is a common culprit behind why your laundry room cabinets are warping or pulling apart at the seams.
The Future of Precision Carpentry and Smart Fitting
Looking ahead, the manual process of dragging a pencil compass across a ceiling is rapidly evolving. We are starting to see the integration of consumer-grade 3D laser scanners that can map the exact contour of a room’s ceiling in seconds. In the near future, professional DIYers and custom builders will likely upload these digital scans directly to compact CNC routers in their garages, cutting perfectly scribed filler strips on the first try with zero manual sanding. This technology is already being pioneered by organizations like the Woodwork Institute to ensure absolute precision in high-end commercial millwork. However, until those scanners become budget-friendly for everyone, mastering the physical hand-scribing technique remains your best superpower. Whether you are aiming to install creative built-ins for seamless storage or putting the finishing touches on a bedroom upgrade, take the time to practice your back-bevel cuts on a few scrap pieces of plywood first. The precision you gain today will elevate your entire home’s aesthetic for decades to come.
The Hardest Lesson I Learned About Filling Cabinet and Ceiling Gaps
When I first started installing custom trim, I assumed that closing a gap was simply about making it disappear from sight. I did not realize that the house is a living, breathing structure. The hardest lesson I learned is that rigidity is the enemy of longevity. If you wedge your trim piece so tightly against the plaster that there is zero breathing room, something will eventually buckle. I once spent three days crafting what I thought was a perfect, zero-clearance crown molding run on a set of creative built-ins for seamless storage, only to watch the joints split wide open when the winter dry air hit and the house settled. Now, I always design with a tiny micro-reveal and choose highly flexible materials over rigid adhesives. You must plan for movement, or your home will plan it for you.
My Essential Toolkit for Precision Scribing and Fitting
If you want to achieve that high-end, custom look without pulling your hair out, you need to abandon the standard pencil-and-school-compass routine. Here are the specific tools I carry to every job site:
- Precision Brass Scribing Tool with Lock Nut: This keeps your measurement locked perfectly in place so your line remains consistent across a ten-foot run.
- Barrel-Grip Jigsaw: Unlike top-handle models, a barrel-grip gives you ultimate control when cutting the delicate back bevels needed for the back-bevin trick for scribing cabinets to out-of-plumb walls.
- Elastomeric Joint Sealant: Never use cheap acrylic caulk. I rely exclusively on premium elastomeric sealants because they stretch up to 300% without cracking when the ceiling shifts.
- Micro-Profile Sanding Blocks: Essential for smoothing out those tiny, wavy contours after you make your jigsaw cuts.
Step Up to the Challenge and Erase Those Empty Shadows
Staring at an unfinished gap can make even the most expensive kitchen or bath renovation feel like an amateur DIY project. But now that you know how to map your ceiling’s unique waves and cut with a back bevel, you have the exact blueprint to fix it. Taking the time to properly seal that void transforms ordinary cabinetry into stunning, built-in masterpieces. It is the defining detail that separates a basic weekend project from a high-value home investment. Go grab your tools, cut a few test scraps of plywood, and reclaim that space above your cabinets once and for all.
Have you ever struggled with a warped ceiling or had your trim pull away after a seasonal change? Let me know in the comments below!