

I still remember the sinking feeling in my stomach three years ago. I had just finished building what I thought was a masterpiece: a gorgeous, wall-to-wall oak media center. It looked stunning, solid, and incredibly professional. Then, my wife brought in the electronics. As I began plugging in the receiver, the gaming consoles, the streaming boxes, and the subwoofer, my beautiful creation morphed into a chaotic nightmare of tangled black cables. I tried stuffing them behind the consoles, but they spilled out of the open cubbies like plastic spaghetti. It looked awful. In my rush to build a beautiful piece of furniture, I had completely ignored how the actual technology would live inside it. It was a classic rookie mistake, and it taught me a lesson I will never forget.
Why We Keep Getting Media Center Cable Management Wrong
Most of us focus entirely on the exterior aesthetics of our creative built-ins for seamless storage, leaving wire routing as an afterthought. We buy some plastic zip ties or adhesive clips and hope for the best. But true cable management isn’t about hiding wires after the fact; it is about designing a clear, structural pathway inside the cabinetry itself. If you do not plan for how those cables travel between shelves, you end up blocking airflow, pinching expensive HDMI lines, or having to pull the entire television off the wall just to reset a router. The real secret lies in creating a dedicated, hidden vertical chase behind the cabinet backing, allowing wires to drop freely from the television cavity down to the lower equipment bays without ever being seen.
Is planning for hidden wires really worth the extra carpentry hassle?
You might be wondering if cutting custom access panels and building false backs is overkill. Trust me, it is not. A disorganized media cabinet is more than just an eyesore; it is a thermal trap. According to safety and performance studies by the Consumer Technology Association, modern home theater components generate intense heat, and poor ventilation combined with crowded wiring is a leading cause of premature hardware failure. Without a designated routing path, cables bunch up directly behind exhaust fans, trapping heat inside the cabinet. By incorporating a smart routing system alongside a proper stealth venting move for built-in media centers, you protect your electronics, make upgrading your components incredibly simple, and keep your living room looking absolutely pristine. Have you ever spent hours fighting with a tangled web of cables behind your TV just to plug in a new device? Let me know in the comments below, because today we are going to fix that headache forever.
Creating the Hidden Vertical Wire Highway
The secret to keeping your media center completely wire-free is to construct a double-back wall. Think of this as building a tiny, secret corridor behind your cabinet backing where cables can travel freely up and down without ever being seen from the front. Instead of nailing your back panels directly to the cabinet carcass frame, you need to set them forward by exactly two inches. This simple change creates a two-inch deep void that acts as an invisible highway for all your power cords, HDMI connections, and optical cables.
During a family room project last spring, I tried to save a few inches of depth by setting my false back only three-quarters of an inch forward. It was a disaster. When it came time to route a thick, heavy-duty surge protector cable and two stiff, high-speed HDMI cords, they jammed in the narrow gap. I spent two hours trying to fish them through with a wire hanger, ultimately scratching the cables and pulling my hair out. Learn from my pain and stick to a generous two-inch spacing. It gives you plenty of wiggle room for thick cords and makes future tech upgrades incredibly simple.
Mapping and Drilling Your Access Portals
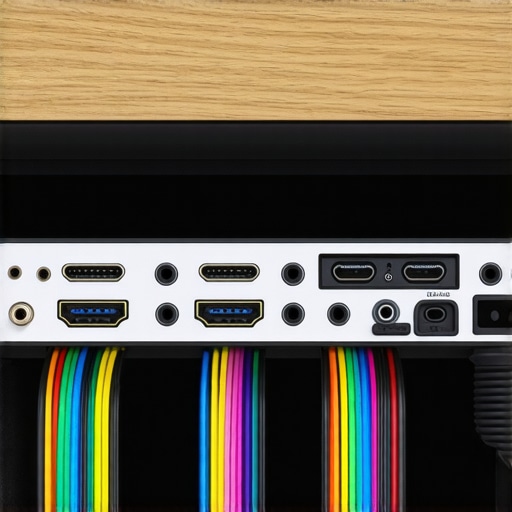
Once your false back is planned, you need to cut clean access points. Do not just hack random holes with a drywall saw. Use a proper hole saw to cut perfect three-inch circles in the back panels of your media compartments. Place these holes in the upper left or right corners of each shelf cavity, aligning them perfectly from the top TV bay all the way down to your lower receiver cabinets. To keep everything looking clean, pop in some plastic or brass desk grommets. This simple addition covers the raw wood edges and prevents cords from snagging on rough splinters when you pull them through.
Supporting Heavy Equipment Without Blocking the Chase
When you set your cabinet backing forward, you lose some structural stability for holding heavy home theater equipment. Standard shelf pins won’t cut it when you are supporting a fifty-pound vintage audio amplifier. To prevent your shelving from sagging or pulling away from the back wall, you need to reinforce the cabinet carcass internally. Applying the hidden support rail for floating media consoles ensures your structural integrity remains rock-solid while keeping your entire two-inch cable chase completely clear of brackets, screws, and blocking.
Routing Power and Keeping It Cool
Never run high-voltage power cables loose inside a sealed wood wall. Instead, install a recessed power bridge kit behind the television. This professionally routes electrical power from your existing wall outlet up to the TV cavity safely. In the lower equipment bays, use heavy-duty hook-and-loop wraps to bundle your low-voltage signal cables at least six inches away from power lines. This simple separation prevents electromagnetic interference from degrading your audio and video signals. Combine this organized layout with proper passive ventilation slots at the base and top of your cabinetry, and your high-end electronics will run cool, quiet, and completely out of sight.
Most DIY enthusiasts and even seasoned carpenters believe that as long as you have a clear vertical cavity, your cable management issues are solved. In my experience, this is a major misconception. Simply providing a hollow space is only half the battle; the real challenge lies in how you manage cable tension and physics within that dark, hidden corridor. If you simply let your expensive, heavy-duty HDMI and power cables hang freely inside a two-inch false wall, gravity will eventually ruin your day.
Over time, the sheer weight of a vertical cable bundle pulls down on the connection ports of your receiver or television. I once visited a client whose brand-new smart TV kept losing its input signal. The homeowner was convinced the television was defective. In reality, the weight of three heavy, shielded cables hanging over a six-foot drop was slowly prying the HDMI jacks right off the internal circuit board. To prevent this costly catastrophe, you must integrate strain-relief tie-offs inside your cabinet chase, securing the bundle at the top of the run so the plug ends bear absolutely zero weight.
Why do standard plastic cable ties fail inside custom media cabinets?
It is tempting to grab a bag of cheap plastic zip ties to bundle everything together tightly. However, the plastic engineering team at the DuPont corporation has documented how standard nylon ties degrade, become brittle, and snap under sustained thermal stress. When locked inside a warm electronics cabinet, those cheap ties will fail within two to three years. Even worse, cinching plastic ties too tightly can actually pinch the delicate internal copper shielding of high-speed data cables, severely degrading your signal quality. Instead, professional cabinet installers always use soft, adjustable hook-and-loop fabric wraps. This simple switch prevents cable pinching and allows you to easily add or remove wires as your home theater setup evolves over time.
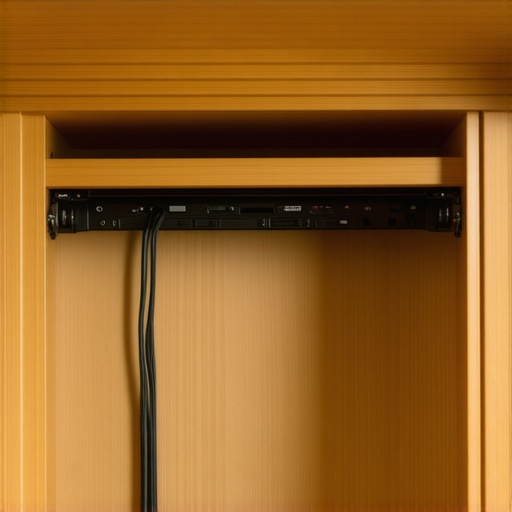
Another classic trap is neglecting the future serviceability of your effortless storage solutions for a tidy stylish home. Many people seal their false backs completely, meaning that if a single cable fails, they have to tear down the entire installation. This is why I always design removable access panels on my creative built-ins for seamless storage. By using simple magnetic touch latches on the rear panels of your cabinet bays, you can easily pop open the chase, run a new wire, and click the panel back into place without a single tool.
If you are taking on a wider project, such as a full-width console, you must also consider how to route cables horizontally across different cabinet bays without weakening your vertical partitions. To keep your structural integrity rock-solid, make sure to implement the hidden support rail for extra-wide media centers 2, which supports the heavy span while leaving your wire pathways completely unobstructed. Have you ever fallen into this trap and ended up with a broken HDMI port or a jammed cable run? Let me know in the comments below, and let’s troubleshoot your setup together.
When you have spent days designing and executing the perfect hidden cable highway, the last thing you want is for your custom setup to degrade over time. Maintaining the structural integrity of your media cabinet while keeping your tech accessible requires a proactive approach. I learned this years ago when a simple hardware swap required me to completely disassemble a face frame because I had not accounted for structural shift. To avoid these headaches, we must shift our focus from the initial installation to the long-term mechanics of custom cabinetry.
How do I maintain my custom media cabinet cable systems over time?
To keep your media center performing flawlessly, you must schedule a simple bi-annual hardware and cable audit. Wood is a living material that expands and contracts with seasonal humidity changes, which can put unexpected tension on tightly routed wires. Every six months, open your removable access panels and check for any cable binding or tension. At the same time, inspect your structural connections. If you have built a floating configuration, keeping an eye on the anchoring points is vital. Applying the principles from my guide on the hidden support rail for floating media consoles ensures your back wall never sags and pinches those delicate fiber-optic runs.
The Professional Tool Kit for Cabinetry Longevity
I never step onto a job site without a few highly specialized tools that guarantee long-term precision. For instance, instead of using standard wood screws that can back out of plywood over time due to speaker vibrations, I exclusively use architectural-grade cabinet assembly screws with a washer head. These screws distribute the clamping force evenly and never slip. For precision cable routing, I rely on a carbide-tipped forestner bit rather than a standard spade bit. It cuts incredibly clean, splinter-free holes in veneered plywood, protecting your delicate HDMI cables from sharp wood fibers. If you are working on massive, heavy-duty setups, you will also want to secure your foundation using the hidden steel plate secret for ultra-wide media console support to prevent any structural bowing that could pinch your hidden wire highways.
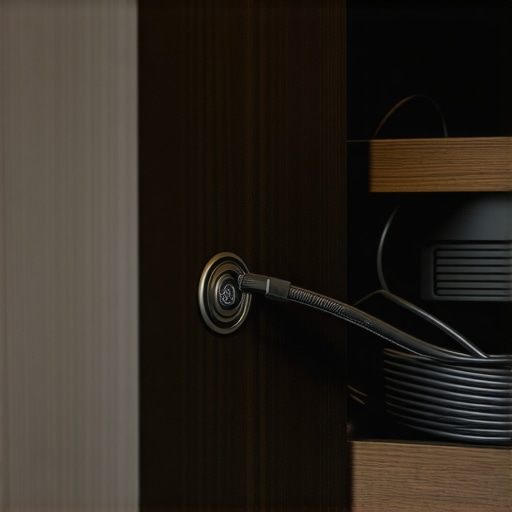
Looking ahead, the future of home theater integration is moving toward fully wireless power and ultra-thin fiber-optic arrays. However, the physical need for robust, structural pathways will never disappear. As components shrink, we will see cabinetry designs adapt to include shallower, more modular false backs that maximize usable storage space. To stay ahead of the curve, I highly recommend implementing a magnetic-latch access panel on your very next build. This small, advanced step will save you hours of frustration the next time you upgrade your receiver or streaming device. Take fifteen minutes this weekend to map out your cable highway, install a few soft hook-and-loop wraps, and feel the incredible satisfaction of a completely organized, high-performance home entertainment system.
I still remember the sinking feeling in my stomach three years ago. I had just finished building what I thought was a masterpiece: a gorgeous, wall-to-wall oak media center. It looked stunning, solid, and incredibly professional. Then, my wife brought in the electronics. As I began plugging in the receiver, the gaming consoles, the streaming boxes, and the subwoofer, my beautiful creation morphed into a chaotic nightmare of tangled black cables. I tried stuffing them behind the consoles, but they spilled out of the open cubbies like plastic spaghetti. It looked awful. In my rush to build a beautiful piece of furniture, I had completely ignored how the actual technology would live inside it. It was a classic rookie mistake, and it taught me a lesson I will never forget.
Why We Keep Getting Media Center Cable Management Wrong
Most of us focus entirely on the exterior aesthetics of our creative built-ins for seamless storage, leaving wire routing as an afterthought. We buy some plastic zip ties or adhesive clips and hope for the best. But true cable management isn’t about hiding wires after the fact; it is about designing a clear, structural pathway inside the cabinetry itself. If you do not plan for how those cables travel between shelves, you end up blocking airflow, pinching expensive HDMI lines, or having to pull the entire television off the wall just to reset a router. The real secret lies in creating a dedicated, hidden vertical chase behind the cabinet backing, allowing wires to drop freely from the television cavity down to the lower equipment bays without ever being seen.
Is planning for hidden wires really worth the extra carpentry hassle?
You might be wondering if cutting custom access panels and building false backs is overkill. Trust me, it is not. A disorganized media cabinet is more than just an eyesore; it is a thermal trap. According to safety and performance studies by the Consumer Technology Association, modern home theater components generate intense heat, and poor ventilation combined with crowded wiring is a leading cause of premature hardware failure. Without a designated routing path, cables bunch up directly behind exhaust fans, trapping heat inside the cabinet. By incorporating a smart routing system alongside a proper the stealth venting move for built-in media centers 2, you protect your electronics, make upgrading your components incredibly simple, and keep your living room looking absolutely pristine. Have you ever spent hours fighting with a tangled web of cables behind your TV just to plug in a new device? Let me know in the comments below, because today we are going to fix that headache forever.
Creating the Hidden Vertical Wire Highway
The secret to keeping your media center completely wire-free is to construct a double-back wall. Think of this as building a tiny, secret corridor behind your cabinet backing where cables can travel freely up and down without ever being seen from the front. Instead of nailing your back panels directly to the cabinet carcass frame, you need to set them forward by exactly two inches. This simple change creates a two-inch deep void that acts as an invisible highway for all your power cords, HDMI connections, and optical cables.
During a family room project last spring, I tried to save a few inches of depth by setting my false back only three-quarters of an inch forward. It was a disaster. When it came time to route a thick, heavy-duty surge protector cable and two stiff, high-speed HDMI cords, they jammed in the narrow gap. I spent two hours trying to fish them through with a wire hanger, ultimately scratching the cables and pulling my hair out. Learn from my pain and stick to a generous two-inch spacing. It gives you plenty of wiggle room for thick cords and makes future tech upgrades incredibly simple.
Mapping and Drilling Your Access Portals
Once your false back is planned, you need to cut clean access points. Do not just hack random holes with a drywall saw. Use a proper hole saw to cut perfect three-inch circles in the back panels of your media compartments. Place these holes in the upper left or right corners of each shelf cavity, aligning them perfectly from the top TV bay all the way down to your lower receiver cabinets. To keep everything looking clean, pop in some plastic or brass desk grommets. This simple addition covers the raw wood edges and prevents cords from snagging on rough splinters when you pull them through.
Supporting Heavy Equipment Without Blocking the Chase
When you set your cabinet backing forward, you lose some structural stability for holding heavy home theater equipment. Standard shelf pins won’t cut it when you are supporting a fifty-pound vintage audio amplifier. To prevent your shelving from sagging or pulling away from the back wall, you need to reinforce the cabinet carcass internally. Applying the hidden support rail for floating media consoles ensures your structural integrity remains rock-solid while keeping your entire two-inch cable chase completely clear of brackets, screws, and blocking.
Routing Power and Keeping It Cool
Never run high-voltage power cables loose inside a sealed wood wall. Instead, install a recessed power bridge kit behind the television. This professionally routes electrical power from your existing wall outlet up to the TV cavity safely. In the lower equipment bays, use heavy-duty hook-and-loop wraps to bundle your low-voltage signal cables at least six inches away from power lines. This simple separation prevents electromagnetic interference from degrading your audio and video signals. Combine this organized layout with proper passive ventilation slots at the base and top of your cabinetry, and your high-end electronics will run cool, quiet, and completely out of sight.
Most DIY enthusiasts and even seasoned carpenters believe that as long as you have a clear vertical cavity, your cable management issues are solved. In my experience, this is a major misconception. Simply providing a hollow space is only half the battle; the real challenge lies in how you manage cable tension and physics within that dark, hidden corridor. If you simply let your expensive, heavy-duty HDMI and power cables hang freely inside a two-inch false wall, gravity will eventually ruin your day.
Over time, the sheer weight of a vertical cable bundle pulls down on the connection ports of your receiver or television. I once visited a client whose brand-new smart TV kept losing its input signal. The homeowner was convinced the television was defective. In reality, the weight of three heavy, shielded cables hanging over a six-foot drop was slowly prying the HDMI jacks right off the internal circuit board. To prevent this costly catastrophe, you must integrate strain-relief tie-offs inside your cabinet chase, securing the bundle at the top of the run so the plug ends bear absolutely zero weight.
Why do standard plastic cable ties fail inside custom media cabinets?
It is tempting to grab a bag of cheap plastic zip ties to bundle everything together tightly. However, the plastic engineering team at the DuPont corporation has documented how standard nylon ties degrade, become brittle, and snap under sustained thermal stress. When locked inside a warm electronics cabinet, those cheap ties will fail within two to three years. Even worse, cinching plastic ties too tightly can actually pinch the delicate internal copper shielding of high-speed data cables, severely degrading your signal quality. Instead, professional cabinet installers always use soft, adjustable hook-and-loop fabric wraps. This simple switch prevents cable pinching and allows you to easily add or remove wires as your home theater setup evolves over time.
Another classic trap is neglecting the future serviceability of your effortless storage solutions for a tidy stylish home. Many people seal their false backs completely, meaning that if a single cable fails, they have to tear down the entire installation. This is why I always design removable access panels on my creative built-ins for seamless storage. By using simple magnetic touch latches on the rear panels of your cabinet bays, you can easily pop open the chase, run a new wire, and click the panel back into place without a single tool.
If you are taking on a wider project, such as a full-width console, you must also consider how to route cables horizontally across different cabinet bays without weakening your vertical partitions. To keep your structural integrity rock-solid, make sure to implement the hidden support rail for extra-wide media centers 2, which supports the heavy span while leaving your wire pathways completely unobstructed. Have you ever fallen into this trap and ended up with a broken HDMI port or a jammed cable run? Let me know in the comments below, and let’s troubleshoot your setup together.
When you have spent days designing and executing the perfect hidden cable highway, the last thing you want is for your custom setup to degrade over time. Maintaining the structural integrity of your media cabinet while keeping your tech accessible requires a proactive approach. I learned this years ago when a simple hardware swap required me to completely disassemble a face frame because I had not accounted for structural shift. To avoid these headaches, we must shift our focus from the initial installation to the long-term mechanics of custom cabinetry.
How do I maintain my custom media cabinet cable systems over time?
To keep your media center performing flawlessly, you must schedule a simple bi-annual hardware and cable audit. Wood is a living material that expands and contracts with seasonal humidity changes, which can put unexpected tension on tightly routed wires. Every six months, open your removable access panels and check for any cable binding or tension. At the same time, inspect your structural connections. If you have built a floating configuration, keeping an eye on the anchoring points is vital. Applying the principles from my guide on the hidden support rail for floating media consoles ensures your back wall never sags and pinches those delicate fiber-optic runs.
The Professional Tool Kit for Cabinetry Longevity
I never step onto a job site without a few highly specialized tools that guarantee long-term precision. For instance, instead of using standard wood screws that can back out of plywood over time due to speaker vibrations, I exclusively use architectural-grade cabinet assembly screws with a washer head. These screws distribute the clamping force evenly and never slip. For precision cable routing, I rely on a carbide-tipped forestner bit rather than a standard spade bit. It cuts incredibly clean, splinter-free holes in veneered plywood, protecting your delicate HDMI cables from sharp wood fibers. If you are working on massive, heavy-duty setups, you will also want to secure your foundation using the hidden steel plate secret for ultra-wide media console support to prevent any structural bowing that could pinch your hidden wire highways.
Looking ahead, the future of home theater integration is moving toward fully wireless power and ultra-thin fiber-optic arrays. However, the physical need for robust, structural pathways will never disappear. As components shrink, we will see cabinetry designs adapt to include shallower, more modular false backs that maximize usable storage space. To stay ahead of the curve, I highly recommend implementing a magnetic-latch access panel on your very next build. This small, advanced step will save you hours of frustration the next time you upgrade your receiver or streaming device. Take fifteen minutes this weekend to map out your cable highway, install a few soft hook-and-loop wraps, and feel the incredible satisfaction of a completely organized, high-performance home entertainment system.
My Hardest Lessons in Hidden Wire Routing
Over the years, I have realized that true craftsmanship is not about never making mistakes, but about designing your mistakes out of the finished piece. One major lightbulb moment was discovering how quickly the backing material degrades if you do not seal the cut edges of your grommets; moisture can creep into raw MDF or plywood cores and cause warping around your main access tunnels. Another hard lesson was realizing that the weight of horizontal cable spans requires dedicated internal support, which is why I now use the hidden cable management trick for built-in desks 2 to run horizontal connections without risking sagging shelves. Designing for ease of access from day one will save you countless hours of reconstruction later on.
My Essential Woodworking and Wire Gear
When executing these intricate internal wire runs, using the right tools prevents costly visual and structural damage. Here are the items I swear by on every custom entertainment center build:
- Ultra-Sharp Forstner Bits: Standard twist or spade bits shred veneered plywood. A high-quality Forstner bit leaves glass-smooth edges that won’t nick your cords.
- Heavy-Duty Hook-and-Loop Roll: I buy these in bulk rolls so I can custom-cut straps. They apply gentle pressure to high-end fiber cables while letting you swap gear in seconds.
- Magnetic Access Latches: Instead of screwing false backs into place, I use push-to-open magnetic latches. This makes accessing your vertical chase completely tool-free.
Bring Order to Your Living Space
Now is the time to turn your living room into a clean, wire-free sanctuary. By incorporating these double-back wall strategies into your carpentry plans, you will elevate your next project from a basic DIY build to a professional-grade home theater showpiece. Stop fighting with tangled cables and take control of your entertainment space today. Let’s build some gorgeous, highly functional built-in storage ideas to declutter and enhance your home that stand the test of time.
Have you ever had to pull apart your media cabinet just to plug in a new HDMI cable? Let me know your biggest cable management struggles in the comments below!