

I sat there on the floor at 2 AM, staring at a three-thousand-dollar mistake. My ultra-wide media console, the centerpiece of my “perfect” living room, was visibly dipping in the middle like a tired old bridge. I’d done everything by the book. I used high-grade plywood, solid oak trim, and enough wood glue to sink a ship. But physics does not care about your effort. Gravity is a relentless jerk, and when you are spanning eight feet without center legs to keep that minimalist look, wood alone is going to lose every single time. That night was my breaking point, leading me down a rabbit hole of structural engineering that changed how I build everything from living room units to creative built-ins for seamless storage.
Why Wood Alone Fails on Eight-Foot Spans
Most of us want that sleek, floating look or a massive console that stretches from wall to wall without a forest of legs underneath. I made the classic rookie error of thinking I could just beef up the plywood backing strategy for floating media consoles and call it a day. It did not work. The problem is creep—not the weird neighbor kind, but the structural kind where wood fibers permanently deform under constant load. I eventually learned that even the best hidden support rail needs a backbone that does not breathe or flex. According to the Engineering Toolbox, steel has a Young’s modulus—a measure of stiffness—nearly 20 times higher than most hardwoods. By routing a channel and hiding a cold-rolled steel plate inside the cabinet carcass, you create a spine that effectively ignores gravity. It is the same logic used in the internal ribbing secret for long desktop spans, just applied to your media center.
Is Adding Metal Actually Worth the Extra Effort?
You might be thinking this sounds like overkill. I thought so too, until I had to uninstall a finished unit, strip the finish, and reinforce it after the fact because the doors started sticking. Trust me, doing it twice is way more effort than doing it right once. Integrating stealth steel cleats or internal plates allows you to achieve those impossible, modern designs without the fear of your expensive OLED TV ending up on the floor. It is the ultimate peace of mind insurance for anyone serious about stopping wobbly custom built-ins before they start. Have you ever noticed a tiny, unsettling gap forming between your console and the wall, or a slight dip in the center that was not there six months ago?
Carve Your Way to a Sag-Free Shelf
To beat gravity on an eight-foot span, you have to think like a bridge builder, not just a cabinet maker. The process starts with a 1/2-inch cold-rolled steel plate. You are not just laying this on top; you are performing surgery on your plywood. I use a plunge router with a straight-cut carbide bit to carve a precise channel into the underside of the main horizontal members. This is where most people get nervous—removing material feels like you are weakening the wood. But remember, wood is the skin; the steel is the bone. When you embed 4 internal steel stiffeners that stop massive bookcase shelves into that routed pocket, you create a composite beam that is exponentially stiffer than the sum of its parts. 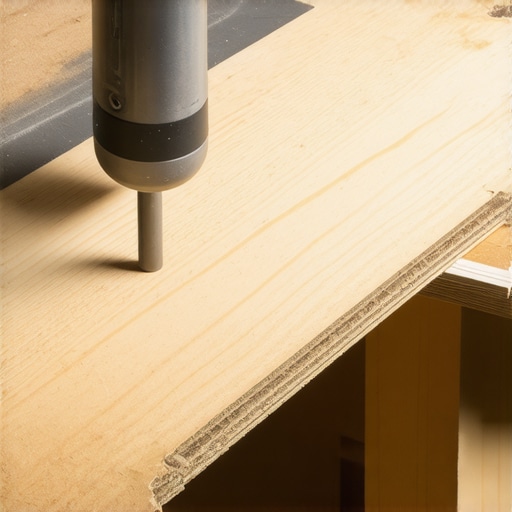
The Invisible Bone Structure for Heavy Loads
I remember building a 9-foot desktop for a home office where the client insisted on a completely open floor space—no legs, no gables, nothing. I thought I could get away with just a thicker face frame. By the time I was applying the second coat of poly, I could see the center dipping just by looking at the reflection of the shop lights. I had to flip the entire unit over and rout in two 1/4-inch steel C-channels. It was a messy, dusty midnight rescue mission, but it taught me that stopping wobbly custom built-ins with 4 hidden steel plate fixes is the only way to sleep at night when you’re dealing with wide spans. The trick is to secure the steel with epoxy and machine screws every six inches, ensuring the metal and wood move as a single, rigid unit.
How to Support Double Sinks Without Those Ugly Center Legs
This structural philosophy is not just for media centers; it is the secret sauce for maximizing your space with custom vanities. If you are trying to figure out how to support double sink vanities without center legs, you apply the same logic. You can use a heavy-duty steel angle iron hidden behind the front apron. This allows you to have a floating vanity that looks light as air but can support the weight of two heavy porcelain sinks and a thick quartz top without a hint of deflection. It is about shifting the load-bearing responsibility from the visible wood to the invisible steel. When you are performing a flawless vanity installation, integrating these hidden rails ensures that your cabinet doors won’t start rubbing or sticking a month after the homeowners move in. Always check your level across the entire span twice—once before the steel goes in, and once after the epoxy cures. If you’re off by even an eighth of an inch over eight feet, your reveal gaps will haunt you forever.
Common wisdom suggests that solid oak or maple is the ‘gold standard’ for high-end cabinetry. I am here to tell you that this belief is a recipe for disaster on an eight-foot span. Solid wood is hygroscopic—it breathes, expands, and shrinks with the seasons. According to the USDA Forest Products Laboratory, wood can change dimensionally by up to 10% across the grain depending on relative humidity. In a massive media center or a long vanity, that means your ‘perfect’ unit is literally trying to tear itself apart twice a year. This is why I almost always opt for high-density, furniture-grade plywood for the main carcass and reserve solid wood for the face frames and trim where movement is less of a structural threat.
Why I Stopped Using Solid Hardwoods for Long-Span Structures
In my early days, I thought using solid wood meant quality. I quickly learned that for stability, engineered cores are superior because they are cross-laminated to resist that inevitable seasonal warping. If you are working in a bathroom, the stakes are even higher. I’ve seen beautiful installs fail because the builder ignored 7 moisture barriers for vanities in high-humidity bathrooms, leading to solid wood panels that cupped and cracked within a single winter. When you are spanning eight feet, you need the predictability of plywood combined with the rigidity of the steel reinforcements we discussed earlier.
Stop Fighting the Wall and Start Scribing
The biggest ‘oops’ factor I see with DIYers and even some pros is the assumption that walls are flat and corners are ninety degrees. They aren’t. They never are. If you build a cabinet perfectly square and try to shove it against a wavy wall, you will end up with gaps that no amount of caulk can hide. This is why your built-in face frames are separating from the wall just a few months later. You must master the ‘back bevel’ and the scribing hack for fitting vanities against out-of-plumb walls. By leaving an extra quarter-inch of material on your stiles and physically carving it to match the specific ‘topography’ of your drywall, you create the illusion that the furniture grew out of the wall itself. 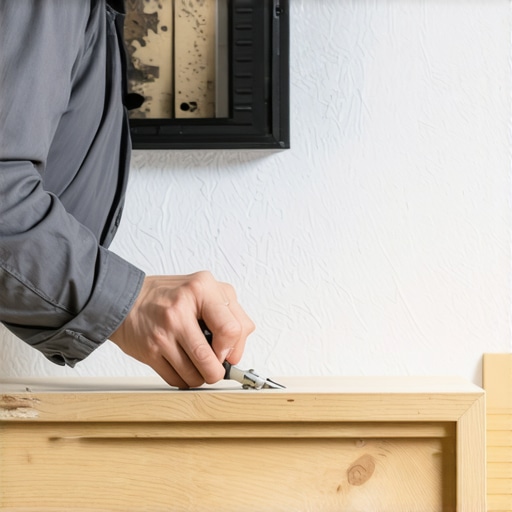
Why do your cabinet doors still rub after a perfect level?
It is the most frustrating moment in a build: you have leveled the cabinet perfectly, yet the doors are still wonky or rubbing against each other. This happens because of ‘racking.’ Even if the base is level, if the cabinet box is not perfectly square in its vertical plane, the doors will never align. I often find that people focus so much on the bubble in the level that they forget to measure the diagonals of the cabinet box. If those diagonals are off by even a sixteenth of an inch, you will be searching for an expert guide to flawless vanity installation just to figure out how to shim the back corner to pull the box back into square. Learning how to fix uneven gaps in custom built-in doors usually starts with realizing the floor isn’t the problem—the way the cabinet is anchored to the wall is. Have you ever fallen into this trap where everything seemed level but nothing fit? Let me know in the comments. Digging into these nuances is what separates a weekend project from a piece of heirloom furniture.
The Toolkit That Actually Survives a Decade of Daily Use
I’ve spent thousands on tools that promised to revolutionize my workflow, but only a handful have actually stayed in the rotation. If you’re serious about scaling your projects from simple boxes to professional-grade creative built-ins for seamless storage, you need a high-end laser level. I use a Bosch GLL3-330CG because it projects three 360-degree green lines. Why? Because green is easier to see in bright rooms, and having three planes means I can square the cabinet to the floor and the wall simultaneously. No more guessing. I also stopped using cheap construction screws for my internal framing. Nowadays, I swear by the GRK Cabinet Screws. They have a built-in washer head that prevents the screw from pulling through the plywood, which is a common reason why your built-in face frames are separating from the wall. Using the right structural screw choice for heavy-duty projects isn’t just about strength; it’s about the precision of the pull.
Keep Your Masterpieces from Creaking and Catching
Long-term results are dictated by the hardware you choose. I’ve seen cheap slides fail in months, turning a $5,000 project into a headache. I strictly use Blum Movento slides now. According to Blum’s technical documentation, these systems are tested for 100,000 open-and-close cycles, which is roughly 20 years of heavy use. But even the best hardware needs a little help. You have to stop pantry pull-outs from jamming with this slide alignment trick: always leave a 1/32-inch ‘breathing room’ on your drawer box width to account for the plywood’s slight expansion. If you don’t, the slides will bind, and you’ll be called back for a repair you can’t charge for.
How do I keep my custom built-ins working like new for years?
Maintenance isn’t about deep cleaning; it’s about moisture management and mechanical checks. For anything in a bathroom or kitchen, you must integrate 7 moisture barriers for vanities in high-humidity bathrooms, specifically sealing the end grain of any plywood that sits near the floor. I also make it a habit to check the hinge adjustment screws every two years. Gravity eventually settles even the best-anchored unit. If you see a gap, don’t wait for it to rub. A quick turn of an adjustment screw can prevent the finish from chipping. Looking forward, I predict we’ll see more ‘smart’ cabinetry integration—think sensors that alert you to a leak under the sink before the wood warps. For now, rely on your eyes and a good set of vanity installation hacks that save time and money during the initial build to ensure longevity.
#IMAGE_PLACE_HOLDER_D#
If you have an eight-foot span coming up, don’t risk the sag—try routing in a steel plate on your next build and see the difference it makes in rigidity.
The Brutal Truths About Wide-Span Engineering
Building massive units taught me that gravity is the only client who never pays and never goes away. Here are the lightbulb moments that saved my career:
- Over-engineering is actually a cost-saver: Spending fifty dollars on a steel plate is far cheaper than spending three days rebuilding a $5,000 unit when it begins to bow.
- Leveling is not a one-time event: Houses move. When you perform a flawless vanity installation, you are setting the stage, but the house will eventually try to knock things out of alignment. Always plan for adjustability.
- Wood is a living thing: Even the best creative built-ins for seamless storage will expand and contract. If you do not account for movement, the wood will find its own way to move—usually by cracking your joints or sticking doors.
The Load-Bearing Toolkit I Swear By
I do not gamble with my reputation, and that means using gear that has proven itself in the trenches. If you want to stop wobbly custom built-ins for good, these are the three tools you need in your shop:
- GRK Cabinet Screws: I have seen standard screws snap under the weight of heavy oak. These are the gold standard because the built-in washer head provides a massive amount of clamping force. Using the right structural screw choice for heavy-duty projects ensures the cabinet stays tight against the wall for decades.
- Blum Movento Runners: When you are maximizing your space with custom vanities, the hardware has to be as strong as the frame. These slides handle the weight of heavy bathroom essentials without flinching.
- Self-Leveling Cross-Line Lasers: Do not trust your old bubble level. A green-beam laser is the only way to ensure your eight-foot span is truly flat across its entire length.
#IMAGE_PLACEHOLDER_E#
Start Your Next Big Project Today
It is easy to feel intimidated by physics, but once you understand how to blend the beauty of wood with the strength of steel, the possibilities are endless. You are not just building a box; you are creating a functional piece of art that defines a home’s character. Whether you are tackling creative built-ins for seamless storage or a massive floating media center, remember that the invisible bones are what make the project an heirloom. Do not be afraid to over-build. Your future self will thank you when those doors still swing perfectly ten years from now. Have you ever faced the mid-span dip on a project you worked hard on? Let me know how you fixed it in the comments below.