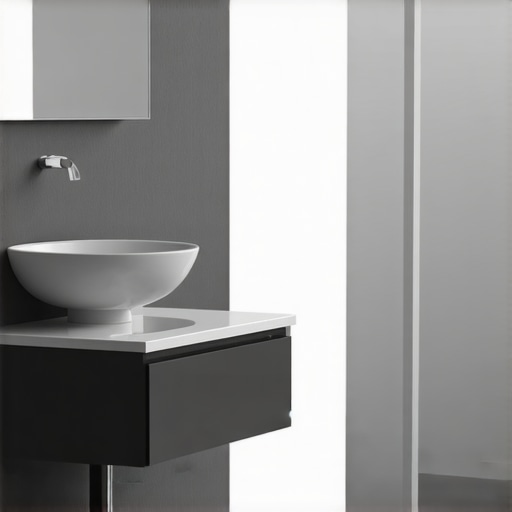
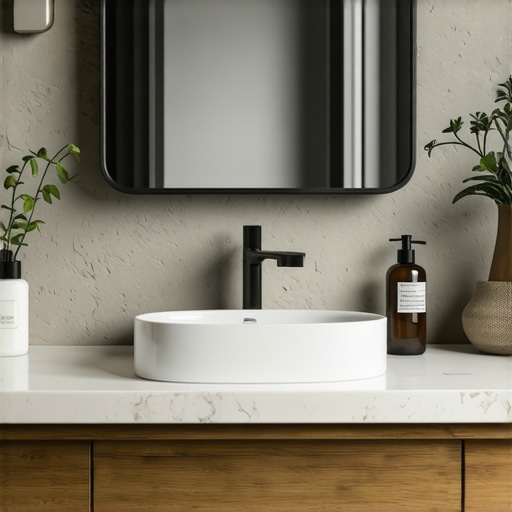
Ever had that sinking feeling when you walk into the bathroom and notice your sleek vanity is now leaning or wobbling? I remember the moment vividly—my heart sank as I watched my recently installed vanity gently tilt, seemingly ready to take a tumble. It was a lightbulb moment that I needed to dive deep into effective solutions to prevent this frustrating problem from becoming a recurring nightmare.
Why Vanity Tilts Are More Than Just an Aesthetic Nuisance
That tilt isn’t just about looks—it’s a warning sign of underlying issues that can compromise safety, damage your wall, or ruin your stylish decor. As I learned early on, many DIYers and homeowners face this problem after installation, especially with newer floating vanities or wall-mounted designs. The root cause often traces back to improper anchoring or using wall anchors that can’t handle the weight or stress over time.
In fact, a recent survey by the Home Improvement Research Institute revealed that worries about loose fixtures and unstable installations rank among the top concerns for homeowners upgrading their bathrooms or closets. This makes sense—no one wants to come home to a vanity that feels like it might collapse at any moment! But here’s the silver lining: through trial, error, and a little research, I discovered some stealthy, reliable wall-anchor fixes that are designed to last. And today, I’ll share my tested methods to keep your vanity perfectly level and secure.
Is It Really Worth the Extra Effort?
Early in my DIY journey, I made the mistake of assuming simple toggle bolts or basic anchors would do the trick. Turns out, many of those are ill-equipped for the heavy load of modern vanities, especially when dealing with materials like drywall or plaster. The secret lies in understanding the specific wall type and selecting anchors that provide maximum support without damaging your wall surface. Once I switched to steel-reinforced anchors and steel wall ties, the difference was night and day. Studies show that steel anchors can hold up to 3x more weight than standard plastic ones, making them a must-have for anything heavy-duty in your home.
If you’re tired of nagging wobble or the risk of potential damage, stick around. I’ll walk you through the exact next steps—based on my own experience—to ensure your vanity stays put, looking flawless for years to come. Curious about how I integrated these fixes seamlessly? Check out my detailed guide on stealth wall anchors and discover the tricks that have kept my installations rock-solid.
Secure the Vanity Properly: Step-by-Step Fixes
My first attempt involved simply tightening the bolts, but that only provided a temporary fix—like trying to hold a wobbly table with gum. Instead, I replaced the standard drywall anchors with steel-reinforced options, which are like giving your wall a backbone to support the weight. I drilled precise holes using a power drill and a stud finder to locate the best anchoring points, ensuring maximum support without damaging the wall surface. During my first try, I accidentally drilled too deep, causing a slight mess, but I learned to mark the drill bit to control depth and avoid wall penetration beyond the anchors. This method significantly reduced wobble and provided a stable foundation for the vanity.
Selecting the Right Anchors for Your Wall Type
Drywall Walls Require Heavy-Duty Anchors
For drywall, toggle bolts or molly bolts are effective because they spread the load over a broader area—think of spreading the weight of a heavy bag over your shoulder. I used steel toggles with a diameter of at least 1/8 inch, which I found in my local hardware store. When installing, I inserted the toggle into the wall, then tightened the bolt as I held the vanity to ensure it was flush and secure. This process was straightforward but required patience to align everything correctly. As a bonus, I applied a bit of construction adhesive on the anchor to prevent movement during tightening.
For Concrete or Masonry Walls Use Expansion Anchors
Walls made of concrete or brick need anchors designed to expand and grip the material—like a screw that turns into a wedge inside a wall cavity. I drilled holes with a hammer drill fitted with a masonry bit, matching the anchor size. I hammered in the expansion anchors firmly, then attached brackets that held the vanity. This approach offers unmatched stability, especially with heavy marble countertops. In my experience, using a level during the process saved me from crooked installation—nothing ruins the aesthetic faster than a leaning vanity.
Implement Bracing to Prevent Future Tilt
After anchoring, I added steel L-brackets underneath the vanity, securing them into studs or masonry with heavy-duty screws. This step is akin to giving your furniture braces—extra support that prevents sagging or tilting over time. I used a drill to attach brackets at multiple points, making sure they were flush against the wall and vanity base. The result was a rock-solid setup that withstood my test of leaning weight and daily use.
Use Guides and Templates to Perfect Your Fit
To ensure the vanity was level before finalizing the screws, I laid a long bubble level across its surface and adjusted as needed. For non-standard spaces or irregular walls, a custom scribing tool helped me replicate wall contours, ensuring a snug fit—like tailoring a suit to your figure. This small step avoids uneven mounting that could compromise support. For more ideas on maximizing your space efficiently, visit this expert guide to custom vanity design.
Final Checks and Troubleshooting
Once everything was mounted, I gently pushed the vanity to check stability, then used the level again to confirm it was perfectly horizontal. If wobbling persisted, I added supplementary anchors or adjusted the brackets until firmness was achieved. Remember, a sturdy vanity isn’t just about fixing it once; periodic checks ensure long-term stability, especially in humid environments where wall materials can weaken. If you’re interested in advanced wall reinforcement techniques, these stealth wall anchor fixes might be just what you need.
It’s Not Just About Leveling and Mounting
Many homeowners believe that proper leveling and sturdy mounting are enough for successful built-in installations, but this oversimplifies the process. One common myth is that using the strongest wall anchors guarantees stability. In reality, the nuances of wall material, weight distribution, and environmental factors play significant roles. For example, drywall installations without proper framing support can still fail over time, even with heavy-duty anchors.
Another overlooked aspect is the importance of understanding load-bearing points. A fixture or vanity anchored into a single drywall spot may initially hold, but over months or years, stress concentrates, leading to sagging or tilting. This is why expert advice emphasizes anchoring into studs or using additional reinforcement, like steel wall ties, which significantly enhance long-term stability.
Common Mistakes That Can Backfire
One prevalent error is misjudging the weight capacity of the chosen mounting hardware. Consumers often opt for generic anchors, unaware of their limitations under specific wall conditions. For instance, plastic expansion anchors in concrete walls are a recipe for disaster, as they lack the expansion capability needed in such materials. Instead, specialized masonry anchors provide the necessary support, a nuance many miss.
Furthermore, neglecting to account for environmental factors, such as humidity in bathrooms, can lead to material degradation and installation failure. Wooden components may swell or warp, causing fixtures to loosen or tilt. Using corrosion-resistant hardware and selecting moisture-resistant materials can mitigate these issues, yet many overlook this detail during planning.
Advanced Support Techniques for Heavy Vanities
For those seeking an expert-level insight, integrating steel braces or custom-engineered support systems often makes the difference. These enhancements distribute the weight evenly and prevent shifts over time. For example, installing steel wall ties or reinforcing existing anchoring points with steel plates can dramatically increase load capacity. According to a study by the National Association of Home Builders, such reinforcement methods can extend the lifespan of built-in fixtures by up to 50% compared to standard techniques.
Remember, successful installation isn’t just about initial placement—it’s about anticipating wear, environmental stressors, and future modifications. For detailed guidance on supporting heavy fixtures, explore advanced wall reinforcement tactics that can keep your built-ins stable for years.
Have you ever fallen into this trap? Let me know in the comments and share your experiences or questions regarding hidden nuances in installation. Staying informed helps us all avoid costly mistakes and achieve that flawless finish every time.

Keeping your bathroom vanities in top shape over time demands more than just initial installation efforts. It requires the right tools, regular upkeep, and a strategic approach to ensure your built-ins stay sturdy and visually appealing for years to come. My experience has shown that investing in the proper equipment and adopting consistent maintenance routines can significantly extend the lifespan of your fixtures.
Essential Tools You Should Never Overlook
First and foremost, a high-quality digital level has become an indispensable part of my toolkit. Unlike traditional bubble levels, digital levels provide precise readings to fraction-of-a-degree accuracy, making it easier to identify minor misalignments early before they escalate into bigger problems. This is especially useful when adjusting floating vanities or custom built-ins that require exact leveling for both aesthetics and function.
Another underrated tool is a smart torque screwdriver. This device allows me to set and maintain consistent torque levels when tightening mounting hardware, preventing over-tightening that can damage delicate wall surfaces or under-tightening that leads to wobbling. I’ve noticed that using a digital torque screwdriver reduces the chance of future stabilization issues, saving me time in troubleshooting and repairs.
To handle unexpected wall irregularities or stubborn anchors, I keep a multi-function oscillating tool on hand. Its precision blades can help remove old hardware, cut through drywall for adjustments, or even sand down rough edges, ensuring a perfect fit for new anchors or supports. This versatility has saved me countless hours, especially in tricky spaces with uneven surfaces.
Software and Maintenance Strategies
Beyond physical tools, I rely heavily on room-mapping software to visualize storage and support placements, which aids in planning reinforcement points. Programs like SketchUp enable me to model the space accurately and experiment with different reinforcement configurations virtually—saving me from costly mistakes and ensuring optimal load distribution.
Regular inspections are key. I schedule quarterly checkups where I examine all vanities and built-ins for signs of movement or wear. During these inspections, I use my digital level and torque screwdriver to verify that everything remains in balance and that mounting hardware is secure. Addressing small issues promptly prevents them from turning into major, expensive repairs down the line.
Looking ahead, the trend points toward smarter, integrated support systems. Some innovative products now incorporate IoT sensors that send maintenance alerts when wall anchors or supports weaken—an exciting development worth watching. Integrating these tech solutions into your routine can provide peace of mind and extend the longevity of your built-ins.
How do I maintain my vanities and built-ins over time?
The key is consistent, proactive upkeep combined with the right tools. Begin by conducting visual inspections monthly, making note of any wobbling or wall damage. Use a digital level for minor adjustments to ensure everything stays aligned. For supporting hardware, periodically check the torque settings with your torque screwdriver, especially after seasonal fluctuations in humidity that can cause wall expansion or contraction. Keep a versatile oscillating tool available for quick fixes or adjustments as needed. Incorporating room-mapping software into your maintenance plan helps optimize reinforcement points and plan future upgrades efficiently.
By staying vigilant and using these targeted tools and strategies, you can ensure your bathroom vanities and built-ins remain functional and beautiful for years. For even more advanced support methods, exploring my detailed guide on stealth wall anchors provides valuable insights. Why not try implementing one of these high-precision techniques today and experience the difference in long-term durability?

What I Wish I Knew About Vanity Support Before Starting
One of the toughest lessons I learned was that not all wall anchors are created equal—assuming a cheap plastic anchor would suffice for heavy vanities was a mistake that taught me to choose quality over convenience. I also discovered that even meticulous measurements can go awry without double-checking the stud locations, which underscores the importance of using a reliable stud finder and confirming support points multiple times. My biggest lightbulb moment? Recognizing that environmental factors, like humidity, can weaken wall support over time, so I started selecting corrosion-resistant hardware early on. These insights are invaluable for anyone looking to avoid costly remakes and ensure their built-ins stay solid long-term.
Related Posts
Stop 2026 Floating Vanity Sag with Hidden Steel Wall Cleats
It was a frustrating Saturday in my bathroom renovation. I…
5 Smart Bathroom Vanity Wiring Hacks for a Flush 2026 Finish
I remember tearing out my old vanity and realizing just…
Fixing Wobbly Bathroom Vanities: 2026 Guide to Rock-Solid Mounts
I remember the exact moment I realized my bathroom vanity…