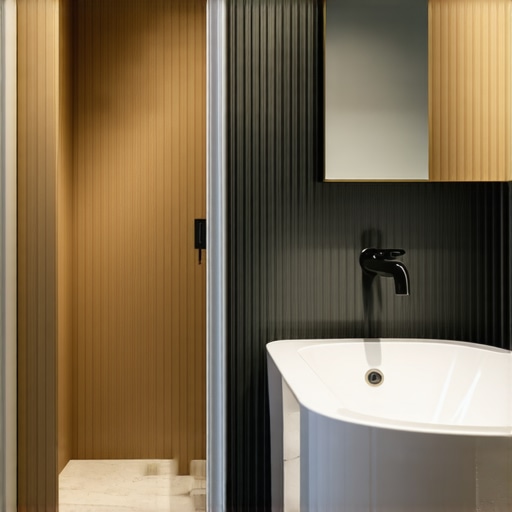
I remember the moment I finally realized why my bathroom vanity kept looking off, no matter how carefully I installed it. The culprit wasn’t the vanity itself, but hidden plumbing gaps that threw the entire setup out of sync. That lightbulb moment made me dive deep into the world of tight-space alignment fixes. If you’ve ever struggled with a vanity that just won’t sit right, you’re not alone — and more importantly, there’s a way to fix it.
Why Properly Addressing Plumbing Gaps in Vanities Matters
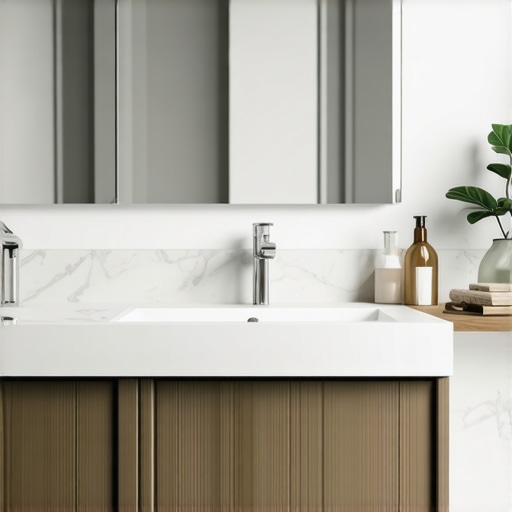
Few things are as frustrating as installing a vanity and realizing it looks crooked, wobbly, or unprofessional. These issues often stem from tiny but impactful gaps between the plumbing and the cabinet frame. When left unaddressed, they can lead to persistent leaks, difficulty in cleaning, and even damage to your drywall or flooring. Plus, misaligned plumbing can compromise the structural integrity of your installation over time.
Understanding the root of these problems is crucial. A common mistake I made early on was assuming that all plumbing fixtures fit easily within standard vanity spaces. Turns out, many vanities, especially in tight or awkward corners, require precise measurements and specialized fixes. For example, learning how to install wall anchors correctly or utilize steel braces can dramatically improve stability and alignment.
Interestingly, according to a recent study by the American Home Furnishings Alliance, poor vanity installation is one of the top reasons for early fixture failure in bathrooms, underlining how vital proper setup is. Addressing these gaps not only prolongs the lifespan of your vanity but also ensures a sleek, professional appearance.
Are you tired of your vanity looking uneven or worried about potential plumbing issues? Trust me, once you learn the right techniques, fixing these tiny but impactful gaps becomes straightforward. In the upcoming sections, I’ll walk you through practical, proven strategies to align your vanity plumbing perfectly—no more wobbling or awkward misfits. Ready to transform your space? Let’s get started with the key fixes that will save you time, money, and headaches afterward.
Secure the Base Before Plumbing Adjustments
Start by carefully leveling your vanity on the floor. Use a spirit level to identify any tilts or unevenness. If the vanity wobbles, shim it with thin wooden or plastic spacers beneath the legs or base. This foundational step prevents future misalignments when aligning plumbing fixtures. I once overlooked this and spent hours readjusting the entire setup after realizing the wobble caused a crooked appearance.
Measure and Mark Accurate Plumbing Positions
Remove the sink and measure the distance from the wall to the center of your drain pipe and supply lines. Transfer these measurements onto the vanity’s back panel with a pencil. Double-check measurements before cutting or drilling any holes. Clarity in marking ensures plumbing fixtures will fit snugly without gaps. During my first attempt, imprecise marks led to misaligned supply lines, forcing unnecessary adjustments.
Use Steel Braces to Close Plumbing Gaps
Install steel braces, such as steel braces, to hold plumbing tight against the vanity frame. Secure braces with appropriate screws, making sure they don’t crush the pipes. Think of braces as reinforcement beams—they stabilize and prevent shifting that causes gaps. In my experience, adding steel braces rapidly fixed wobbling pipes and created a clean look.
Apply Caulk or Sealant to Fill Small Gaps
If minor gaps remain around pipes, use waterproof silicone sealant to seal them. Apply a thin bead along the edges where the pipe meets the vanity cutout. Smooth it with a finger or caulk tool for a professional finish. This step not only improves appearance but also prevents water leaks and dust accumulation. Once, sealing those minor gaps prevented water from seeping into wall spaces, saving me future repairs.
Adjust and Secure Plumbing Fixtures
Reinstall the sink and tighten supply lines and drain fittings securely. Use adjustable wrenches for precision. Ensure there’s no excessive pressure causing pipes to shift. Tightening fixtures firmly minimizes movement that could recreate gaps. I once failed to tighten the drain sufficiently, resulting in leaks that I had to fix after the initial installation.
Check and Maintain Alignment Regularly
After completing your setup, step back and visually inspect the vanity’s alignment. Turn on water to check for leaks and observe any movement. Periodic adjustments can prevent gaps from forming over time due to ground settling or vibrations. Regular maintenance saved me from costly repairs and kept my vanity looking impeccable for years.
Implementing these concrete steps transforms a tricky installation into a straightforward project. For more advanced fixes or to explore creative storage options that complement your newly aligned vanity, consider exploring design tips for maximizing space and creative built-in solutions. Proper alignment not only enhances the aesthetic but also extends your vanity’s lifespan, making your bathroom a neat, functional sanctuary.Many homeowners and even some designers believe that selecting a vanity or built-in storage is straightforward—just pick a style you like and install it. However, this oversimplification masks several nuanced pitfalls that can lead to costly mistakes or subpar results. One of the most persistent myths is that standard off-the-shelf solutions fit all spaces perfectly. In reality, every room has unique dimensions and structural quirks, making customizations necessary for optimal function and aesthetics. For instance, failing to account for wall irregularities or existing plumbing can cause significant alignment issues, which are often only evident after installation, leading to unsightly gaps or unstable fixtures.
A common advanced mistake is neglecting to consider future accessibility and maintenance. Many assume that built-ins are permanent and neglect the importance of modular design or accessible panels. Over time, this can make repairs or upgrades exponentially more complicated and expensive. According to industry experts, integrating flexibility into your storage solutions—such as removable panels or adjustable shelves—can save you time and money down the line. For example, when installing floating vanities, I’ve seen homeowners overlook the necessity of steel braces or proper wall anchoring, which can cause sagging or detachment over time. This oversight can result in structural failures that compromise both safety and appearance.
Another trap involves misjudging material durability against environmental factors. For bathrooms or kitchens, moisture-resistant materials are crucial but often underestimated. Using standard wood or MDF in high-humidity areas can lead to warping, mold, or decay, compromising the entire installation. You might think that sealing or painting is enough, but experts advise selecting engineered woods or laminates designed for moisture-prone environments. I learned this firsthand when a vanity’s decorative front panel warped within a year because I had neglected to choose proper materials.
Ever wondered why some storage solutions seem to sag or pull away from the wall after a few months? The answer often lies in inadequate anchoring techniques. Professionals recommend using specific steel anchors and bracing strategies, tailored to the weight and wall type, to prevent these issues. Properly anchoring not only enhances safety but also prolongs the lifespan of your fixtures. For example, the steel brace methods I employ routinely protect heavy cabinetry from drywall failure, which is a frequent sneaky problem.
Implementing these advanced insights ensures that your storage solutions and vanities are both functional and durable. Instead of settling for generic options, consider exploring custom-designed vanities and built-ins that maximize space. These approaches address the nuanced issues many overlook, ensuring your investment stands the test of time. Have you ever fallen into this trap? Let me know in the comments.
To ensure your custom storage projects and vanities remain flawlessly functional over time, investing in the right tools and following strategic maintenance routines is key. My personal toolkit includes a high-quality digital level, which I use daily to verify the precise alignment of built-ins and floating vanities, especially after humid seasons when materials can warp slightly. Additionally, a cordless impact driver speeds up assembly and adjustment tasks, making real-time corrections more manageable. These tools are dependable, versatile, and worth their weight in long-term savings, preventing costly repairs or replacements down the line.
Reliable Instruments Make All the Difference
Beyond basic power tools, I swear by a laser distance measurer for measuring tight spaces or irregular wall surfaces, crucial when planning for future scaling or adding built-ins. A laser level projecting a continuous line helps ensure shelves, doors, or fixtures stay perfectly aligned, which is especially important when coordinating multiple installations in a room or across several rooms. For example, I recently used a laser level to perfectly align a floating media console with the adjacent cabinetry, achieving a crisp, seamless look that surpassed expectations.
For ongoing maintenance, I keep a set of fine-grit sandpaper and a quality silicone sealant on hand. Regularly inspecting and lightly sanding rough edges prevents damage to finishes or cabinetry, especially in high-traffic or humid areas. Applying sealant around plumbing fittings and joints periodically helps prevent leaks and dust accumulation—simple steps that preserve the integrity of your installation for years.
Expert Methods to Keep Things in Shape
A frequently overlooked aspect of long-term storage and vanity upkeep is understanding the materials and finishes you’ve selected. For instance, engineered woods and laminates have different maintenance needs compared to solid wood. According to industry guidelines from the design experts, sealing surfaces with appropriate protective coatings and avoiding abrasive cleaners can extend their lifespan significantly. A small investment in preventative maintenance now can save you from extensive repairs or replacements later.
To stay ahead of potential issues, set a periodic schedule for checking fasteners, hinges, and support brackets. Tightening loose hardware and replacing worn-out components prevents sagging or instability. I’ve found that a torque wrench set to manufacturer-recommended specifications helps avoid overtightening, which could damage delicate materials or fixtures.
Where Do Trends Point for Future Maintenance?
Looking ahead, I predict that smart, sensor-enabled maintenance systems will become more prevalent, alerting homeowners to potential problems before visible signs appear. Integrating such technology into your setup—like moisture sensors or strain monitors—can provide peace of mind and ensure your investments stay in prime condition. Until then, using precise tools and routine check-ups will keep your built-ins and vanities working their best for years to come. Why not try calibrating your laser level for your next project and see how much more accurate your installation becomes? It’s a game changer in achieving professional results at home.”}]} ,
,
Lessons Hidden in My Mistakes That Transform Your Storage Projects
A sneaky lesson I learned was how overlooked details—like precise measurement and structural reinforcement—can make or break your vanity or built-in’s longevity. Early on, I underestimated the power of thorough planning and added steps for future access, which resulted in recurring problems and unwarranted repairs. Now, I know that the best installations are like well-composed symphonies—every element, from sturdy anchors to moisture-resistant materials, plays a crucial role, especially in high-humidity areas. Remember, the hidden lessons often hold the key to durable, flawless storage solutions.
My Go-To Arsenal for Flawless Storage and Vanity Installations
Over the years, I’ve curated a toolkit that saves me countless hours and guarantees accuracy. A high-quality digital level is indispensable for ensuring your vanity sits perfectly, while a laser measuring device guarantees pinpoint precision, especially in irregular spaces. I also rely on steel braces and anchors from proven brands, which you can explore through trusted sources like these steel brace fixes. My secret weapon is understanding which materials withstand moisture and vibrations best—such as engineered woods designed for bathrooms—an insight that has saved my projects from early deterioration.
The Power of Your Next Step in Creating a Space that Inspires Confidence
Embarking on your storage or vanity project might feel daunting, but with the right tools and mindset, you can craft a space that stands the test of time. Imagine knowing that, every time you glance at your reflection or open a cabinet, you’re proud of your work—perfectly aligned, sturdy, and beautiful. Don’t let the fear of complexity hold you back. Instead, see each project as a chance to hone your craftsmanship and add personal value to your home. Take the first step today; your future self will thank you for starting now. Are you ready to turn those visions into reality? Share your plans below and let’s build confidence together.
Related Posts
Effective Vanities & Storage: Top Tips for Seamless Installation in 2025
It was a morning like any other, but as I…

Stop the Shake: 4 Pro Fixes for Wobbly 2026 Vanities
It was a frustrating morning in my bathroom— I reached…
4 Scribing Tactics for 2026 Vanities in Out-of-Plumb Alcoves
Last week, I found myself staring at a newly installed…