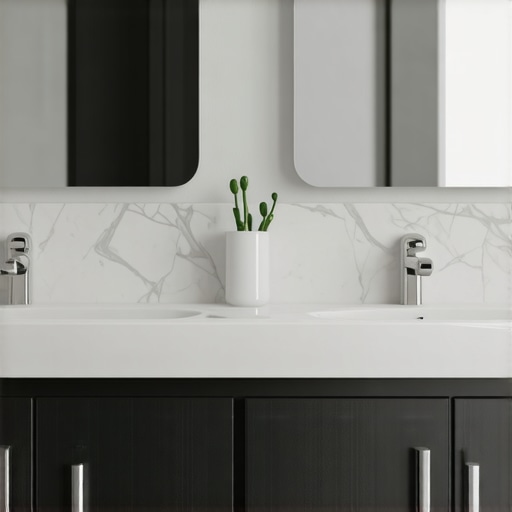
Imagine this: you’re finally installing that sleek, custom vanity you’ve envisioned for your bathroom. The measurements are spot-on, the design is perfect, but as you connect the plumbing, you realize there’s a tiny, maddening gap. It’s just enough to catch your eye and make the whole project feel unfinished. I’ve been there. After struggling with these elusive gaps myself, I had an aha moment: even the most precise plans can fall apart in tight spaces if you don’t account for specific, often overlooked alignment challenges.
Why Tiny Gaps Can Ruin Your Bathroom Makeover
Those small misalignments might seem insignificant, but they can lead to big problems—water leaks, mold, or just that feeling of something being off every time you see it. Plus, in limited spaces, even a quarter-inch shift can make it impossible to close drawers or doors properly. I learned this the hard way early on when my vanity’s plumbing didn’t line up, causing leaks and frustration. It was a costly mistake that could have been avoided with a few smart fixes. To save yourself the headache, I want to share five tried-and-true solutions for tight-space plumbing alignment issues, especially for vanities that are nestled right up against walls or other fixtures.
Is Professionals’ Fixes Overhyped, or Are They Worth It?
Honestly, I initially thought I could handle these adjustments myself. I was wrong. My first attempt involved rigidly forcing fittings into place, which only worsened the gaps and risked damaging the fixtures. It wasn’t until I consulted with a seasoned plumber and learned the importance of specialized tools and techniques that things improved. That mistake taught me the value of expert tips, and it’s a lesson I’d love to pass along to you. Want to discover how to prevent these issues before they happen? Let’s dive into the solutions that transformed my bathroom from a frustrating space into a flawless setup. For more ideas on optimizing space and avoiding common installation pitfalls, check out this helpful guide to maximizing your space with custom vanities.
This is just the beginning—next, we’ll explore practical fixes to ensure your vanity plumbing fits perfectly, no matter how tight the space. Ready to get your hands dirty and perfect that install? Let’s go.
Measure Before You Cut and Fit
Start by double-checking all measurements of your vanity and plumbing connections. I once rushed into installing a new faucet without verifying the pipe lengths, which led to awkward bends and gaps. Use a tape measure to gauge the distance from the wall to the connection points accurately. This initial step saves you from headaches down the line and ensures components fit snugly without forcing them into place. Think of it like an architect laying out blueprints—you want every piece to align precisely before assembly.
Use Flexible Connectors to Bridge Gaps
Rigid pipes are unforgiving—they don’t adapt to minute misalignments. I recommend switching to flexible connectors or braided hoses for drain and supply lines. These act like the punctuation in a sentence, allowing slight adjustments without squeezing or bending. When I replaced my stiff copper lines with flexible hoses, I was amazed at how much easier it became to align everything perfectly, reducing gaps and preventing leaks.
Employ Shims and Spacers for Precise Positioning
When installing the vanity against the wall, gaps often appear due to wall irregularities. Inline with techniques for built-in storage here, using shims is invaluable. Place thin strips of wood or plastic behind the vanity to level it out, ensuring a flush fit without forcing or damaging the cabinetry. I once used cardboard shims temporarily to test fit before securing, which helped identify uneven parts and guided permanent adjustments.
Tip: Avoid Over-tightening Connections
It’s tempting to tighten fittings to the max, but this can warp or crack fixtures, creating further gaps. Instead, tighten just enough to create a snug fit—think of it like turning a screw until resistance is felt, then a quarter turn more. During a recent project, I over-tightened the supply valve and cracked the ceramic fitting, leading to leaks. Learning this lesson the hard way underscored the importance of gentle, deliberate tightening.
Seal Gaps with Waterproof Caulk
Even after aligning everything perfectly, tiny imperfections might remain. A bead of waterproof silicone caulk around the base of the vanity and along pipe edges can seal minor gaps, preventing water infiltration and mold growth. I applied caulk around the base of my vanity after installation, and it not only improved waterproofing but also gave a polished finish. Remember to smooth out the caulk for a professional look and check for any excess that might clog your pipes.
Implement Reinforced Support for Heavy Fixtures
Heavy vanities or sinks can sag over time if unsupported, exacerbating gaps. Installing steel brackets or plates, like those discussed in here, provides the extra support needed to keep everything aligned. For example, I recently added steel L-brackets underneath my heavy marble vanity, which eliminated any shifting and maintained a perfect seal over months. These supports are a lifesaver when dealing with substantial fixtures in tight spaces.
Final Check and Adjustment
Once everything is installed, turn on the water slowly and observe the connections for leaks or misalignments. Use a flashlight to inspect tight spots and adjust shims or fittings as needed. I once noticed a small leak caused by a slightly loose connection; tightening that remedied the problem instantly. Think of this step as your quality control, ensuring your hard work translates into a flawless, gap-free setup that lasts.
Even experienced homeowners and renovators often assume that choosing the right vanity style or storage solution is enough to guarantee a flawless installation. In reality, many get caught off guard by subtle details that can compromise both aesthetics and durability. One common misconception is that all vanities are interchangeable, regardless of the wall backing or floor conditions. However, materials like drywall, plaster, or uneven concrete require different mounting techniques and reinforcement. Failing to account for these nuances can lead to wobbly fixtures or, worse, structural damage over time. In my deep dives into professional installation practices, I’ve uncovered that overlooked factors like wall studs accessibility and moisture-resistant framing play a critical role in preventing future issues.
Many people believe that seamless built-ins are just about perfect measurements and clean finishes, but they often neglect the importance of hidden support structures. For instance, heavy built-ins placed without proper reinforcement can sag or detach, causing gaps and instability. Skilled designers emphasize the need for steel brackets or concealed wall anchors that can handle load-bearing demands without sacrificing clean aesthetics. According to expert consensus in the industry, proper support not only extends the lifespan of your fixtures but also simplifies maintenance and future upgrades.
Another widespread myth is that storage solutions should prioritize capacity over accessibility. While maximizing space is tempting, the real genius lies in smart, hidden compartments that keep clutter out of sight yet within easy reach. This requires intricate planning, such as scribing cabinetry to uneven walls or integrating recessed power outlets for electronic devices. Advanced homeowners often invest in custom solutions that blend seamlessly with their interior design, creating a harmonious balance of form and function. If you’re thinking of upgrading your home, learning these nuanced techniques can elevate your project from basic to professional quality.
Have you ever fallen into this trap? Let me know in the comments.
What are the risks of not considering wall material variations during installation?
Inadequate preparation for different wall types can lead to insecure mounting and long-term damage. For example, mounting heavy vanities on drywall without proper anchors may cause the fixture to pull away, damaging your wall and creating gaps. Conversely, ignoring the presence of moisture-prone areas can lead to mold and deterioration of the cabinetry over time. A professional approach assesses wall composition carefully, utilizing specific fasteners and reinforcements tailored for each scenario. Industry studies highlight that improper anchoring accounts for a significant percentage of post-installation failures, emphasizing the importance of nuanced site evaluation.
To prevent these pitfalls, it’s wise to consult detailed guides and expert opinions on installation best practices. For example, exploring [expert design tips](https://customcabinetrypro.com/maximize-your-space-with-custom-vanities-expert-design-tips) can provide insights into tailored reinforcement methods. Remember, successful vanities are not just about looks—they’re about smart engineering beneath the surface.
Ensuring your bathroom vanities and built-in storage solutions remain functional and visually appealing over time requires the right tools and regular maintenance routines. I personally rely on a combination of specialized equipment and strategic practices that make upkeep more effective and less time-consuming.
Invest in Quality Adjustment Tools for Precise Fittings
One of my go-to tools is a digital angle finder. This device helps me quickly assess whether surfaces and fixtures are perfectly level or aligned, which is critical when maintaining tight seals around plumbing or fitting built-ins flush against uneven walls. I’ve found that using a high-quality digital level, like the Stabila Digital Laser Level, dramatically improves accuracy, reducing the need for frequent readjustments or repairs down the line.
Maintain Plumbing with Specialized Cleaners and Inspection Cameras
Regularly inspecting plumbing connections is essential, especially for vanities tucked into confined spaces. I use a compact camera inspection tool to peer into hard-to-see areas behind fixtures, helping spot leaks, buildup, or misalignments early. Pairing this with non-abrasive, biodegradable cleaning solutions ensures any minor issues are caught before they escalate into costly repairs. Predicting where problems might occur allows for preemptive maintenance, prolonging your fixtures’ lifespan.
Adopt Modular Storage Solutions for Long-Term Flexibility
Flexibility is key when scaling or modifying storage over time. I recommend modular storage systems like adjustable shelving or pull-out drawers with integrated soft-close mechanisms. These components are easy to reconfigure as your needs evolve, saving you from complete rebuilds. Tools such as a 3D router allow me to customize panels or trim to perfectly match existing cabinetry, ensuring seamless aesthetics regardless of adjustments.
Use Multi-Purpose Sealants for Durability
Applying waterproof, flexible sealants like silicone-based caulk in strategic areas helps prevent water damage and mold growth. I prefer high-grade sealants from brands like GE, which maintain their adhesion and elasticity despite temperature fluctuations. Regularly checking and renewing sealants—especially around plumbing joints and vanity bases—protects your investment in long-term durability.
Implement Preventive Measures with Smart Sensors
Thinking ahead, installing water leak sensors connected to your smart home system provides peace of mind. When triggered, these sensors alert you immediately, allowing swift action to prevent damage. I’ve integrated sensors beneath sinks and near water heaters, which have saved me from potential flooding and water wastage. As technology progresses, expect these systems to become more affordable and integrated with maintenance schedules, making proactive upkeep even easier.
In the future, I believe the trend will move toward smarter, AI-driven maintenance systems that not only alert you of issues but also suggest specific fix routines. Embracing these innovations early can keep your built-ins performing optimally for years.
How do I maintain built-in storage and vanities over time?
Consistent cleaning, periodic inspection of seals and joints, and updating support structures as your needs grow are crucial. Using the right tools like adjustable wrenches, sealant guns, and inspection cameras ensures efficiency and effectiveness. For example, effortless storage solutions can be adjusted easily with minimal disruption, helping your space remain tidy and functional. I recommend you try installing a waterproof sealant in one of your vanity joints this week—it’s a simple step that provides lasting protection and peace of mind.
Lessons Hidden in My Biggest Installation Oops
- One lesson I learned the hard way is the importance of considering wall irregularities before installing built-ins; ignoring wall imperfections can lead to wobbling fixtures and ongoing gaps, which costs time and money to fix. Never assume your walls are perfectly straight—always test and shim for a snug fit.
- Another insight is the underestimated power of flexible connectors in plumbing; rigid pipes seem straightforward but lack adaptability. Switching to braided hoses made my plumbing alignments simple, preventing leaks and easing future adjustments.
- Finally, I realized that supporting heavy vanity units with steel brackets or plates not only preserves stability over time but also maintains perfect alignment. Skimping on support can cause sagging and gaps—invest in reinforcement from the start for long-lasting results.
Tools and Resources That Changed My Approach
- Digital Level and Laser Tools: These powered precision tools help me ensure every installation is level and aligned, reducing guesswork and post-installation tweaks. Trust me, their accuracy saves hours.
- Quality Sealants like GE Silicone: Waterproof, flexible, and durable sealants are essential for preventing water infiltration around plumbing and vanity bases—peace of mind in high-moisture areas.
- Modular Storage Systems: Adjustable drawers and shelving components allow me to reconfigure as needs evolve, keeping storage functional and organized without major overhauls.
- Inspection Cameras: Small, portable, and effective, these cameras let me peer into tight spaces for early leak detection or structural assessment, keeping repairs manageable.
Embrace Your Next Vanities Project with Confidence
Remember, every perfect vanity or built-in starts with understanding the unique quirks of your space and applying practical, well-thought-out solutions. This process isn’t just about aesthetics but about creating a durable, functional haven tailored to your lifestyle. Dive into the [latest trends](https://customcabinetrypro.com/top-trends-in-vanity-designs-you-need-to-know-in-2025) to inspire your design, and don’t hesitate to experiment with new support and alignment techniques. Your ideal bathroom oasis is within reach—start today with confidence and inside knowledge that only comes from real-world experience. What’s the most challenging part of your vanity installation journey so far? Share below!
Related Posts
5 Steel-Cleat Fixes for 2026 Floating Double Vanities
I remember the exact moment I realized I had underestimated…
5 Hidden Bracing Fixes for 2026 Kitchen Corner Vanities
It was a morning like any other—until I opened my…
5 Costly Bathroom Vanity Installation Errors to Fix in 2026
I still remember the moment my bathroom vanity slipped unexpectedly…