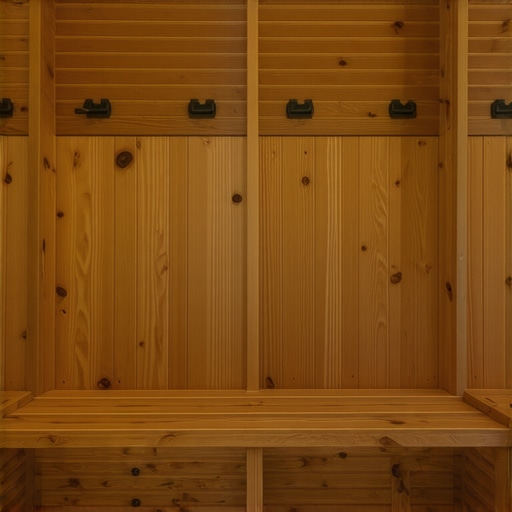
It was one of those mornings where I opened my front door, and instead of a tidy entryway, I was greeted by the chaos of a wobbly bench and clutter spilling onto the floor. Frustration washed over me as I realized my trusty entryway bench was failing — uneven, wobbly, and not quite hiding the problem I really wanted to solve: my Hide Your 2026 Robot Vacuum. That lightbulb moment made me wonder: how could I make this piece not just functional but also seamlessly stealthy for my robotic helper?
Transforming Your Entryway Bench: Small Mods, Big Impact
Now, I want to share how I tackled this challenge with four simple yet effective mods that turned my entryway bench into a stealth-friendly spot. Not only did these tweaks improve stability, but they also helped hide my robot vacuum docks without sacrificing style or accessibility. If you’re dealing with a similar problem—clunky furniture pulling focus or wobbling under weight—you’re in for a game-changer.
Is Stealth Entryway Storage Oversold? My Take
Early on, I made the mistake of thinking that hiding my vacuum was about installing fancy cabinetry. Turns out, a few strategic mods sufficed. I learned the hard way that overengineering — like trying to hide a dock behind a full cabinet — can backfire, making access more difficult and compromising usability. Trust me, a little planning and simple mods can do more than you think. For more insight on how to optimize your space effectively, check out these storage hacks.
So, if you’ve faced the frustration of a cluttered, wobbling entryway that just doesn’t seem to hide your tech or tools well, keep reading. I’ll walk you through my step-by-step mods that keep everything tidy, functional, and, most importantly, stealthy.
Secure a Stable Base for Your Bench
Start by assessing your current entryway bench. In my case, I found the legs were uneven, causing wobbling and instability. To fix this, I used shims made from scrap wood under the shorter legs, much like leveling a wobbly table. This quick fix immediately improved stability and prevented future tilting issues, especially when placing heavier items or your robot vacuum dock.
Reinforce and Anchor the Structure
Install Steel Brackets for Heavy Loads
Next, I installed steel L-brackets at each corner inside the bench’s frame to strengthen the joints. These act like braces on a building—distributing weight evenly and preventing wobbling over time. Drill pilot holes first to avoid splitting and secure brackets tightly with screws. Doing this turned my flimsy bench into a solid platform able to support regular daily use without shifting.
Anchor to the Wall for Extra Stability
To prevent the entire unit from shifting when accessed, I anchored it to the wall using steel wall anchors and brackets. For particularly uneven walls, like mine with aged plaster, I followed a guide on how to anchor heavy furniture onto aging walls. This method ensures your structure stays put, especially if your pet or kids bump into it regularly.
Hide Your Robot Vacuum Dock Seamlessly
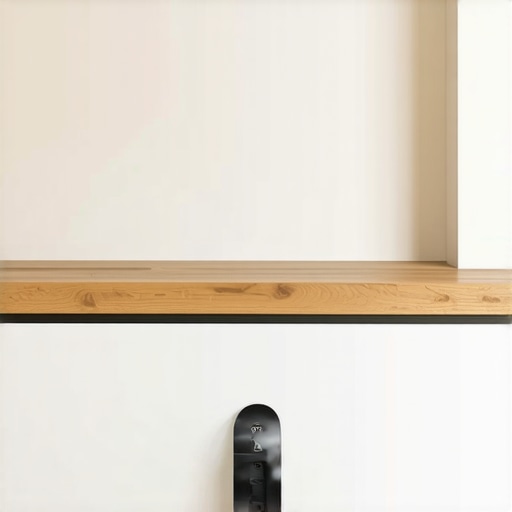
Once the bench was secure, I created a designated concealment for the vacuum dock. I built a false panel out of plywood matching the bench’s surface and painted it to blend in. For a cleaner look, I scribed the panel to match wall angles using techniques from a guide on scribing built-ins. This approach ensures your vacuum dock remains hidden yet easily accessible when needed.
Optimize Storage Without Sacrificing Style
To maximize space, I installed low-profile drawers and compartments for shoes and umbrellas. Using a built-in storage design allowed me to keep clutter out of sight. I also added a shallow tray for keys and mail, ensuring everything stays organized and within reach.
Finalize With Finishing Touches
Finally, I coated the entire piece with a durable finish to resist daily wear and tear. Choosing a color similar to wall paint helps it blend effortlessly with the surroundings. Plus, adding a few decorative elements, like a cushion or artwork, transformed a purely functional piece into a stylish entryway statement.
Many people assume that choosing the right storage solution or installing built-ins is mostly about picking stylish materials or following standard instructions. However, as an expert, I can tell you that a common misconception is underestimating the importance of nuanced details that can make or break your project. For instance, a frequent mistake is neglecting the subtle differences in wall structure and material behavior, which can lead to instability or future damage. While tutorials may suggest straightforward installation, they often overlook the need for pre-installation assessments and tailored reinforcement techniques.
One myth worth busting is that all fasteners or brackets are universally suitable. In reality, selecting the wrong hardware can cause sagging, wobbling, or even structural failure over time. For example, heavy-built-in vanity units require steel brackets that are specifically rated for load and wall compatibility—something that a quick online DIY might ignore.
Let’s consider an advanced question that often confounds even seasoned DIYers: How can you ensure that your built-ins will stay perfectly aligned over the years, especially in uneven or aged walls? The answer involves understanding the intricacies of wall anchoring and sometimes custom reinforcement. A best practice is to use steel braces or plates that distribute weight evenly, and to adapt installation techniques based on wall composition. For example, when anchoring into plaster walls, using appropriate anchors and considering additional reinforcement prevents future tilting or damage. You can learn more about these advanced methods here.
Ignoring these nuances often results in costly fixes down the line. An improperly installed vanity can sag or shift, leading to uneven surfaces or plumbing issues. To avoid this, invest time in assessing your specific wall conditions and applying reinforcement strategies tailored to your space.
By paying attention to these details, you turn a standard installation into a durable, seamless feature that enhances your home’s aesthetics and functionality. If you’re interested in exploring more about innovative storage solutions tailored to your home’s needs, check out [these ideas], or learn about [vanity installation hacks].
Have you ever fallen into this trap? Let me know in the comments.
Maintaining your home storage systems, especially those integrated into built-ins or custom vanities, ensures they remain functional and aesthetically pleasing over the years. One of my go-to tools for this is a high-quality cordless electric drill, such as the DeWalt DCD791D2. Its lightweight design, combined with variable speed control, allows me to tighten or loosen fasteners precisely without damaging delicate finishes. Regularly inspecting and tightening hinges, brackets, and screws prevents loose components that can compromise stability or accessibility. For general cleaning, I rely on a microfiber duster and a soft brush to gently remove dust from hidden corners, ensuring the longevity of both hardware and surfaces. Additionally, applying a silicone-based lubricant like WD-40 Specialist Silicone Spray on moving parts keeps drawers and hinges operating smoothly, reducing wear over time. In my experience, setting a routine—monthly checks, annual deep cleans, and timely repairs—preserves the integrity of your built-ins and vanity units. Looking ahead, the integration of smart maintenance tools, such as IoT-enabled sensors that monitor structural stability and alert you to shifts or damages, is a trend that will gain momentum. Investing in digital monitoring can significantly reduce unexpected repairs and extend the lifespan of your storage investments.
How do I maintain my built-in storage and vanities over time?
For those seeking to elevate their maintenance game, I highly recommend exploring professional-grade tools and following detailed guides like those found in expert resources. Implementing one or two advanced maintenance tips, such as regularly applying lubricant to hinges or conducting systematic inspections, can save you money and headaches down the line. Don’t wait for issues to become obvious—preemptive care is the key to lasting functionality. For more comprehensive strategies, you might find this [guide on longstanding vanity upkeep](https://customcabinetrypro.com/privacy-policy) helpful. Now, why not try scheduling a monthly check and applying lubricant to your hinges? It’s a simple step that yields noticeable benefits in durability and performance.
Lessons That Changed My Approach to Storage and Built-ins
One of my most eye-opening revelations was realizing that overcomplicating solutions often leads to more issues than solutions. I once attempted to design a concealed compartment behind my vanity, only to discover that quick fixes like heavy-duty hinges and thin panels didn’t hold up over time, causing even more frustration. This taught me the importance of investing in robust hardware and considering long-term durability from the start.
Another lightbulb moment was understanding the subtle art of wall assessment. Assumptions about wall stability or material types can sabotage even the best plans. For example, anchoring heavy built-ins into drywall without proper reinforcement resulted in sagging and damage—not an ideal outcome. Taking the time to evaluate wall structure ensures your installations stay secure and functional for years to come.
Lastly, I learned that seamless invisibility requires more than just paint and matching textures. Effective hiding of tech like robot vacuum docks involves clever design—such as custom scribing, low-profile panels, and aligning finishes—that blend utility with style. Small details, like aligning grain direction or using paint tricks, can make your hidden compartments truly disappear, elevating your space’s aesthetic.
Where to Find the Best Tools and Inspiration
My go-to resource for project planning and hardware tips is the Effortless Storage Solutions guide. It provides practical advice on selecting materials and understanding load capacities, which saved me from costly mishaps. For inspiration on modern vanity designs and built-in concepts, current trends in vanity design helped me envision stylish yet functional ideas tailored to my space.
If you’re interested in tackling your storage projects more confidently, I recommend exploring tools like the scribing tactics for custom fits and hardware like steel brackets and anchors that ensure stability. These resources have been invaluable in turning my ideas into durable, seamless installations.
Your Next Step Toward a Smarter Space
Transforming your storage and built-ins isn’t just about fixing what’s broken—it’s about reimagining your space with confidence and thoughtful detail. Remember, the real magic happens when you pay attention to the small, often overlooked nuances that make a big difference. So, start small, plan carefully, and enjoy the process of creating a home that’s as functional as it is beautiful.
What’s your biggest challenge when concealing or installing built-in storage? Share your experiences below and let’s learn from each other’s journeys!
,
Related Posts
4 Heavy-Duty Mudroom Bench Fixes for Sagging Seats in 2026
Have you ever stepped into your mudroom and immediately noticed…
![Mudroom Bench Fixes: How to Level Built-ins on Uneven Floors [2026]](https://customcabinetrypro.com/wp-content/uploads/2026/02/Mudroom-Bench-Fixes-How-to-Level-Built-ins-on-Uneven-Floors-2026.jpeg)
Mudroom Bench Fixes: How to Level Built-ins on Uneven Floors [2026]
It was a frustrating morning in my workshop when I…
How to Hide 2026 Robot Vacuum Docks in Entryway Benches
It was a typical Tuesday afternoon when I finally stumbled…