

I still remember the crisp October morning I stood in my kitchen, holding a steaming mug of coffee, watching in absolute horror as a single runaway blueberry slowly but surely rolled off the edge of my brand-new quartz countertop and plunged straight onto the floor. I had spent three grueling weekends installing those beautiful custom boxes, only to realize my house was playing a slow-motion game of tug-of-war with the earth below. You see, I live on a highly active, clay-rich clay soil slab. It breathes. It heaves in the wet spring and shrinks in the dry winter. When I first attempted to anchor my cabinets, I made the classic rookie mistake of assuming a concrete floor was a flat, dead, unchanging surface. It isn’t. It is alive, and if you fight it with standard shims and a prayer, the slab always wins.
Your Slab is Moving, and Your Cabinets are Trapped in the Middle
When you are dealing with a heaving foundation, traditional installation methods are a recipe for binding drawers, cracked stone countertops, and squeaking joints. Standard shims crush under the pressure, or worse, they fall loose when the soil decides to settle back down. Today, we are going to fix that. I am going to share the exact strategy to isolate your kitchen base cabinets from the independent movements of your foundation, ensuring your countertops stay dead-level even when the ground beneath them decides to take a hike. This isn’t just about making things look good today; it is about protecting your massive investment from structural stress over the next decade.
Is this actually worth the extra hassle?
You might be wondering if you really need to go through all this extra trouble instead of just driving a few extra screws into the drywall studs. Trust me, it is. According to geological data from organizations like the United States Geological Survey, expansive soils cause billions of dollars in foundation and home damage annually in the US alone—more than floods, hurricanes, and earthquakes combined. When that concrete moves, it exerts thousands of pounds of upward pressure. If your cabinets are rigidly locked to both a shifting floor and a stationary wall, something has to give. Usually, it is your expensive cabinet joints or your stone tops.
Early in my DIY journey, I tried to solve a similar unlevel floor issue on a smaller project. I ended up forcing a bathroom vanity flush against a bowed wall without compensating for the floor heave. The result? Within six months, the doors rubbed so badly I had to shave the wood down, and the plumbing began to leak from the structural strain. I learned the hard way that you need to master techniques like using the scribing hack for fitting vanities against out of plumb walls and using heavy-duty adjustable leveling legs rather than solid wooden blocks. For this kitchen project, we are going to rely on a clever combination of heavy-duty leveling legs and a floating wall ledger system that allows the floor to shift slightly without taking your kitchen counter along for the ride. Have you ever noticed your cabinet doors suddenly sticking during the humid summer months, or felt like your kitchen island is slowly tilting? Drop a comment below and let me know—I bet your slab is secretly on the move too. Let’s dive into the exact tools and prep work you need to conquer this beast once and for all.
How to Isolate Your Cabinets from a Heaving Foundation
To keep your kitchen countertops flat when the ground beneath them is actively moving, you have to abandon the old-school method of fastening cabinet boxes directly to the floor. Think of your kitchen assembly like a suspension bridge. The bridge doesn’t fight the movement of the river; it floats above it while remaining anchored to solid ground. For this setup, we will use a combination of heavy-duty adjustable polymer legs and a heavy-duty wall ledger. By supporting the rear weight on a structurally secure wall ledger and letting the front rest on high-impact adjustable legs, you create a system that can absorb minor soil expansion without twisting your high-end cabinet boxes out of shape.
Set the Wall Ledger as Your True Zero Level
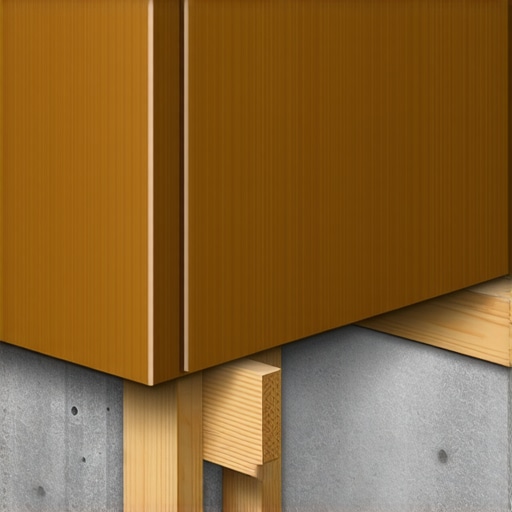
Your wall studs do not move up and down with the seasonal moisture changes of your slab, making them your only reliable reference point. Start by finding the highest point on your concrete floor along the cabinet run. Measure up from that point to your standard cabinet height (usually 34.5 inches) and mark a level line across the drywall. Just like utilizing the ledger board move for level mudroom benches to support massive weight, you will install a structural 2×4 support cleat directly to the wall studs. This cleat acts as a solid shelf that supports the entire back edge of your base cabinets, taking the slab out of the equation for the rear half of your cabinetry.
Ditch Wood Shims for Adjustable Polymer Legs
Wooden shims are highly susceptible to compression and rot when moisture wicks up from a concrete floor. I learned this lesson the hard way during a kitchen remodel in a damp basement where the homeowner’s cheap wooden shims turned to mush after a minor spring thaw, causing a massive granite top to crack near the sink cutout. Instead, install heavy-duty ABS leveling legs to the underside of your cabinet boxes. Much like adjusting the legs on bathroom vanities to keep them steady, these threaded legs allow you to fine-tune individual cabinet heights with a simple twist of a wrench. If you need inspiration for organizing the interiors of these adjustable bases, explore creative storage solutions for vanities to declutter in style. By utilizing independent leveling legs, your cabinets sit slightly off the wet concrete, creating an air gap that prevents moisture transfer while allowing you to easily adjust the front of the boxes as the slab shifts over time.
Fasten to Studs with Over Sized Washers
When you secure the cabinet backs to the wall studs, do not drive the screws home as tightly as possible. If the concrete slab rises, it will push the cabinet boxes upward. If the cabinet backs are locked tightly to the wall studs, the screw heads will tear right through the thin back panel. Instead, use structural cabinet screws paired with oversized fender washers, and drill your mounting holes in the cabinet back slightly oversized. This simple trick allows the cabinet body to float up or down a fraction of an inch against the wall without pulling loose from the wall studs. This is a crucial step to prevent structural failures, similar to how installers must carefully secure furniture to avoid damage, as detailed in our guide on how to secure heavy mudroom benches over hydronic heat floors.
When you read standard installation manuals, they all preach the same gospel: shim it until it is perfectly flat, and then screw it tight. Everyone says rigid anchoring is the key to longevity, but in my experience, absolute rigidity is your worst enemy. If you live in an area with highly expansive clay soils or an active concrete slab, locking your cabinetry down like a bank vault actually invites disaster. A structure that cannot bend will inevitably break.
Why does my quartz countertop crack near the sink?
This is the ultimate nightmare scenario for any homeowner, and it rarely has anything to do with the quality of the stone. Research from materials engineering institutions like the Materials Research Society highlights that rigid materials under concentrated, uneven structural deflection will always fail at their thinnest cross-section. On a kitchen counter, that thinnest point is almost always the narrow strip of stone in front of or behind your sink cutout. When your slab heaves and pushes up on one corner of your cabinet base, it acts as a lever, forcing the cabinet frame upward. If the frame is too rigid to flex and cannot slide on its wall mounts, that immense upward force is transferred directly into the quartz. To prevent this catastrophe, you must establish a structural buffer zone. Using specialized hardware like the hidden steel support for massive quartz vanities or utilizing flexible, non-hardening silicone adhesives instead of rigid epoxy at the cabinet-to-countertop joint allows the wood and stone to move independently without cracking.
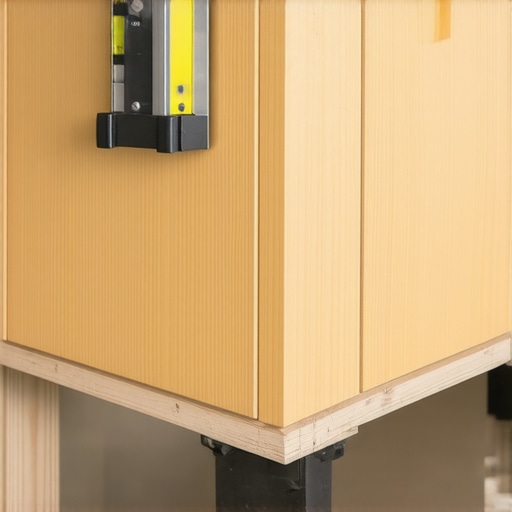
The biggest “oops” factor I see DIYers—and even seasoned pros—fall into is neglecting the interaction between the cabinets and the wall framing when the floor shifts. It is easy to focus so much on the floor that you forget the wall studs are relatively stable. If you drive standard construction screws flush through the back of your cabinet box directly into the studs without using oversized washers or slotted mounting brackets, you are creating a rigid shear point. When the floor settles down in the dry season, the cabinet hangs from those screws, tearing the backs out of the boxes. If the floor heaves, it forces the cabinet up, shearing the screw heads off entirely. Have you ever fallen into this trap or noticed mysterious cracks appearing in your drywall near your built-ins? Let me know in the comments below.
If you are planning to expand your storage solutions into other areas of the house, like putting in customized bathroom vanities, you should think about how those bases interface with your flooring. I always suggest exploring creative storage solutions for vanities to declutter in style to keep internal items safe from moisture while leaving space underneath for critical structural breathing room. Using techniques such as the waterproof shim move for vanities on wet room floors or choosing a floating design altogether can isolate your delicate woodworking from both standing moisture and foundation shifts alike. The goal is always the same: build beautiful, functional storage that works in harmony with your home’s natural movements, rather than fighting an expensive battle against gravity and soil expansion that you are guaranteed to lose.
When you are committed to building things that endure, the job doesn’t end the moment the last door hinge is adjusted. Over the years, I have realized that keeping custom woodworking in pristine shape requires a proactive approach to seasonal shifts. Whether you are dealing with sophisticated kitchen setups, high-use vanities, or complex wall systems, learning how to monitor and maintain your installations will save you thousands of dollars down the road. Let’s look at the actual physical tools and maintenance steps you need to keep your storage running flawlessly.
How do I maintain my installations over time?
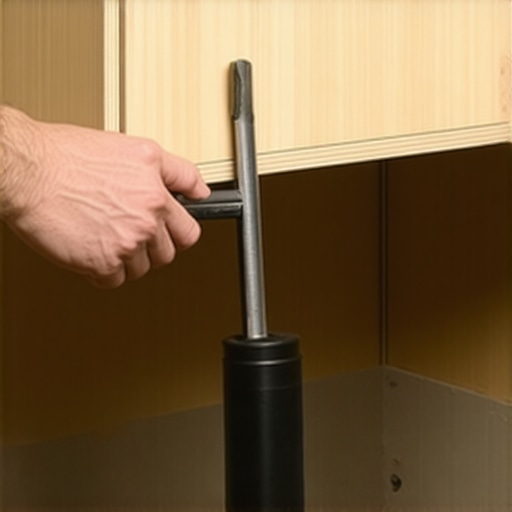
To ensure your cabinetry survived the heavy spring rains and dry winter drafts, you need to conduct a quick bi-annual check. I keep a dedicated digital hygrometer inside my cabinet bases to monitor moisture levels. If the relative humidity in your home swings wilder than 35% to 55%, your wood panels are going to warp, regardless of how well you anchored them. To mitigate this, check your adjustable support legs twice a year using a standard 10mm open-face wrench. Just like adjusting the bases of bathroom cabinetry to prevent settling, a quarter-turn adjustment on your polymer leveling legs can instantly relieve tension on your countertops before stress fractures ever get a chance to form. If you are applying these protective measures to smaller built-ins, check out our step-by-step guide to vanity installation for beginners to ensure your base starting points are absolutely solid.
Beyond manual leveling, the tools you use during the installation phase dictate how much maintenance you will face later. I never rely on standard drywall screws for load-bearing cabinetry; instead, I exclusively use rugged cabinet screws featuring a built-in washer head, which provides a massive clamping surface that prevents the wood backings from tearing out. If you are organizing your storage spaces to handle substantial weight, exploring creative built-ins for seamless storage and home aesthetics can help distribute weight loads more evenly across your wall studs. For those attempting to mount storage units in tricky or compact layouts, utilizing smart design practices is key, as we outline in our detailed tips on maximizing space innovative built-in solutions for small rooms.
The future of adaptive home construction
Looking ahead, I predict we will see a massive shift toward fully decoupled, modular cabinetry systems. As weather patterns become more erratic and soil stability fluctuates, rigid, permanently attached furniture will increasingly fail. Future designs will likely incorporate smart, spring-loaded leveling legs and micro-adjustable bracket systems that automatically compensate for foundation movement. To get ahead of this trend, I highly recommend trying out the floating ledger strategy on your very next project. Go ahead and install a heavy-duty wall cleat on your next mudroom bench or cabinet run, and experience firsthand how simple it is to achieve a perfect level without fighting a shifting floor. It is a complete game-changer for durability and peace of mind.
3 Myths About Foundation Heave That Ruined My First Cabinet Builds
When I first started tackling custom built-ins, I fell hook, line, and sinker for the traditional carpentry advice passed down through generations. But when you are dealing with living, breathing foundations, the old rulebook will actively sabotage your work. Here is the reality check you need before starting your next project:
- Myth 1: Concrete is perfectly static. It isn’t. Soil hydration cycles cause concrete slabs to flex and lift, making rigid installations highly vulnerable to cracking and warping.
- Myth 2: Tight anchoring means stronger cabinets. Over-tightening your mounting screws to the wall studs without allowing for vertical movement is the fastest way to pull the back panels right off your cabinet boxes.
- Myth 3: Wood shims are good enough. Standard wood shims compress under weight and rot quickly when exposed to the microscopic moisture that constantly wicks up through concrete floors.
Learning to decouple your work from the foundation is the ultimate secret to building things that last. By embracing smart installation systems, you allow the floor to breathe without placing any stress on your beautiful cabinetry joints.
The Gear I Trust to Outsmart Shifting Slabs
You do not need a massive arsenal of high-tech machinery to build adaptive, long-lasting storage. However, you do need to swap out cheap hardware for structural-grade components designed to absorb movement. Here is the exact toolkit I rely on for every tricky slab installation:
- Threaded Polymer Leveling Legs: These replace traditional wood blocks entirely. They isolate the wood from damp concrete, prevent rot, and allow for simple, periodic height adjustments with a basic wrench.
- Oversized Steel Fender Washers: Essential for wall mounts, these washers provide a wide clamping surface over slightly oversized pilot holes, letting the cabinet float slightly up or down against the wall studs.
- Flexible Silicone Adhesive: Never bond your heavy stone or quartz countertops to the wood frame with rigid epoxy. Using flexible silicone allows the wood base to expand and contract without transferring cracking pressure into the stone.
If you are planning to apply these smart leveling principles to other areas of your home, I highly recommend looking over our step-by-step guide to vanity installation for beginners to ensure your base points are perfectly dialed in before you secure anything to the walls.
Your Next Project Won’t Crack Under Pressure
Building cabinetry that stands the test of time is all about working in harmony with your home’s natural environment. When you stop fighting the inevitable shifting of the earth and start utilizing clever, adaptive installation techniques, your woodworking projects will remain level, stable, and beautiful for decades. Whether you are tackling a full kitchen renovation or exploring creative built-ins for seamless storage and home aesthetics, these structural precautions will completely change the way you build.
Have you ever struggled with binding doors, cracked countertop joints, or squeaking bases in your home? Let me know in the comments below—I would love to help you troubleshoot your specific setup!