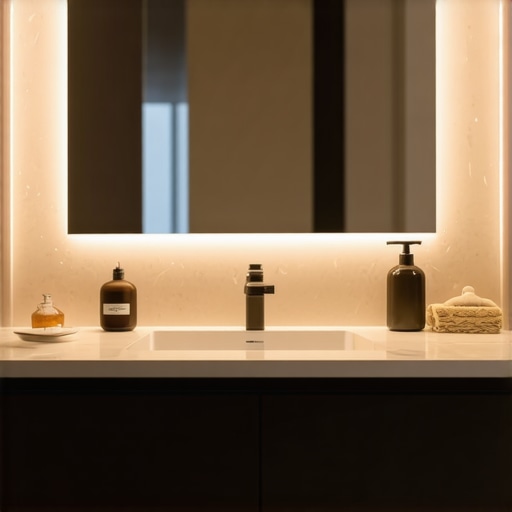
Have you ever stood in front of your bathroom mirror, desperately trying to find that one essential item—lipstick, skincare product, or jewelry—and realized everything is just a jumble of clutter? I used to face this daily chaos, and honestly, it drove me nuts. That lightbulb moment hit me hard when I finally understood that the problem wasn’t my stuff but how I stored it. A chaotic space can make even the most beautiful home feel stressful. If you’re tired of digging through drawers or knocking over stacks of products every morning, then stick with me. Today, I’ll share how smart vanities and built-in storage can totally change your routine and elevate your space.
Why Better Storage Means Better Living
Many folks overlook the importance of smart storage until their homes become a cluttered mess. Trust me, I’ve been there. I made the mistake early on of choosing generic furniture that looked nice but offered no real organization. That led to more frustration and wasted time. The good news? It’s never too late to upgrade. With custom vanities and built-in storage solutions, you can maximize your space, keep everything accessible, and even add a touch of luxury to your home. According to experts at Custom Cabinetry Pro, well-designed storage can make your entire home feel more spacious and functional. Now, let’s dive into how you can achieve this transformation.
Is This Just a Trend or Worth the Investment?
One of my biggest fears when I first considered built-in storage was whether it was really worth the cost. I worried it might be a fleeting trend or a complicated project. I remember making the mistake of rushing into a DIY installation without proper planning—big mistake! It cost me time, money, and a lot of frustration. The key is to approach it with expert guidance. For example, you can find helpful tips and step-by-step guidance at this detailed guide that walks you through the process. When done right, these upgrades not only look fantastic but also significantly improve your daily routine, saving you time and stress. Ready to learn how to do it right? Let’s move on to the practical steps to get started.
Select the Right Storage Units
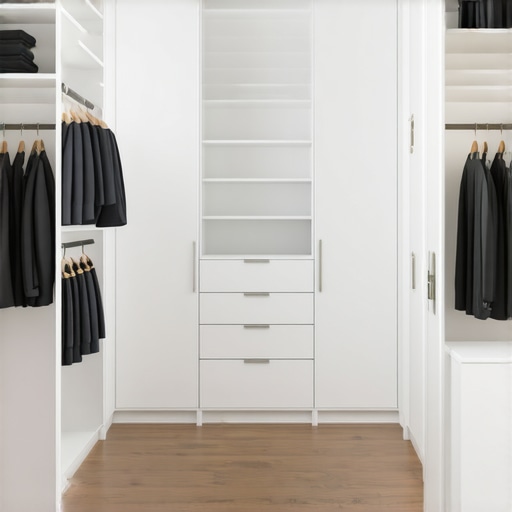
Start by choosing storage that fits your space and style. I once measured my bathroom twice because I was nervous about fitting a custom vanity. When I finally ordered a unit based on precise measurements, installation was smooth. Use a tape measure and a level to ensure your measurements are accurate. For a sleek look, opt for vanity units that include integrated fixtures. This minimizes clutter and maximizes space.
Plan Your Layout Carefully
Mapping out your storage layout is crucial. I sketched a simple diagram on graph paper, marking where each item would go. Think about accessibility: keep everyday items at eye level and less-used things lower or higher. Use adjustable shelves inside cabinets for flexibility. Remember, a well-thought-out plan saves time and prevents costly modifications later. For inspiration, check built-in storage ideas that can be tailored to your needs.
Choose Quality Materials
Quality matters when selecting materials. I learned this the hard way after installing a cheap MDF cabinet that warped in humidity. Instead, opt for moisture-resistant plywood or solid wood for longevity. This improves durability and appearance. When you invest in high-quality materials, your storage solution will withstand daily wear and tear, keeping your space tidy longer. Explore storage solutions designed for durability.
Follow Expert Installation Tips
Installation is where many rush and make mistakes. I followed a step-by-step guide from this beginner-friendly tutorial, which broke down each phase. Use a level and a drill to secure units properly. Mount heavy cabinets first to avoid accidents. For complex installations, don’t hesitate to call a professional. Proper mounting prevents future damage and ensures safety. For additional hacks, see installation hacks.
Optimize with Smart Storage Features
Maximize your space by incorporating features like pull-out shelves, soft-close drawers, and built-in organizers. I added a pull-out trash bin under my vanity, which kept clutter hidden and accessible. Use smart storage ideas to declutter and keep everything in its place. Consider vertical storage options like tall cabinets or wall-mounted shelves. These tricks make a tiny bathroom feel larger and more organized.
Maintain and Adjust Your Storage
Once installed, keep your storage in top shape by regularly decluttering and cleaning. I schedule monthly quick tidy-ups, which prevent buildup. Adjust shelves as your needs change, and replace worn-out hardware promptly. This maintenance extends the life of your investment and keeps your space inviting. For ongoing tips, see storage innovation ideas.

Many homeowners and even seasoned DIY enthusiasts fall into common traps when upgrading their vanities and storage solutions. Let’s dig deeper into the nuances that often go unnoticed and can make or break your project’s success. One widespread myth is that all custom vanities are created equal. In reality, the devil is in the details: choosing the wrong material, hardware, or installation method can drastically reduce durability and functionality. For instance, opting for inexpensive MDF in humid environments like bathrooms often leads to warping and mold growth, which compromises your space’s longevity. Instead, experts recommend moisture-resistant plywood or solid wood, which might cost more initially but provide lasting benefits. To master this, check out these durable storage ideas that ensure your investment pays off over time.
Another prevalent misconception is that installation is straightforward—simply align, secure, and forget. However, improper mounting can result in unsafe, unstable furniture that damages your walls or causes injuries. Many overlook the importance of precise measurements and proper anchoring techniques, which are critical for built-ins and wall-mounted vanities. For example, using a level and a stud finder during installation can prevent misalignment and future sagging. To avoid costly mistakes, I recommend following this comprehensive guide that covers all the essential steps and common pitfalls.
Now, let’s address a frequently misunderstood aspect: the role of storage features in maximizing space. Many believe that big drawers and deep cabinets alone solve clutter issues. In truth, the true secret lies in smart organization and innovative features like pull-out shelves, soft-close mechanisms, and built-in dividers. These additions are often overlooked yet can dramatically improve usability. Implementing vertical storage, for instance, allows you to utilize every inch efficiently. For advanced tips, explore these expert ideas for transforming small spaces into highly functional zones.
What advanced considerations should homeowners keep in mind for seamless integration?
For those aiming for a truly professional finish, understanding the importance of harmonizing design and function is key. This involves choosing hardware finishes that match fixtures, ensuring consistent color schemes, and integrating lighting for both aesthetics and practicality. Additionally, paying attention to the installation environment—like humidity, temperature fluctuations, and wall material—can prevent future issues. A common mistake is neglecting these environmental factors, which can lead to warping, mold, or hardware failure over time. Expert guidance emphasizes the importance of tailored solutions, such as moisture-resistant finishes and flexible mounting brackets, to ensure longevity and style. For a detailed approach, see these advanced installation tips.
How do I keep my vanity and built-in storage working smoothly over time?
Maintaining your custom vanities and built-in storage is crucial to ensure they stay functional and beautiful for years. From choosing the right tools to adopting smart maintenance routines, I’ve learned that proactive care saves time and money. One of my top recommendations is investing in a quality cordless drill, like the DeWalt DCD771. I personally use it for adjusting hardware or fixing loose panels because its lightweight design and versatile torque settings make it perfect for detailed work without causing damage. Additionally, a set of precision screwdrivers helps in tightening hinges and handles that can loosen with regular use.
For cleaning, I prefer gentle, non-abrasive cleaners like those from Method or homemade solutions with vinegar and water, which keep surfaces spotless without degrading finishes. Regularly inspecting hinges, slides, and hardware ensures smooth operation; I do this every few months, applying a small amount of lubricant such as WD-40 Specialist Silicone to prevent squeaks and rust. Remember, hardware like soft-close drawer mechanisms benefit from lubrication, which keeps them functioning silently and efficiently.
In terms of long-term results, I’ve found that sealing wood surfaces with a quality polyurethane finish enhances durability, especially in humid environments like bathrooms. For DIY refinishing, I use a detail sander like the Makita BO5041, which I’ve used to smooth out surfaces before applying sealant. This tool’s ergonomic design reduces fatigue during prolonged projects and ensures a professional-looking finish.
Looking ahead, the trend in vanity maintenance is shifting towards smart solutions. Automated hinges and touchless LED lighting not only make upkeep easier but also add a modern touch. As technology advances, I predict more integrations like app-controlled lighting and self-cleaning surfaces will become standard, making maintenance even simpler. To stay ahead, I recommend exploring innovative products from trusted brands and incorporating them into your routine.
Why opt for professional help when maintaining built-ins?
While regular cleaning and minor adjustments are manageable, complex repairs or upgrades often require expert intervention. For instance, if your built-in cabinets develop structural issues or require re-hanging, professional installers have the right tools and expertise to ensure safety and longevity. I’ve relied on specialists for installing new hardware or fixing warped panels, and their precision work has saved me from costly mistakes. For comprehensive guidance, check these expert tips.
In conclusion, maintaining your vanity and built-in storage involves a combination of the right tools, routine inspections, and occasional professional help. I encourage you to try out a high-quality cordless drill or a precision sander this month; these investments will make your maintenance tasks much easier and more effective. Proper care ensures your fixtures remain seamless, functional, and beautiful, enhancing your home’s overall aesthetic and value for years to come.
The Hardest Lesson I Learned About vanities, storage solutions, installation, and built-ins
- Details Matter More Than You Think: I once chose a vanity based on looks alone, only to find out that poor-quality materials warped quickly. I learned that investing in moisture-resistant plywood or solid wood makes all the difference in durability, especially in humid spaces like bathrooms. Don’t skimp on materials if you want your storage to last.
- Measuring Twice Is Still Not Enough: I used to skip extra measurements and ended up with a vanity that didn’t fit or look right. Now, I always measure at least three times and use a level and a stud finder during installation. This small step prevents major headaches and ensures everything aligns perfectly.
- Smart Features Save Time and Space: Incorporating pull-out shelves, soft-close drawers, and vertical organizers transformed my cluttered bathroom into a sleek, functional space. These features maximize every inch and make daily routines smoother. Thinking creatively about storage features really pays off.
- Professional Help Is Worth It for Complex Projects: I tried DIY installation for my built-in storage and regret it. When I hired a professional, the results were safer, more polished, and lasted longer. Sometimes, a small investment in expert help saves money and stress in the long run.
My Essential Toolkit for Vanities and Built-Ins
- DeWalt DCD771 Cordless Drill: Reliable, lightweight, and versatile, it’s perfect for adjusting hardware and fixing panels. I trust it to make my DIY projects easier and more precise.
- Makita BO5041 Detail Sander: This sander helps me smooth surfaces before sealing or painting, ensuring a professional finish every time.
- Precision Screwdriver Set: Keeps hinges, handles, and hardware tight and functioning smoothly without damaging delicate finishes.
- Quality Non-Abrasive Cleaners: Gentle cleaners like Method or homemade vinegar solutions keep surfaces spotless without degrading finishes, essential for maintaining your investment.
Seize the Moment and Transform Your Space
Creating a beautifully organized vanity or built-in storage isn’t just about aesthetics—it’s about elevating your daily routine and enjoying a clutter-free home. Every step, from choosing the right materials to installing features and maintaining them, is an investment in your comfort and happiness. Remember, small improvements today set the stage for a more functional and stylish home tomorrow. If you’re ready to start, explore expert guides and tips to ensure your project is a success. Your dream space is within reach—don’t wait to make it a reality.
Have you ever struggled with measuring or choosing materials for your vanity project? Share your experiences below—I’d love to hear your story!
3 Replies to “Smart Vanities & Built-in Storage Solutions for Modern Homes”
Leave a Reply
Related Posts

Expert Vanities Installation & Storage Solutions for 2025
My Journey to a Stylish and Organized BathroomLast year, I…
Vanity & Storage Solutions: Expert Tips for Seamless Installations Today
My Journey into Vanity & Storage Solutions: From Clutter to…
Installation Tips for Smart Vanities & Storage Solutions in 2025
Discovering the Perfect Storage Solution: My Personal EncounterAs someone passionate…
I really appreciate how this article emphasizes the importance of thoughtful planning and quality materials when upgrading bathroom storage. I’ve personally experienced the frustration of choosing cheaper, less moisture-resistant cabinets in a humid environment, which warped and deteriorated much faster than expected. It’s clear that investing in solid wood or moisture-resistant plywood pays off in the long run. I also agree that proper measurement and professional installation are critical steps that can’t be rushed—skipping these often leads to uneven gaps or even costly wall repairs. After my last renovation, I realized that taking the time to sketch out the layout and measure three times made the installation smoother and prevented headaches. Has anyone here experimented with innovative smart storage features, like pull-out organizers or built-in chargers? I’d love to hear what’s been most effective in your own projects.
This post really hits home for me. I used to struggle with keeping my vanity organized until I invested in some smart storage solutions. Pull-out trays and modular dividers changed everything—they made it so much easier to find what I needed quickly, especially in the mornings when time is tight. I completely agree that choosing the right materials is key; I once opted for cheap MDF for a vanity project and it warped within a year due to humidity. Upgrading to moisture-resistant plywood was a game-changer in terms of durability. I’m curious, has anyone experimented with integrated lighting or built-in chargers in their storage? I’ve been thinking about adding LED strip lights to my vanity for better visibility — would love to hear if others have similar ideas or experiences with smart features that improve daily routines.
This article really resonated with me because I’ve been on the lookout for ways to optimize my bathroom storage without sacrificing style. I totally agree with the importance of choosing durable, moisture-resistant materials like solid wood or high-quality plywood—cheap MDF just won’t cut it in humid environments and tends to warp, which is frustrating in the long run. I’ve also learned that proper measurements and solid installation are critical; I once rushed the process and ended up with uneven gaps that took hours to fix. Has anyone here tried integrating hidden compartments or smart features like built-in charging stations? I think those little touches can make a big difference in daily convenience and keeping clutter at bay. Also, HVAC conditions in your home can impact the longevity of your storage—does anyone have tips on how to safeguard invested cabinetry from humidity fluctuations?