

The sound was like a slow-motion car crash—a dry, gritty crunch followed by a sickening thud. I had just finished hanging a gorgeous, forty-pound oak vanity in my 1925 bungalow. It looked perfect for about ten minutes. Then, the gap appeared. I watched, horrified, as my expensive new fixture began to peel away from the wall, taking a chunk of historic plaster with it. I made the classic rookie mistake: I trusted the old lath to do the heavy lifting. I thought a few extra-long screws would find enough “meat” to hold. I was wrong, and I almost ruined my bathroom floor in the process. If you’re staring at a beautiful new sink and a wall made of wood strips and horsehair, don’t pick up that drill just yet. Today, I’m going to show you the exact internal bracing method I developed after that disaster so you can get that sleek, floating look without the structural nightmare. [image]
The Brutal Reality of Old Plaster Walls
Old houses have soul, but they also have walls that crumble if you look at them sideways. When you’re dealing with modern vanity designs, you aren’t just hanging a mirror; you’re suspending a massive weight on a vertical plane. Most people assume that because lath and plaster is thick, it’s strong. In reality, the National Park Service notes in their Preservation Briefs that historic plaster is often only held together by ‘keys’—the bits of plaster that squeeze between the wooden lath strips—which become brittle and snap over time. If those keys are gone, the wall has zero structural integrity for a load. I learned this the hard way when I realized why my cabinets were pulling away; I was essentially trying to screw into dust. You need an expert guide to vanity installation that respects the age of your home while using 21st-century reinforcement. It’s about more than just finding a stud; it’s about creating a foundation where none exists.
Can a Few High-Quality Anchors Actually Save You?
I get asked this all the time: “Can’t I just use those fancy butterfly toggles?” The short answer is no. While toggle bolts work for mirrors, they are a recipe for disaster with a vanity. A vanity creates leverage. Every time you lean on that sink to brush your teeth, you’re multiplying the force pulling against those brittle lath strips. I once tried to shortcut a project by using heavy-duty anchors on crumbling walls, and the anchors didn’t pull out—the entire section of the wall did. You need to get behind the plaster and talk directly to the studs. We’re going to look at the hidden sub-frame move that transfers all that weight into the wall’s internal structure instead of the decorative surface. Most homeowners are terrified of cutting into their plaster, but trust me, a small hole now is much better than a massive hole created by a falling sink later. Have you ever felt that heart-stopping moment where a screw just keeps spinning in your old walls? Tell me I’m not the only one who’s dealt with a ‘spinning’ screw disaster!
Forget Your Stud Finder and Grab a Magnet
Electronic stud finders are essentially paperweights when it comes to lath and plaster. The layers of wood and dense plaster confuse the sensors, leading to ‘false positives’ that result in a wall full of unnecessary holes. Instead, I use a high-powered neodymium magnet. It doesn’t look for wood; it looks for the steel nails used to hammer the lath to the studs. When the magnet sticks, you’ve found a vertical member. I remember my first bathroom remodel where I ignored this and ended up with a ‘Swiss cheese’ wall because I kept missing the timber by half an inch. Once you’ve marked your studs, you realize they are rarely spaced perfectly for your vanity’s mounting holes. This is why a step-by-step guide to vanity installation for older homes always begins with the realization that the wall, as it stands, is your enemy.
Open the Wall to Build a Real Backbone
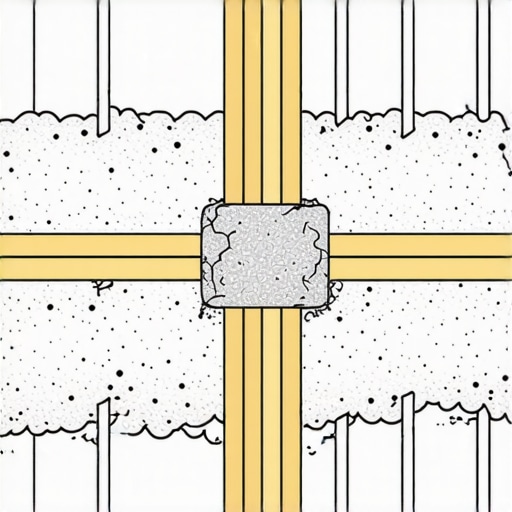
To get that rock-solid mount, you have to perform a little ‘surgery.’ I use an oscillating multi-tool to cut a rectangular horizontal channel into the plaster, exactly where the vanity’s mounting rail will sit. This feels like sacrilege in a historic home, but it’s the only way to implement the hidden blocking strategy. You are essentially creating a new, internal wooden beam. I once skipped this on a ‘quick’ guest bath flip, and three months later, the homeowner called because the quartz top had shifted the whole unit downward. Now, I always install horizontal 2×6 blocks between the studs, screwed in with heavy-duty fasteners. This creates a continuous wooden surface so you can drive your vanity screws anywhere along that line, not just where the studs happen to be. It’s the same logic used in mounting heavy built-in shelves to plaster walls; you are building the strength inside the wall rather than relying on the surface.
Why 2×6 Blocking Beats Every Wall Anchor
Think of wall anchors like a band-aid on a broken leg—they might look okay on the surface, but they aren’t fixing the underlying structural failure. A 2×6 block transfers the load across multiple studs, turning the entire wall into a support system. If you are dealing with a particularly heavy unit, you might even consider how to stop floating vanities from dipping with steel plates. These plates can be recessed into your blocking for even more rigidity. I’ve seen 400-pound double-sink setups held up by nothing more than a well-placed sub-frame. It’s one of those vanity installation hacks that saves you thousands in potential water damage and wall repair down the line. When I installed the massive library unit in my own home, I used the hidden sub-frame move, and ten years later, it hasn’t budged a millimeter.
The Final Lag Bolt Lockdown
Once your blocking is in and the plaster is patched or covered by the vanity back, you aren’t just using standard wood screws. You need lag bolts with washers. The washer is crucial because it prevents the bolt head from crushing the cabinet’s back panel. I always pre-drill my holes to prevent the new blocking from splitting. This is the moment of truth. If you’ve done your blocking right, the vanity will pull tight against the wall with a satisfying ‘thud’ rather than the soft, mushy feeling of a screw stripping out. It’s the difference between a vanity that feels like a permanent part of the architecture and one that feels like it’s just ‘hanging out’ until gravity wins.
Stop Trusting Your Floor to Be Level
After those lag bolts are in, most people celebrate and start the plumbing. But here is the contrarian truth: your wall isn’t the only thing trying to kill your vanity; your floor is a silent accomplice. Most DIYers assume that because a vanity sits on the ground, the wall anchors are just ‘extra’ support. In reality, if your floor is even slightly sloped—and in a 100-year-old home, it definitely is—the weight of that quartz top will cause the cabinet box to ‘rack’ or twist. This structural distortion is often why your vanity plumbing is leaking into the cabinet base; the drain pipe remains rigid while the cabinet sags just enough to break the seal. When a vanity sits on an uneven floor, the weight of the stone top creates a ‘twisting’ force. Most people think their wall fasteners will hold the cabinet’s shape, but I’ve seen high-end plywood cabinets delaminate because the floor was only a quarter-inch out of level. This is why pros use the floor bolt hack for stable island cabinetry logic even on wall-side units. I have spent more time learning how we fixed a tilted floating vanity with hidden leveling shims than I have actually driving screws. Don’t assume the floor is your friend; check the squareness of the cabinet box after it is loaded, not just when it is empty.
The Silent Killer Behind Cold Exterior Walls
Then there is the ‘Oops’ factor that almost nobody discusses until the smell of mold kicks in: the thermal bridge. In my 1925 bungalow, the bathroom shared a wall with the uninsulated north side of the house. I installed a beautiful built-in, but I didn’t account for the temperature differential. Within two years, the back panel was warped and black with mildew. The experts at the Building Science Corporation highlight that air-permeable insulation or the total lack thereof on cold masonry leads to condensation at the dew point interface. This is why I now swear by the moisture barrier trick for vanities against cold walls. A simple layer of rigid foam or a radiant foil wrap creates a thermal break that prevents your innovative storage solutions from becoming a health hazard. It is a five-minute step that saves a five-thousand-dollar cabinet.
Can You Really Offset Plumbing Without Ruining Your Storage?
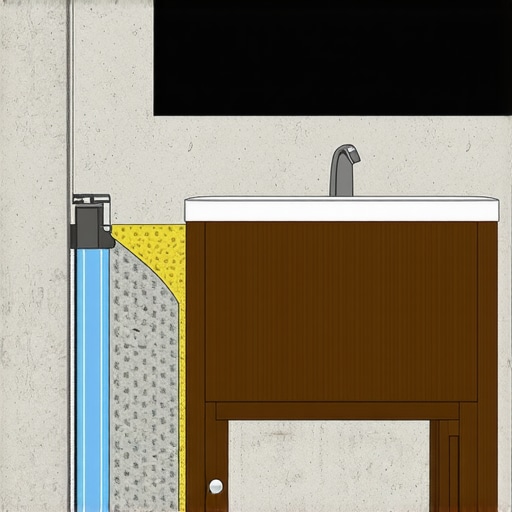
This is where the ‘experts’ separate themselves from the amateurs. You find the perfect vanity, but the P-trap is exactly where a drawer slide needs to be. The amateur move is to cut the drawer in half, losing all your creative storage solutions for vanities and leaving raw, exposed wood that swells with moisture. Beyond the plumbing, people forget that built-in storage ideas to declutter and enhance your home only work if the drawers actually open. If your vanity is tight against a corner, you need to account for door swing and hardware clearance. I’ve seen beautiful installs where the drawer hits the door casing—a classic ‘oops’ that forces you to move the entire unit. The expert move is to relocate the wall plumbing slightly within the wall cavity while you have the plaster open. If you cannot move the pipes, you need to know how to fit a vanity over off-center plumbing pipes by building a custom ‘U-channel’ drawer. This preserves the structural integrity of the drawer box while still letting you organize your morning routine efficiently. Have you ever fallen into this trap or discovered a ‘plumbing surprise’ after you already bought the cabinet? Let me know in the comments!
After the dust settles and the water is flowing, the real test begins: time. I’ve seen gorgeous installations fail not because of the initial mount, but because of a lack of long-term maintenance. You need the right tools for the surgery, and you need a plan for the aftercare. For the ‘surgery’ phase, I never step into a bathroom without my oscillating multi-tool. Whether it’s a Fein or a Milwaukee, this tool is the scalpel of the DIY world. It allows you to make precise cuts for your internal blocking without vibrating the rest of the brittle plaster off the lath. If you use a reciprocating saw, you’re asking for trouble; the vibration will snap those delicate plaster keys ten feet away from where you are working.
How Can I Keep These Custom Built-ins From Sagging Over Time?
Maintenance is where most people drop the ball. In a high-moisture environment, wood and metal are constantly under siege. I recommend a bi-annual check-up. Grab a screwdriver and check the tension on your mounting bolts and hinge plates. Humidity causes wood to swell and contract, which can slowly back a screw out of its housing. This is particularly true if you are trying to stop cabinet doors from warping in humid bathrooms. If you notice a door is hanging slightly lower, don’t just force it shut; adjust the hinge. According to technical documentation from Blum Inc., high-quality hinges are tested for 200,000 opening and closing cycles, but that rating assumes the cabinet remains level and the screws stay tight. If you neglect the hardware, you’ll eventually find why your soft-close hinges are snapping under the uneven tension.
The Hidden Reality of Heavy Drawer Maintenance
If you’ve installed deep drawers to house heavy bottles and styling tools, you need to watch the slides. Overloading is the silent killer of creative storage solutions for vanities. Most undermount slides are rated for 75 to 100 pounds, which sounds like a lot until you fill a drawer with stone-heavy hair products and extra tile. If the drawer starts to feel ‘gritty’ or resists closing, it’s time to stop drawer dragging with this under-mount slide adjustment. A quick spray of dry silicone lubricant (never WD-40, which attracts dust) can extend the life of your drawer slides by years. I predict that in the next few years, we’ll see more integrated ‘smart’ sensors in innovative storage solutions that alert homeowners to moisture spikes or weight imbalances before the wood begins to delaminate.
My best advice for scaling these projects is to invest in a high-quality laser level. When you are moving from a single vanity to a full-room built-in, a bubble level isn’t enough to prevent cumulative errors. If you’re ready to take your skills to the next level, I challenge you to perform a ‘torque test’ on your mounting lag bolts six months after installation. You might be surprised at how much that ‘rock-solid’ mount has settled. Tightening those bolts by even a quarter turn can prevent the hairline plaster cracks that often appear a year into a renovation.
The Three Biggest Lies Your Walls Ever Told You
After decades of wrestling with historic homes, I’ve realized that most of our ‘common sense’ is actually a recipe for disaster in a lath and plaster setting. First, the idea that adding more screws increases strength is a dangerous myth; in reality, every extra hole is just another opportunity to snap a plaster key. Second, never assume your cabinet back is designed to hold weight. Unless you use the same logic as the hidden ledger trick for rock-solid entryway seating, that thin plywood back will eventually delaminate under the weight of a stone top. Finally, remember that plaster is dynamic—it moves with the seasons. If you don’t account for why your built-in cabinets are pulling away from the ceiling, you’ll be patching hairline cracks every single spring.
Gear That Saved My Sanity in 1920s Bathrooms
You don’t need a truckload of tools to do this right, but you need the right ones. My absolute go-to is a simple neodymium magnet for finding lath nails—it is more accurate than any electronic sensor I’ve ever owned. I also never start a project without a dedicated oscillating multi-tool for ‘surgical’ plaster removal; it’s the only way to minimize dust and prevent accidental cracks. For those looking to streamline the process, I highly recommend reviewing these vanity installation hacks that save time and money. I also trust the technical specs from the National Center for Preservation Technology and Training for any advice on historic fasteners.
#IMAGE_PLACEHOLDER_E#
Stop Staring at Your Walls and Start Cutting
It is easy to get paralyzed by the fear of ruining historic materials, but true preservation means building things to last. By opening that wall and installing real internal blocking, you are protecting your home’s integrity for the next century. Whether you are following maximize your space with custom vanity expert design tips or just trying to get through a DIY weekend, the extra effort inside the wall pays off every time you lean on that sink. You have the plan and the method; now go grab your tools and make it happen. Have you ever found a ‘mystery’ behind your plaster walls that completely changed your installation plan? Let me know in the comments!