

I’ll never forget the sickening crunch of a Tuesday morning three years ago. I had just finished my dream kitchen, complete with massive, 30-inch deep pantry drawers. I pulled one out to grab a 25-pound bag of flour, and the whole unit groaned, bowed, and practically begged for mercy. I was so proud of those deep drawers, but I had made a fundamental mistake: I built for volume, not for the physics of weight. If you have ever felt that shimmy and shake when you open a cabinet, you probably know why your large kitchen drawers drag and the support fix becomes an urgent weekend project. I learned the hard way that when you go deep, you have to go strong on the inside. Today, I’m going to show you exactly how to brace those monsters so they never skip a beat, even when they are loaded down with cast iron and canned goods.
Why Depth is a Deceptive Trap for Most DIYers
Depth is seductive. We all want more storage, but the further a drawer extends, the more leverage that weight has against your slides and the drawer box itself. Early in my career, I figured that 3/4-inch plywood was enough for anything. I was wrong. Without internal bracing, even the best materials will eventually bow under a heavy load. According to the National Kitchen & Bath Association (NKBA), a standard drawer is tested for 75 pounds, but extra-deep pantry units often hold upwards of 150 pounds of staples. That is a massive amount of stress on the floor of the drawer. If you don’t reinforce the structure, you’ll eventually be looking for ways how to stop heavy pantry drawers from jumping tracks because the box has literally warped out of alignment. Have you ever felt a drawer ‘dip’ as it reaches full extension? That’s your first warning sign.
Is Internal Bracing Just Over-Engineering for No Reason?
I get it. You’re thinking, “It’s just a drawer, why am I adding extra wood and hardware inside?” It feels like you’re losing precious storage space. But I promise you, losing half an inch of height to a support rib is a lot better than having the bottom of your drawer fall out on your toes. When I started using the heavy-duty dowel strategy for wide drawer bases, my callbacks for drawer repairs dropped to zero. It’s not about being ‘extra’; it’s about making sure your hard work lasts as long as your house does.
The Secret Support Ribs That Save Your Slides
The most effective way to handle that massive weight is through internal stiffeners. Instead of relying on the glue at the edges of the drawer bottom, we are going to talk about how to integrate ‘ribs’ that tie the front of the drawer to the back. This turns the bottom from a flimsy sheet into a rigid platform. Think of it like floor joists in a house; you wouldn’t walk on a floor made of a single sheet of plywood with nothing underneath, right? The same logic applies here. By the time we are done, your drawers will slide as smooth as butter, no matter how many bags of rice you throw at them.
Put an End to the Center-Point Sag
The problem with deep drawers isn’t the wood—it’s the physics. When you have a 30-inch deep drawer, the center of that bottom panel is a long way from the support of the side walls. I remember building a massive set of pantry drawers for a client who was a serious home baker. She filled those drawers with fifty-pound bags of flour and sugar. Within a month, the 1/4-inch bottoms looked like a sagging hammock. I had to go back and retrofit everything using what I call the ‘mid-span rib.’ This involves running a vertical support member from the front panel to the back panel, directly underneath the drawer bottom. It acts exactly like a floor joist in a house, cutting the span of the plywood in half and doubling the weight capacity instantly. Learning how to support extra wide kitchen drawers without dragging starts with this internal skeleton.
The Mid-Span Rib That Works Like a Floor Joist
To do this right, you need to cut a strip of 3/4-inch plywood that is the same height as your drawer sides. This rib needs to be notched if your drawer bottom is recessed into a groove. I usually cut a 1/2-inch deep notch along the top edge of the rib so the drawer bottom can slide right over it. When I was first starting out, I tried to just glue these in, but the vibration of opening and closing the drawer eventually broke the seal. Now, I use a combination of wood glue and 2-inch trim screws driven through the front and back drawer faces into the ends of the rib. If you are worried about aesthetics, the drawer front will hide the screws on the face, and a quick dab of wood filler handles the back. This is the same level of durability you should expect when looking for an expert guide to flawless vanity installation tricks tips for your bathroom storage. 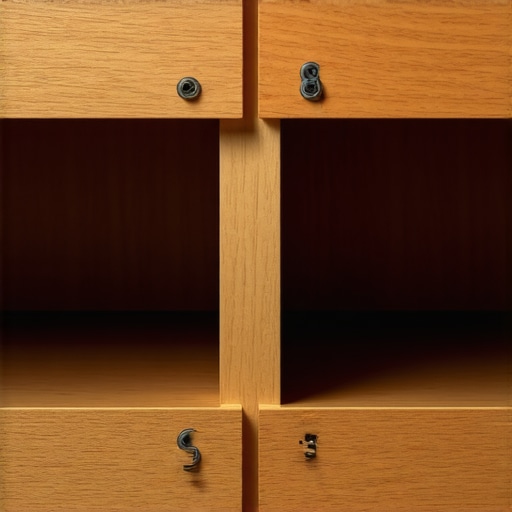
Why Mechanical Fasteners Beat Glue Alone
Glue is great for tension, but mechanical fasteners like screws or the heavy-duty dowel strategy for wide drawer bases are what handle the shear force of a heavy load. When that drawer is full of cast iron, every time you pull it open, you’re putting lateral stress on those joints. If you only rely on glue, the humidity changes in your kitchen will eventually cause it to fail. I always pre-drill my holes to avoid splitting the grain, especially when working with hardwoods like maple or oak. It takes an extra five minutes, but it prevents the heartbreak of a cracked drawer box during the final assembly.
Don’t Let Your Slides Be the Weakest Link
Even the strongest drawer box is useless if your hardware can’t handle the heat. For deep pantry units, standard 75-pound slides are a recipe for disaster. You need to upgrade to 150-pound or 200-pound heavy-duty under-mount or side-mount slides. When I retrofitted that baker’s kitchen, I swapped her standard hardware for heavy-duty ball-bearing slides and the difference was night and day. If the drawer still feels stiff, you may need to stop drawer dragging with this under-mount slide adjustment 2 to ensure the box is perfectly level. If the box isn’t level, the weight will shift to one side, causing the ball bearings to grind and eventually leading to a situation where you’ll need to know how to stop heavy pantry drawers from jumping tracks. Proper alignment is the difference between a drawer that feels like a luxury and one that feels like a chore.One of the biggest myths I see in the cabinetry world is the over-building fallacy. Many DIYers assume that if a drawer is sagging, the immediate solution is to use thicker, heavier 3/4-inch plywood for the entire box. I used to do this too, thinking it was the ultimate mark of quality. But here is the reality: you are adding significant dead weight before you have even put a single pot or pan inside. That extra bulk actually eats into your slide’s weight capacity. Instead of sheer mass, you need structural geometry. A thinner 1/2-inch box reinforced with a torsion-box bottom or a single mid-span rib is significantly stronger and lighter than a massive, unreinforced slab of birch. When you start thinking like an engineer rather than a weightlifter, you’ll find that your expert guide to flawless vanity installation tricks tips focuses more on bracing than on the thickness of the boards.
The Parallelism Trap That Kills Smooth Motion
Another subtle trap that catches even seasoned builders is what I call Back-Wall Blindness. We spend so much time leveling the front of our units, but if the back wall has a slight bow—which almost every home does—your drawer slides will never be perfectly parallel. According to the Architectural Woodwork Institute (AWI) standards, even a 1/32-inch deviation over the length of a slide can cause premature bearing failure and grinding. If your slides are pinched at the back, they will bind. If they are flared, the drawer will feel sloppy and eventually you will wonder why your drawer slides bind and the simple realignment needed to save them.
How Do You Handle Out-of-Square Alcoves Without Losing Your Mind?
When you are fitting a deep drawer unit into a built-in nook or a closet, you will rarely find a perfect 90-degree corner. I have seen pros try to force a square box into a trapezoid-shaped hole, only to find the drawers won’t open once the face frame is tightened. The secret isn’t just learning how to fit built-ins into out-of-square alcoves 2; it is about building your inner carcass about an inch narrower than the opening. This creates a shim zone that allows your internal hardware to stay perfectly rectangular even if the house walls are leaning. One final nuance for these deep units: if you are installing in a bathroom or near an exterior wall, you must follow the moisture barrier rule for cabinets on cold outer walls. Condensation trapped behind a heavy, deep drawer will rot your structural supports from the inside out before you ever see a spot of mold on the face. Have you ever fallen into this trap of over-building only to have the hardware fail anyway? Let me know in the comments.I never step onto a job site without my Bosch GLL3-330CG laser. While many DIYers rely on a spirit level, I’ve found that even a high-quality bubble can be off by a fraction of an inch over a long run. When you are executing the leveling move for vanities on slanted bathroom floors 2, that fraction becomes a massive gap at the ceiling that ruins the aesthetic. I also use GRK R4 multipurpose screws exclusively. Their recessed star drive prevents the stripping that ruins a beautiful face frame, and the self-tapping threads bite into hardwoods without splitting the grain. This kind of grip is non-negotiable if you’re following the lag bolt pattern for heavy tool chest anchoring in a high-traffic garage or workshop.
How do I keep my heavy-duty drawers sliding smoothly for a decade?
The biggest mistake is the ‘set it and forget it’ mentality. According to the Forest Products Laboratory’s Wood Handbook: Wood as an Engineering Material, wood moves seasonally due to relative humidity. This means your perfectly aligned slides in the summer might bind or grind in the winter. Once a year, I pull my deepest drawers out and check for ‘bearing creep’—the gradual migration of ball bearings. I clean the tracks with a microfiber cloth and apply a dry PTFE lubricant. Never use oil-based lubricants; they turn into a sticky sludge that attracts dust. If your hardware starts to resist, it’s a warning. Ignoring it is why your soft-close hinges are snapping 2 later on. 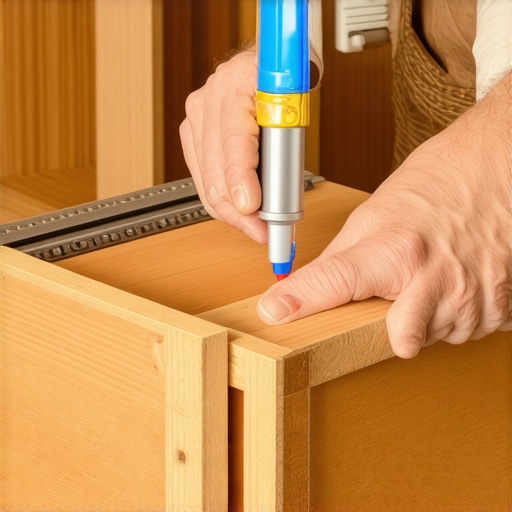
Why the Future of Cabinetry is Getting Smarter
Looking ahead, I predict we’ll see a shift toward smart-tensioning slides that automatically adjust for weight load and humidity fluctuations. Until then, we rely on creative built-ins for seamless storage and home aesthetics to hide our structural reinforcements. If you’re planning innovative storage solutions to transform your bathroom, remember that the best results come from high-quality fasteners and annual maintenance. My advice is simple: go check your heaviest drawer right now—if it dips more than 1/8th of an inch when fully extended, it’s time to add a mid-span rib before the bottom gives out. Use a combination of glue and mechanical fasteners for a fix that will outlast the house itself.
What 15 Years of Sagging Drawers Taught Me
I have spent more time than I care to admit retrofitting drawers that I thought were ‘strong enough.’ The hardest lesson I learned is that no amount of premium wood can overcome poor structural geometry. I once built a set of massive units using 3/4-inch walnut, only to find the drawer bottoms bowing within six months because I skipped the internal supports. I realized that effortless storage solutions for a tidy stylish home are built on skeletons, not just thick panels. Also, never trust a ‘factory-grade’ glue joint to hold a 50-pound bag of flour alone—mechanical fasteners are your insurance policy against gravity. Finally, if you are looking into vanity installation hacks that save time and money, always apply these same bracing rules; bathroom humidity makes the structural integrity of wood even more volatile.
My Holy Grail List for Rock-Solid Builds
To get these results, I rely on a very specific kit. The Bosch GLL3-330CG Laser is my go-to for ensuring everything is perfectly parallel across deep spans. I also never build without GRK R4 multipurpose screws; their star drive prevents stripping in tight cabinet corners. For understanding how your wood will react over time, the Wood Handbook from the Forest Products Laboratory is an essential reference I consult before every major build. These resources are the secret to creating creative built-ins for seamless storage and home aesthetics that remain functional for decades rather than months.
Your Pantry Deserves This Upgrade
The satisfaction of a drawer that glides silently under a full load is one of the greatest rewards for any DIYer or professional. By taking the time to install mid-span ribs and choosing high-capacity hardware, you ensure that you never have to worry about why your large kitchen drawers drag and the support fix again. Your home is an investment, and the internal structure of your cabinetry is its foundation. If you are tackling a complex renovation and need a second set of eyes on your plans, feel free to contact us for professional guidance. Now, grab your drill and go give those heavy drawers the support they deserve.
Have you ever opened a drawer only to find the bottom panel has completely popped out of its groove? Let me know your biggest cabinetry horror story in the comments below!