

The sound of a slow, rhythmic creak at two in the morning is enough to make any homeowner break into a cold sweat. Last year, I sat in my living room and watched as a hairline fracture appeared right above my brand-new floating media unit. It was gorgeous, sleek, and—as it turns out—slowly losing its battle with gravity. I had spent a small fortune on that custom piece, only to see it bowing forward like a weary traveler. If you have noticed a tiny gap appearing between your wall and your cabinetry, do not ignore it. That gap is a warning. I made the classic mistake of trusting heavy-duty drywall anchors instead of doing the hard work of finding the dead center of my studs. It is a common pitfall, very similar to the structural issues people face when built-in cabinets pull away from the ceiling. Today, we are going to stop the sag and secure your unit so you can finally stop worrying about your television ending up on the floor. Have you ever walked into a room and realized your furniture was literally trying to escape the wall?
That Growing Gap is a Physics Problem You Cannot Ignore
Most people assume that if a cabinet is screwed in, it is safe. But a floating unit creates immense leverage. The further out the shelf extends, the harder it pulls against the top screws. When I first started installing these, I thought four anchors would be plenty. I was wrong. The weight of the wood, combined with a modern television, puts massive pull-out stress on your fasteners. It is the same reason vanity installation hacks always prioritize structural blocking over simple drywall fixes. According to data from the Gypsum Association, standard gypsum board is designed for compressive strength, not for holding heavy cantilevered loads. In fact, most drywall will fail under sustained tension once you exceed just a few dozen pounds of force. You need to hit the wood, or better yet, use steel brackets that save sagging media units to distribute that weight properly. If you have a wider unit, you might even need to look into hidden steel plate tactics to prevent any lateral wobble.
Is the Stud Fix Actually Worth the Extra Effort?
You might be thinking, can I just shove some construction adhesive back there and call it a day? Please, for the love of your flooring, do not do that. Glue is excellent for keeping things still, but it will not hold up a hundred-pound console over time. The Stud Fix involves more than just finding wood; it is about creating a mechanical bond that transfers the load directly into the frame of your house. It is the only way to ensure your stylish home stays safe and looks sharp. We are not just looking for a quick patch; we are looking for a permanent solution that handles the weight of your electronics, books, and decor without flinching. We are going to dive into how to locate those studs accurately and what to do if they are not exactly where you need them to be.
Don’t Guess Where the Wood Is
Finding a stud is not a suggestion; it is the law of the land if you want your unit to stay airborne. Many DIYers rely on cheap electronic sensors that beep at every pipe or wire. I prefer the triple-check method. Use a high-strength magnet to find the drywall screws holding the board to the stud, then drill a tiny pilot hole to confirm you are hitting solid timber. This level of precision is exactly what we discuss in the guide on anchoring tool cabinets to wood stud walls. If you miss the center of the stud, you are essentially relying on a sliver of wood to hold up fifty pounds of television and cabinetry. I once tried to rush a mount in my own hallway; the screw caught the edge of the stud, and by morning, the cabinet had developed a sickening lean. I had to patch the wall and start from scratch, which took twice as long as just being careful the first time.
Drive Structural Screws for a Permanent Hold
Forget standard gold screws or drywall fasteners. You need structural lag screws with a built-in washer head. These behave like iron fingers clamping your unit to the frame of your home. If your unit is particularly deep, the leverage increases exponentially. This is why vanity installation hacks emphasize mechanical fasteners over adhesives every single time. For extra-long spans where the studs do not align with your unit’s mounting holes, you must use steel brackets that save sagging media units. These allow you to bridge the gap between your wall’s structure and your furniture’s design without compromising safety.
Build a Hidden Support Frame for Total Stability
Sometimes the internal structure of the cabinet itself is the weak point. If the back panel of your unit is just thin 1/4-inch hardboard, no amount of wall-screwing will save it; the cabinet will simply pull away from its own back. In these cases, you need to implement a sub-frame move. This involves mounting a solid 3/4-inch plywood cleat or a steel rail to the wall first, then hanging the unit onto that support. It is a technique often used to stop floating shelf sag with internal torsion box engineering. This distributes the weight across multiple points of contact, ensuring that no single fastener is doing all the heavy lifting.
Why Pre-Drilling is Your Best Friend
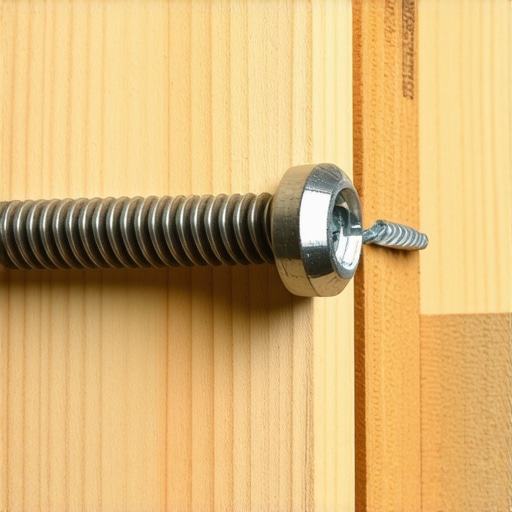
Hardwoods and even some dense plywoods will split if you drive a heavy-duty screw in without a pilot hole. A split in your mounting rail is a catastrophic failure waiting to happen. It turns your solid wood into two pieces of kindling that can no longer grip the threads of your screw. When you are working on flawless vanity installation, pre-drilling ensures the integrity of the cabinet remains intact. Think of it like a surgical prep—measure the diameter of the screw’s core and choose a drill bit that matches. This allows the threads to bite deep into the wood without forcing the fibers apart.
Let’s dig deeper into why simply hitting the wood isn’t always the end of the story. Most homeowners think that if a cabinet starts to sag, the solution is to just keep driving more screws into the wall until it stays put. This is a dangerous myth. In reality, over-perforating a single stud can actually weaken the timber, creating a ‘perforation line’ that invites structural splitting. Instead of turning your wall into Swiss cheese, you should focus on lateral load distribution. This is where you can stop wobbly custom built-ins with 4 hidden steel plate fixes. These plates spread the tension across a wider surface area, preventing the wood fibers from crushing under the pressure of a single bolt. Have you ever fallen into this trap where everything felt solid on day one but started to tilt by month six? Let me know in the comments.
More Screws Won’t Save a Bad Layout
The National Kitchen & Bath Association (NKBA) recommends that for heavy cantilevered loads, the wall must be reinforced with horizontal blocking between the studs. This isn’t just a suggestion; it is a necessity for weight distribution. If your studs are 16 inches apart, but your cabinet’s structural points are 20 inches apart, you are in trouble. I see this often in bathrooms where people skip the structural prep. You might think you’re fine, but eventually, you’ll need the hidden sub-frame move for supporting massive quartz top vanities to prevent a total failure. Without that internal skeleton, the weight of the stone will eventually pull the cabinet’s face away from its frame.
Avoid the Trap of Overtightened Fasteners
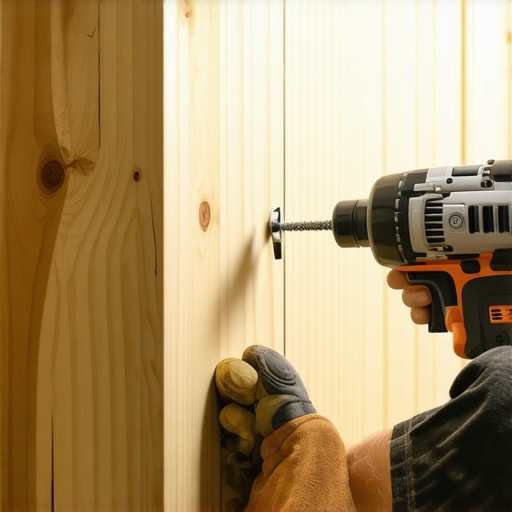
Here is the ‘oops’ factor that ruins many high-end installs: the over-tightened screw. When you use a high-torque impact driver, it is easy to ‘bury’ the head of the screw into the mounting rail. This doesn’t make it tighter; it actually compromises the structural integrity of the wood. Once the wood fibers are crushed, the screw loses its clamping force. This is particularly devastating with lower-density materials. If you aren’t careful, you’ll see why particle board shelves sag and why those fasteners eventually pull through like a hot knife through butter. Always use a washer or a structural screw with a wide ‘flange’ head to distribute that pressure evenly.
Should You Rely on Mechanical Fasteners Alone for Heavy Quartz?
The short answer is no. For massive built-ins or vanities with stone tops, the vertical load must be shared by more than just the threads of a screw. Professional installers often use a ‘ledger board’ or a hidden steel rail to provide a physical shelf for the cabinet to sit on. This changes the physics of the installation from ‘pull-out’ tension to ‘shear’ strength, which is much higher for most fasteners. If your floor is uneven, which it likely is, you will also need to master the leveling move for vanities on slanted bathroom floors before you ever drive your first screw. If the unit isn’t perfectly plumb, gravity will pull it away from the wall regardless of how many anchors you use.
Why Your Level Might Be Lying to You
Finally, remember that ‘level’ and ‘square’ are two different things. Your wall might be perfectly plumb (vertical), but if it is bowed or has ‘bellies’ in the drywall, your cabinet will never sit flush. When you tighten your screws against a bowed wall, you are actually bending the cabinet to fit the wall’s imperfections. This leads to drawers that stick and doors that won’t stay closed. Use shims behind the mounting points to fill those gaps. It’s an extra ten minutes of work that saves you years of frustration. Have you ever tried to install a cabinet only to find the wall was shaped like a banana? I’d love to hear your horror stories in the comments below.
Once you have conquered the initial installation, the real work begins in ensuring that your setup remains rock-solid for the next decade. I have seen too many beautiful projects fail because the builder ignored the long-term physics of wood movement. If you want to avoid the ‘slow sag’ of a bathroom unit, you really need to understand how to stop cabinet doors from warping in humid bathrooms. It is not just about the wood; it is about the environment it lives in. I personally swear by using GRK RSS structural screws for every mount. Why? Because they are heat-treated and have a built-in washer head that prevents the screw from ever pulling through the mounting rail. I have replaced dozens of standard gold screws that snapped under the sheer weight of a loaded media unit, and I refuse to let that happen to my clients.
Get a Real Level Instead of Relying on Your Phone
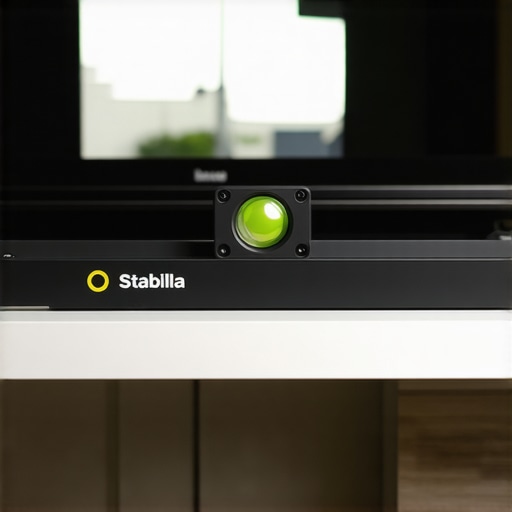
Stop using your smartphone’s level app for professional-grade cabinetry. The sensors in your phone are fine for hanging a picture frame, but they lack the precision needed for a six-foot vanity. I use a Stabila 48-inch magnetic level because the vials are calibrated to be accurate for life. When you are performing a step-by-step guide to vanity installation, even a sixteenth of an inch of error across the width of the unit can lead to drawers that won’t close properly three months later. The American Wood Council’s National Design Specification (NDS) for Wood Construction emphasizes that fastener withdrawal capacity is heavily dependent on consistent wood density and penetration depth, meaning your alignment has to be perfect to maximize the grip of your hardware.
How can I make sure my built-in storage stays level over time?
Maintenance is the part of DIY that nobody likes to talk about, but it is the difference between a project that lasts and one that ends up in a landfill. Every six months, I recommend taking a screwdriver to your hinges. If you notice your doors are sticking, do not force them. Check out why your soft-close hinges are snapping to see if you need to adjust the tension or replace the hardware before it shears off entirely. In climates with high humidity swings, your built-ins will expand and contract. This can actually loosen the tension on your wall anchors. A quick check of the mounting screws once a year ensures that the ‘physics problem’ we discussed earlier stays under control. For those working with limited room, integrating smart storage solutions to optimize small bathroom spaces can reduce the overall weight load on your fasteners by better distributing the items you store.
The Future of Storage is Modular and Metal
Looking ahead into 2025 and beyond, I predict we are going to see a massive shift away from pure wood frames toward hybrid systems. We are already seeing professional shops move toward internal aluminum skeletons for floating furniture. This allows for incredibly thin, sleek profiles that can support hundreds of pounds without the bulk of a traditional wood cleat. If you are planning a renovation, look into innovative storage solutions to transform your bathroom that utilize these modern materials. I challenge you to go into your living room right now, put a level on your media unit, and see if it is still as true as the day you installed it. If it is dipping even slightly, go grab those structural screws I mentioned and fix it today before gravity wins the battle. Your future self will thank you when your television is still safely on the wall and not on the rug.
The Hardest Lessons I Learned the Heavy Way
Over the years, I have realized that the wall isn’t just a surface; it’s a living part of the home that reacts to weight and movement. I used to think ‘close enough’ was good enough for stud alignment, but I learned that even a quarter-inch off-center can lead to a slow-motion disaster. Another breakthrough was understanding that built-in storage ideas to declutter and enhance your home are only as good as the back panel of the cabinet itself. If that back isn’t solid or properly reinforced, the whole unit is a house of cards. I also stopped trusting plastic anchors entirely for any load over ten pounds—they are the ‘fast food’ of construction: cheap, easy, and ultimately unsatisfying for anything heavy that needs to stay put for a decade.
The Gear That Never Lets Me Down
If you want professional results, you need a toolkit that doesn’t quit when the torque gets high. I always keep a box of GRK RSS structural screws on hand; they have a built-in washer that acts like a clamp, which is essential when you stop wobbly custom built-ins with hidden steel plate fixes. I also swear by my Stabila magnetic level. It is a bit more of an investment, but it is the only tool I trust to tell me the truth about a slanted floor or a bowed wall before I drive my first fastener. For those tricky spots where you simply cannot hit a stud, I rely on high-capacity steel toggle bolts, though I only use them as secondary support. Finally, never underestimate the power of simple 3/4-inch plywood offcuts—they make the best shims and internal support blocks you can find for reinforcing a weak cabinet frame.
#IMAGE_PLACEHOLDER_E#
Your Home Deserves Structural Peace of Mind
Taking the time to do this right is about more than just aesthetics; it is about the safety of your family and the longevity of your home investment. Whether you are tackling a massive living room media wall or following an expert guide to flawless vanity installation, the physics of weight distribution remains the same. You are building a legacy of quality and craftsmanship in your home. Don’t rush the prep work or settle for ‘good enough’ hardware. When you finally sit back and see a unit that is perfectly flush and rock-solid, you will know that innovative storage solutions to transform your bathroom or living space are worth every extra pilot hole and every triple-checked measurement. You have the skills and the knowledge—now go make it happen and secure your space for good. Have you ever found a mysterious gap growing behind your cabinets after a few months? Let me know how you handled it in the comments below!