

I’ll never forget the sound of a slow, ominous creak coming from my guest bathroom at two in the morning. It was the sound of a 200-pound quartz slab slowly winning a tug-of-war against three-inch wood screws and standard pine 2x4s. I had spent weeks crafting the perfect minimalist floating vanity, only to realize I’d built a beautiful shelf that was structurally about as sturdy as a cardboard box. It was a terrifying wake-up call that looking cool is not the same as staying up. Since then, I’ve obsessed over the physics of wall-hung cabinetry, and I’m here to make sure you don’t have to learn through a midnight structural failure like I did. [image]
Stop Worrying About Your Vanity Ripping Off the Wall
In this guide, I am going to walk you through the exact methods I use to marry heavy stone tops with floating designs. We aren’t just talking about bigger screws; we are talking about structural integrity that lasts for decades. If you are currently planning a renovation, you probably already know that maximizing your space with custom vanities requires more than just a pretty finish. You need a foundation that respects the laws of gravity. I learned the hard way that standard wood frames often bow under pressure, which is why I now swear by tactics for supporting heavy quartz counters on standard wood vanities. It’s all about transferring that downward force into the floor and wall framing rather than just the cabinet back.
Will my wall really hold up all that weight?
It’s a valid fear. Quartz is notoriously dense, weighing roughly 18 to 20 pounds per square foot for a standard 3cm slab. According to the Natural Stone Institute, the sheer load of a large double-sink vanity can exceed 400 pounds once you add the sinks and hardware. If you haven’t considered the hidden sub-frame move for supporting massive quartz top vanities, you’re essentially gambling with your drywall. In my early days, I once tried to mount a unit without proper blocking behind the plaster—a mistake that ended in a very expensive cracked backsplash. I want to know, have you ever started a project only to realize the materials you chose were way heavier than your original plan? It’s a common hurdle, but one we can definitely clear with the right bracing.
Reinforce Your Wall Before the Cabinet Even Arrives
Standard wall studs are great for holding vertical weight, but a floating vanity is a different animal. It exerts a constant outward pulling force on the top and a pushing force at the bottom. To combat this, you need horizontal blocking. I always recommend opening up the drywall and installing 2×8 lumber between the studs at the mounting height. Think of this like a solid anchor point that turns the entire wall into a single, unified support system rather than relying on a few isolated vertical points. If you skip this, your mounting screws are only grabbing an inch and a half of wood per stud, which simply isn’t enough to hold 400 pounds of stone safely. Following a step-by-step guide to vanity installation for beginners will show you that the prep work behind the wall is 90% of the battle. When you bolt through the cabinet back and into that wall blocking, you are creating a structural sandwich where the cabinet back is the meat and the plywood cleat and wall blocking are the bread. If the bread is weak, the whole thing falls apart.
Build a Skeleton Inside the Cabinet
Most off-the-shelf vanities are built with thin MDF or particle board backs. That is a recipe for a midnight disaster. You need to create an internal sub-frame. I use 3/4-inch plywood to create a “U” shape inside the cabinet that connects the back rail to the side panels. This mimics the internal torsion box move for long floating shelves, distributing the weight through the cabinet’s own structural sides rather than letting the back panel fasteners do all the heavy lifting. I remember a job in a mid-century modern remodel where I ignored the center point of a six-foot vanity because I thought the wall blocking was sufficient. By the time the quartz installers finished, the middle of the cabinet had dropped nearly a quarter inch. I had to crawl underneath and retro-fit steel plates while the adhesive was still wet—it was a nightmare of sweat and panic, but it taught me that the longer the span, the more you need to think like a bridge engineer.
Stop the Dip with Strategic Steel
Even with a perfect wall, a long vanity can sag in the middle under the weight of two sinks. This is where how to stop floating vanities from dipping with steel plates becomes your best friend. Now, I always pre-install heavy-duty L-brackets that extend at least two-thirds of the way under the vanity depth. These brackets act like a ribcage, keeping the stone perfectly flat and preventing the wood from bowing over time. 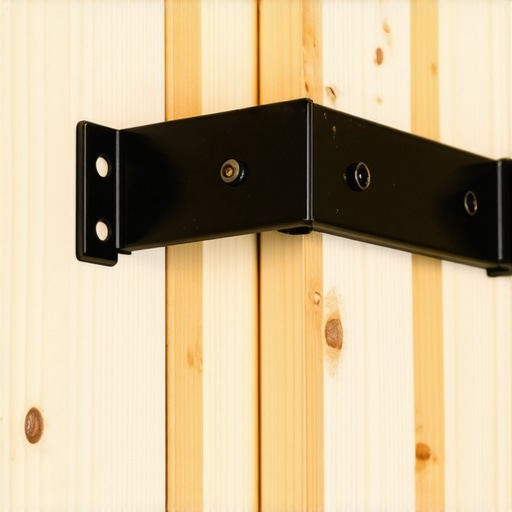
Don’t Trust Your Eyes—Trust the Laser
Floors are never level, and walls are rarely plumb. If your vanity is tilted even a fraction of a degree forward, the center of gravity shifts, and the quartz will constantly try to peel the cabinet off the wall. I always use a self-leveling cross-line laser to ensure the mounting line is dead-on. If things are off, do not just force the screws; use shims. I have seen pros use hidden leveling shims to correct a significant floor slope, ensuring the cabinet sits perfectly square. These vanity installation hacks that save time and money are not just about speed; they are about preventing a catastrophic failure years down the road. Also, keep your plumbing in mind during the bracing phase. I once spent four hours reinforcing a unit only to realize I had placed a steel support exactly where the P-trap needed to go. It is a puzzle where every structural piece must respect the plumbing layout. Always check your clearances before the final bolt is tightened.
Why More Screws Won’t Save a Poorly Anchored Vanity
Everyone tells you to just ‘hit the studs’ and use more fasteners if the cabinet feels heavy. In my experience, that is exactly how you end up with a cracked wall. The myth that quantity of screws equals safety is dangerous because it ignores the principle of shear strength versus pull-out resistance. When you are hanging a heavy stone top, the top screws are under intense tension, trying to pull straight out of the wood, while the bottom of the vanity is actually pushing into the wall. If you haven’t mastered the expert guide to flawless vanity installation tricks and tips, you might miss the fact that the type of fastener matters more than the count. I’ve seen 3-inch deck screws snap like toothpicks under the weight of a double-thick quartz slab because they weren’t rated for the shear load. The National Kitchen & Bath Association (NKBA) recommends that any wall-hung fixture be supported by a structure capable of holding the fixture’s weight plus an additional 200-pound safety margin. If your wall isn’t braced internally, those screws are just waiting for a humid day to start sliding. Have you ever fallen into this trap of over-fastening? Let me know in the comments.
How can I ensure my built-ins survive an out-of-square room?
The ‘oops’ factor that kills most high-end projects isn’t the assembly—it’s the geometry of the room. I once spent forty hours on a set of innovative built-in solutions for small rooms, only to find the alcove was nearly two inches wider at the front than the back. If you don’t use the scribing move for flawless cabinet gaps on natural stone, your expensive custom work will look like it was shoved into place. You must learn how to fit built-ins into out-of-square alcoves by templating the walls first. Most people assume walls are flat, but they are actually undulating waves of mud and tape. 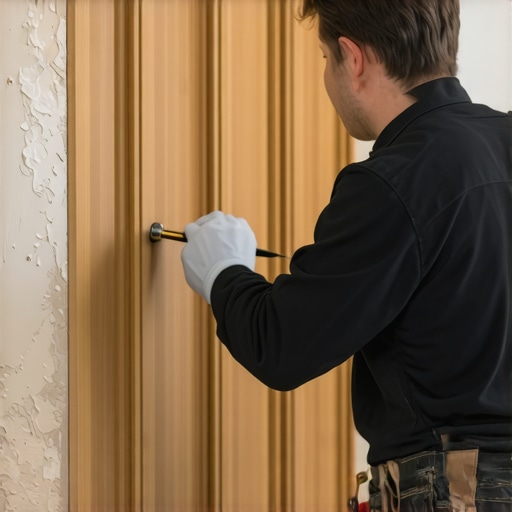
The Hidden Tension of Over-Engineered Storage
Another advanced mistake is ignoring how internal weight shifts affect the cabinet’s box integrity. We often focus so much on the wall connection that we forget the cabinet itself can rack. If you are building deep drawers to maximize your space with custom vanities, the leverage exerted when those drawers are fully extended is massive. This is often why your large kitchen drawers drag; the weight of the contents is actually twisting the cabinet face. To combat this, I always integrate a secondary internal frame that bridges the gap between the drawer slides and the wall-mounting points. It’s about creating a rigid box that doesn’t care what the floor is doing. When you combine vanity installation hacks that save time and money with actual structural engineering, you move from being a ‘weekend warrior’ to a true craftsman who builds things that last longer than the house itself.Once you have that massive vanity or library wall perfectly aligned, the real challenge begins: keeping it there. I’ve seen gorgeous projects fail six months in because the homeowner didn’t account for seasonal humidity or the inevitable settling of a house. To keep things rock-solid, I rely on a very specific toolkit that goes beyond a standard hammer and drill. My ‘holy grail’ for heavy-duty installs is the GRK RSS Structural Screw. Unlike standard lag bolts that can split wood if you aren’t careful, these have a built-in washer head and specially hardened steel that handles the shear force of a 400-pound quartz top without breaking a sweat. If you’re following an expert guide to flawless vanity installation tricks and tips, you’ll know that the fastener is only half the battle; the other half is precision. I never step onto a job site without my Festool TS 55 track saw for making those ultra-tight scribes against wonky walls. Using the scribing move for flawless cabinet gaps on natural stone is the difference between a project that looks DIY and one that looks like a high-end architectural feature. 
How do I keep my heavy built-ins from shifting over time?
Maintenance isn’t just about cleaning the wood; it’s about monitoring the structural points. Every six months, I recommend doing a ‘torque check’ on your mounting bolts. Wood is an organic material—it breathes. In the winter, when the air is dry, your studs might shrink slightly, creating a tiny gap between the wall and the cabinet back. This is often why your large kitchen drawers drag or why you might see a hairline crack in the caulk line at the backsplash. According to the Kitchen Cabinet Manufacturers Association (KCMA) in their A161.1 performance standard, cabinets must withstand specific load tests, but these tests assume a stable environment. If your bathroom lacks proper ventilation, that moisture will eventually soften the fibers around your anchor points. I always tell my clients to invest in a high-quality exhaust fan before they invest in a high-end vanity. This is also why I’m a huge advocate for vanity installation hacks that save time and money, like using marine-grade plywood for the sub-frames in high-moisture zones. Looking toward 2025, I see the industry moving toward fully integrated metal chassis systems for floating furniture—essentially a hidden steel skeleton that takes the house’s movement out of the equation entirely. For now, your best defense is a solid installation and a keen eye for those seasonal shifts. If you want to level up your next project, I challenge you to ditch the standard wood screws and try a structural steel bracket for your next floating seat or heavy pantry unit; the peace of mind is worth every penny.
The Hard Lessons I Learned About Drywall Compression
One thing nobody tells you is that even if your studs are solid, the drywall itself is a weak point. I’ve seen heavy vanities slowly crush the bottom half-inch of gypsum because of the leverage force pushing the bottom of the cabinet into the wall. To prevent this, I often swap the drywall behind the vanity for a layer of 3/4-inch plywood. This ensures the cabinet is pushing against structural wood, not soft powder. Also, never forget that internal torsion box engineering isn’t just for shelves; applying those same principles to your cabinet frame prevents the sides from bowing when that heavy slab finally lands. Finally, always account for dynamic weight—someone leaning on the edge of the stone while brushing their teeth can add a sudden 150 pounds of downward pressure that your fasteners must be ready to handle.
#IMAGE_PLACEHOLDER_E#
The Hardware and Tools I Trust My Reputation With
I don’t play around with mystery hardware from big-box stores when a 400-pound countertop is on the line. For every install, I rely on GRK RSS Structural Screws because they offer incredible shear strength and don’t snap like standard deck screws. I also swear by a self-leveling cross-line laser; if you are even an eighth of an inch off across a sixty-inch span, your stone will look crooked against your tile lines. For a truly professional finish, following an expert guide to flawless vanity installation tricks and tips is essential, especially when you are dealing with older homes where walls are rarely plumb. Lastly, keep a set of composite shims on hand; they provide a rock-solid base that won’t compress or rot over time.
Time to Build a Vanity That Actually Defies Gravity
Building a floating piece is one of the most rewarding home improvement projects you can tackle. It opens up the floor plan and provides a high-end, modern aesthetic that standard cabinets just can’t match. By taking the extra time to reinforce the wall and build a robust internal skeleton, you can maximize your space with custom vanities without the nagging fear of a midnight structural failure. Remember, the goal is to make the unit look like it’s floating while ensuring it’s anchored as firmly as the house itself. Have you ever encountered a wall that was so out-of-plumb it made you want to walk away from a project? Let me know your installation horror stories in the comments below!