

I still remember the sinking feeling—literally—as my brand-new walnut floating desk began its slow descent toward the floor just days after I’d bragged about it to my neighbors. It started as a subtle slope, the kind you only notice because your pen keeps rolling away, but within a week, the gap between the desk and the wall was wide enough to swallow a smartphone. I’d made the classic rookie mistake of overestimating my drywall’s patience and underestimating the brutal physics of leverage. Floating desks are beautiful, but they are essentially giant levers trying to pry your hardware right out of the studs. If you’ve been staring at a growing gap in your home office, you aren’t alone; this is the most common failure point in modern built-in storage ideas to declutter and enhance your home. Today, I’m going to show you how to move past the hope-and-pray method of installation and get that workspace level again.
Stop the Slope with Better Structural Support
Most people assume that if they hit a stud, they’re safe. I thought so too, until I realized that standard wood screws don’t always provide the clamping force needed for a deep work surface. When I first started, I ignored the depth-to-weight ratio, leading to a disastrous afternoon where my entire setup nearly collapsed. You have to realize that every inch of desk depth adds significant pull-out tension on your top anchors. This is why the hidden steel plate fix for wobbly floating desks has become my go-to solution for heavy-duty setups. According to the Gypsum Association, standard drywall has a very limited capacity for resisting the crushing force at the bottom of a cantilevered bracket, which is exactly why your desk starts to bite into the wall and tilt downward.
Can you really trust a desk with no legs?
It’s the question I asked myself the second time I tried to reinforce the wall with even more screws. It sounds like a gamble, but the truth is that a floating desk is perfectly safe if you treat the wall like a structural component rather than just a backdrop. If your desk is particularly long, you might also be seeing some flex in the middle, which is a different beast entirely—you should investigate why your built-in desk is bowing and the middle leg fix if the wood itself is curving. But if the whole unit is diving toward your lap, we need to talk about the anchors. Have you noticed your desk pulling away at the top, or is it actually crushing the drywall at the bottom edge? Leave a comment and tell me what you’re seeing, because the fix depends entirely on where that movement starts. We’re going to dive into the specific hardware that actually holds, but first, we need to understand why those standard hardware store heavy duty toggles aren’t cutting it for a 24-inch deep surface.
Stop Relying on Cheap Drywall Toggles
Most homeowners make the mistake of thinking that as long as they have a ‘heavy-duty’ anchor, the wall will hold. I learned the hard way that when it comes to a 24-inch deep work surface, those plastic toggles are essentially just placeholders for a future disaster. The physics of a floating desk are brutal; you are dealing with a massive amount of leverage that wants to pull the top of your bracket out of the wall while pushing the bottom of the bracket through your drywall. To combat this, you need to transition from ‘hanging’ a desk to ‘integrating’ it into the structure. I remember a specific project where I was installing a heavy oak vanity for a client—it looked rock solid until they leaned on it to brush their teeth, and the whole unit groaned. That’s when I realized that standard mounting is never enough for high-torque surfaces. You should look into an expert guide to flawless vanity installation tricks tips if you’re dealing with wet-area built-ins, but the structural principles remain the same for your office desk.
Create a Foundation with the Ledger Method
The most effective way to stop the slope is to give the desk a ‘shoulder’ to lean on. Instead of just bolting the desk to the studs, I always install a structural ledger first. This is a horizontal strip of hardwood or steel that is screwed into every single stud along the length of the desk. By doing this, you aren’t just relying on the pull-out strength of a few screws; you’re creating a shelf that the desk sits on. This is exactly why I recommend the hidden ledger trick for rock-solid entryway seating, as it provides that necessary vertical support that prevents the unit from ever beginning that downward pivot. When I used this method for a massive walnut desk last year, the result was so stable I could literally stand on the edge of the desk without a hint of movement. 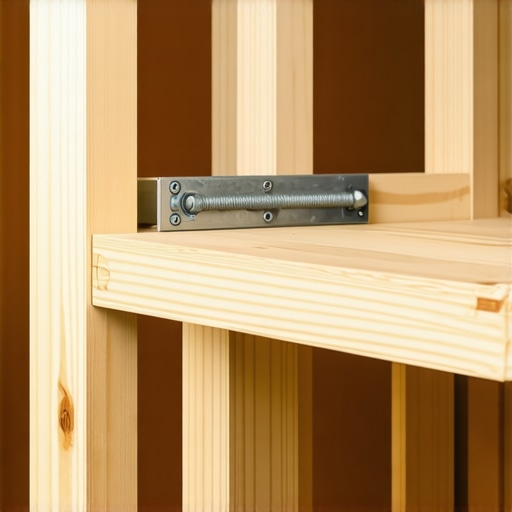
Fight Gravity with Structural Steel Plates
If your desk is already tilting, it means your top anchors are failing or the bottom of the desk is crushing the gypsum board. To fix this, you need to distribute the pressure over a larger area. This is where why your floating shelf is tilting down and the wall fix becomes your best friend. Instead of a standard bracket, use a steel plate that extends at least six inches down the wall behind the desk. This plate acts as a lever in reverse, spreading the ‘crushing’ force across a wider section of the wall. In my own home office, I actually cut out a small section of drywall and mounted the steel plates directly to the studs, then patched around them. It was a messy afternoon of sanding and painting, but that desk hasn’t moved a fraction of an inch in three years.
How to Handle Tricky Metal Studs
Many modern apartments use thin metal studs that won’t hold a traditional wood screw. If you’re in this boat, you have to be even more surgical with your hardware choice. You cannot simply ‘drill and hope.’ You need to understand how to secure built-in desks to thin metal studs using specialized heavy-duty snap-toggles that expand behind the metal channel. For extra-long spans where you’re worried about the wood itself bowing under the weight of monitors and gear, I highly suggest employing an internal torsion box move for long floating shelves. This engineering trick uses a hollow-core grid to keep the desk perfectly flat and rigid without adding the massive weight of a solid slab, which only makes your anchoring job harder. Finally, to ensure the desk looks like it was born in the room, use the scribing secret for perfect built-ins on rounded drywall corners to eliminate those ugly gaps that appear when a straight desk meets a crooked wall.Let’s dig deeper into the structural physics that most DIY tutorials conveniently gloss over. I’ve seen it a hundred times: a beautiful floating vanity that looks perfect on day one, only to have the mitered edges start to crack because the wall couldn’t handle the rotational torque. Everyone tells you to just hit the studs, but in my experience, the studs alone are rarely enough for the weight of modern stone tops. If you are trying to maximize your space with custom vanities expert design tips, you have to look at the physics of the entire wall assembly, not just the wood behind the paint. The National Kitchen & Bath Association (NKBA) emphasizes that the ‘dynamic load’—the weight of a person leaning on a desk or vanity—is often double the static weight of the furniture itself. This is where the ‘Oops’ factor hits most homeowners: they build for the weight of the wood, but not the weight of the user. Have you ever fallen into this trap where a shelf felt solid until you actually put a book on it? Let me know in the comments.
Stop Relying on the More Screws Myth
Most homeowners assume that if two lag bolts are good, six must be indestructible. This is actually a dangerous misconception. When you cluster heavy-duty fasteners too close together in a single 2×4 stud, you are essentially creating a perforated line, much like on a sheet of notebook paper. This invites the wood grain to split vertically under the tension of a cantilevered load, leading to a sudden and catastrophic failure. It is far more effective to use fewer, high-capacity fasteners spaced specifically than a horizontal line of overkill. This is a common nuance missed in even the best effortless storage solutions for a tidy stylish home. If you’re looking for creative storage solutions for vanities declutter in style, you must prioritize the integrity of the timber over the quantity of the hardware.
The Compression Trap That Crushes Your Drywall
The real silent killer of built-ins isn’t the pull-out force at the top; it’s the compression at the bottom. When you hang a heavy unit, the bottom edge acts as a pivot point, trying to dive into the wall. Because standard drywall is essentially just compressed chalk, it will eventually crumble under this localized pressure. This is why a simple step-by-step guide to vanity installation for beginners might not mention the need for a load-spreading plate. If you don’t distribute that ‘crushing’ force, your desk will tilt, no matter how many screws you have in the studs. For those working in basements or bathrooms, you also have to consider how humidity affects this; I always recommend the moisture barrier strategy for below-grade vanities to keep your wall structure from softening and losing its grip.
How do you handle heavy stone tops without visible legs?
When you’re moving into high-end territory with quartz or granite, you have to utilize the hidden sub-frame move for supporting massive quartz top vanities 4. This involves a structural skeleton that transfers the weight directly to the floor plates of your framing rather than just the vertical studs. Simply knowing how to support quartz counters on custom floating vanities isn’t enough; you must ensure the entire wall doesn’t bow under the strain. 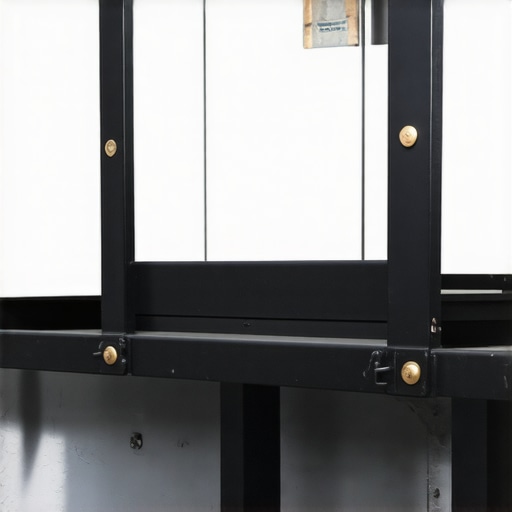 This level of engineering precision is what separates a DIY project from a professional-grade installation that lasts a lifetime.Even the most over-engineered installation can fall victim to the slow march of time and physics. I’ve found that the real secret to a desk or vanity that stays level for a decade isn’t just the initial bolt—it’s the gear you use and the follow-up care you provide. If you’re serious about your home office, you need to stop using the basic drill that came in a holiday bundle and move to an impact driver with high-torque settings. I personally swear by the Milwaukee M18 Fuel series because the controlled pulse prevents the stripping of those crucial lag bolts. When I’m setting up a heavy unit, I use vanity installation hacks that save time and money, like using a laser level to map out the entire wall before a single hole is drilled. A standard spirit level is fine for a shelf, but for a six-foot desk, even a sixteenth of an inch of error at the wall becomes a glaring half-inch slope at the front edge.
Invest in the Right Steel for the Long Haul
You can’t expect a standard zinc screw from a big-box bin to resist the shear forces of a heavy workstation. I always source GRK structural screws; their W-Cut thread design acts like a saw blade, reducing the chance of splitting the stud while providing incredible drawing power. This is the same level of detail I apply when I’m looking to enhance your home with sleek built-in vanities design tips for 2025. If you aren’t using fasteners rated for structural loads, you are essentially building on a foundation of sand. For those of you working with masonry or old-world materials, I recommend looking into the scribing trick for cabinets against uneven masonry to ensure your load-bearing points are actually flush against the wall.
How do I keep my built-ins from failing years later?
Maintenance is the part everyone ignores until they hear a crack in the middle of the night. The Structural Engineering Institute (SEI) notes that ‘creep deformation’—the tendency of a solid material to move slowly or deform permanently under the influence of persistent mechanical stresses—is a major factor in why desks that were level in year one start to sag in year three. To combat this, I do a ‘torque check’ every six months. I grab my driver and ensure the primary anchors haven’t backed out due to the natural expansion and contraction of the home’s framing. This is especially vital if you’ve implemented smart storage solutions to optimize small bathroom spaces where high humidity can soften the wood fibers around your screws. If you notice your hardware is starting to protest, you might need to check why your soft-close drawers are slamming and the tension fix, as vibration from slamming drawers can actually loosen wall anchors over time.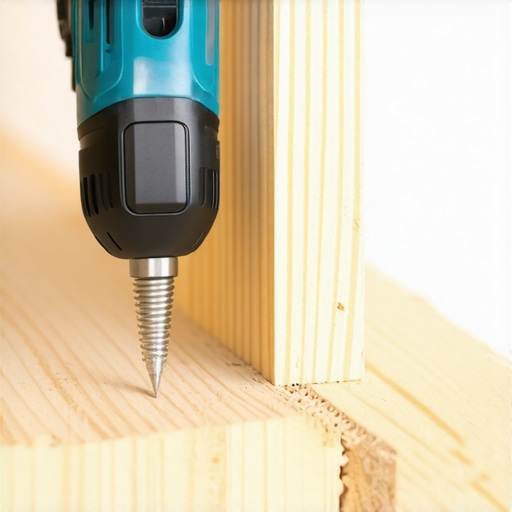
The Coming Shift Toward Integrated Tech and Hidden Bracing
Looking ahead, the ‘floating’ look isn’t going anywhere, but the way we achieve it is becoming much more high-tech. I predict that by 2025, we will see built-ins with embedded sensors that alert your phone if a structural anchor begins to shift or if moisture is detected behind a vanity. We’re already seeing top trends in vanity designs you need to know in 2025 leaning heavily into internal aluminum skeletons that weigh half as much as wood but offer triple the rigidity. If you want to stay ahead of the curve, start experimenting with maximizing space innovative built-in solutions for small rooms by using thinner, high-tensile materials like cold-rolled steel for your hidden supports. My challenge to you: don’t just fix the slope; upgrade your hardware to structural grade this weekend and feel the difference in how solid that desk feels under your elbows.
The Hardest Lesson I Learned About Gravity and Drywall
Over the years, I’ve realized that the biggest mistake isn’t using the wrong screw; it’s ignoring how materials behave under long-term stress. I used to think a desk was ‘done’ once the levels hit center, but wood breathes and drywall compresses. I learned that you should never cluster more than three heavy fasteners in a single vertical stud line, or you’re just inviting a split that could bring the whole unit down. Also, always account for ‘the lean’—we all put our elbows on the desk eventually, which can double the weight your anchors are feeling in an instant. If you’re also working on bedroom projects, I’ve found that choosing the perfect vanity style for your bedroom or bath requires the same structural skepticism to ensure long-term stability against the wall. #IMAGE_PLACEHOLDER_E#
The Only Hardware I Trust with My Laptop
After replacing a dozen failed anchors, I’ve narrowed my toolkit down to the essentials. First, structural screws are non-negotiable because they are engineered not to snap under shear force. Second, a high-quality laser level is worth its weight in gold for long spans; I’ve seen five-foot desks look like playground slides because of a tiny bubble error on a cheap spirit level. Third, I always keep a stash of innovative storage solutions to transform your bathroom techniques in mind, as the heavy-duty mounting methods used for stone-top vanities are exactly what you need for a deep workstation. Finally, don’t be afraid to visit a local steel shop for custom plates—standard big-box brackets are often too thin to resist the leverage of a 24-inch deep surface.
Build Something That Actually Stays Level
It’s easy to get intimidated by the physics of leverage, but once you move past basic toggles and embrace structural steel and ledgers, the fear of the ‘overnight sag’ disappears. You have the power to create a workspace that is both beautiful and permanent. By applying creative built-ins for seamless storage and home aesthetics, you aren’t just hanging a piece of wood; you are engineering a lasting part of your home. Take your time, pre-drill your holes, and trust the steel. If you notice things looking a bit off after the main installation, you can always learn how to fix uneven gaps in custom built-in doors to polish off the final aesthetic. Have you ever heard that gut-wrenching ‘crack’ of a wall anchor failing in the middle of the night? Let me know your DIY horror stories in the comments!