Ever found yourself frantically digging through piles of toiletries just to find your favorite serum? Or worse, stepping into your bathroom only to be greeted by a chaotic mess that turns relaxation into stress? I’ve been there. A few years ago, my bathroom storage was a disaster zone—product clutter, misplaced items, and zero organization made mornings stressful and evenings frustrating. That lightbulb moment led me to explore smart vanities and built-in storage solutions—and let me tell you, the transformation was game-changing.
Why Getting Storage Right Matters More Than Ever
As I’ve tinkered with various setups, I realized one thing: good storage isn’t just about decluttering. It’s about creating a space that works seamlessly with your daily routines. Especially now, with more of us working from home and blending personal spaces, a bathroom that’s both functional and stylish can seriously boost your mood and efficiency. Did you know that according to the National Association of Home Builders, modern bathrooms are prioritizing built-in storage to maximize space and enhance aesthetics? (source: Effortless Storage Solutions) That statistic was a wake-up call for me—and it could be for you too. If your current setup feels chaotic or outdated, you’re not alone—and there are effective ways to turn things around.
Is Installing Built-ins a Hassle Worth Taking On?
Early in my DIY adventures, I underestimated the complexity of installing built-in storage. I thought it would be a straightforward project—turns out, I made a few rookie mistakes, like underestimating the importance of precise measurements and rushing the process. That’s why I always recommend a clear plan and considering professional help when needed. For a detailed step-by-step guide, check out this vanity installation guide. Learning from those initial missteps helped me save time and money—and I want you to avoid the same pitfalls.
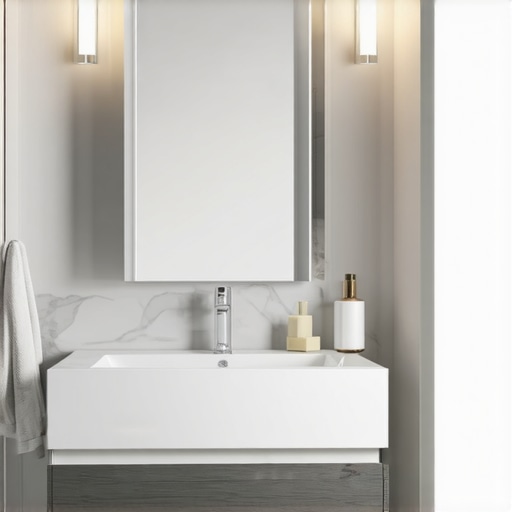
Ready to dive into practical tips and expert advice? Let’s explore how to create an effortlessly organized and stunning bathroom space using smart storage and built-in solutions.
Plan Your Layout Before Drilling
Start by sketching your bathroom’s current layout, noting where existing plumbing, electrical outlets, and fixtures are located. This preparation prevents surprises during installation. I once spent hours measuring, only to realize a planned built-in would block a window—wasting time and effort. Use painter’s tape to outline intended cabinet positions for a virtual preview.
Choose the Right Materials for Durability
Select moisture-resistant materials like MDF with waterproof veneer or treated plywood. I initially chose cheap particleboard for a vanity, which warped within months. Investing in quality ensures longevity and maintains aesthetic appeal. For sleek finishes, consider high-gloss paints or laminate surfaces that withstand humidity.
Measure Twice, Drill Once
Accurate measurements are crucial. Use a tape measure and level for every cut. I recommend creating a cut list and double-checking each length before cutting. Remember, a miscut can set your project back days. For complex cuts, a circular saw with a guide improves precision.
Implement Modular Storage for Flexibility
Opt for modular units like stackable bins, adjustable shelves, or pull-out trays. These adapt to your changing needs. I added adjustable dividers to my drawers—saving space and organization time. Incorporate clear acrylic containers to quickly find items without rummaging.
Conceal Wires and Plumbing Ingeniously
Hide electrical cords with cord covers painted to match walls. Use access panels for plumbing fixtures—making maintenance easier without disrupting the entire vanity. I installed a hidden electrical outlet behind a mirror for a clutter-free surface. Proper concealment maintains a clean look while ensuring accessibility.
Assemble With Precision and Care
Follow manufacturer instructions carefully, and don’t rush. Use clamps for even joins and check alignments frequently. I once hurried through assembly, resulting in uneven surfaces—requiring disassembly and rework. Taking your time guarantees a professional finish. For complex steps, refer to detailed guides like vanity installation hacks.
Seal and Protect Your Storage
Apply water-resistant sealants and protective finishes. This shields surfaces from moisture and spills. I used a waterproof varnish on my built-in cabinetry, ensuring easy cleaning and longevity. Regular maintenance keeps your investment looking fresh and functional.
Think Beyond the Basics
Incorporate innovative features, such as integrated LED lighting or soft-close hinges, to enhance usability. Consider installing a pull-out mirror or hidden charging stations. Personal touches like these make your bathroom a sanctuary of both style and convenience. For inspiration, explore built-in storage ideas.
When it comes to bathroom storage, many homeowners believe that installing the latest sleek vanity or numerous drawers automatically solves all organization issues. However, let’s challenge that assumption. A prevalent misconception is that more storage equals better organization. In reality, poorly planned storage can lead to clutter retention, hidden messes, and accessibility problems. For instance, if storage compartments aren’t tailored to your specific needs—like incorporating adjustable shelves or dedicated zones for skincare and hair tools—they might end up underutilized or chaotic. Experts emphasize that thoughtful design surpasses mere size or quantity; it requires understanding your routines and customizing solutions accordingly. Moreover, some assume that built-in furniture is always complex and time-consuming to install. Yet, with strategic planning and attention to detail—such as precise measurements and selecting durable materials—installation can be both smooth and long-lasting. For advanced tips on avoiding common pitfalls and making your bathroom storage truly work for you, consider exploring detailed guides like vanity installation hacks. One sneaky trap to watch out for involves underestimating the importance of proper ventilation and moisture-resistant materials. Using subpar finishes may cause warping or mold over time, negating your initial effort. A study published in the Journal of Building Engineering highlights the critical role of moisture management in bathroom cabinetry, underscoring why material choice isn’t just about aesthetics but longevity. Now, for the savvy renovator, a key question often arises: How can I seamlessly integrate storage solutions without sacrificing style? The answer lies in innovative built-in options that blend form and function, like concealed drawers or integrated shelving that complement the space. Ready to elevate your bathroom organization? Dive into expert resources that detail efficient, stylish, and durable installation methods, ensuring your investment pays off in the long run. Have you ever fallen into this trap? Let me know in the comments and share your experience.
Maintaining your bathroom storage setup is crucial to ensuring it remains functional and attractive over the years. From choosing the right cleaning tools to implementing smart maintenance routines, staying proactive can save you time and Money. Personally, I swear by specific equipment to keep everything in top shape.
Tools I Recommend for Long-Term Maintenance
First, a high-quality microfiber cloth is indispensable for daily wiping and dusting. I prefer the Norwex Microfiber Cloth because its fibers trap dust and moisture without the need for chemical cleaners, extending the lifespan of my cabinetry and surfaces. For deep cleaning, a soft-bristled brush helps clean grout lines and tight corners, preventing mold buildup in humid environments. A flexible hand-held vacuum, like the Dyson V8 Absolute, simplifies the task of removing debris from shelves and corners, keeping dust and pests out of your storage spaces. For moisture control, a reliable dehumidifier such as the Frigidaire FFAD7033R1 maintains optimal humidity levels, which is vital for preventing warping or mold growth on wooden or MDF materials.
Using the correct cleaning agents is just as essential. I recommend gentle, pH-balanced cleaners suitable for wood and laminate surfaces. Avoid abrasive scrubbers that can scratch finishes—investing in proper tools protects your investment. For routine ahead of installing or after modifications, applying a silicone-based sealant around edges and seams minimizes moisture infiltration and prolongs the life of your built-ins.
How do I maintain my storage system over time?
Consistency is the key. Regularly inspect Components for any signs of wear, such as loose hinges, warped wood, or peeling veneers. Address issues immediately—tighten screws, replace worn-out hardware, and reapply protective coatings if needed. Scheduling seasonal deep cleans helps prevent the accumulation of dust, dirt, and moisture, especially in humid climates. Additionally, periodically rearranging and decluttering your storage can reveal underutilized spaces and make maintenance easier. For expert insights on durable materials and long-term care, consult resources like Effortless Storage Solutions. Implementing these habits ensures your investments in built-ins and vanities continue to impress and perform.
Remember, a well-maintained storage system not only looks better but also functions more efficiently. Don’t hesitate to invest in the right tools and routine upkeep—your future self will thank you. Want to level up your maintenance game? Try using a dehumidifier during humid months; it significantly reduces moisture-related issues. For tailored advice on installing or maintaining your fixtures, feel free to reach out here.
Three Surprising Lessons I Learned About Bathroom Storage
First, I discovered that more is not always better; overloading a space with storage can make it feel cluttered rather than organized. Second, I realized that tailored, adjustable solutions outperform generic shelving—customization genuinely improves functionality. Lastly, I learned that patience during installation, coupled with meticulous planning, saves countless headaches later, transforming a daunting task into a rewarding DIY project.
Tools and Resources That Elevated My Bathroom Makeover
The Vanity Installation Hacks guide became my go-to for efficient setup strategies, minimizing trial-and-error. The Effortless Storage Solutions resource helped me select durable materials suited for humid environments, ensuring longevity. I also rely on a high-quality cordless drill from this trusted supplier to execute precise, clean fittings, making the entire process smoother. These tools and guides collectively made my bathroom storage transformation manageable and satisfying.
Your Next Step Towards a More Organized Bathroom
Embrace the journey of creating a space that balances style with practicality, knowing that a well-designed storage system is within your reach. Start with a detailed plan, choose quality materials, and don’t rush—every step is a learning experience. Your ideal bathroom storage isn’t a distant dream; it can be your reality with patience and the right resources. Are you ready to turn your chaotic bathroom into a sanctuary of order and beauty? Share your plans or challenges below—I’d love to hear how you’re approaching your next storage project.
Related Posts
Smart Vanities & Built-in Cabinets: Efficient Installation Ideas for 2025
My Journey to a Modern Bathroom Upgrade: Embracing Smart Vanities…

Guide to Vanities & Built-in Installations for a Modern Look
My Journey to a Stylish Bathroom MakeoverWhen I first decided…

Vanities & Fixtures: The Ultimate Guide to Modern Installation in 2025
I remember the first time I tried installing a custom…