

I still remember the sound—a slow, gritty crunch followed by a thundering crash that shook my entire bedroom floor. I ran in to find my brand-new wardrobe system face-down on the rug, looking like a graveyard of bent wire and splintered wood. The worst part? I had followed the instructions on the box. But those instructions were written for modern drywall, not the 100-year-old, brittle horsehair plaster in my home. Every heavy-duty plastic anchor I used had simply acted like a drill bit, chewing through the wall until gravity did the rest. It was a dusty, expensive mess. If you are staring at a pile of white dust and wondering if your house is literally falling apart, take a deep breath. Today, I am going to show you how to bypass that brittle mess so your clothes actually stay where you put them.
Why Plaster and Heavy Loads Usually Do Not Mix
Plaster is beautiful, but it is essentially just a layer of dried mud held together by thin strips of wood called lath. Over many decades, that mud gets thirsty and extremely brittle. When you try to hang a massive organizer, the plaster isn’t just supporting the weight; it is being crushed by the leverage. Early in my DIY journey, I made the amateur mistake of thinking more anchors meant more strength. I jammed six toggle bolts into a tiny area, but all I did was create a perforated line that made it even easier for the wall to fail. If you are tired of waking up to the sound of falling shelves, you need to stop relying on the plaster itself. We have to look deeper. Whether you are working on mounting built-in shelves to crumbling walls or trying to figure out how to secure a floating vanity to lath, the strategy is the same: find the bones of the house.
Is my old wall even strong enough for this?
It is a fair question to ask. You look at that white dust and think the whole house might come down. According to structural insights from the National Trust for Historic Preservation, traditional plaster is actually incredibly durable—but it has almost zero tensile strength. It simply cannot grip a screw the way modern wood-based products can. That skepticism you are feeling is your house telling you that standard hardware won’t cut it. We are going to use the steel L-bracket strategy and why you might need a hidden plywood header to distribute that weight across the wall. Have you ever had a shelf rip a massive chunk of plaster right out of the wall, or are you just here to prevent the inevitable? Let me know in the comments, because I have definitely been in both positions.
Finding the Studs When They Do Not Want to Be Found
The real trick isn’t the anchor; it is the stud. But in old houses, studs aren’t always 16 inches apart. Sometimes they are 14, sometimes 20, and sometimes they seem to exist in a different dimension entirely. If you cannot hit a stud, you aren’t hanging a closet; you’re just decorating a disaster. Standard stud finders often get confused by the wooden lath behind the plaster, giving you false positives every two inches. To get a rock-solid foundation, you might need to use a high-strength magnet or even drill a few tiny pilot holes to confirm you’ve hit solid wood. Once you find that timber, you can stop worrying about the plaster and start building something that lasts.Once you have located those elusive studs, you cannot just drive a screw through the organizer’s rail and call it a day. Plaster is like a giant, brittle eggshell; if you apply pressure to one tiny point, the whole thing cracks. To prevent this, I always use a plywood header or backer board. You span several studs with a piece of 3/4-inch birch plywood, essentially creating a new, flat, incredibly strong surface on top of your old wall. I did this in a cramped 1920s guest room when I needed to stop closet rod sag with this hidden plywood header. It felt like overkill at the time—until I hung forty winter coats on it and the wall did not even groan. This method spreads the pull of the heavy closet across three or four studs instead of just one. It is the difference between holding a heavy box with your fingertips or your entire palm.#IMAGE_PLACE_HOLDER_B#
Why Steel L-Brackets Beat Plastic Anchors Every Time
For those really massive organizers that hold everything from shoes to heavy storage bins, you need to look at the steel L-bracket hack for heavy closet organizers. These brackets act like a skeleton, taking the weight off the fragile plaster and transferring it directly into the wood framing. I remember a kitchen renovation where we were installing floor-to-ceiling units. The homeowner was terrified the old lath would not hold. We used the steel rail tactic for anchoring massive floor-to-ceiling pantries, which is basically an industrial-strength version of the plywood plate. It worked so well that we later used a similar approach when following an expert guide to flawless vanity installation in the primary bath. Standard hardware is designed for the friction of drywall; in plaster, you need mechanical leverage, and steel provides that without flexing under the load.
Floating Vanities Need More Than Just Hope
Floating items are the ultimate test for 100-year-old walls. If you are attempting a step-by-step guide to vanity installation for beginners on an old wall, remember that gravity is your enemy. The top of the vanity wants to pull away from the wall while the bottom wants to crush into it. To fight this, you need to ensure your mounting screws are long enough to bite at least 1.5 inches into the solid stud—not just the lath. If the wall is uneven, which it always is in historic homes, you will need to how to scribe built-in cabinets to slanted floors and walls to ensure there are no gaps. Any gap is a leverage point where the vanity can start to wiggle, and once plaster starts to wiggle, it starts to crumble.
The Toggle Bolt Safety Net
When you absolutely cannot hit a stud for every single hole, do not reach for those cheap plastic ribbed anchors. They are useless in plaster. Instead, use a heavy-duty toggle bolt. But here is the secret: only use them as secondary support. Think of the studs as your primary suspenders and the toggle bolts as a belt. They help keep the unit flush against the wall so it does not tilt, which is exactly why why your floating media unit is pulling away in many older homes. By combining these mechanical fasteners with a solid wood-to-wood connection on the studs, you are building a system that can handle the weight of a full wardrobe without turning your bedroom into a construction zone.If you have made it this far, you are already ahead of the weekend warriors who just buy a box of plastic plugs and hope for the best. But there is a nuance that even experienced DIYers miss: the difference between a secure fit and a crushed wall. I have seen homeowners use the toggle bolt strategy for heavy walk-in pantry racks only to find they have tightened the bolts so much they have literally pulverized the brittle plaster behind the bracket. This creates a pocket of dust that eventually lets the hardware wiggle. Once that wiggle starts, the leverage of a heavy shelf will finish the job. You are not looking for maximum torque; you are looking for distributed surface contact. Have you ever fallen into this trap where you keep tightening a screw and it never seems to stop until it is too late? Let me know in the comments, because that is the sound of your structural integrity turning into powder.
Why does my perfectly level vanity look like it is leaning?
One of the biggest myths in home renovation is that level is always right. In a brand-new build, sure. But in a house that has settled over eighty years, a perfectly level floating vanity will often look disastrously crooked against a slanting floor or a bowed wall. If you follow a step-by-step guide to vanity installation for beginners, they rarely tell you that you might need to intentionally un-level a piece by a fraction of an inch to match the room’s sightlines, or better yet, use the scribing secret for perfect built-ins to bridge the gap. #IMAGE_PLACE_HOLDER_C# The real oops factor comes when we talk about modern materials in old spaces. Everyone wants a massive stone top, but few realize that a sixty-inch quartz slab can weigh over two hundred pounds before you even put a single bottle of lotion in the drawer. If you are not using the hidden sub-frame move for supporting massive quartz top vanities, you are basically asking your cabinet’s thin side-walls to act like bridge pilings. According to the USDA Forest Service’s Wood Handbook, the withdrawal strength of a screw is directly tied to the density of the wood and the depth of the threads. If you are only catching half an inch of a soft pine stud through an inch of plaster, that vanity is a ticking time bomb. To avoid this, I always recommend 5 internal bracing tactics that shift the load from the fasteners to the frame itself. This is especially vital when you maximize your space with custom vanities that feature deep drawers. The deeper the drawer, the more leverage is applied to the wall when it is pulled out. Stop thinking about the wall as a flat surface and start thinking about it as a series of levers. If you master that, your built-ins will outlast the house itself.
The reality of old houses is that they never stop moving. Even if you follow an expert guide to flawless vanity installation tricks tips, the wood will swell in August and shrink in January. That is why the gear you use matters just as much as the strategy. For years, I struggled with standard high-speed steel bits that would overheat and ‘walk’ across my plaster, leaving jagged holes that were impossible to hide. Now, I never touch a project without a set of carbide-tipped multi-material bits. They bite into the plaster without shattering the surrounding finish and keep going straight into the wood lath or studs behind. I also suggest keeping a 24-inch box level and a decent cross-line laser in your kit. If you are trying to maximize your space with custom vanities, a laser is the only way to ensure your cabinet is plumb relative to the world, even if the floor itself is doing its best impression of a sinking ship. 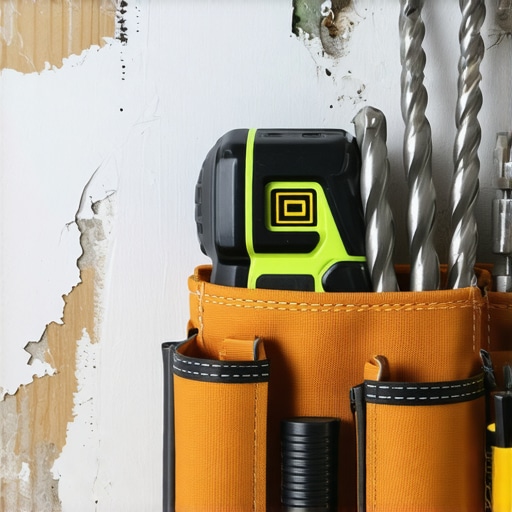
The Toolbox Must-Haves That I Won’t Start Without
Beyond the drill bits, you need to invest in a high-sensitivity magnetic stud finder. Electronic ones are great for drywall, but they are practically blind when faced with thick plaster and wooden lath. A neodymium magnet will find the tiny nails holding the lath to the studs, giving you a ‘map’ of the wall’s skeleton without making a single hole. I also keep a stash of stainless steel shims. When you are performing a step-by-step guide to vanity installation for beginners, you will realize that walls are never flat. Plastic shims can compress over time under the weight of a quartz top, but steel stays true. This is especially vital when you need to stop floating vanities from dipping with steel plates; you want zero movement once those bolts are torqued down.
How often should I check my built-in hardware for stability?
I usually tell my clients to do a ‘wrench-check’ once a year, specifically after the first major humidity shift of the season. Plaster is notorious for microscopic compression under heavy loads. According to the Architectural Woodwork Institute (AWI) Quality Standards for Installation, fasteners in high-stress areas like floating units should be inspected if you notice even a hair-line gap between the unit and the wall. If you see signs that your built-in face frames are separating from the wall, do not just reach for the caulk gun. That gap is the house telling you a fastener is losing its grip. Tighten the primary bolts, and if the hole has stripped, it might be time for the steel plate fix for sagging fireplace mantel shelves or a similar internal reinforcement tactic.
What the future holds for custom storage
Looking toward 2025 and beyond, I see a massive shift toward modularity within these ‘permanent’ installs. We are moving away from monolithic, unmovable blocks and toward systems where you can transform your bedroom with custom vanities that feature interchangeable internal components. This allows the structural skeleton—the part we worked so hard to anchor to those difficult plaster walls—to remain permanent while the aesthetic ‘skin’ and internal drawers can be updated. My best advice for you right now? Go into your closet, find the heaviest shelf, and check for that tell-tale white dust at the bracket. If you see it, try the internal torsion box engineering method before the whole thing comes down. It is much easier to reinforce a shelf today than it is to patch a six-inch hole in 100-year-old plaster tomorrow.
Why Your First Three Pilot Holes Might Be Lies
After years of wrestling with 19th-century timber, I have learned that plaster hides a lot of secrets. One of the biggest myths is that the first sign of wood on your drill bit means you have hit the jackpot. Often, you are just hitting the edge of a thin lath strip, which will split the moment you drive a structural screw into it. I have had to learn the hard way that patience is a literal tool in this process. If you do not feel that consistent, deep resistance of a 2×4 stud, stop immediately. It is also worth noting that learning how to fix wobbly built-ins with 4 hidden steel plate tactics often comes down to admitting when a hole is blown and moving two inches to the left. Don’t let your ego ruin your wall; a patched hole is always cheaper than a collapsed closet.
Another lightbulb moment for me was realizing that dust control is not just about cleaning up—it is about visibility. Brittle plaster creates a fine powder that coats your level and your layout marks. I started using blue painter’s tape over my intended drill sites. It prevents the plaster from spalling and keeps my lines crisp. If you are aiming for creative built-ins for seamless storage, these tiny procedural shifts are what separate the amateurs from the pros. #IMAGE_PLACEHOLDER_FINAL#
The Gear That Actually Survives Old Home Reno
If you want to stop the crumble, you have to stop using standard hardware store equipment. I personally trust carbide-tipped multi-material bits more than any standard wood bit because they do not overheat when they hit that rock-hard old-growth pine. For those struggling with placement, I recommend checking out vanity installation hacks that save time and money, which often involves using better layout tools. I also never go into a job without a handful of stainless steel shims. When you are trying to choose the perfect vanity style, remember that the heavier the unit, the more you will need these shims to bridge the gap between a wavy wall and a straight cabinet back.
Go Build Something That Stays Put
Old houses are living, breathing things that demand respect, especially when you are adding modern weight to them. By moving away from flimsy anchors and embracing the actual skeleton of your home, you are not just installing a shelf; you are preserving the integrity of your space. Whether you are looking into top trends in vanity designs for 2025 or just trying to get your shoes off the floor, the principles of solid anchoring remain the same. Take your time, find the wood, and build with confidence. Have you ever had a mounting project go south because of a hidden wall surprise? Let me know in the comments below!