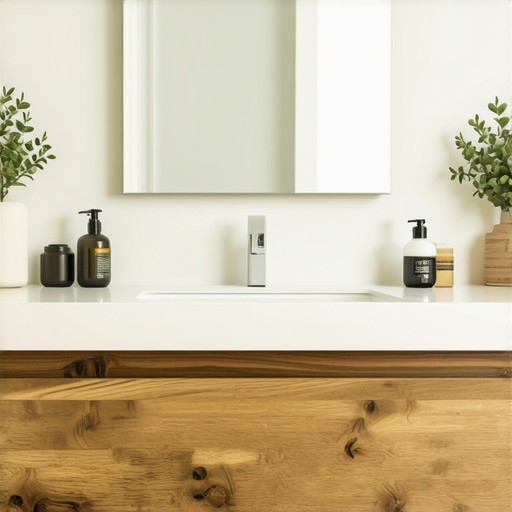
I still remember the moment I realized my bathroom storage was a disaster. Piles of toiletries, mismatched cabinets, and a frustrating search every morning made me feel more overwhelmed than ready for my day. It was a lightbulb moment—why was my space feeling so chaotic despite all my efforts to stay organized? That’s when I discovered the game-changing potential of professional custom vanities and built-in cabinets. Since then, my home has transformed into a sleek, functional sanctuary, and I want the same for you.
Why Investing in Built-in Storage Matters More Than Ever
The truth is, our homes are getting smaller while our belongings are growing. According to recent studies, space optimization isn’t just a luxury but a necessity in modern living (source: Effortless Storage Solutions). The right cabinetry can seamlessly hide clutter, elevate aesthetics, and even boost your home’s value. But here’s the catch—many homeowners make rookie mistakes that can turn their elegant upgrades into frustrating money pits.
ever-pleasing or just plain wrong? Think again
Early in my DIY journey, I underestimated the importance of precise measurements and professional guidance. I once installed a vanity that looked gorgeous but didn’t fit the space—wasted my money and extra time. This mistake taught me that expert insights and proper planning are essential. Want to avoid the same pitfalls? Discover the must-know tips for flawless vanity installation hacks that save both time and cash. Whether you’re planning a bathroom overhaul or a stylish bedroom update, understanding the value of quality craftsmanship makes all the difference—and right now, the options in 2025 are better than ever.
Ready to step beyond basic cabinets and unlock the magic of tailored storage design? Next, we’ll delve into how you can maximize every inch of space with smart, stylish solutions tailored just for your home.
Accurate Measurements Build the Foundation
The first crucial step is measuring your space precisely. I once spent hours planning a custom vanity, only to find it was too wide for the bathroom doorway—creating a mess that set my project back days. To avoid this, use a tape measure and record all relevant dimensions, including height, width, and depth. Don’t forget to measure the clearance for doors and drawers. For complex spaces, creating a scaled floor plan on graph paper or digital tools ensures accuracy and saves time later.
Design for Your Needs and Style
Decide what items need storage—consider toiletries, towels, or equipment—and plan compartments accordingly. For example, I designed a built-in cabinet with adjustable shelves to accommodate different bottle sizes and daily-use items. Think about integrating a mix of open shelves for easy access and concealed cabinets for clutter hiding. Consult style guides to align the design with your aesthetic preferences and ensure the functionality matches your routines.
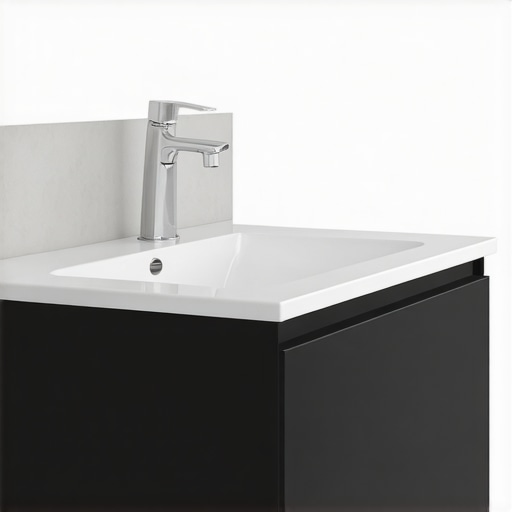
Select Quality Materials and Hardware
Durable materials like solid wood or high-grade plywood resist warping and damage over time. I opted for moisture-resistant MDF with laminate finish in my bathroom project, which proved resilient against humidity. Quality hinges, soft-close mechanisms, and sturdy drawer slides enhance usability and lifespan. Remember, investing in top-tier hardware minimizes maintenance and repairs, making your built-in storage both beautiful and practical. For tailored guidance, explore installation tips.
Prepare the Space Before Installation
Clear the area and repair any damage to the wall or floor. I used a level and painter’s tape to mark out the exact placement of my cabinets, ensuring perfect alignment. Seal or treat surfaces if necessary to prevent moisture issues. Having a tidy, prepared workspace allows for smoother assembly and reduces mistakes. Wearing protective gear and organizing tools ahead of time streamlines the process and prevents delays. For more detailed prep steps, see storage solutions.
Follow a Step-by-Step Installation Process
Use a reliable template or mounting jig to position the cabinet accurately. Start by anchoring the upper frame or mounting brackets securely to the wall studs—this is critical for stability. I used a stud finder and confirmed placements with a level before drilling. Carefully attach the main cabinet body, ensuring it’s flush and secure. Double-check measurements and alignment periodically. Tighten all fasteners and verify the stability of the unit before proceeding to add fixtures. For comprehensive guidance, refer to installation steps.
Finalize with Accessories and Finishing Touches
Install hardware like handles, knobs, or lighting fixtures for a polished look. In my project, adding under-cabinet LED lighting illuminated the workspace and added a modern touch. Seal all joints and edges with appropriate fillers or sealants to prevent moisture ingress. Regularly inspect and adjust hardware to maintain smooth operation. These finishing details transform a functional piece into a seamless part of your home’s aesthetics, fulfilling both form and function.
Many homeowners assume that simply installing custom cabinets or vanity units automatically guarantees a flawless and functional space. However, misconceptions and overlooked nuances often lead to pitfalls that can compromise both aesthetics and utility. One prevalent myth is that larger or more intrusive built-in units are always better; in reality, oversized installations can hinder accessibility and make spaces feel cramped, especially in smaller rooms. Expert insights emphasize the importance of proportionate designs that align with your room’s dimensions, ensuring both style and practicality. Moreover, a frequent mistake is neglecting the importance of proper ventilation and moisture control, particularly in humid areas like bathrooms—that’s a misstep that can cause long-term damage to your cabinetry. You can explore effective strategies for this by visiting our guide on innovative storage solutions.
Ever wonder if ultra-modern styles might clash with your home’s existing decor? The key lies in understanding nuanced design harmony rather than just choosing trendiest materials. Advanced homeowners often underestimate the significance of precise measurements; a small miscalculation can lead to misaligned doors or drawers, which not only looks unprofessional but also hampers functionality. For expert tips on achieving perfect precision, check out our step-by-step installation guide.
One critical nuance that many overlook is the choice of hardware and finish materials—these details drastically influence durability and ease of maintenance. For instance, selecting hardware with high corrosion resistance ensures longevity in moisture-prone bathrooms, while matte finishes tend to hide fingerprints better than gloss, reducing cleaning frequency. Did you know that hardware deterioration can be an expensive correction if overlooked early? Investing in quality components and consulting with experts can save you money and stress long-term. Want to learn more? Discover how to select the right materials for your project.
What about the advanced question—how do you ensure your built-in units remain timeless amidst changing styles? The secret is focusing on classic design principles, such as balanced proportions and neutral color palettes, combined with adaptable fixtures. This approach guarantees your storage solutions remain functional and appealing through years of evolving trends. Incorporate innovative features, like adjustable shelving or modular units, to allow future customization without complete overhaul. It’s a subtle art to balance innovation with timelessness, but it pays off. For design inspiration, our insights on creative built-ins can guide you toward sophisticated choices.
Finally, beware the trap of thinking DIY is always the better route. While some projects are manageable, complex built-ins require precision and expertise for seamless integration—skimping on professional guidance often results in costly mistakes. Trusting experts and understanding the nuances can elevate your space, making it truly customized and durable. Have you ever fallen into this trap? Let me know in the comments.
Once you’ve installed your custom vanities and built-in storage solutions, maintaining their functionality and appearance is key to long-term satisfaction. Regular upkeep prevents issues like moisture damage, hardware wear, and misalignments. I personally rely on specific tools and methods to keep my cabinetry in top shape, ensuring they serve me well for years to come.
Tools That Make Maintenance Effortless
For ongoing upkeep, I recommend investing in a high-quality magnetic screwdriver set. Unlike standard screwdrivers, magnetic tips hold fasteners securely, making adjustments or repairs more precise and less frustrating. I’ve found this invaluable when tightening hinges or replacing handles, especially in tight spaces. Additionally, a digital moisture meter helps me monitor humidity levels where cabinetry is installed, preventing warping or mold growth. Regularly checking moisture levels allows me to address issues before they escalate.
Another favorite is a soft-bristled detailing brush, perfect for removing dust and debris from behind hinges and within crevices. Keeping hardware and joints clean reduces wear and ensures smooth operation. For surfaces, a microfiber cloth dampened with a gentle cleaner prevents buildup without scratching, preserving finishes over time.
Maintenance Routines for Longevity
Developing a routine is crucial. I like to set monthly reminders to inspect hinges and drawer slides for looseness or corrosion. Applying a light lubricant, such as silicone spray, helps keep moving parts functioning smoothly. When cleaning, I focus on areas prone to moisture exposure—by keeping these dry and well-ventilated, I minimize damage and maintain the integrity of materials.
How do I sustain the beauty and utility of built-ins over many years? By scheduling biannual checkups with a professional for detailed inspections. They can verify structural stability and recommend adjustments or restorations as needed. This proactive approach extends the lifespan of your cabinetry far beyond initial expectations.
What is the best way to maintain built-in storage solutions over time?
Employing precise tools like a digital moisture meter and magnetic screwdrivers, combined with a consistent maintenance routine, ensures your custom cabinetry remains functional and beautiful. Embrace these methods, and you’ll enjoy seamless organization long into the future. For more insights on optimizing your space with durable solutions, visit our effortless storage solutions. Want to dive deeper? Consider scheduling regular professional inspections to catch issues early and keep your built-ins working flawlessly. Remember, staying proactive is the best investment for lasting home improvement success.
Looking for expert-approved tools? A precision calibration gauge for hinges and slides, as recommended in industry standards such as professional cabinetry guides, can help you fine-tune your adjustments. Using top-tier hardware and regular maintenance makes all the difference—and it’s easier than you think with the right equipment.
What I Wish I Had Known When Starting Out with Built-Ins
One of the hardest lessons I learned is that *proportion matters*—oversized cabinets can swallow a small room, making it feel cramped rather than organized. It’s tempting to go big on storage, but understated designs often serve better. Another insight was realizing the importance of **ventilation and moisture control**, especially in humid spaces like bathrooms—a mistake I made early on that cost me in the long run. Lastly, I discovered that *personalization truly elevates* built-ins; tailoring compartments to my routines transformed everyday routines into seamless experiences, proving that craftsmanship isn’t just about aesthetics but also about functionality.
Tools and Resources That Transformed My Projects
Having the right tools makes all the difference. I rely heavily on a precision laser level—it’s invaluable for ensuring perfectly aligned installations. My go-to guide has been the step-by-step vanity installation guide; it demystifies complex steps and saves me hours of trial and error. For hardware, I trust high-quality, corrosion-resistant handles, ensuring longevity despite humidity exposure. Lastly, I’ve found that engaging with online communities and reading relevant articles—like those on installation tips for 2025—keeps me inspired and informed about the latest in design innovation.
Your Next Move Toward Seamless Storage Mastery
Embrace this journey of thoughtful design and precise execution—you hold the power to elevate your home into a sanctuary of sleek organization. Remember, every detail, from measured accuracy to hardware choice, contributes to a lasting upgrade that reflects your style and needs. Don’t shy away from exploring new materials or techniques; the landscape of home storage solutions keeps evolving, and you can be at the forefront. Take the first step today, whether by revisiting your space with fresh eyes or consulting with experts, and turn your renovation dreams into reality. Your well-designed built-in storage isn’t just about space—it’s about creating a home that works for you, beautifully and effortlessly.
Related Posts
Guide to Installing Vanities & Built-ins for a Modern Home Makeover
Transforming My Space: A Personal Tale of Vanity and Built-in…
3 Hidden Bracket Fixes for Wobbly 2026 Floating Vanities
I remember the first time I installed a floating vanity…
Trust Smart Built-ins & Vanities for Seamless Home Upgrades
I remember the frustration vividly—the cluttered bathroom counter, the awkwardly…