

I will never forget the sound of a slow, rhythmic creak at 3:00 AM. It was not a ghost; it was the sound of my pride and joy—a floor-to-ceiling integrated wardrobe—slowly surrendering to gravity and pulling away from the drywall. I had spent a small fortune on materials, thinking I had achieved that creative built-in look, only to find a half-inch gap staring back at me two months later. It is a visceral, heart-sinking moment when your hard work literally starts to detach from your home. This happens more often than you think, especially when we prioritize aesthetics over structural anchoring. Today, I am going to show you exactly how to diagnose if your wardrobe is just settling or if it is actually in danger of a total failure. [image]
The Hidden Reason Your Wardrobe Is Drifting
When I first started out, I made the classic rookie mistake of assuming that if I screwed the cabinet into the wall studs, it was going nowhere. I ignored the fact that houses are living, breathing things. Between seasonal shifts and the sheer weight of a fully loaded closet, things move. If you are seeing a gap, it is usually not because the ceiling is rising; it is because the unit was not properly anchored to the overhead joists or, more likely, you skipped the crucial scribing move for flawless gaps to account for your ceiling’s natural dips and bows. Much like why your built-in face frames are separating, this issue often stems from the initial mounting strategy.
Is that widening gap actually a sign of a collapse?
It is the question that keeps every DIYer up at night. Usually, it is not an immediate emergency, but it is a serious warning. Wood is an organic material that reacts to its environment. According to the USDA Forest Products Laboratory, wood can expand or contract significantly based on the relative humidity of your home. If your fasteners are not biting into the actual ceiling joists or a solid top plate, the combined weight of the cabinetry and your wardrobe will eventually win the tug-of-war against the drywall. Have you noticed a hairline fracture starting to appear at the crown molding of your built-ins lately? Before you grab a tub of caulk and hope for the best, you need to realize that a cosmetic fix is just a Band-Aid on a structural problem. If you have ever had a similar scare with an installation gone wrong, you know that the permanent fix starts behind the wood, not on the surface. We need to look at how the unit is braced and whether it was built to handle the load it now carries.
Find the Skeleton Behind Your Sheetrock
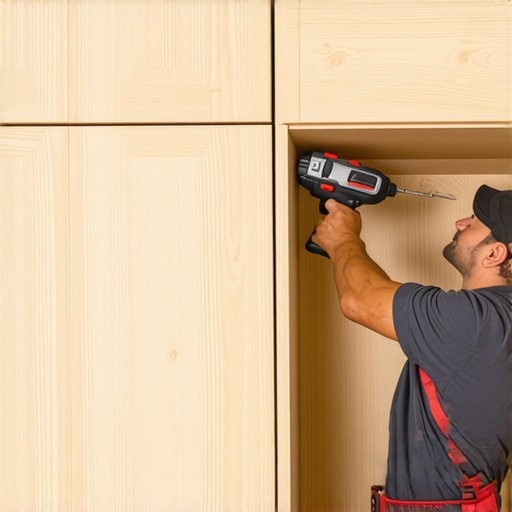
Your drywall is a cosmetic mask, not a structural support. If you are mounting a massive unit, you need to think of the wall as a series of ribs. To stop that terrifying gap from forming, your first move is to bypass the plaster and find the 2×4 studs or ceiling joists. I like to use a deep-scan stud finder, but even then, I do not trust it blindly. I drill ‘reconnaissance holes’—tiny 1/8-inch pilot holes that will eventually be covered by the cabinet—to confirm I am hitting solid wood. If you are dealing with a particularly tall unit, you should consider the floor-to-ceiling bolt move for massive pantry units to ensure the weight is distributed vertically rather than just pulling horizontally on the wall fasteners.
Reinforce the Stress Points Early
When you are dealing with hundreds of pounds of clothing or storage, the corners of your cabinet are the primary failure points. Think of it like a bridge: if the joints are weak, the whole structure sags. I have found that standard wood screws often lack the shear strength needed for long-term stability. Instead, I rely on 6 heavy-duty L-brackets for reinforcing custom built-in units. These brackets act as the ‘sinew’ of your installation, holding the cabinet carcass tight against the wall framing. I once ignored this on a reach-in closet project, only to return a month later to see the top rail bowing. Since then, I never install a unit without internal bracing. You can find plenty of built-in storage ideas to declutter and enhance your home, but none of them work if the base is not rock-solid.
How I Saved a Shaky Oak Library with Steel Plates
A few years ago, I was called to fix a library unit that was literally vibrating every time someone walked past it. The original builder had used thin finish nails and a prayer. I did not want to tear the whole thing down, so I used a surgical approach. I slid thin, high-strength steel plates behind the back panel to bridge the gap between the unit and the studs. It was a variation of how we stop wobbly custom built-ins with 4 hidden steel plate fixes. By cinching the unit to the wall with these plates, we turned a vibrating hazard into a solid part of the architecture. If you are building something today, do not wait for the wobble. Secure it now. Whether you are looking at creative storage solutions for vanities or full-scale wardrobes, the physics remain the same: mechanical connection beats gravity every single time.
I see it in every DIY forum: the belief that a few extra-long lag bolts can fix any structural deficiency. But here is a contrarian take that might ruffle some feathers: sometimes, the more fasteners you use, the weaker your installation becomes. When you riddle a 2×4 stud with holes, you are essentially perforating it like a piece of notebook paper. Instead of a solid anchor, you’ve created a tear line. This is a common trap when people try to maximize your space with custom vanities expert design tips without considering the sheer force of a cantilevered load. If you are mounting a floating unit, you aren’t just fighting gravity; you are fighting torque.
Why Does Your Heavy Stone Top Keep Cracking the Cabinet Frame?
This is the “oops” factor that catches even seasoned renovators. Most people assume the wall carries the weight, but the cabinet carcass is the middleman that often gives up first. According to the National Kitchen & Bath Association (NKBA), a standard 36-inch vanity with a stone top can easily exceed 150 pounds. If you haven’t reinforced the internal corners, the weight of the stone pushes down while the wall anchors pull back, creating a scissor effect that snaps the joinery. This is exactly why your heavy quartz vanity is cracking the cabinet frame. To prevent this, I always advocate for a sub-frame approach rather than relying on the cabinet’s own thin back panel.
Another nuance people miss is the micro-climate behind the wood. In a bathroom, the gap between your beautiful new built-in and a cold exterior wall is a breeding ground for condensation. Many homeowners focus on creative storage solutions for vanities but forget that wood is a sponge. If you do not employ the moisture barrier strategy for below-grade vanities, that expensive oak will be warped within two seasons. I have seen five-thousand-dollar installations ruined because someone skipped a twenty-dollar roll of vapor barrier. You need to think about 7 moisture barriers for vanities in high-humidity bathrooms before the first screw even touches the wall.
The real secret to a forever installation isn’t just finding a stud; it is understanding how to support quartz counters on custom floating vanities by distributing the load across the entire wall assembly, not just three or four points. Have you ever fallen into this trap of over-fastening only to see a crack form anyway? Let me know in the comments—I would love to hear your war stories so we can all learn from them.
Precision Tools That Make or Break the Job
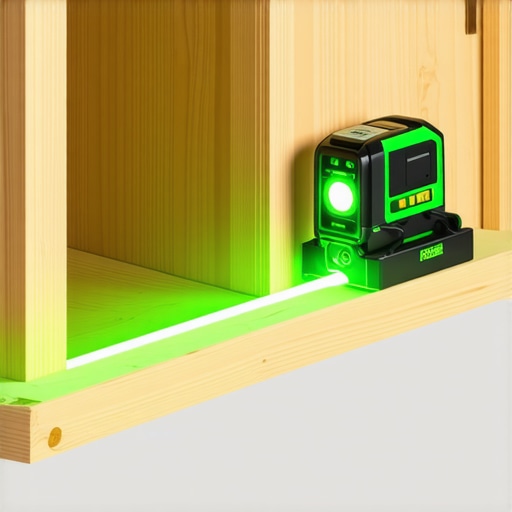
I stopped relying on my old bubble level the day I realized my ‘level’ pantry was actually leaning three-quarters of an inch over a six-foot span. Now, I never start an installation without a self-leveling cross-line laser. It is the only way to ensure your reference lines are truly plumb across a wide room. If you are serious about this, invest in a dedicated scribe. I personally use the scribing tool for cabinets against textured plaster walls because it allows for micro-adjustments that a standard compass simply cannot handle. When you are fitting a unit into a tight alcove, that extra millimeter of precision is the difference between a high-end look and a gap that needs three tubes of caulk.
How do I keep my custom built-ins looking new?
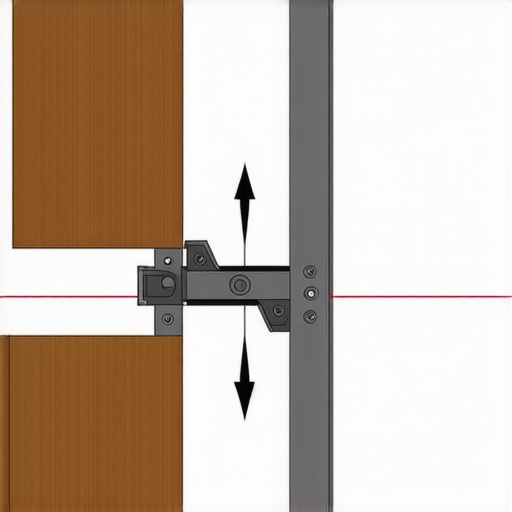
Maintenance is where most homeowners drop the ball. We treat built-ins like part of the wall, but they are mechanical assemblies. Every six months, I recommend a ‘hardware audit.’ This means opening every door and drawer to check for resistance. If you ignore a slight catch, you are putting unnecessary torque on the frame. According to the Blum Technical Hardware Guide, the performance of soft-close mechanisms depends heavily on the ‘initial set’ during installation; even a 2mm deviation can lead to premature failure of the hydraulic dampener. If you notice your doors are drooping, you need to learn how to fix drawer fronts that wont stay aligned or investigate why your soft-close drawers are slamming and the tension fix. Tightening a single screw today prevents a stripped wood-thread disaster three years from now.
The Future of Storage Is Smarter Than You Think
As we look toward 2025 and beyond, the trend is shifting from mere ‘storage’ to ‘integrated utility.’ I am seeing a massive surge in demand for built-ins that act as tech hubs. This is not just about aesthetics; it is about infrastructure. When planning your next project, consider the hidden cable management trick for built-in desks to accommodate the growing number of devices we all own. We are moving toward a world where your furniture is as smart as your phone, with integrated lighting and wireless charging pads embedded directly into the wood surfaces. Whether you are looking for innovative storage solutions to transform your bathroom or a full library, think about where the wires will go before the back panel is nailed on. I challenge you to go to your most problematic cabinet right now, check the hinge tension, and give it a quarter-turn adjustment. You will be amazed at how much ‘newer’ the whole unit feels just by restoring that factory-smooth glide. We have covered the structural risks and the tools of the trade, but the real secret is staying ahead of the wear and tear.
I will never forget the sound of a slow, rhythmic creak at 3:00 AM. It was not a ghost; it was the sound of my pride and joy—a floor-to-ceiling integrated wardrobe—slowly surrendering to gravity and pulling away from the drywall. I had spent a small fortune on materials, thinking I had achieved that creative built-in look, only to find a half-inch gap staring back at me two months later. It is a visceral, heart-sinking moment when your hard work literally starts to detach from your home. This happens more often than you think, especially when we prioritize aesthetics over structural anchoring. Today, I am going to show you exactly how to diagnose if your wardrobe is just settling or if it is actually in danger of a total failure. [image]
The Hidden Reason Your Wardrobe Is Drifting
When I first started out, I made the classic rookie mistake of assuming that if I screwed the cabinet into the wall studs, it was going nowhere. I ignored the fact that houses are living, breathing things. Between seasonal shifts and the sheer weight of a fully loaded closet, things move. If you are seeing a gap, it is usually not because the ceiling is rising; it is because the unit was not properly anchored to the overhead joists or, more likely, you skipped the crucial scribing move for flawless gaps to account for your ceiling’s natural dips and bows. Much like why your built-in face frames are separating, this issue often stems from the initial mounting strategy.
Is that widening gap actually a sign of a collapse?
It is the question that keeps every DIYer up at night. Usually, it is not an immediate emergency, but it is a serious warning. Wood is an organic material that reacts to its environment. According to the USDA Forest Products Laboratory, wood can expand or contract significantly based on the relative humidity of your home. If your fasteners are not biting into the actual ceiling joists or a solid top plate, the combined weight of the cabinetry and your wardrobe will eventually win the tug-of-war against the drywall. Have you noticed a hairline fracture starting to appear at the crown molding of your built-ins lately? Before you grab a tub of caulk and hope for the best, you need to realize that a cosmetic fix is just a Band-Aid on a structural problem. If you have ever had a similar scare with an installation gone wrong, you know that the permanent fix starts behind the wood, not on the surface. We need to look at how the unit is braced and whether it was built to handle the load it now carries.
Find the Skeleton Behind Your Sheetrock
Your drywall is a cosmetic mask, not a structural support. If you are mounting a massive unit, you need to think of the wall as a series of ribs. To stop that terrifying gap from forming, your first move is to bypass the plaster and find the 2×4 studs or ceiling joists. I like to use a deep-scan stud finder, but even then, I do not trust it blindly. I drill ‘reconnaissance holes’—tiny 1/8-inch pilot holes that will eventually be covered by the cabinet—to confirm I am hitting solid wood. If you are dealing with a particularly tall unit, you should consider the floor-to-ceiling bolt move for massive pantry units to ensure the weight is distributed vertically rather than just pulling horizontally on the wall fasteners.
Reinforce the Stress Points Early
When you are dealing with hundreds of pounds of clothing or storage, the corners of your cabinet are the primary failure points. Think of it like a bridge: if the joints are weak, the whole structure sags. I have found that standard wood screws often lack the shear strength needed for long-term stability. Instead, I rely on 6 heavy-duty L-brackets for reinforcing custom built-in units. These brackets act as the ‘sinew’ of your installation, holding the cabinet carcass tight against the wall framing. I once ignored this on a reach-in closet project, only to return a month later to see the top rail bowing. Since then, I never install a unit without internal bracing. You can find plenty of built-in storage ideas to declutter and enhance your home, but none of them work if the base is not rock-solid.
How I Saved a Shaky Oak Library with Steel Plates
A few years ago, I was called to fix a library unit that was literally vibrating every time someone walked past it. The original builder had used thin finish nails and a prayer. I did not want to tear the whole thing down, so I used a surgical approach. I slid thin, high-strength steel plates behind the back panel to bridge the gap between the unit and the studs. It was a variation of how we stop wobbly custom built-ins with 4 hidden steel plate fixes. By cinching the unit to the wall with these plates, we turned a vibrating hazard into a solid part of the architecture. If you are building something today, do not wait for the wobble. Secure it now. Whether you are looking at creative storage solutions for vanities or full-scale wardrobes, the physics remain the same: mechanical connection beats gravity every single time.
I see it in every DIY forum: the belief that a few extra-long lag bolts can fix any structural deficiency. But here is a contrarian take that might ruffle some feathers: sometimes, the more fasteners you use, the weaker your installation becomes. When you riddle a 2×4 stud with holes, you are essentially perforating it like a piece of notebook paper. Instead of a solid anchor, you’ve created a tear line. This is a common trap when people try to maximize your space with custom vanities expert design tips without considering the sheer force of a cantilevered load. If you are mounting a floating unit, you aren’t just fighting gravity; you are fighting torque.
Why Does Your Heavy Stone Top Keep Cracking the Cabinet Frame?
This is the “oops” factor that catches even seasoned renovators. Most people assume the wall carries the weight, but the cabinet carcass is the middleman that often gives up first. According to the National Kitchen & Bath Association (NKBA), a standard 36-inch vanity with a stone top can easily exceed 150 pounds. If you haven’t reinforced the internal corners, the weight of the stone pushes down while the wall anchors pull back, creating a scissor effect that snaps the joinery. This is exactly why your heavy quartz vanity is cracking the cabinet frame. To prevent this, I always advocate for a sub-frame approach rather than relying on the cabinet’s own thin back panel.
Another nuance people miss is the micro-climate behind the wood. In a bathroom, the gap between your beautiful new built-in and a cold exterior wall is a breeding ground for condensation. Many homeowners focus on creative storage solutions for vanities but forget that wood is a sponge. If you do not employ the moisture barrier strategy for below-grade vanities, that expensive oak will be warped within two seasons. I have seen five-thousand-dollar installations ruined because someone skipped a twenty-dollar roll of vapor barrier. You need to think about 7 moisture barriers for vanities in high-humidity bathrooms before the first screw even touches the wall.
The real secret to a forever installation isn’t just finding a stud; it is understanding how to support quartz counters on custom floating vanities by distributing the load across the entire wall assembly, not just three or four points. Have you ever fallen into this trap of over-fastening only to see a crack form anyway? Let me know in the comments—I would love to hear your war stories so we can all learn from them.
Precision Tools That Make or Break the Job
I stopped relying on my old bubble level the day I realized my ‘level’ pantry was actually leaning three-quarters of an inch over a six-foot span. Now, I never start an installation without a self-leveling cross-line laser. It is the only way to ensure your reference lines are truly plumb across a wide room. If you are serious about this, invest in a dedicated scribe. I personally use the scribing tool for cabinets against textured plaster walls because it allows for micro-adjustments that a standard compass simply cannot handle. When you are fitting a unit into a tight alcove, that extra millimeter of precision is the difference between a high-end look and a gap that needs three tubes of caulk.
How do I keep my custom built-ins looking new?
Maintenance is where most homeowners drop the ball. We treat built-ins like part of the wall, but they are mechanical assemblies. Every six months, I recommend a ‘hardware audit.’ This means opening every door and drawer to check for resistance. If you ignore a slight catch, you are putting unnecessary torque on the frame. According to the Blum Technical Hardware Guide, the performance of soft-close mechanisms depends heavily on the ‘initial set’ during installation; even a 2mm deviation can lead to premature failure of the hydraulic dampener. If you notice your doors are drooping, you need to learn how to fix drawer fronts that wont stay aligned or investigate why your soft-close drawers are slamming and the tension fix. Tightening a single screw today prevents a stripped wood-thread disaster three years from now.
The Future of Storage Is Smarter Than You Think
As we look toward 2025 and beyond, the trend is shifting from mere ‘storage’ to ‘integrated utility.’ I am seeing a massive surge in demand for built-ins that act as tech hubs. This is not just about aesthetics; it is about infrastructure. When planning your next project, consider the hidden cable management trick for built-in desks to accommodate the growing number of devices we all own. We are moving toward a world where your furniture is as smart as your phone, with integrated lighting and wireless charging pads embedded directly into the wood surfaces. Whether you are looking for innovative storage solutions to transform your bathroom or a full library, think about where the wires will go before the back panel is nailed on. I challenge you to go to your most problematic cabinet right now, check the hinge tension, and give it a quarter-turn adjustment. You will be amazed at how much ‘newer’ the whole unit feels just by restoring that factory-smooth glide. We have covered the structural risks and the tools of the trade, but the real secret is staying ahead of the wear and tear.
10 Years of Anchoring Heavy Cabinets Taught Me This
After fixing dozens of units that were slowly peeling away from the wall, I’ve had a few lightbulb moments that changed my entire approach to effortless storage solutions for a tidy stylish home. First, your drill bit is a storyteller; white dust means drywall, but the moment you see wood shavings, you’ve hit the structural gold of a stud. Second, never trust a single anchor point. Gravity is relentless, and distributing weight across multiple joists is the only way to sleep at night. Finally, the gap you see today is a warning of the failure you’ll see tomorrow—never ignore a hairline fracture in your caulk line.
The Survival Kit for Rock Solid Storage
I don’t walk onto a job site without a specific set of tools that guarantee my innovative built-in solutions for small rooms stay put. I personally rely on a Bosch self-leveling cross-line laser because it eliminates the ‘visual tilt’ that human eyes often miss. For those aiming to save time and money on vanity installation, I highly recommend investing in a dedicated cabinet scribe rather than a cheap school compass. Lastly, keep the NKBA (National Kitchen & Bath Association) weight guidelines bookmarked on your phone; knowing the shear strength of your fasteners is better than guessing every time.
Take the Leap and Secure Your Space
Building your own dream closet or media center is incredibly rewarding, but it all hinges on the quality of your installation. Don’t be intimidated by the physics of it—embrace the prep work, find your studs, and use the right steel reinforcements. Whether you are hunting for top storage ideas for 2025 or fixing a sagging shelf, doing it right the first time is the ultimate gift to your home. If you are a beginner, follow a vanity installation guide to get the basics down before moving to massive floor-to-ceiling units. Have you ever felt that sinking feeling when you realized your wardrobe was pulling away from the wall? Let me know your close calls in the comments below!