

I sat down on my entryway bench last Tuesday, clutching a bag of groceries and a tired set of keys, and “CRAAACK.” Okay, it wasn’t a full-on snap, but that high-pitched, wooden groan echoed through the house like a haunted mansion door. It is absolutely infuriating. You spend all this time on built-in storage ideas to declutter and the moment you actually use them, they sound like they are ready to give up the ghost. My biggest mistake early on was assuming that more glue equals more strength—it does not, especially when the humidity hits and the wood starts to breathe. Today, we are going to silence that noise once and for all using a technique I call the Hidden Screw Fix.
That Annoying Squeak is Actually Your Bench Begging for Help
If your bench is groaning, it is not just “character.” It is friction. When the wood moves against a fastener or another piece of timber, you get that sharp sound. Often, it is because the sub-frame strategy for rock-solid entryway benches was not fully executed, leaving tiny gaps. According to the American Wood Council, wood is hygroscopic, meaning it is constantly breathing in moisture and swelling, then exhaling and shrinking. This cycle eventually pulls standard nails or weak screws loose. [IMAGE_PLACEHOLDER]
Will a few extra screws actually make a difference?
You might be skeptical. I get it. “I already used twenty screws, why would two more help?” The secret isn’t the quantity; it is the tension and the placement. If you have noticed your mudroom bench pulling away from the wall, you know that gravity is working against you every time you sit down. A standard screw into a stud is a good start, but a hidden screw at a 45-degree angle through the internal cleat is what actually stops the shifting. I have seen folks try to fix this by driving massive bolts through the top, totally ruining the finish. Do not do that. We want a fix that is invisible and permanent. Have you ever felt that sinking feeling when a guest sits down and your custom work makes a loud noise? Let me know, because I have been there, and it is embarrassing. We are about to look at how the ledger board move for level mudroom benches sets the stage for a silent, sturdy seat.
Listen to Where the Wood is Rubbing
Think of your entryway bench like a car’s suspension system. When every part is tight and lubricated, it’s silent. But the moment one bolt loosens, the whole ride becomes a noisy mess. To kill the squeak, you have to find the friction. I usually have a family member sit on the bench and shift their weight while I’m on my hands and knees with a flashlight. Look for the ‘micro-gap’—that tiny space where a joint is opening and closing by less than a millimeter. If you find the seat is rubbing against the side panel, you are dealing with a lack of lateral support. This often happens when creative built-ins for seamless storage and home aesthetics are installed without accounting for the weight of three adults sitting down at once. I remember a cherry wood bench I built for my neighbor, Sarah. Two weeks in, she called me because it sounded like a ghost was living in her mudroom. I hadn’t pre-drilled the pilot holes deep enough, so the screws were tight against the head but loose in the substrate. I had to back them all out and start over.
Why the 45-Degree Screw Angle is Your Best Friend
The most effective way to stop the movement is through toe-nailing or using pocket screws from the underside of the frame. You want to pull the two pieces of wood together so tightly that they act as a single unit. A screw driven straight in can easily pull out over time, but a screw at a 45-degree angle creates a wedge effect that resists vertical pressure. This is a core part of the structural cleat strategy for heavy mudroom lockers. You are essentially creating a clamp that never lets go. 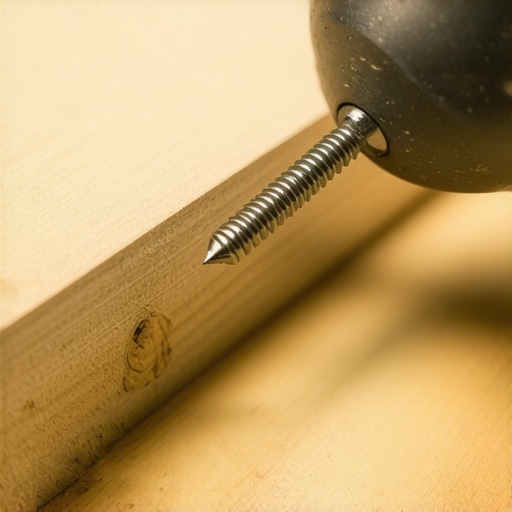 When I’m working on high-end projects, I’ll often apply a small amount of wood glue to the joint before driving that 45-degree screw, but only if I’m 100% sure the wood has reached its equilibrium moisture content. If the bench is still rattling, it might be an issue with the base. Just like how you would how to fix rattling sliding doors in custom bedroom closets, you need to isolate the moving part and stabilize it.
Stop the Wobble with Internal Reinforcement
If the frame itself is shifting, you need more than just screws. You need surface area. This is where stop wobbly custom built-ins with 4 hidden steel plate fixes comes into play. By adding a small steel L-bracket or a wooden triangular corner block to the internal corners of the bench, you prevent the ‘parallelogram’ effect where the legs try to fold inward. For benches that are particularly heavy or long, I always rely on the plywood plate move for secure entryway bench anchoring to distribute the load across multiple studs. If your floor is tile or concrete and the bench is sliding even a fraction of an inch, the friction against the floor will telegraph through the whole structure as a groan. In those cases, 7 heavy duty floor bolts for securing mudroom entryway benches are the nuclear option that guarantees silence. It’s about creating a foundation that doesn’t fight against the house, but becomes a part of it.
While a squeaky entryway bench is an annoyance, failing to account for the weight and environmental stress on larger built-ins is where things get truly expensive. Transitioning from small furniture to full-scale bathroom or bedroom units requires a massive shift in how you think about load-bearing. Most homeowners—and even some pros—assume that if a cabinet feels solid on the showroom floor, it will perform perfectly under a three-hundred-pound slab of stone. This is a dangerous misconception. In my years of troubleshooting, I have found that the ‘sturdiness’ of the cabinet box is almost irrelevant compared to how that box transfers energy to the wall and floor. Let’s dig deeper into the nuances that separate a DIY weekend project from a lifetime installation.
Heavy Stone is the Silent Killer of Custom Cabinets
Everyone says that thick quartz or granite is the gold standard for top trends in vanity designs you need to know in 2025, but in my experience, these materials are the leading cause of frame failure. People assume the stone just sits there. In reality, stone exerts a constant, relentless downward force that causes ‘creep’—a structural term for the slow, permanent deformation of wood fibers. According to data from the National Kitchen & Bath Association, a significant percentage of cabinetry complaints stem from structural sagging rather than aesthetic defects. If you haven’t followed an expert guide to flawless vanity installation tricks tips, you might notice your doors beginning to rub or gaps appearing at the backsplash. This isn’t the house settling; it is your cabinet frame slowly being crushed under the weight because you didn’t provide a direct load path to the floor or the wall studs.

Can your wall studs handle a floating vanity without extra blocking?
This is the question that haunts high-end bathroom renovations. If you are aiming for a modern look, you probably want a floating unit, but standard 2×4 studs are often not enough on their own. The ‘oops’ factor here is relying on the drywall to provide support. Drywall has zero structural integrity for shear force. I have seen beautiful bathrooms ruined because the installer didn’t use 6 heavy duty wall fixes for massive quartz top vanities 3 to bridge the gap between the cabinet back and the timber. If you don’t open that wall up and install horizontal 2×6 blocking, you are essentially asking a few small screws to hold up a literal mountain of stone and water. This is exactly why your heavy quartz vanity is cracking the cabinet frame—the weight is pulling the top of the cabinet away from the wall while the bottom is being pushed into it, creating a scissor effect that tears the joints apart.
The One Mistake That Leads to Hidden Mold Growth
Another nuance that most people miss is the interaction between the vanity base and the bathroom floor. Even if you aren’t in a basement, bathrooms are high-moisture zones. The ‘trap’ to avoid is installing your custom built-ins directly onto tile without a capillary break. Wood will suck up moisture from a damp floor like a straw, leading to rot that you won’t see until the cabinet literally collapses. I always recommend using 7 moisture barriers for vanities in high humidity bathrooms to ensure there is an airtight and watertight seal at the base. It’s not just about the plumbing leaks; it’s about the steam from your morning shower condensing and running down the side panels. Have you ever fallen into this trap where you thought everything was solid only to find a crack or a soft spot months later? Let me know in the comments, because catching these mistakes early is the only way to save the investment in your home’s aesthetics.
Maintenance isn’t just about wiping away dust; it is about managing the physics of a living home. Once you have navigated the complexities of moisture and weight, your job shifts to ensuring the hardware stays as sharp as the day it was installed. I have seen 20-year-old cabinets that look brand new because the homeowner understood that wood and metal are in a constant dance of expansion and contraction. If you notice your doors aren’t sitting flush anymore, do not panic. Learning how to fix uneven gaps in custom built-in doors is a fundamental skill that prevents long-term warping. It is usually just a quarter-turn on the hinge adjustment screw, but ignoring it allows the door to pull unevenly on the face frame, eventually stripping the wood fibers entirely.
Stop the Slam Before It Breaks the Frame
We often think of soft-close hinges as a luxury, but they are actually a structural necessity. Every time a heavy door or drawer slams, it sends a shockwave through the joinery. Over thousands of repetitions, those micro-vibrations loosen the glue joints and the screws holding your innovative storage solutions to transform your bathroom together. If your hardware is starting to fail, you need to understand why your soft-close drawers are slamming and the tension fix that saves the cabinet box. According to the Kitchen Cabinet Manufacturers Association (KCMA) A161.1 performance standard, quality cabinets must withstand 25,000 door swing cycles and 15,000 drawer cycles. If you aren’t maintaining the hardware tension, you won’t even make it halfway to those benchmarks before things start rattling apart.
How do I maintain custom cabinetry over time?
The secret is a seasonal ‘hardware audit.’ Every six months, I grab my favorite Pozidriv screwdriver—don’t use a standard Phillips, as it will cam out and ruin your high-end hardware—and I check every mounting plate. I also apply a tiny drop of dry-film lubricant to the drawer runners. Unlike oil or grease, dry lubricant won’t attract sawdust and pet hair, which can turn into a gritty paste that grinds down your slides. If you have utilized smart storage solutions to optimize small bathroom spaces, these moving parts are likely under higher stress than usual due to the density of items stored. A five-minute tune-up prevents a five-hundred-dollar replacement down the road.
The Three Tools I Never Leave at Home
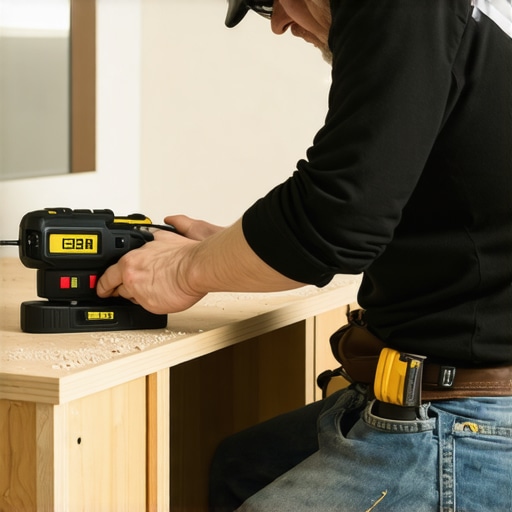
If you want your built-ins to look professional, you have to stop guessing. My most prized tool is my laser level, but a close second is the scribing tool for cabinets against textured plaster walls 2. You cannot trust a house to be square. If you try to force a perfectly square cabinet against a wonky wall, you are introducing internal stress into the frame. Scribing allows the wood to follow the wall’s imperfections while the structure remains perfectly plumb. Looking ahead, I predict we will see more ‘smart sensors’ integrated into high-end vanities and built-ins within the next five years—small, battery-less chips that alert your phone to moisture spikes or structural shifts before you can even see them with the naked eye. Until then, we rely on precision and preventative care. I strongly encourage you to go to your bathroom right now and check the tension on your vanity hinges; catching a loose screw today prevents a sagging door tomorrow. If you are ready to scale up your storage game or need a hand with a complex layout, feel free to contact us 2 for a deeper dive into custom engineering.
The Painful Mistakes That Actually Made Me a Better Craftsman
I’ve learned the hard way that a silent home is the result of respecting the material, not fighting it. Early in my career, I ignored the way moisture migrates through a base, only to see beautiful work warp within a year. Now, I never skip using 7 moisture barriers for vanities in high humidity bathrooms because peace of mind is worth the extra ten minutes. Another revelation was realizing that weight distribution is an invisible science; if you are wondering how to support quartz counters on custom floating vanities, remember that the wall is your primary ally, not just the cabinet box. Finally, I discovered that every ‘squeak’ is a lesson in friction—if you don’t address why a joint is moving, you’re just masking a deeper structural cry for help.
The Gear I Reach for When Everything Has to Be Perfect
Building something that lasts requires more than just a hammer and a prayer. My toolkit is built on precision, starting with a high-quality scribe. I rely on the scribing tool for cabinets against textured plaster walls 2 to ensure that my built-ins look like they grew out of the wall rather than being forced against it. For the finishing touches, I always keep a tube of high-grade silicone nearby; mastering the waterproof sealant move for vanity backsplashes is what separates a DIY look from a professional, long-term seal. I also frequently revisit the expert guide to flawless vanity installation tricks tips to keep my methods sharp against new building materials and stone weights.
Take the First Step Toward a Home That Truly Lasts
There is a profound sense of pride that comes from sitting on a bench you built—one that doesn’t groan—or opening a vanity drawer that glides with silent precision. By focusing on the structural bones of your projects today, you are creating innovative storage solutions to transform your bathroom and entryway into spaces of calm rather than clutter. Don’t let the fear of a heavy countertop or a tricky wall stop you from starting. Have you ever encountered a hidden structural issue that nearly ruined a project? Let me know in the comments below!