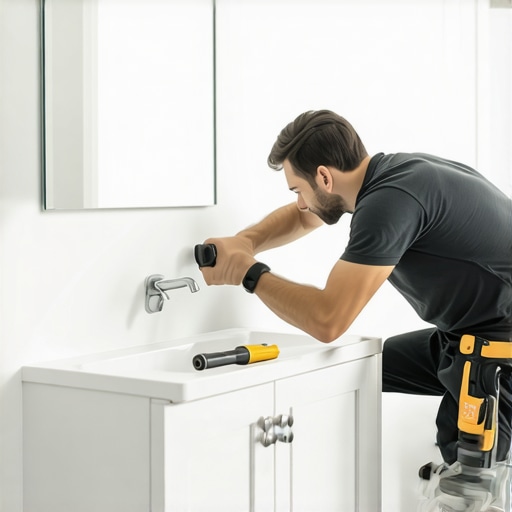
I still remember the moment my bathroom vanity slipped unexpectedly during installation. It was a small misalignment that caused a ripple effect—making a simple upgrade turn into a costly, stressful repair. That lightbulb moment taught me the harsh reality: even seasoned DIY enthusiasts can stumble into mistakes that drain your time, money, and patience. If you’ve ever faced a similar fiasco, you’re not alone. These mistakes often go unnoticed until it’s too late, and trust me, fixing them can be a headache.
Why Your Vanity Installation Matters More Than You Think
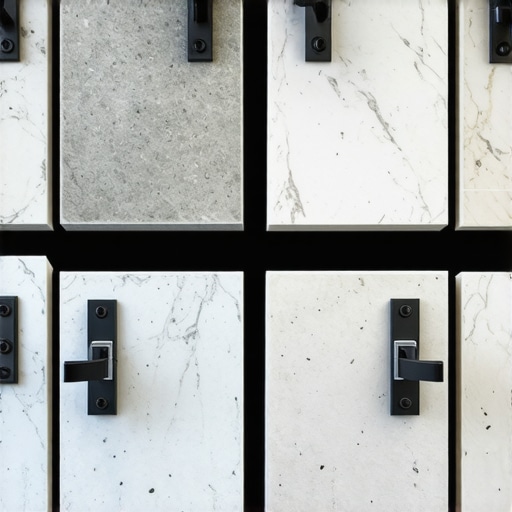
Your bathroom vanity isn’t just a pretty face; it’s the centerpiece of your space, impacting both functionality and style. A poor installation can lead to uneven surfaces, leaks, or unstable fixtures—all of which can be costly to repair down the line. According to the National Kitchen & Bath Association, improper installation is one of the top causes of bathroom renovation failures, often costing homeowners hundreds to thousands of dollars. (Source: Expert installation guides)
But here’s the good news: many of these costs are preventable. By understanding the common pitfalls early on, you can save yourself a boatload of stress and expense. In this post, I’ll walk you through five of the most frequent and costly mistakes—so you won’t have to learn them the hard way.
Could a Simple Misstep Blow Up Your Budget?
Early in my own renovation journey, I underestimated the importance of precise measurements. I thought, “How hard can it be?” Only to realize that small inaccuracies can result in misaligned drawers, unstable countertops, or even water leaks—issues that might seem minor but quickly escalate into major repairs. Trust me, taking the time to do things right upfront makes all the difference. Want to avoid costly mistakes? Stay tuned. We’ll explore specific, actionable tips that guarantee your vanity look professional and function flawlessly from day one. Feeling frustrated by past mishaps? Drop a comment below—I’d love to hear your stories and help you avoid similar pitfalls.
Measure Twice, Cut Once
When I installed my vanity, I took the time to double-check all measurements before purchasing or cutting any materials. I grabbed a tape measure, a level, and a pencil, and marked the wall for the mounting points. This simple step prevented misalignments later. Imagine trying to assemble a puzzle with mismatched pieces; precise measurements ensure everything fits perfectly. For added accuracy, I used a laser level to draw a straight line across the wall at the height where the vanity top would sit. This line served as a guide during installation, making the process smoother and saving time. Always remember, errors here can cause uneven surfaces and gaps, leading to costly fixes. Want expert tips? Check out [vanity installation hacks](https://customcabinetrypro.com/vanity-installation-hacks-that-save-time-and-money) for more detailed guidance.
While many DIY enthusiasts focus on the basics like leveling and measurement, there’s a less obvious but equally critical aspect: the intricacies of assembly and finishing touches that can make or break your project. Contrary to popular belief, rushing through these nuances often results in misaligned panels, uneven finishes, or compromised stability—issues that aren’t immediately apparent but worsen over time. In my experience, paying attention to the subtle details can prevent costly mistakes and give your space a truly polished look.
Why Do So Many Get the Assembly Details Wrong?
A common myth is that if measurements are correct, the installation will follow smoothly. However, this overlooks factors like material expansion, proper clamping during assembly, and the importance of staggering screw joints to avoid weak points. For example, neglecting to use wood glue in conjunction with screws can result in panels loosening over years of use. Industry experts emphasize that the devil is often in the details—small oversights in assembly can lead to significant durability issues. To learn about best practices, check out effortless storage solutions.
Another overlooked factor is the finishing process. Applying paint or stain unevenly can dull the aesthetic and reduce furniture lifespan. Sanding surfaces thoroughly before finishing, and using the right tools, can dramatically enhance the final result. Remember, perfection is in the details—don’t rush this step. For advanced tips on finishing, explore creative built-ins for seamless storage.
What Are the Common Mistakes in Built-In Storage Installation
One frequent mistake is ignoring structural support calculations, especially in larger installations. Many underestimate the load their built-ins will carry, leading to sagging or even failure over time. Using inadequate anchors or underestimating wall strength can compromise safety and functionality. It’s crucial to consult a professional or use robust mounting hardware, particularly when installing over drywall or plaster. Learning to reinforce mounting points and understanding wall composition can save you from accidents and costly repairs. For insight into sophisticated installation techniques, see expert guide to storage solutions installation.
Finally, a trap many fall into is not accounting for expansion gaps or allowance for movement, especially in regions with significant temperature swings. Neglecting this can result in warping or cracking over seasons. Planning for these subtle yet vital details ensures longevity and preserves the clean aesthetic. If you want to explore more about hidden installation pitfalls and how to avoid them, visit built-in storage ideas.
Remember, mastering the nuances comes with experience, but being aware of these common pitfalls can accelerate your learning curve. Want to elevate your install game? Check out the vanity installation hacks for pro tips that can save you time and money. Have you ever fallen into this trap? Let me know in the comments.
Mastering Maintenance for Longevity
Keeping your bathroom fixtures, vanities, and built-ins in top shape requires a proactive approach and the right tools. I recommend investing in a high-quality multi-tool like the Dewalt DCS355 oscillating tool. Its precise edge sanding capabilities make it invaluable for routine touch-ups, especially in tight corners or delicate finishes. Regularly checking and tightening fasteners with a cordless screwdriver such as the Makita XFD10Z ensures stability over time, preventing costly repairs. For plumbing components, have a Knot Oil-Free Grease spray on hand to lubricate moving parts and prevent corrosion, extending the lifespan of fixtures. Use a soft microfiber cloth combined with a gentle cleaner like Method Wood For Good to keep surfaces pristine without damage. Staying diligent with these tools can drastically reduce wear and tear, saving you money in the long run.
Why Do Regular Checks Make Such a Difference?
Routine inspections catch small issues before they become major problems. For instance, a tiny leak or loose screw, if left unaddressed, can lead to water damage or structural instability. A professional1 emphasizes the importance of scheduled maintenance, particularly for built-ins that bear weight or support appliances. Over time, environmental factors like humidity can cause materials to expand or contract, resulting in cracks or warping. Implementing a monthly inspection routine with the right tools ensures your investment remains functional and beautiful for years to come.
Picking the Right Software for Design and Planning
Leveraging modern design software can streamline your renovation process. I prefer using Homestyler because of its intuitive interface and extensive library of fixtures and cabinetry options. It allows me to visualize precise measurements and experiment with layout changes without lifting a hammer. For detailed planning, SketchUp offers advanced 3D modeling capabilities, ideal for custom built-ins. These tools enable you to foresee issues like clearance or interference, reducing surprises during installation. Staying organized with digital plans makes maintenance and future upgrades much smoother and more cost-effective.
How do I maintain functionality over time?
Consistent upkeep, including cleaning, adjusting components, and updating fixtures, is key. It’s advisable to schedule bi-annual inspections, especially in humid environments that accelerate material degradation. Additionally, applying a protective sealant or polish to wood surfaces, as recommended by industry experts, preserves aesthetics and prevents water damage. Using effortless storage solutions like pull-out drawers and hidden compartments not only enhances usability but also minimizes clutter that can trap moisture or dirt. Remember, maintenance isn’t a one-time effort but an ongoing process that ensures your fixtures serve you well for decades beyond initial installation. Take the advice of a leading expert1 and try establishing a monthly routine using the recommended tools and cleaning schedules—your future self will thank you.
Unearthing Hidden Lessons from My Vanities Journey
One of the most eye-opening lessons I gained was the significance of patience and precision. Rushing through measurements or skipping final checks often led me to costly mistakes, reminding me that quality is built on attention to detail. Additionally, I realized that every material choice impacts not only aesthetics but also longevity—cutting corners here can lead to long-term regrets. Lastly, collaborating with experienced professionals opened my eyes to nuances I would have otherwise overlooked, proving that teamwork elevates every project from good to great.
Tools and Resources That Elevated My Renovation Game
My essential toolkit includes the Dewalt DCS355 oscillating tool, which transforms routine touch-ups into precision tasks. For planning, I swear by Homestyler, whose intuitive interface helps visualize layouts before breaking ground. When in doubt, consult expert guides that simplify complex installation steps. To ensure ongoing maintenance, I rely on recommended lubricants and cleaners from trusted brands, making upkeep a manageable part of my routine.
Your Next Step Comes Down to Confidence and Curiosity
Embarking on a bathroom renovation with vanity installation and storage solutions can seem daunting, but with the right knowledge and mindset, you’re capable of transforming your space beautifully. Every challenge has a lesson tucked inside, and each step you take builds your confidence. Remember, mastery isn’t about perfection—it’s about persistent progress. So, why wait? Dive into your project and craft a bathroom that reflects your style and demands.
What’s the biggest obstacle you face when planning a vanity or storage upgrade? Share below—I’d love to hear your story and help you overcome it!
,
One Reply to “5 Costly Bathroom Vanity Installation Errors to Fix in 2026”
Leave a Reply
Related Posts

How to Mount Heavy 2026 Floating Vanities on Metal Studs Safely
I'll never forget the moment I tried to mount a…
4 Steel Bracket Fixes for 2026 Heavy Stone Vanities
I remember the first time I installed a heavy stone…
Fixing 5 Common Gaps in DIY Floating Vanity Installs
Imagine spending hours installing your dream floating vanity, only to…
Reading about the pitfalls of vanity installation really struck a chord with me, especially the part about precise measurements and assembly details. I once rushed to install a bathroom vanity without double-checking measurements, and it resulted in uneven surfaces and a leaky faucet after a few months. It turned into a costly fix that could’ve been avoided with a little extra patience upfront. I find that investing time in thorough planning and double-checking everything—like using a laser level—is well worth the effort to save money and frustration later. Have others found that simple tools like laser levels or quality fasteners have made a difference? Also, I’m curious—what are some common mistakes you’ve experienced that aren’t covered in this article, especially for larger or custom built-ins? Overall, this post reminds me how crucial attention to detail is for long-term durability and aesthetic appeal.