

I will never forget the sound of three jars of expensive, home-canned heirloom tomato sauce shattering on my pantry floor at two in the morning. It sounded like a home invasion, but it was just gravity reclaiming my poorly supported plywood shelves. If you have ever opened your closet doors only to notice a depressing, downward bow in the middle of your shelving, you are not alone. Traditional shelf pins and thin side cleats simply cannot handle the sheer weight of a fully stocked kitchen pantry. After cleaning up that sticky, red disaster, I vowed to find a permanent remedy that did not involve buying ugly plastic racking or rebuilding the entire closet from scratch. That is when I developed my go-to framing strategy to reinforce these high-stress zones. Today, we are going to walk through a simple, incredibly robust method that stops deflection in its tracks, giving you the peace of mind to stack as many heavy cans as you want. If you are dealing with similar structural failures around the house, check out how we handle why your built-in bookcase is sagging for more clever shelf-stiffening hacks. Let us get your storage spaces locked down.
The Night I Realized Single Cleats Just Do Not Cut It
My early mistake was relying entirely on standard, single-strip ledger boards because I thought a few drywall anchors and some finish nails would hold up under the weight of a family-sized grocery haul. It was a classic rookie blunder. The shelf did not fail at the ends; it twisted and pulled the single cleat right out of the plaster. According to engineering data compiled by the Wood Database, even robust softwoods like Pine can experience severe permanent creep under continuous, heavy loads if the span exceeds thirty inches without center or rear support. By adding a secondary, interlocking structural batten directly beneath the primary ledger, you effectively double the shear resistance and prevent the shelf from twisting downward under pressure. If you are struggling with other heavy-duty storage failures, you might also want to learn how to secure massive pantry shelves using the right hardware.
Are you actually willing to lose two inches of vertical storage space?
This is the main objection I get from homeowners when I recommend this fix. They worry that doubling up on support lumber will eat into their precious vertical storage height. Yes, you lose about an inch and a half of clearance directly underneath the shelf. But let me ask you this: would you rather lose a tiny sliver of air space, or lose your entire collection of glassware and dry goods to a catastrophic midnight collapse? If you are looking for smart ways to optimize every square inch of your home without compromising on structure, our guide on built-in storage ideas to declutter and enhance your home offers excellent inspiration. Have you ever walked into your kitchen and noticed your own shelves taking on a sad, banana-shaped curve? Tell me about your worst pantry disasters in the comments below before we dive into the step-by-step installation process.
Step-by-Step Framing: The Interlocking Cleat System
To eliminate sagging under immense weight, we have to look at shelves like miniature bridges. A bridge doesn’t just rest on its ends; it distributes force horizontally across a structural ledger. Think of this method as building an integrated ‘L-beam’ support system directly onto your wall studs. First, you need to locate and mark every single wall stud along your pantry layout line. If you miss a stud here, you are anchoring into nothing but fragile drywall, which guarantees failure under pressure.
Once the studs are located, measure and cut your primary rear ledger from 1×2 or 1×3 hardwood. Use a laser level to snap a perfect line across the back wall. Apply a thin bead of wood glue to the back of the ledger and drive 2.5-inch cabinet screws directly into each stud. Do not use drywall screws; they are brittle and will snap under shear stress. This primary ledger acts as your level foundation. If you have ever tackled a heavy-duty bathroom project, you know that securing a solid base is half the battle; the same structural rules apply when learning how to manage a step-by-step vanity installation successfully.
Locking in the Interlocking Support Batten
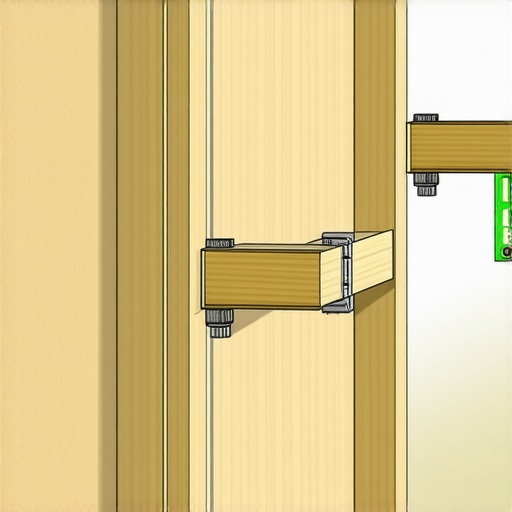
Here is where the magic happens. Instead of resting your heavy plywood shelf directly on top of that single ledger, you will install a secondary, interlocking support batten directly underneath the front edge of the shelf. I remember trying this for the first time on a custom kitchen project in a century-old house with horribly warped walls. I was skeptical that a secondary brace would fit, but once it was pocket-screwed into the side supports, the shelf was so stiff I could literally stand on it. To do this, cut a matching hardwood strip that spans the exact width of your shelf. Glue and screw this face-cleat directly to the underside of the shelf’s leading edge, creating an incredibly rigid front apron.
This front apron completely resists the downward bending force (or deflection) that naturally occurs when you load the middle of a wide shelf. This is highly comparable to the rigid internal structures we use in other custom carpentry projects, such as when we apply internal torsion box engineering to stop shelf sag on floating installations. Once your front apron is attached, slide the shelf assembly over your back ledger and secure them together with pocket screws from underneath.
Why Tight Tolerances Save Your Drywall
When you are installing heavy shelving, the fit against the side walls must be tight. If you leave a gap wider than a sixteenth of an inch at the sides, the shelf has room to shift and twist when loaded. This minor shifting acts like a lever, gradually pulling your wall anchors loose and cracking your plaster or drywall. Just like aligning drawers in high-end cabinetry to prevent binding, precise wall scribing makes or breaks your installation. If you struggle with hardware alignments elsewhere in your home, you might find our insights on how to align sliding pantry pull-outs incredibly helpful for achieving flawless, bind-free operation.
The Myth of Uniform Load Distribution
Most home improvement guides treat shelf load as if it is perfectly distributed across the wood surface, but that is simply not how real life works. In reality, we tend to shove heavy canned goods to the front or stack heavy glass jars right in the middle of a shelf. This uneven loading creates a high-torsion zone that standard cleats cannot counteract on their own. While a traditional single ledger board supports vertical weight, it does absolutely nothing to stop the twisting force that occurs when weight is concentrated at the front edge of the shelf. According to structural research published by the Forest Products Laboratory, wood under continuous, asymmetric stress is highly susceptible to progressive deformation, also known as mechanical creep. To truly protect your cabinetry investment, you have to engineer for the worst-case scenario: highly concentrated, off-center weight.
Why are your structural wall fasteners still failing even after hitting the studs?
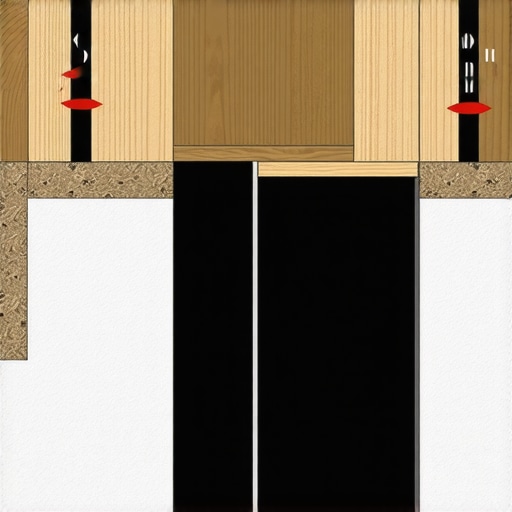
This is the ultimate ‘oops’ factor that catches even seasoned DIYers off guard. You spent the time finding the exact center of every wall stud, you used heavy-duty structural screws, and yet, over time, you notice the back ledger is still pulling away from the drywall. The culprit is almost always compression failure of the drywall itself. When a heavily loaded shelf begins to sag, even minutely, it acts as a lever arm. The bottom edge of the supporting ledger is forced backward, crushing the relatively soft gypsum core of the drywall behind it. Once that drywall compresses by even a sixteenth of an inch, the tension on your structural screws increases exponentially, eventually leading to loose threads and a sagging shelf structure. To prevent this, professional installers use specialized blocking or hardwood backing strips to distribute that compression force over a much wider surface area. It is the same structural engineering concept we use when learning how to execute a flawless vanity installation without damaging delicate wall surfaces.
If you are planning a broader home upgrade, avoiding these subtle structural traps is the difference between a project that lasts for decades and one that fails in a year. From choosing creative built-ins for seamless storage to selecting the right hardware, minor installation details make all the difference. Have you ever fallen into this structural compression trap and watched your drywall slowly crumble behind a loaded cabinet? Let me know in the comments below, and let’s keep your home storage safe, solid, and built to last.
How to Maintain Heavy-Duty Pantry Storage Over Time
Once you have built your rigid interlocking cleat system, you might think your work is finished for the next twenty years. However, timber is a natural material that responds constantly to changes in your home’s microclimate. To prevent minor structural shifts from turning into another midnight disaster, you need to perform quick, semi-annual inspections of your high-stress storage areas. I always check my pantry supports right at the change of seasons—specifically in late autumn and spring—when indoor humidity levels fluctuate the most. I look for hairline cracks in the paint around the ledgers and use a digital caliper to check if any middle-of-the-span sagging has started, even by a millimeter.
As we look to the future of custom home storage, I predict we will see smart sensors integrated directly into high-capacity shelving. Lightweight, low-profile strain gauges, which are currently used in industrial warehousing to monitor pallet rack integrity, will soon become standard in high-end residential pantries. These tiny sensors can alert your phone if a shelf experiences structural creep before any visible bowing occurs. For now, we must rely on excellent manual installation techniques and physical inspections. If you want to expand these rock-solid structural habits to other parts of your home, check out our guide on built-in storage ideas to declutter and enhance your home to see how we blend high-capacity engineering with beautiful aesthetics.
What tools do I actually use to guarantee this level of precision?
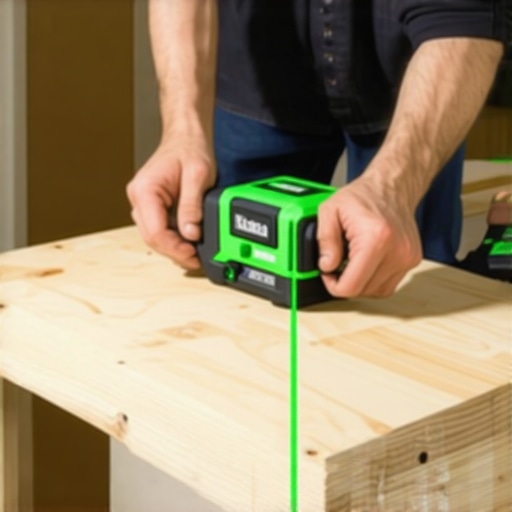
I do not rely on cheap plastic level bubbles or bargain-bin wood glue. When I am anchoring shelves that will hold hundreds of pounds of family provisions, my absolute go-to tool is the Stabila LAX 300 G Cross-Line Laser Level. It projects incredibly crisp, green horizontal lines that remain visible even in dark, deep closet corners. For fastening, I completely avoid standard drywall screws and instead rely on GRK Fasteners Cabinet Screws. These structural fasteners feature a built-in washer head that distributes clamping pressure across the ledger face, preventing the wood from splitting or crushing under intense tension. To ensure the shelf itself remains perfectly flat under stress, I also utilize the hidden tension rod fix for bowing shelf units, which provides adjustable resistance against sag.
According to the technical guidelines published by the Architectural Woodwork Institute (AWI), a maximum deflection of 1/270 of the span is the absolute limit for functional aesthetics under full load. For a standard 36-inch shelf, that means your center sag must never exceed 0.13 inches. To achieve this, your scribing tools must be top-tier. I personally use the Starrett 505A-7 ProSite Miter Protractor alongside a specialized scribing compass to map out the exact irregularities of out-of-plumb drywall. If you are applying these precise installation principles to other heavy storage areas, like a master bathroom remodel, you can learn more about how to execute a flawless vanity installation using the exact same scribing and leveling principles.
If you want to ensure your storage never fails, I highly recommend implementing the interlocking front apron trick on your very next shelf project. Grab a piece of scrap hardwood, pocket-screw it to the front underside of your weakest shelf, and watch the deflection disappear instantly. Feel free to share your success stories or ask questions about matching your wood species in the comments below.
3 Myths About Heavy-Duty Shelving That Left Me Sweeping Up Shards
When I first started reinforcing high-stress storage zones, I fell victim to standard woodworking folklore. The most dangerous myth is that thicker plywood solves everything. While upgrading from half-inch to three-quarter-inch plywood helps, it only delays deflection; without mechanical reinforcement at the front edge, even premium Baltic birch will eventually bow under the weight of heavy canned goods. Another common misconception is that adding extra screws into your studs will compensate for a weak ledger. In reality, over-fastening in a tight cluster actually splinters the wood grain and weakens the support system. Finally, many believe that steel brackets are always superior to wood cleating. A poorly anchored steel bracket will bend or pull out of the wall much faster than a continuous, wood-glued interlocking ledger system that distributes the weight across the entire length of the wall.
My Essential Toolkit for Rock-Solid Support Systems
Over the years, I have refined my toolkit to include only the most reliable gear for heavy-duty storage installations. Here is what I always keep in my pack:
- Stabila LAX 300 G Cross-Line Laser Level: Crucial for projecting ultra-bright green lines in tight pantry corners, ensuring your horizontal ledger is perfectly flat.
- GRK Cabinet Screws: My absolute favorite structural fasteners. The integrated washer head prevents wood splitting and offers massive shear strength.
- Starrett 505A-7 Miter Protractor: Indispensable for mapping out out-of-plumb walls before scribing your support cleats.
- Titebond III Ultimate Wood Glue: Essential for achieving a permanent mechanical bond between your interlocking cleats and the shelf itself.
If you are expanding your carpentry skills beyond the pantry, mastering these structural leveling principles is incredibly useful. You can use this exact level of precision when organizing smart storage solutions to optimize small bathroom spaces or setting up structural support bases for custom casework.
How Will You Protect Your Storage From a Midnight Collapse?
Taking the time to install an interlocking cleat system is more than just a home improvement project; it is an insurance policy for your hard work and valuable supplies. By transforming your simple shelving into rigid, load-sharing beams, you can confidently pack your pantry to the ceiling without ever worrying about a catastrophic structural failure. If you want to explore further ideas to upgrade your home, consider incorporating creative built-ins for seamless storage to bring both strength and elegant design into every room of your house.
Have you ever had a heavy shelf bow or completely pull out of the wall? Let me know what happened and how you fixed it in the comments below!