

I was staring at my living room wall, feeling that specific kind of defeat only a DIYer knows. You know the one—where you’ve spent three weekends perfecting creative built-ins for seamless storage and home aesthetics, only to realize that the laws of gravity don’t care about your Pinterest board. I had loaded my middle shelves with a heavy collection of vintage encyclopedias, and the 3/4-inch plywood was beginning to resemble a hammock. It wasn’t just an eyesore; it was a ticking time bomb for my favorite hardcovers. My biggest mistake was thinking that a long, unsupported span would hold up just because I used ‘the good wood.’ I forgot that even the best materials have their limits. That’s when I had my lightbulb moment. I was organizing the pantry and saw an old tension rod used for spice jars. I wondered: could I hide one of these in plain sight to brace my sagging shelves? Today, I’m going to show you exactly how to implement this ‘stealth support’ strategy. We’ll cover why it works, how to hide it, and why you don’t need to be a master carpenter to save your furniture.
Stop the Sag Before Your Books Hit the Floor
I’ve seen it happen in bedroom closets and even in high-end kitchen pantries. We often overestimate the structural integrity of our shelving, especially when we’re focused on the look rather than the load. It’s a common frustration that leads to why your built-in bookcase is sagging and the mid-span fix. The ‘hidden tension rod’ isn’t just a band-aid; it’s a clever bit of engineering that uses vertical compression to counteract the downward force of your books or decor. It’s a trick I wish I’d known before I warped my first set of custom units. I remember once trying to stop drawer sag in bedroom closets using bulky L-brackets, which worked but looked terrible. This tension rod approach is different because it keeps your lines clean. Have you ever walked into a room and felt like your shelves were literally frowning at you? You aren’t alone, and you definitely don’t have to live with it.
Does a $10 tension rod actually have the strength for this?
It sounds a bit flimsy at first, right? We usually think of tension rods for hanging lightweight curtains or dividing drawers. However, when placed vertically, they act like a mini-pillar. The engineering is sound: you’re creating a mid-span support that transfers the load from the center of the bowing shelf down to a more stable base or the shelf below. It’s about distributed weight. According to technical data from the USDA Forest Products Laboratory, wood ‘creep’ is a very real phenomenon where long-term loading causes permanent deformation. If you don’t catch it early, that ‘frown’ becomes a permanent feature of the wood. This fix is about stopping that process in its tracks. It’s particularly useful for those of us trying to maximize smart storage solutions to optimize small bathroom spaces where we might be tempted to over-pack a thin shelf. [IMAGE_PLACEHOLDER] I’ll be honest, the first time I tried this, I used a rod that was a bright, clashing chrome. It stuck out like a sore thumb and looked like a temporary fix. That was my second big mistake. The secret isn’t just the support; it’s the camouflage. By matching the rod’s finish to your shelf color—or even wrapping it in a matching wood veneer—you turn a structural necessity into an invisible helper. This method is a game-changer for renters too, since it requires zero drilling and zero permanent changes to the built-in storage ideas you already have. Let’s dive into the specifics of how to pick the right rod and how to make it virtually invisible to anyone who isn’t looking for it.
Pick Your Pillar with Care
When you head to the store, skip the lightweight plastic rods meant for cafe curtains. You need a heavy-duty steel tension rod with a high-friction rubber foot. Think of this rod as the jack post in a basement; it is there to provide a solid vertical path for the weight of your books or heavy bathroom supplies to travel straight down to the floor or a sturdier lower shelf. I remember trying to fix a guest bathroom unit where the shelves were literally peeling away from the sides under the weight of oversized detergent bottles. I initially tried some flimsy 6 heavy-duty L-brackets for reinforcing custom built-in units, but they required drilling into the tile—which was a mess I did not want to deal with. The tension rod, however, just squeezed into place and took the load off the weak joints immediately without a single hole in the wall.
Find the Center of Gravity
Measurement is your make-or-break moment in this process. You want the rod to sit exactly at the point where the shelf is dipping the most, which is typically the dead center of the span. If you place it too far forward or back, the shelf might actually twist or tilt. I once set a rod too far back on a deep pantry shelf, and the front edge continued to dive toward the floor while the back stayed straight. It looked completely distorted. Ensure the rubber feet of the rod are clean; any dust or grease will cause the rod to slip under pressure. This logic is similar to how we handle vanity installation hacks that save time and money—it is all about finding that stable, level anchor point before the weight goes on. If you are working with a shelf that has already bowed significantly, you may need to use a temporary clamp to pull the shelf straight before tightening the rod into place.
Make the Support Disappear
A bare metal rod often looks like a temporary repair rather than a professional design choice. To make it truly stealthy, you have to match the texture and color of your existing cabinetry. If you have white shelves, a white rod is a start, but a better move is to slide a piece of PVC pipe over the rod before you install it. You can prime and paint that PVC to match your exact cabinet color using a high-quality enamel. It creates a thicker, more intentional-looking column that blends into the background. When I was working on smart storage solutions to optimize small bathroom spaces, I actually wrapped a tension rod in a scrap piece of wood veneer that matched the oak grain of the vanity. Once it was in, it looked like a decorative architectural element. 
Lock It Down for Long-Term Stability
Once the rod is in place and the camouflage is applied, give the rod an extra half-turn to ensure it is locked. You want it tight enough that it does not move when you nudge it, but be careful not to overtighten. Over-torquing can actually push the top shelf upward, creating a reverse bow. This vertical compression is the same principle behind stop drawer sag in bedroom closets with internal bracing. If you are dealing with a multi-shelf unit, you can stack these rods vertically, one on top of the other across different levels, creating a spine that runs through the center of the unit. This creates a continuous line of support from the very top down to the base. This is a highly effective why your built-in bookcase is sagging and the mid-span fix because it addresses the structural weakness without the need for expensive carpenter tools or permanent modifications to your built-ins.
Let’s dig deeper into the structural physics most people ignore until they hear a crack in the middle of the night. While the tension rod is a brilliant mid-span fix, it highlights a larger issue in home organization: we often misunderstand how weight actually moves through a cabinet. Most DIYers think that more screws always equals more strength, but that is a dangerous myth. In reality, over-driving fasteners can split the grain of your cabinet’s backing plate, actually weakening the connection over time. This is a common pitfall when attempting to maximize your space with custom vanities. Instead of just adding more hardware, seasoned professionals use the cleat hack for mounting vanities to steel studs or wooden framing to create a structural ledge that carries the load through surface contact rather than just screw threads.
How much weight can your wall actually carry before the studs fail?
This is the question that separates the hobbyists from the experts. It’s not just about the vertical pull of gravity; it’s about the moment arm, or the leverage a deep cabinet exerts on your wall. According to the International Residential Code (IRC), wall-mounted fixtures must be secured to withstand specific load requirements, yet many ignore the necessity of internal blocking. If you’re hanging a heavy unit and only hitting the studs with a few lag bolts, you’re risking a catastrophic pull-out because the drywall eventually crushes under the pressure. I’ve seen beautiful projects ruined because the owner didn’t realize why your heavy quartz vanity is cracking the cabinet frame—it was simply too much weight for an unreinforced box to handle. 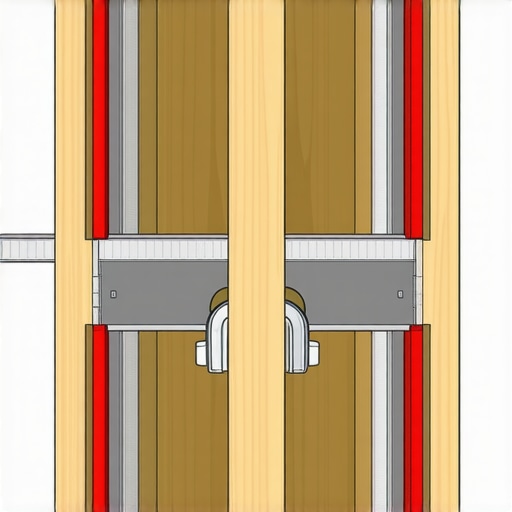 This Oops factor is most common with the 2025 trend toward massive quartz and marble tops. These materials are essentially solid stone, and they require 6 heavy-duty wall-fixes for massive quartz top vanities to ensure the weight is transferred directly to the floor or the building’s structural framing, not just the cabinet’s joinery. When you’re following a step-by-step guide to vanity installation for beginners, always look for the section on structural reinforcement. Have you ever fallen into this trap of underestimating the true weight of your materials? Let me know in the comments.It’s one thing to get a cabinet securely on the wall; it’s another to keep it there and maintain that factory-fresh look through years of seasonal changes. I learned the hard way that fluctuating humidity is the true enemy of tight joinery. If you aren’t using a professional-grade moisture meter before you start your vanity installation hacks that save time and money, you are essentially gambling with your wood’s future. I personally swear by the Wagner MMC220 pinless meter because it allows me to check the wood’s internal saturation without marring the finish of expensive hardwoods. For those tricky wall edges that are never quite straight, I stopped relying on a pencil and a prayer. Now, I use the scribing tool for cabinets against textured plaster walls to ensure that the gap between the unit and the wall is non-existent, creating a seal that prevents dust and moisture from creeping behind your work.
Stop Guessing with Professional Level Layout Tools
Precision tools aren’t just for showing off; they are the insurance policy for your labor. When I’m setting up a complex unit, I use cabinet claws instead of standard C-clamps. These specialized tools align the face frames of two cabinets while simultaneously holding them flush, allowing you to drill and fasten in one smooth motion. This prevents that annoying 1/16th-inch offset that screams ‘DIY’ rather than ‘Professional.’ I’ve found that even the best step-by-step guide to vanity installation for beginners can’t save you if your initial layout is off by even a fraction. Using a self-leveling cross-line laser has also replaced my old bubble levels, ensuring that my base cabinets are perfectly horizontal across a ten-foot span.
How can I maintain my custom storage over time?
Maintenance is about more than just a quick wipe-down. You need to periodically inspect your moving parts. If you notice why your integrated pantry pull out is catching and the easy fix, do not just force it. That resistance is usually a sign that your house has settled or the weight load has caused a minor rail misalignment. Every six months, I do a ‘hardware sweep’ where I check the tension on my hinges and ensure the drawer faces haven’t shifted. If they have, I look into how to fix drawer fronts that wont stay aligned before the wood starts to rub and chip. For bathroom units, moisture management is non-negotiable. According to technical guidelines from the National Kitchen & Bath Association (NKBA), proper vanity clearance and ventilation are essential for wood longevity. I always recommend implementing 7 moisture barriers for vanities in high humidity bathrooms to stop steam from delaminating your veneers. 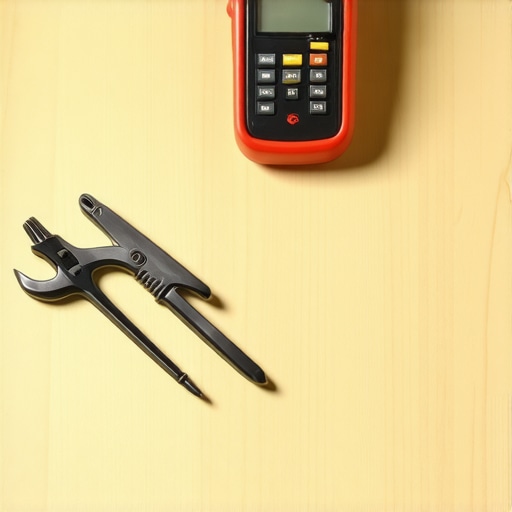 Looking toward the future, I predict we will see a massive shift toward ‘smart cabinetry’ where internal sensors can alert you to a slow plumbing leak or high internal humidity before visible damage occurs. Until then, stay proactive. My best advice for your next project? Don’t skip the structural details. Give the internal ribbing secret for long desktop spans a try; it provides the rigidity needed for modern, wide-open designs without the bulk of traditional supports.
What I Finally Realized About Supporting Heavy Loads
After years of trial and error, I have come to accept that the invisible work—the structural spine hidden behind the face frames—is what defines a professional build. I used to prioritize the finish over the frame, but gravity is a patient teacher. I learned that wood ‘creep’ is inevitable if you push your spans too far without a mid-span fix. [IMAGE_PLACEHOLDER_WRAPUP] I also realized that over-engineering is not just about adding more steel; it is about strategic placement. Sometimes, a single vertical tension rod is worth more than twenty haphazardly placed screws if it hits the right load-bearing point.
My Lightbulb Moments in the Workshop
- The Silence of Stability: If your cabinetry does not creak when you load it, you have done it right. Using an expert guide to flawless vanity installation tricks tips helped me move from ‘good enough’ to ‘bombproof.’
- Moisture is the Silent Killer: Never assume your home’s humidity is stable. Checking moisture levels with a tool like the Wagner MMC220 before you scribe is the difference between a tight joint and a seasonal gap.
- Adjustability is King: Always leave yourself a way to tweak things later. This is why I look into why your pantry pull out is tilting and the rail support fix before the hardware fails completely.
The Gear That Rescued My Projects
You do not need a massive workshop, but you do need a few pieces of high-performance gear. I personally swear by a self-leveling cross-line laser; it turned a two-person leveling job into a solo afternoon task. I also never start a project without my cabinet claws. These specialized clamps align face frames perfectly while you fasten, ensuring your innovative storage solutions to transform your bathroom look factory-made. Finally, if you are dealing with noise, learning how to fix rattling sliding doors in custom bedroom closets usually starts with high-quality track lubricant and a precision screwdriver.
Build Something That Lasts Decades
At the end of the day, your home is a living environment that moves and breathes. By using these stealth support strategies and focusing on structural integrity, you are not just fixing a shelf; you are investing in the longevity of your home. Do not be afraid to try these more advanced storage solutions even if you are just starting out. The confidence you gain from a shelf that stays perfectly level is the best tool in your kit. Have you ever heard a shelf crack in the middle of the night? Let me know about your closest DIY disaster in the comments below!