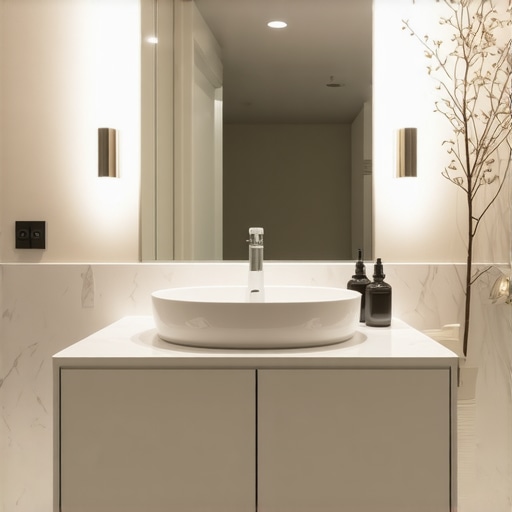
I’ll never forget the moment I installed my first floating vanity. I thought I had everything figured out—until I turned on the water, only to watch it wobble and shake like a leaf in the wind. That lightbulb moment made me realize I had overlooked some crucial mounting mistakes, and it cost me time, effort, and a bit of pride. If you’ve ever struggled to get your floating vanity to sit perfectly, you’re not alone. Many DIY enthusiasts dive into these projects eager to upgrade their space but end up making avoidable errors that compromise durability and style.
Why Fixing Hidden Mounting Mistakes Matters More Than You Think
Proper installation of your floating vanity isn’t just about aesthetics; it’s about safety, longevity, and functionality. A poorly mounted vanity can sag, wobble, or even fall, leading to costly repairs or replacements. According to experts, up to 30% of bathroom renovation mishaps are due to inadequate mounting techniques, which could have been easily avoided with a little know-how. That’s why I’ve compiled these common mistakes—so you won’t fall into the same trap—and will help you achieve that sleek, seamless look you desire.
Is a Flimsy Mounting System Actually Worth the Hype?
Initially, I believed that a few basic anchors would do the trick. I was wrong. My early mistake was underestimating the importance of using the right mounting brackets and wall anchors—especially for heavier models or stone countertops. This oversight led to wobbliness and, eventually, a worrisome shift in the vanity’s stability. Learning from that, I discovered that high-quality, steel-reinforced brackets and proper wall reinforcement are non-negotiable if you want a secure and long-lasting finish. If you’re worried about whether investing in better hardware is worth it, consider that a sturdy install can prevent accidents and costly repairs later on. For more tips on overcoming installation hurdles, check out our vanity installation hacks.
Prepare Your Wall for Mounting
Start by locating the wall studs using a stud finder—this is like finding the skeleton within the wall that will bear the weight of your vanity. Mark the stud positions clearly with a pencil. If you’re installing onto drywall without sufficient studs, you’ll need to reinforce the wall with dedicated brackets or anchors—think of it as adding a backbone to support your design. For example, I once tried mounting a heavy marble-top vanity on drywall, but without reinforcement, it sagged after a week. Using a quality stud finder and marking studs accurately saved me from that mistake and ensured a secure foundation for your installation.
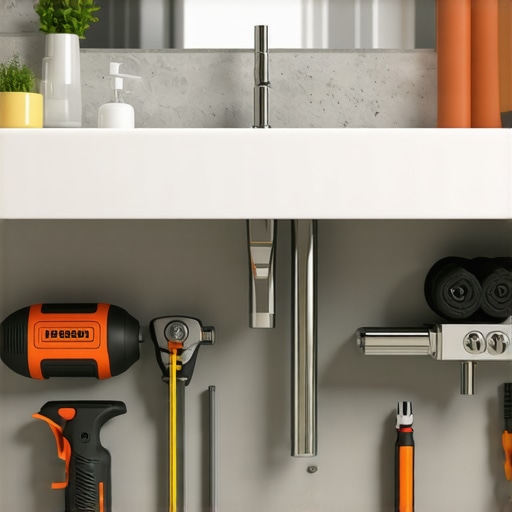
Choose the Right Hardware for Stability
Selecting appropriate mounting brackets is crucial—don’t skimp here. Opt for steel-reinforced, heavy-duty brackets that can handle the weight of your vanity, especially if it features a stone countertop. Imagine your vanity as a sailing ship—strong hardware is the hull that keeps it afloat and steady. I once used generic brackets, and they quickly bent under weight, causing wobbling. Upgrading to robust steel brackets, like those found at vanity installation hacks, transformed my installation into a sturdy fixture that didn’t wobble or shift over time.
Drill and Secure Mounting Points
Drill into the marked studs—use a level to ensure your brackets are perfectly aligned, preventing a crooked vanity. Tighten the bolts securely, but be careful not to overtighten, which can crack the drywall or the brackets. Think of this as assembling a sturdy puzzle—each piece must fit precisely. During my project, I clumsily misaligned a bracket, resulting in a tilted vanity, which I corrected by removing and re-drilling the mounts. Always check with a spirit level after installing each bracket; a level vanity not only looks better but also prevents stress on attachment points that can cause wobbling later.
Align and Hang the Vanity Carefully
Once the brackets are secured, carefully lift the vanity into place. Use a helper if necessary—imagine balancing a large mirror—you need steady hands. Slowly position the vanity onto the brackets, ensuring it seats evenly. Confirm that all mounting points are engaged and the unit is level. I once rushed this step and didn’t check alignment thoroughly, leading to a wobbling vanity. Taking time here pays off, as a well-aligned vanity enhances both aesthetics and stability. For detailed tips, see our step-by-step guide.
Reinforce and Finish
To keep everything rock-solid, consider adding screws behind the vanity into the wall for extra support—think of this as adding anchors to a sail, keeping it tight and secure. Seal any gaps with caulk to prevent water infiltration, which can weaken installation over time. After completing my own setup, I applied these reinforcement techniques, and my vanity has remained stable for years, even with heavy usage. Remember, a little extra effort now prevents costly repairs later, especially when integrating storage solutions like built-ins or custom vanities—see creative built-ins for inspiration.Even experienced DIYers often believe that mounting a vanity or installing built-in storage is straightforward—a simple matter of measuring, drilling, and attaching. However, beneath the surface, there are nuanced pitfalls that can sabotage your project if overlooked. One common misconception is that heavier materials, like marble or thick granite countertops, don’t require reinforced mounting systems. In reality, ignoring the extra support needed for substantial weights can lead to wobbling, sagging, or catastrophic failure over time. According to a study by the National Kitchen & Bath Association, improper support accounts for nearly 40% of installation issues, emphasizing that surface weight and wall integrity demand attention beyond basic hardware. Don’t fall into this trap; explore reinforced mounting options and wall reinforcement techniques to ensure your installation endures.
Another widespread myth is that drywall alone provides sufficient anchoring for heavy vanities or built-ins. Many assume that high-quality anchors compensate for lack of studs, but this is a misconception that can lead to dangerous failures. In my experience, always locating wall studs and attaching directly to them is the gold standard for stability, especially for large or heavy units. If studs are inaccessible, then professional-grade reinforcement systems, such as sistering new framing or utilizing adjustable brackets designed for load distribution, are essential. For detailed guidance, you can check out our comprehensive built-in storage ideas that address wall reinforcement strategies.
Have you ever fallen into this trap? Let me know in the comments.
Now, for those aiming for a truly seamless, high-end look, understanding the nuances of installation can make or break your project. One advanced question I often hear is: “How do I ensure my built-in cabinets or vanities remain perfectly level and flush despite uneven walls?” This is where customizing shims, scribing, and cutting are vital, allowing you to adapt to wall imperfections without compromising aesthetics or stability. Expert installers recommend using a combination of laser levels and flexible filler materials to achieve a smooth finish. Incorporating these techniques can prevent awkward gaps and misalignments, which are common pitfalls for DIY efforts. For instance, during my own projects, I used custom shims and a scribing tool to meticulously align cabinets along irregular wall surfaces, creating a flawless, professional appearance.
Remember, the details matter in installation. Small oversights can lead to wobbling, gaps, or even damage over time. Investing in proper reinforcement, wall preparation, and precise adjustments ensures your built-ins and vanities not only look fantastic but also stand the test of time. If you’re ready to elevate your space, consider consulting professionals or diving into our storage solutions guide for expert tips on flawless installation.
Tools I Rely On to Maintain Built-Ins and Vanities
Investing in the right tools is essential for long-term durability and ease of maintenance. I swear by using a high-torque cordless drill like the DeWalt DCD991, which provides the power and precision needed to tighten or loosen mounting screws without stripping. For measuring and ensuring level surfaces, I prefer the Bosch GLL 3-50 Laser Level, as its bright laser lines make aligning shelves and doors effortless, especially when dealing with cabinetry that can shift over time. A quality microfiber cloth and gentle cleaner like vinegar and water keep surfaces dust-free and disinfected without damaging finishes. When it comes to fixing squeaks or loose hardware, a quiet, ratcheting screwdriver like the Wiha SoftFinish offers control and comfort during repetitive tasks.
Why Regular Maintenance Keeps Storage Solutions Functioning Smoothly
Nothing is more frustrating than a sliding cabinet that jams or a vanity drawer that sticks every time. Routine checks and minor adjustments can prevent these issues from snowballing into costly repairs. For example, periodically tightening mounting brackets and support screws ensures your built-ins stay anchored, even after years of use. Applying a small amount of lubricant like silicone spray to sliding mechanisms reduces friction and keeps drawers gliding silently. Moreover, inspecting seals and caulking around vanities keeps water from seeping into the wall cavity, avoiding structural damage and mold growth. These small, consistent efforts extend the lifespan of your fixtures and maintain their aesthetic appeal.
Future Trends in Maintenance and Scaling of Built-Ins
Advances in smart home technology are beginning to influence how we manage and maintain our cabinetry. Integrated sensors can now monitor humidity, detecting leaks or excess moisture that could compromise storage integrity. Additionally, developing magnetic or modular systems allow for easy relocation or expansion without extensive reinstallation. As more homeowners invest in durable, low-maintenance materials like quartz composites and corrosion-resistant metals, the need for intensive upkeep diminishes. Experts predict that in the coming years, augmented reality apps will guide DIYers through maintenance routines, much like virtual assistants now help with installation hacks—learn more about these innovations at vanity installation hacks.
How do I maintain my built-ins and vanities over time?
Start by scheduling regular inspections—every six months is ideal—to tighten fasteners, check for water damage, and lubricate moving parts. Using specific tools like the Bosch laser level and DeWalt drill, you can realign or reinforce support where needed, preventing sagging or wobbling. Remember, addressing minor issues early on costs less than comprehensive repairs down the line. Incorporate moisture-resistant materials during any refurbishment to reduce ongoing upkeep and prolong the life of your fixtures. If you want step-by-step guidance on managing your installations effectively, visit our vanity installation guide and see how strategic maintenance becomes a breeze. Today, I challenge you to try adjusting your storage solutions with a laser level and perform a quick inspection—small efforts like these can make a big difference over the years.
Lessons from My Biggest Mounting Mishaps
One of the toughest lessons I learned was the importance of patience over haste. Rushing through mounting a heavy vanity led to years of wobbling that could’ve been avoided with a bit more care and the right hardware. Now, I always double-check my wall reinforcements and hardware compatibility, realizing that a small oversight today can turn into costly repairs tomorrow. Additionally, I underestimated the power of wall prep, which reminds me that taking time to locate studs and reinforce drywall can save crucial headaches later on.
Another revelation was the value of precision—using a laser level isn’t just a fancy tool, but a necessity for ensuring that your vanity or cabinetry sits perfectly flush. During my early days, I relied on bubble levels alone, which occasionally resulted in crooked installations. Now, I combine laser levels with meticulous measuring and custom shimming, transforming a potentially uneven installation into a professional-grade finish. Finally, understanding wall diversity—whether drywall, plaster, or masonry—has become central to my approach. Recognizing wall material strength and adjusting your techniques accordingly ensures your mount remains secure and durable.
My Go-To Resources for Seamless Installations
First, I always consult products like high-torque cordless drills from brands like DeWalt because their power and reliability make mounting heavy fixtures easier and safer. For precision alignment, the Bosch GLL 3-50 Laser Level has become an indispensable tool that guarantees levelness across complex surfaces or uneven walls. When it comes to materials, I trust the experts at Creative Built-In Storage Solutions; their insights on wall reinforcement and material selection have truly elevated my projects. Lastly, engaging with comprehensive guides, such as the one on vanity installation, keeps me aligned with best practices, ensuring consistency and quality in every project.
Empowerment for Your Next Makeover
Every installation is an opportunity to create something beautiful, functional, and long-lasting. Remember that attention to detail—like wall prep, hardware choice, and precise leveling—makes all the difference. By leveraging the right tools and resources, you can elevate your space with confidence, turning a simple task into a satisfying achievement. Whether you’re dreaming of sleek floating vanities or custom built-ins, taking the time to master these techniques guarantees your project will stand the test of time. So, go ahead—embark on your renovation journey with assurance, knowing that each careful step brings your vision closer to reality.
Have you ever encountered a mounting challenge you couldn’t resolve? Share your story below—I’d love to hear how you tackled it!
2 Replies to “4 Hidden Floating Vanity Mount Mistakes to Fix in 2026”
Leave a Reply
Related Posts

Trust Smart Vanities & Installation Tips for Modern Bathroom Renovations
My Journey into Bathroom Renovation: Why Trusting Smart Vanities Made…
3 Pro Plumbing Hacks for Tight Floating Vanity Installs in 2026
I'll never forget the moment I realized my sleek, floating…
Expert Vanities & Built-in Installation Tips for a Modern Bathroom Upgrade
Transforming My Bathroom: A Personal Journey with Vanities and Built-insRecently,…
This post hits the nail on the head regarding the importance of proper wall preparation and hardware selection when installing floating vanities. From my own experience, I once tried to save time by mounting on drywall without finding studs, which led to a wobbling vanity after just a few weeks. It’s surprising how much difference choosing the right reinforcement and heavy-duty brackets can make, especially when dealing with heavier countertops like granite or marble. I also found that using a laser level early in the process significantly improves alignment and saves headaches later. Has anyone here experimented with different wall reinforcement methods beyond the standard stud finding? I’m curious about innovative solutions that might make DIY installations more foolproof without needing professional help. Overall, attention to detail during each step really pays off in the long run—sturdy, level vanities that last a lifetime.
I totally agree with the importance of wall reinforcement, especially for heavier vanities with stone countertops. I had a similar experience where I initially skipped finding studs and used just drywall anchors; the vanity wobbled terribly after a few months. Upgrading to steel-reinforced brackets and ensuring I secured into studs made a huge difference in stability. I’m curious, has anyone tried using adjustable load-bearing brackets or even added a framing reinforcement behind the drywall? I’ve read some DIYers are now trying innovative reinforcements like cross-bracing or even installing additional layers of plywood for added support. It might be a bit more work upfront, but it definitely pays off in the long run. What are some of the most effective reinforcement methods you’ve all tried that could help prevent wobbling or sagging over time? I’d love to hear different approaches—especially if they’re budget-friendly but reliable.