I remember the moment vividly — I reached into my garage cabinet to grab some heavy-duty tools, only to have the entire shelf groan and wobble dangerously beneath the weight. That sinking feeling of potential disaster made me realize I was neglecting a common, yet stubborn problem: sagging garage cabinets holding heavy gear. If you’ve experienced similar frustrations, you’re not alone. Over time, the weight of 2026 planning gear, tools, and equipment can take a toll on your storage, leading to a sag that threatens both your safety and your organization.
The good news? You’re about to discover real, practical solutions that worked for me and can work for you. Today, we’ll cover six proven fixes to stabilize and reinforce your garage cabinets against heavy loads. No more wobbly shelves or fearing heavy items might fall down when you least expect it. By implementing these tips, you’ll be able to restore your cabinets’ strength and longevity, making your storage both safer and more efficient.
Why Garage Storage Fails Under Weight and What You Can Do About It
Garage cabinets are designed to store plenty of gear, but they aren’t always built for the heavy loads we pile onto them over the years. The constant stress causes wood or particleboard to warp, metal brackets to bend, and hinges to loosen. This isn’t just an inconvenience; it’s a safety hazard. Early in my own experience, I made a critical mistake — I overlooked the importance of proper support and relied on the existing hardware without reinforcement. That misstep led to a near disaster when a shelf collapsed under a stack of heavy gear.
Supporting heavy cabinets isn’t just about tossing in stronger brackets. It’s about understanding the root causes and addressing them effectively. If you want your garage storage to withstand the test of time and weight, it’s essential to look beyond quick fixes and adopt strategies that ensure durability. For instance, choosing the right materials and learning smart installation techniques can make a world of difference.
For further insight, I recommend checking out [Smart Storage Solutions for Modern Homes](https://customcabinetrypro.com/smart-storage-solutions-to-optimize-small-bathroom-spaces), which offers excellent ideas on how proper planning can prevent storage mishaps. But let’s get into the specific fixes that will reinforce your cabinet setup, making it rock-solid even with your heaviest gear in tow.
Ready to breathe new life into those sagging cabinets? Let’s dive into six effective ways to reinforce and stabilize them, starting with straightforward support enhancements and moving towards professional-grade upgrades.
Secure the Shelves with Heavy-Duty Brackets
First, remove everything from your sagging shelves and carefully unmount the current supports. Measure the length and weight capacity needed; then, select steel brackets rated for at least twice the typical load. Mount these brackets into wall studs using a stud finder and a power drill, ensuring they are level and securely anchored. When I replaced my old brackets, I found that installing into studs rather than drywall made a massive difference; my shelves no longer wobble even under heavy tools.
Reinforce the Shelf Material
Assess the shelf material; particleboard is common but weak under heavy loads. Upgrade to a solid wood or high-pressure laminate surface, or add a back brace—a wooden strip along the rear of the shelf can distribute weight evenly. In my project, I clamped a 1×4 wooden support underneath the shelf, fastening it with wood screws. That simple step transformed a wobbly surface into a rock-solid platform capable of holding my heaviest equipment.
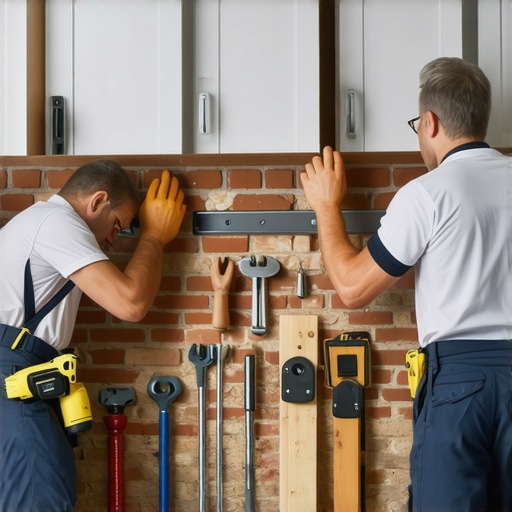
Install Additional Wall Support
For major reinforcement, add vertical supports directly into the wall. Use metal L-brackets secured into wall studs, extending from the wall up to the underside of the shelf. This redistributes weight and prevents sagging. I once installed an extra support beam beneath a large cabinet, which completely eliminated previous sag and increased safety. Remember to check for plumbing or electrical wires before drilling.
Use Wall Anchors and Toggle Bolts for Drywall Fixes
If you can’t locate studs, utilize toggle bolts or heavy-duty wall anchors rated for your shelf’s weight. Drill a hole, insert the anchor or toggle, and tighten until snug. While not as strong as stud anchoring, this method significantly enhances load capacity when properly installed. During my last upgrade, I used toggle bolts on a thin wall, which held up surprisingly well—even with my bulky garden tools.
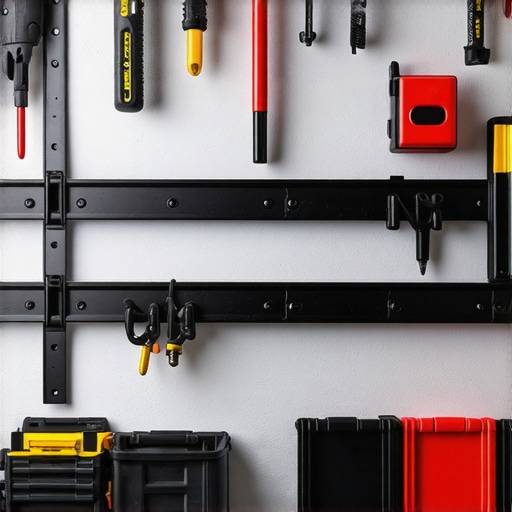
Implement Steel Wall Mounting Brackets
Upgrade the standard brackets with steel mounting systems designed for heavy-duty use. These brackets often have multiple mounting points and adjustable arms. Attach them securely into wall studs or reinforced drywall using appropriate fasteners. For added security, I used steel brackets with plastic spacers to prevent any flexing, ensuring long-term stability even with frequent access.
Distribute the Load Evenly
Finally, avoid concentrating weight in one area. Spread heavy items across multiple shelves, and place lighter items on top. Use bins or containers to organize gear and prevent shifting that can stress supports. When I reorganized my garage, grouping tools and supplies by weight and frequency of use, I noticed a dramatic reduction in shelf stress and increased ease of access. Consistent organization prevents undue strain and extends lifespan of your support system.
Integrate these reinforcement strategies to ensure your garage cabinets withstand heavy loads over time. For comprehensive ideas on custom solutions, visit creative built-ins for inspiration. Reinforcing your system isn’t just about safety; it’s about preserving your organization and peace of mind.While built-in storage and vanities are often praised for their sleek appearance and space efficiency, many homeowners fall prey to misconceptions that can undermine their functionality and longevity. A common myth is that custom-built units are always the superior choice, but in reality, improper installation or choosing the wrong materials can make even the best design fail prematurely. For example, assuming that a professional installation isn’t necessary can lead to hidden issues like uneven surfaces or weak joints, which compromise durability; according to experts in cabinetry, precise measurements and proper fastening techniques are crucial for lasting performance, and skipping these steps often results in costly repairs later. Another prevalent mistake is relying solely on aesthetic appeal without considering practical factors such as weight distribution, moisture exposure, or accessibility. Simply put, a beautiful vanity that doesn’t support your daily routines can quickly become a cluttered nightmare. One advanced nuance that many miss involves understanding load-bearing capacity, especially in corner or awkward spaces. For instance, installing a built-in in a wall not designed to handle heavy loads can lead to sagging or structural damage, which is why reinforcement strategies—like integrating steel braces or additional studs—are essential for long-term stability. Have you ever fallen into this trap? Let me know in the comments.¿
What are the best practices to ensure your built-ins withstand daily use and weight?
Implementing smart support strategies from the start—even for seemingly minor projects—can save you headaches down the line. For a comprehensive guide on this, check out this article on storage solutions, which emphasizes proper reinforcement techniques. Don’t let these common myths and pitfalls trip you up; understanding the hidden nuances of installation and materials will guarantee your storage investments stand the test of time. Remember, quality craftsmanship combined with informed choices leads to truly seamless and durable home upgrades.
Maintaining your built-in storage and vanities over time is essential to ensure longevity, optimal performance, and aesthetic appeal. One of the most effective ways to achieve this is by employing professional-grade tools and adopting routine maintenance procedures. Personally, I rely heavily on a few specialized tools that help me keep everything functioning smoothly, especially when it comes to installation adjustments or repairs. A high-quality cordless drill, such as the DeWalt DCD777, provides the power and precision needed for tightening or replacing fasteners without damaging delicate materials. Its variable speed control allows for delicate adjustments, which is crucial when dealing with wood or laminate surfaces.
For measuring and ensuring perfect alignments, I use a digital level like the Johnson Level & Tool 48” digital level. Unlike traditional bubble levels, this device offers real-time digital readouts, enabling me to fine-tune installations with excellent accuracy. This has saved me countless hours during complex vanity alignments, ensuring that everything is perfectly level and plumb. To maintain the cleanliness and finish of my cabinets, I turn to microfiber cloths combined with gentle, pH-balanced cleaners. Regular cleaning prevents dust buildup that can deteriorate surfaces and keeps hardware functioning smoothly.
Keeping your tools well-maintained is equally important. Regularly lubricating hinges, drawer slides, and mechanical supports with silicone spray ensures they operate silently and efficiently. For example, applying a small amount of silicone spray to the metal tracks of drawer glides reduces friction, preventing future squeaking or sticking. I also inspect support brackets and fasteners annually, tightening any loose components to prevent sagging or imbalance. This proactive approach extends the lifespan of your vanities and built-ins, saving costly repairs later after years of use.
Looking toward the future, emerging smart tools and software will revolutionize maintenance routines. IoT-enabled sensors can monitor support integrity, alerting homeowners to issues before they become critical. For instance, integrating a load sensor into a large built-in can warn you when weight thresholds are exceeded, preventing sagging damage. Experts suggest that adopting such technologies will be the standard in high-end cabinetry management by 2025, as discussed in industry projections.
How do I keep my built-in systems running smoothly over time?
Routine inspections and preventative care are your best allies. Schedule annual check-ups, tighten fasteners, and clean hardware regularly. Additionally, using the right tools—like a high-precision drill and a digital level—makes adjustments quick and accurate. Don’t forget to lubricate moving parts periodically; silicone spray is ideal for hinges and slides. Incorporate technology where possible—such as load sensors—to stay ahead of structural issues. For ongoing support and detailed tutorials, visiting this guide on vanity installation can set you on the right path. I highly recommend trying out a precision tool like the digital level for your next project to ensure your built-ins remain sturdy and beautiful for years to come.
Lessons That Changed My Approach to Heavy-Duty Built-ins
One of the biggest surprises I encountered was realizing that hardware alone isn’t enough—you need to genuinely understand the weight distribution and the materials involved. For instance, relying on drywall anchors without checking for wall studs was a rookie mistake that taught me the importance of thorough site assessments. Additionally, I learned that reinforcement isn’t a one-size-fits-all solution; each cabinet’s location, material, and load requirements demand a tailored approach. Finally, patience and incremental improvements proved to be more effective than overhauling the entire system at once, saving me time and stress.
Tools and Resources That Elevated My Reinforcement Game
During my projects, I found certain tools invaluable. A high-quality stud finder like the Zircon MetalliScanner helped me locate optimal anchoring points quickly, ensuring maximum support. The Dewalt DWS715 miter saw allowed me to precisely cut reinforcements that fit seamlessly, avoiding unwanted gaps. For comprehensive guidance, I highly recommend the article on 2025 vanity design trends to inspire your upgrade ideas, complemented by the DIY tips on vanity installation. My favorite resource remains expert blogs that blend practical advice with real-world demonstrations, transforming complex reinforcement strategies into manageable projects.
Turning Challenges Into Confidence—Your Next Move
Embarking on reinforcement projects might seem daunting at first, but each successful fix builds your confidence and skill. Remember, understanding the specifics of your storage system is essential—meticulously plan your reinforcement strategy, choose the right tools, and take it one step at a time. Whether you’re reinforcing a small corner cabinet or a hefty garage setup, these lessons and resources will empower you to create safer, longer-lasting built-ins. Don’t wait for a potential mishap—start strengthening your garage storage today and enjoy peace of mind. What’s the next reinforcement challenge you’re eager to tackle? Share your plans below, and let’s motivate each other to build smarter and stronger environments.
Related Posts

7 Heavy-Duty Garage Rack Fixes for 2026 E-Bike Storage
It was a Saturday morning when I finally realized my…
4 Steel Wall-Track Tactics for Heavy 2026 Garage Storage
I recall the moment vividly — standing in my cluttered…
How to Anchor 2026 Garage Cabinets to Uneven Brick Walls
You know that frustrating moment when you try to hang…