Have you ever wrestled with a tiny room where even the smallest desk feels like it’s taking over? I remember the moment I realized my office overflowed into my walk-in closet, every inch cramped and cluttered. It was frustrating—until I had my lightbulb moment: I didn’t need a bigger space, I just needed smarter solutions. Sound familiar? If you’ve hit that same wall, keep reading because I’m going to share five proven built-in desk fixes that transformed my small room from chaos to calm.
Why Small Spaces Need Clever Built-ins That Work
In 2026, homeowners are increasingly discovering that traditional furniture just doesn’t cut it in compact rooms. According to industry trend reports, well-designed built-in solutions can double or even triple your usable space, making your room feel larger and more organized. But here’s the thing—simply adding any built-in isn’t enough. The key is in the smart, tailored designs that maximize every inch without overwhelming the space.
Is DIY Built-ins a Wild Goose Chase or Worth It?
Early in my project, I made a rookie mistake—thinking I could cut corners on materials and save money. That backfired when my shelves sagged after a few months. I learned that investing in quality, customized built-ins pays off. If you’re skeptical about tackling this yourself or hiring pros, rest assured that with proper planning, it’s totally doable. Want expert guidance? Check out our step-by-step guide for a seamless experience. And if you’re ready to take the plunge, I recommend reaching out to an expert to get personalized advice – you can contact us here for tailored solutions. Now, let’s dive into the first fix that will revolutionize your tiny workspace.
Start with Precise Measurements
Before purchasing materials or cutting any wood, take a clear, accurate measurement of your space. Use a tape measure to record the width, height, and depth of the area where you want your built-in desk. Remember to account for baseboards or irregularities on walls. On a chilly Saturday, I spent a solid hour with a pencil and level, sketching out the exact dimensions on paper, which saved me from costly mistakes later.
Choose the Right Materials and Design
Select durable, lightweight materials like plywood or MDF that are easier to handle and cut. Decide on your design—floating shelves, integrated drawers, or fold-out surfaces. Use online galleries like creative built-ins for inspiration. I opted for a floating desk with hidden brackets, which gave my room a sleek look without cluttering the floor space.
Build or Assemble the Components
If DIY, cut your panels according to your measurements using a circular saw or table saw, prioritizing safety with goggles and gloves. Sand rough edges for a smooth finish. For instance, I learned the hard way that longer cuts require steady hands—so I clamped my boards tightly before slicing, avoiding uneven edges. Alternatively, consider pre-made components like countertop pieces or modular units for quicker assembly.
Prepare Wall and Attach Supports
Locate studs in your wall using a stud finder—mark their positions with a pencil. For floating desks, heavy-duty brackets like heavy-duty brackets are essential. Drill pilot holes into studs, then securely fasten supports. During installation, I maintained a level line across the wall, marking where supports would go, which ensured my desk was perfectly horizontal. For uneven walls, scribing the supports to fit tightly against the surface makes a significant difference—check out how to scribe built-ins for detailed steps.
Mount the Desk Surface Carefully
Position your desktop onto the supports, then screw it into place through pre-drilled holes. Use a level during placement to ensure it’s even. For heavy surfaces, enlist help or use lifting tools. I ran into a tricky moment when my countertop shifted slightly—adding shims beneath the support brackets helped level it perfectly. Remember, precision here avoids annoying wobble or gaps later.
Seal and Finish for Durability
Apply paint, stain, or sealant to match your decor and protect the wood. Seal edges and surfaces with a polyurethane finish to resist spills and wear. I chose a matte polyurethane, which hardened quickly and gave my desk a professional look. Don’t forget to clean up drips promptly—once dried, sanding lightly and applying a second coat can enhance longevity.
Accessorize Smartly
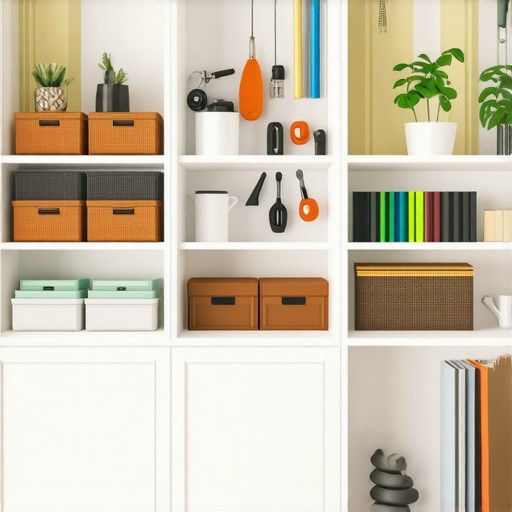
Incorporate storage accessories like mounted shelves, cable management trays, or drawers—optimizing every inch. Use storage solutions to keep clutter at bay. After installing my built-in, I added under-desk drawers on sliders, which kept my workspace tidy and accessible. Think about how you will use the space daily, and plan storage accordingly.
Inspect and Adjust
Finally, stand back and assess your work. Check for wobbles, gaps, or misalignments, making adjustments as needed. Tighten loose screws and reinforce supports if necessary. My first version had slight sagging, but a quick reinforcements with steel brackets fixed the issue—making the desk sturdy enough to withstand daily use. Remember, patience during this phase pays off with lasting results.
Many homeowners and DIY enthusiasts assume that installing built-in cabinets, vanities, or storage solutions is a straightforward process centered around measurements and basic support. However, underestimating the complexity of these installations can lead to costly mistakes and long-term issues. Let’s dig deeper into some common misconceptions and advanced nuances that often get overlooked.
Why the Focus on Perfect Measurements Might Not Be Enough
While accurate measurements are fundamental, many overlook the importance of understanding your wall’s structural nuances. Not all walls are created equal; variations in stud placement, drywall thickness, and wall material can significantly affect support and stability. Relying solely on standard stud finder readings can lead to unsupported or wobbly installations. For instance, in heavy wall-mounted vanities, reinforcement strategies such as installing steel brackets or consulting structural engineers become essential—something many DIYers neglect. Proper preparation ensures your built-in won’t sag or detach over time. For more insights, explore how steel reinforcement can safeguard your investment.
Common Myths About Storage Solutions That Can Hamper Your Success
A prevalent myth is that more storage always equals better organization. In reality, cluttering a space with numerous storage units can overwhelm the area, especially in small rooms. Instead, integrating multifunctional and thoughtfully designed built-ins yields cleaner, more accessible spaces—think floating shelves with concealed compartments or custom vanities with vertical drawers. Additionally, many assume that generic, off-the-shelf cabinetry suits all rooms. In truth, custom solutions tailored to your specific space and usage habits often outperform mass-produced options by maximizing every inch. This is where custom-built designs excel over basic assemblies.
Advanced Mistakes in Mounting Heavy Vanities and Built-ins
One of the most overlooked issues is supporting heavy fixtures like quartz or stone vanities. While mounting these units might seem like a simple matter of securing brackets into the wall, the real challenge lies in ensuring the wall can bear the weight—especially if mounted on drywall alone. Without proper wall reinforcement or using appropriate anchors, there’s a substantial risk of collapse or damage. Furthermore, many underestimate the importance of distributing the load evenly and avoiding stress points that can lead to cracking or detachment. Industry experts recommend anchoring to wall studs and using steel support braces, especially for heavy materials, which can be confusing for the average installer. To learn more about reinforcing your wall supports, check out these expert tips.
Have you ever fallen into this trap? Let me know in the comments. Remember, successful installation combines precision with understanding nuances—go beyond the basics to ensure your project stands the test of time. To get tailored advice or assistance, consider reaching out through our contact page.
How Do I Maintain My Built-In Storage Solutions Over Time?
To ensure your custom built-ins and vanities stay functional and look pristine, regular maintenance is essential. Personally, I recommend inspecting support brackets and wall anchors every six months, especially after seasonal changes that might cause wall shifts. Using a high-quality multi-purpose cleaner like a gentle, pH-balanced disinfectant helps preserve finishes without damage. For protective coatings, I favor applying a furniture-grade sealant annually, which guards against spills and wear. In addition, reviewing and tightening screws or brackets periodically prevents wobbling and structural issues, extending your investment’s lifespan. As trends shift toward smarter homes, integrating sensor-based lighting or retractable components can also enhance long-term usability—these systems require minimal upkeep but add tremendous convenience.
Essential Tools I Rely On for Upkeep and Troubleshooting
Having the right tools makes all the difference. First, I’ve found that a digital stud finder like the Bosch Digital Magnetic Stud Sensor offers precise wall stud locations, reducing the risk of unsupported mounts. It’s more reliable than analog models, especially in drywall with irregular stud placement. Next, a quality cordless drill with adjustable torque control simplifies tightening brackets or removing fixtures during cleaning or adjustments. For finishing touches, a fine-grit sanding block (like 220-grit) keeps surfaces smooth when reapplying sealants or touch-up paint. When it comes to measuring, I prefer a laser distance meter—such as the Bosch PUR profiler—to verify distances quickly, especially in tight corners or high ceilings, ensuring ongoing precision in your installations.
Future Trends: Smarter Maintenance Strategies
Looking ahead, automation and IoT integrations will revolutionize how we care for built-ins. Imagine sensors that detect humidity levels or structural stress, alerting you before issues develop—preventative maintenance at its best. Additionally, eco-friendly, self-healing finishes may become standard, reducing the need for manual touch-ups and prolonging beauty and durability. Embracing these innovations now can safeguard your investments and keep your space sleek and functional for years to come.
Need Expert Advice? We’re Here to Help
If you’re unsure how to select or maintain your built-in systems, don’t hesitate to reach out for personalized support. Our team specializes in custom cabinetry and storage solutions—visit our contact page for guidance or to schedule an expert assessment. Remember, consistent upkeep coupled with the right tools ensures your investment stands the test of time. Try incorporating a regular inspection routine using a digital stud finder and sealing surfaces with protective finishes annually—you’ll be amazed at how much longer your built-ins stay in top shape.
What I Wish I Knew When Starting Out
One of the most valuable lessons I learned is that precision truly pays off. Rushing through measurements or rushing support installations can lead to wobbling shelves or gaps that are hard to fix later. Taking my time to double-check each measurement and understanding the wall structure saved me headaches and money, reinforcing the idea that meticulous planning is the foundation of lasting built-in solutions.
Tools and Resources That Transformed My Project
I relied heavily on a high-quality digital stud finder, which accurately located supporting studs even in tricky drywall. My cordless drill with variable torque control was essential for secure fastening, while a laser distance meter helped verify exact dimensions—saving time and ensuring perfect alignment. For inspiration, I turned to online galleries of custom designs, which offered innovative ideas tailored for small spaces. These tools and sources are my trusted companions in making small spaces function like giants.
Embracing the Journey: Your Space’s Future Awaits
Transforming a cramped room with smart built-in storage is more than a renovation—it’s a chance to reclaim your living space and boost your confidence. Remember, every small upgrade adds up, and the satisfaction of a personalized, organized room makes all the effort worthwhile. Don’t shy away from starting—you’ll be surprised how much personal growth and home happiness come from simple, smart changes in your environment. Take action now, and enjoy the process of making your space truly your own.
Related Posts
Smart Storage Solutions & Built-in Cabinets for Space Efficiency in 2024
My Journey into Space-Saving Elegance: Discovering the Power of Built-in…
7 Pro Anchor Tactics for 2026 Floor-to-Ceiling Built-ins
I remember the first time I tried installing a custom…
5 Hidden Cable-Route Fixes for 2026 Custom Built-in Cabinets
There was a moment early in my renovation journey when…