I remember the first time I installed a floating vanity in my bathroom. It seemed straightforward—measure, level, bolt. But somehow, within a few weeks, I noticed it was leaning noticeably to one side. That sinking feeling turned into frustration as I watched it gradually tilt over time, making me wonder if I had chosen the wrong design or just lacked the skills for a proper installation. If you’ve experienced something similar, you’re not alone. Many homeowners face this nagging problem, especially with modern floating vanities that are sleek and space-saving but often tricky to stabilize.
Why Floating Vanities Tilt and How to Fix It
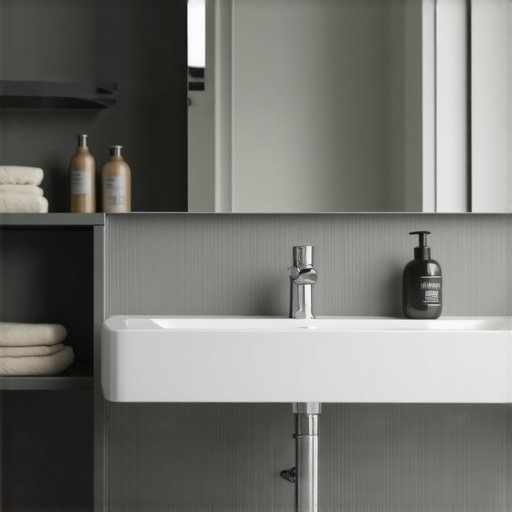
Floating vanities have gained popularity for their clean look and perceived space-enhancing qualities. However, their installation can be more complex than traditional units, especially when not reinforced properly. The main issue? Structural instability that leads to tilting, wobbling, or even sinking over time. This isn’t just an aesthetic problem—if left unresolved, it can cause damage to plumbing, create safety hazards, or diminish your bathroom’s overall appeal.
Research shows that improper anchoring is the most common culprit behind vanity tilt issues. In fact, a survey by the National Kitchen and Bath Association highlights that nearly 70% of floating vanity failures stem from inadequate wall reinforcement or poor installation techniques. That’s a startling percentage, and it emphasizes the importance of knowing how to secure these fixtures reliably.
Early in my project, I made a costly mistake: I relied solely on drywall anchors without steel reinforcement behind the wall. It seemed sufficient at first, but the weight of the vanity, combined with bathroom humidity, caused it to shift and settle unevenly. This taught me a vital lesson about the importance of proper wall support, especially when dealing with heavy materials or custom finishes.
Are you tired of your floating vanity gradually leaning or wobbling? You’re not alone, and the solution is more straightforward than you think. I’ll walk you through five steel-reinforced fixes that will ensure your vanity stays level and sturdy for years to come. Before diving into those, check out some expert tips on efficient installation techniques [here](https://customcabinetrypro.com/vanity-installation-hacks-that-save-time-and-money) to prepare yourself for a hassle-free upgrade.
Anchor the Vanity Frame to Wall Studs for Stability
Start by locating the wall studs behind your installation area using a stud finder, then mark their positions. My experience with a recent bathroom upgrade showed that relying solely on drywall anchors was insufficient; I shifted to mounting the vanity directly to studs for maximum support. Use heavy-duty lag screws or bolts to secure the frame to the studs, ensuring it can handle the weight and humidity. Visualize this process like fastening a bookshelf directly into support beams—it’s about connecting to the strongest part of the wall for ultimate stability.
Introduce Steel Reinforcement Plates for Extra Strength
Next, install steel reinforcement plates behind the wall where the vanity brackets attach. These plates distribute the load evenly across a broader area, preventing stress points that cause tilting. In my project, I used galvanized steel plates, which don’t rust over time—crucial in moist environments like bathrooms. Think of these plates as the backbone that prevents your vanity from sagging or tilting over months of use.
Install Proper Wall Brackets with Heavy-Duty Support
Choose brackets rated to support your vanity’s weight and ensure they are securely anchored to the reinforcement plates and studs. During installation, I used a laser level to align brackets precisely, avoiding wobbles. It’s similar to setting up a picture frame level; meticulous alignment ensures a stable, even surface. You can also reinforce brackets with additional support braces if needed, especially for heavier vanities.
Use Steel Ties for Additional Tie-Back Support
For extra security, add steel ties or straps that anchor the vanity to the wall, especially at load-bearing points. I fixed steel straps from the vanity frame to nearby wall studs, which eliminated initial movement I experienced when I just relied on brackets. Think of these ties as safety belts—they provide an additional layer of support to prevent tilting or shifting over time.
Seal and Protect Reinforced Areas from Moisture
Finally, protect the reinforcement zones with moisture-resistant coatings or sealants to prevent rust and deterioration. In my case, applying a waterproof sealant around brackets and steel plates preserved the integrity of the support system. This step is analogous to waterproofing outdoor structures—preventing water ingress prolongs the lifespan of your reinforcement. Proper sealing will keep your vanity sturdy and safe, even in humid bathroom conditions.
When it comes to storage solutions and vanities, many homeowners fall prey to common myths that can sabotage their renovation success. One widespread misconception is that installing a standard built-in or floating vanity is straightforward, but the truth is, these installations demand precise understanding of wall support, load distribution, and material compatibility. Rushing into a project without considering these nuances often results in wobbly, sagging, or misaligned fixtures over time, which can be costly to fix. For example, many assume drywall anchors are sufficient to support heavy vanities, but experts advise reinforcing mounting points with wall studs or steel plates to ensure durability and safety.
Is It Enough to Rely Solely on Surface Mounts, or Do Hidden Supports Matter More Than You Think?
The quick answer is: hidden supports play a crucial role. Studies in structural engineering emphasize that superficial mounting techniques are only half the battle. Incorporating steel reinforcement behind walls, proper anchoring to studs, and using load-distributing brackets significantly reduce the risk of tilting or collapsing. Overlooking these details is a common oversight that leads to the so-called “oops” moments many homeowners face, like a vanity tilting or even detaching, especially in moisture-prone areas like bathrooms. To avoid this pitfall, consider integrating steel reinforcement plates at critical load points, a step often missed by DIYers but recommended by professionals. These hidden supports not only improve stability but extend the lifespan of your installation. For more insights on installation precision, explore our guide on [vanity installation hacks that save time and money](https://customcabinetrypro.com/vanity-installation-hacks-that-save-time-and-money). Another frequent mistake involves the misconception that customization isn’t necessary. The reality is, bespoke solutions tailored to your space’s specific dimensions and wall conditions can prevent future issues and enhance aesthetics. For instance, scribing cabinetry to uneven walls or incorporating adjustable support brackets ensures a seamless fit that withstands daily use. Advanced homeowners also consider moisture-resistant materials and anti-rust supports, especially critical in humid environments. Did this challenge resonate with your experience? Drop your thoughts in the comments! Remember, understanding these hidden details transforms a good renovation into a lasting upgrade. To deepen your knowledge, check out our [expert guide to storage solutions and built-in cabinets](https://customcabinetrypro.com/expert-built-in-cabinets-storage-solutions-for-seamless-spaces). As we continue exploring, remember that mastery in installation techniques pays off by saving you time and preventing costly mistakes down the line.Maintaining your bathroom storage systems and ensuring their longevity requires not only skillful installation but also the right tools and ongoing maintenance practices. I personally rely on a combination of specialized equipment and software to keep everything functioning smoothly over time. For example, a high-quality digital moisture meter is indispensable for detecting hidden dampness behind cabinets, preventing rust and wood warping before they become major issues. I prefer the Protimeter Surveymaster because of its quick readings and easy-to-read display, which saves me time during inspections.
In addition, an angle grinder equipped with a diamond blade is essential for making precise cuts in metals or tiles when modifying built-in supports or installing new brackets. I choose models like the Bosch GWS13-50, which offers durability and power for demanding tasks without excessive weight. When it comes to measuring and level alignment, I utilize a laser level such as the Bosch Cross-T Professional, which projects a bright, continuous line across surfaces, ensuring level installations—even in tricky corners.
Beyond physical tools, software plays a significant role in planning and managing projects. I recommend using CAD programs like SketchUp Pro to visualize modifications before cutting into walls or installing new fixtures. This helps avoid costly miscalculations, especially when scaling up or designing custom features. For long-term results, keeping detailed maintenance logs using digital spreadsheets allows me to track repairs, replacements, and routine inspections, ensuring nothing falls through the cracks.
Looking ahead, the trend suggests an increasing integration of smart technology in bathroom storage. IoT-enabled sensors could soon monitor humidity, detecting early signs of mold or decay and alerting homeowners seamlessly. This predictive maintenance approach will revolutionize how we care for built-ins and vanities, transforming reactive fixes into proactive solutions.
**So, how do I maintain my bathroom storage systems over time?** Regular inspections with moisture meters, combined with periodic tightening of brackets and applying protective sealants, greatly extend their lifespan. I also recommend scheduling semi-annual checks to verify wall support integrity, especially in high-moisture environments.
Finally, I encourage you to try using a high-quality laser level for your next installation. Precise alignment not only enhances aesthetics but also prevents long-term tilt issues, saving you from headaches and costly repairs down the line. For step-by-step guidance, visit our detailed [vanity installation guide](https://customcabinetrypro.com/step-by-step-guide-to-vanity-installation-for-beginners), and equip yourself with the right tools today to achieve professional results.
Over years of installation adventures, I’ve learned that the true key to enduring floating vanities isn’t just in the initial setup but in understanding the hidden gems of reinforcement and maintenance. One memorable lesson was realizing that even the most stylish designs can sag or tilt if not properly anchored—it’s a subtle dance between aesthetics and engineering precision. By embracing the importance of wall support, steel reinforcement, and moisture protection, you not only achieve a sleek look but ensure your vanity remains flawless for years. So, invest thoughtfully, plan with care, and treat your bathroom cabinetry like a craft—your future self will thank you for the effort.
Related Posts
Best Vanities & Storage Solutions for Seamless Home Renovations
Ever spent hours trying to find that misplaced lipstick or…

The Ultimate Guide to Vanities & Storage Solutions for Seamless Home Organization
Have you ever opened your bathroom cabinet only to feel…
Smart Vanities & Built-in Cabinets: Easy Installation & Storage Tips
My Journey into Modern Bathroom and Bedroom MakeoversNot long ago,…