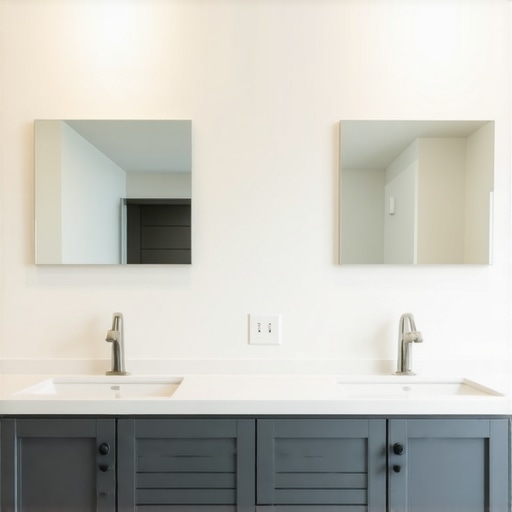
I remember the first time I installed a floating vanity. Everything seemed perfect—until I started noticing some wobbling and slight sagging after just a few months. It was a lightbulb moment for me: I had overlooked a crucial aspect of installation, and my beautiful new fixture was at risk. That experience taught me a valuable lesson that I now want to share with you—especially as we head into 2026, when bathroom fixtures and built-in furniture are becoming more ambitious and heavier.
The Hidden Danger with Floating Vanities
Floating vanities are sleek, modern, and save space, but they come with their own set of challenges. The biggest issue I faced—and many others encounter—is the lack of proper support. When improperly anchored, these units can develop dangerous sagging, cracks, or even detach from the wall. And guess what? The solution isn’t just about choosing quality materials; it’s about installing them correctly.
This is where steel wall ties come into play. They serve as the unsung heroes of wall-mounted fixtures, ensuring your vanity stays secure and level for years to come. According to industry experts, failing to reinforce heavy fixtures with adequate support can lead to damage and costly repairs down the line. In fact, the latest residential safety standards emphasize the importance of steel reinforcement in wall-mounted installations to prevent accidents and structural failure.
Comfortably, I can say that once I added steel ties during my subsequent installs, the peace of mind was worth every minute of extra work. The difference was night and day. If you’re planning a bathroom upgrade or a renovation, don’t underestimate this vital step.
What We’ll Cover Today
In this post, I’ll walk you through exactly why steel wall ties are indispensable for 2026 floating vanities and built-ins. I’ll share practical tips from my experience, highlight common mistakes to avoid, and point you toward reliable solutions to keep your fixtures safe and sturdy. So, if you’ve ever fretted about your vanity wobbling or worse, falling, I promise you’ll find the guidance you need here.
Is Steel Reinforcement Overkill for My Bathroom? Think Again!
Early in my career, I made the mistake of skipping reinforcement entirely, thinking my drywall anchors would suffice. Spoiler alert: they didn’t. That oversight cost me repairs I could have avoided. Trust me, with bathroom fixtures—especially in the moist, humid environment of 2026 homes—proper support isn’t optional; it’s essential. Want to know more about the latest safety standards and best practices? Check out this comprehensive guide.
Now, let’s dive into how to choose, install, and maintain steel wall ties so your vanity remains a safe, stylish centerpiece in your home.
Selecting the Right Steel Wall Ties
My first step was choosing durable steel wall ties that could handle the weight of the vanity. I opted for heavy-duty, corrosion-resistant options, much like choosing the strongest ropes for a treacherous hike. I remembered a time when I underestimated load capacity on a DIY project, which led to wobbling fixtures—definitely not something I wanted again. To avoid this, I researched and selected ties rated for at least twice the weight of my vanity. For guidance, check out this storage upgrade guide for modern bathroom fixtures.
Marking and Preparing Wall Spots
Locate Studs Precisely
Using a stud finder, I traced studs within the wall where I planned to mount the vanity. Think of it as marking anchor points for a sculpture—if you miss the studs, the whole thing can topple. I double-checked my readings by tapping on the wall; hollow sounds indicated drywall only. Mark these locations with a pencil, ensuring they’re level to keep the vanity perfectly aligned.
Pre-Drill Support Holes
Next, I pre-drilled holes into the wall at the marked points, using a drill bit slightly smaller than the screws for the wall ties. This step is crucial—imagine trying to drive nails into stone without pre-drilling; the process becomes frustrating and damages the wall. I held the ties against the wall, aligned with my marks, and drilled through the supports to create clean entry points.
Attaching Steel Ties and Mounting the Vanity
Secure the Supports
After prepping, I fixed the steel wall ties to the wall using heavy-duty screws, turning them into the backbone of my installation. It’s like anchoring a ship’s mast—firm and reliable. I tightened each screw properly, making sure the ties sat flush against the wall for a stable mount. Their placement was strategic: one near each corner and along the center to distribute weight evenly and reduce wobbling.
Install the Vanity onto Ties
With the steel supports firmly in place, I lifted the vanity into position, aligning it carefully with the ties. This part requires an extra set of hands, similar to fitting a puzzle piece perfectly. I then screwed the vanity’s mounting brackets into the steel ties, ensuring a tight fit. The satisfaction came when I gently tested the vanity—no wobble, no sag. For a smoother process, consider reviewing this installation hacks to save time and money.
Final Checks to Guarantee Stability
Once mounted, I examined the entire setup, pressing down on different areas to test for movement. I also checked the levelness with a spirit level, making tiny adjustments as needed. Over time, I recommend inspecting the steel connections annually—think of it as tuning a musical instrument to keep everything in harmony. If you want expert assistance, reaching out through this contact page can help you avoid common pitfalls and ensure your vanity’s longevity.When it comes to storage solutions, especially built-ins and vanities, many homeowners and even seasoned DIYers tend to cling to misconceptions that can compromise the integrity and longevity of their installations. Let’s dig deeper into some of these misunderstandings and how to avoid the pitfalls. One prevalent myth is that heavy-duty brackets or anchors alone are sufficient to support large, custom-built units. While these hardware choices are important, overlooking the underlying wall structure and reinforcement strategies, like steel wall ties, can lead to wobbling, sagging, or even catastrophic failure over time. In fact, the subtle nuance many miss is that the wall’s material and framing play a critical role in support capacity. For example, installing built-ins directly into drywall without understanding its limitations is a rookie mistake that can be costly. Instead, expert installers prioritize locating studs or using steel reinforcement to ensure load-bearing support✅
Another common trap is underestimating the impact of environmental factors such as humidity and temperature fluctuations, which can cause wood or composite materials to warp or expand. Many assume that once the installation is fixed, maintenance isn’t necessary—yet, regular checks and proper sealing or waterproofing are crucial, especially in bathrooms. Overconfidence in DIY skills also leads to misaligned or uneven installations, which may seem minor initially but can cause ongoing issues like gaps or wobbling. Advanced homeowners understand that meticulous prep work and precision tools—along with understanding the wall composition—are essential for seamless results. To learn more about these advanced pitfalls and how to avoid them, I recommend reading this comprehensive guide on innovative storage solutions.
Lastly, there’s a misconception that built-ins are purely aesthetic. The truth is, functionality often hinges on subtle details like support hardware placement, weight distribution, and even the finishing techniques used to hide structural reinforcements. For instance, hidden steel straps or braces can be vital for supporting heavy quartz or stone surfaces—something many overlook during installation. Incorporating these advanced support measures ensures durability and prevents issues such as sagging or cracking down the line. For insight into sophisticated reinforcement methods, explore this expert guide on seamless home upgrades.
Have you ever fallen into this trap? Let me know in the comments. Recognizing these nuances from the start can save time, money, and frustration, transforming your storage solutions into lasting fixtures of your home.
Maintaining your built-in storage solutions, vanities, and wall-mounted fixtures requires more than just initial installation; it demands the right tools and a strategic approach over time. I’ve learned through hands-on experience that investing in quality equipment and adopting specific methods not only extends the lifespan of your installations but also saves you money and stress in the long run. Let’s dive into the essential tools I personally recommend and practical maintenance techniques to ensure your fixtures stay flawless well into the future.
Precision Laser Levels for Perfect Alignment
One of the most critical aspects of maintaining built-ins is ensuring they remain level and aligned over time. I rely heavily on a high-quality laser level, such as the Bosch GLL3-330CG. Unlike traditional bubble levels, laser levels project a visible laser line that allows me to quickly verify the entire length of a surface—perfect for correcting any shifts or sagging in wall-mounted vanities or shelves. This tool is especially useful when adjusting support brackets or reinforcing structures after initial installation. For more insights into choosing the right leveling tools, you might want to review this installation guide.
Magnetic Inspection Cameras for Hidden Checks
Over time, issues like hidden cracks or loose supports can develop behind your cabinetry. I recommend a compact magnetic inspection camera, like the Depstech Wireless Endoscope. This device allows me to peer into dark corners, behind walls, or inside support cavities without invasive procedures. It’s invaluable for checking if steel ties or brackets remain secure, especially in areas that aren’t easily accessible. Using such technology can preempt costly repairs by catching problems early, as we suggest in our maintenance tips article.
Heavy-Duty Power Drill with Cutting and Screwing Capabilities
A versatile drill like the DeWalt DCD791D2 is essential for any ongoing adjustments or reinforcement tasks. When you notice slight shifts or sagging, having a powerful drill at hand means you can quickly add additional steel ties or reinforce existing supports. I also keep a set of high-quality drill bits and screwdrivers to handle different material types—metal, wood, or drywall. Regularly tightening and replacing worn hardware can prevent issues before they escalate. For detailed reinforcement strategies, I recommend consulting this expert guide.
Long-Term Results Come from Consistent Checks
Tools alone aren’t enough; establishing a routine inspection schedule is key. Every six months, I take a few minutes to verify that support brackets remain secure, check the levelness of surfaces, and clean any areas prone to moisture buildup. Incorporating digital reminders or scheduling quarterly maintenance sessions can make this process second nature. As the trend in home upgrades leans toward more complex, heavy fixtures, ensuring your storage solutions remain stable is crucial for safety and aesthetics—think of it as regular tune-ups for a high-performance vehicle.
How do I keep my built-ins functioning smoothly over time?
Beyond tools, adopting a proactive maintenance mindset offers the best results. Always use the recommended hardware and never skip reinforcement steps during initial installation; this foundation makes ongoing upkeep easier. When you notice issues like wobbling or minor cracks, address them immediately with the right hardware—adding steel ties or adjusting supports as needed. Paying attention to environmental factors, such as humidity, is also vital—consider installing dehumidifiers or waterproof coatings to prevent warping. For detailed support and further advice, don’t hesitate to reach out. I encourage you to try out a digital level or inspection camera to start your maintenance routine—you’ll be surprised how much longer your fixtures last when you stay vigilant. Keeping your storage systems in top form today sets the stage for reliable, stylish fixtures tomorrow, especially as we anticipate even more ambitious designs in 2026 and beyond.
Over the years, I’ve realized that confidence in installing floating vanities comes from embracing the lessons that aren’t immediately obvious. One of the most profound insights I’ve gained is that better support isn’t just about choosing heavy-duty hardware; it’s about understanding the wall’s secret language and reinforcing it accordingly. This realization transformed my approach from tentative to assured, especially when dealing with larger, more ambitious fixtures in 2026 homes. Remember, the true mastery lies beneath the surface—literally and figuratively—so never underestimate the power of steel reinforcement and strategic planning in your projects.
Lessons That Changed My Perspective on Installation
- The wall’s backbone is everything: No matter how sturdy your vanity seems, anchoring it into drywall alone is a risk. Locating and reinforcing studs with steel ties makes all the difference in longevity and safety.
- Don’t cut corners with hardware: I used to believe that supplementary brackets were enough—until heavy fixtures caused wobbling. Incorporating steel wall ties reinforced my confidence and ensured stability.
- Environmental factors require proactive support: Humidity and temperature swings are sneaky culprits leading to sagging or cracking. Regular inspections and waterproofing are essential investments that pay off in the long run.
- Preparation is everything: Precise wall marking and pre-drilling save time and prevent mishaps. Taking these steps diligently before mounting guarantees a smooth, durable finish.
- Think beyond aesthetics: The most beautiful floating vanity can be structurally unsound if not properly supported. Embracing hidden reinforcements ensures both beauty and safety, especially as designs become more daring in 2026.
Tools That Became My Best Allies
- Laser levels: A game-changer for perfect alignment, helping me catch even minor shifts—ensuring my vanities stay level over time.
- Magnetic inspection cameras: These gadgets let me peek behind walls, verifying the integrity of support structures without invasive measures.
- Heavy-duty drills and bits: Essential for securing steel ties into wall studs, especially when working with thicker materials or added insulation.
- Digital reminders and inspection routines: Maintaining a schedule for regular checks has become my cornerstone for long-term durability of built-ins.
Embracing the Challenge to Achieve Peace of Mind
Investing time in understanding and implementing reliable support techniques has empowered me to tackle even the most complex fixtures confidently. The shift from reactive repairs to proactive reinforcement has not only extended the lifespan of my installations but also enhanced my satisfaction in taking on new projects. As we anticipate more innovative and heavier designs in 2026, I encourage you to embrace these hidden support secrets. Your craftsmanship will shine brighter, and your home will be safer for it. If you’re ready to elevate your skills, explore this comprehensive guide on modern storage and support strategies—your future installations will thank you. Why settle for wobbling fixtures when secure, seamless support is within your reach?
One Reply to “2026 Floating Vanity Safety: Why Steel Wall Ties are Essential”
Leave a Reply
Related Posts
Expert Vanities & Built-ins: Top Installation Tips for 2024
My First Encounter with Custom Vanities: A Personal JourneyI'll never…

Expert Guide to Vanities & Storage Solutions for Seamless Homes in 2025
I remember the exact moment I realized my bathroom had…
Stop the Tilt: 5 Steel-Reinforced Fixes for 2026 Floating Vanities
I remember the first time I installed a floating vanity…
Reading through this piece really emphasized how essential proper reinforcement is when it comes to floating vanities, especially as they become larger and more complex in design for 2026 homes. I agree wholeheartedly that steel wall ties are often overlooked by DIYers eager to get their projects done quickly, but the long-term safety and durability depend heavily on correct installation techniques. I’ve personally experienced wobbling issues when support was inadequate, which was both frustrating and costly to fix later on. Installing steel ties properly, especially into studs rather than just drywall, makes a massive difference in stability. It’s also interesting to consider environmental factors like humidity, which can subtly weaken even the most well-supported units over time. I wonder, with the trend towards heavier stone or quartz surfaces in vanities, how much more reinforcement might be needed to prevent sagging or cracking? Does anyone have insights or recommendations based on heavier materials? It’s clear that meticulous planning and reinforcement are the keys to avoiding future problems.