Have you ever stood in your own home, surrounded by clutter, feeling like your space is fighting against you? I remember the moment I realized that my chaotic storage was not a reflection of my lifestyle, but a direct result of poor design choices and outdated solutions. It was a lightbulb moment that changed everything. I knew I had to find smarter, more effective ways to organize without sacrificing style.
Why Storage Matters More Than Ever in 2025
In today’s fast-paced world, our homes should be sanctuaries—places that welcome us back and make us feel at ease. Yet, clutter can quickly turn them into stress zones. The challenge? Finding storage solutions that are both functional and beautiful. Trust me, a well-organized space does wonders for mental clarity and daily efficiency. According to a recent study by the National Association of Home Builders, homes with integrated storage options see a 15% increase in overall satisfaction and value. That’s powerful motivation to rethink our approach to home organization.
Facing Skepticism: Is Investing in Custom Built-ins Really Worth It?
I used to think that built-in storage was just a luxury—something only for magazine spreads or high-end renovations. My early mistake was underestimating how custom solutions can transform everyday living. It can seem expensive or complicated at first glance. But the truth? Properly designed built-ins maximize your space and add a seamless aesthetic that often pays for itself in both comfort and home value. Curious? You might want to explore innovative options that fit your unique needs. For a comprehensive guide, I recommend visiting this resource.
Now that I’ve set the stage, let’s dive into how you can identify the best storage solutions for your home, ensuring a clutter-free environment that feels effortlessly stylish. Ready to take the first step? Keep reading.
,
Select the Right Storage Type for Your Space
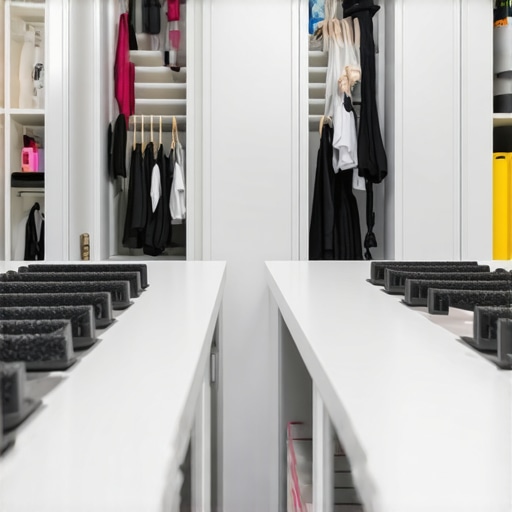
Start by assessing your space and identifying what needs to be stored. Think of your room like a puzzle—each piece (or item) requires a specific slot. For instance, a walk-in closet can benefit from custom-built shelves and drawers, while a compact bathroom might require vertical storage solutions to maximize limited space. I once tackled my cluttered guest bedroom by measuring available wall areas and sketching out concrete plans for floating shelves and hidden cabinets, which dramatically improved accessibility and aesthetics. To dive deeper into custom options, visit this guide.
Design Built-ins That Fit Seamlessly
Crafting built-in units begins with precision. Use a tape measure, level, and pencil to mark your wall where installations will occur. Think of installing built-ins as assembling a giant, complex Lego set. Before attaching, lay out all components on the floor to ensure they fit perfectly. For example, when I installed a custom bookshelf, I pre-measured spacing between shelves and used shims to ensure the unit sat flawlessly against the wall—saving time and frustration. For expert tips, check out this resource.
Install Vanities with Confidence
Installing a vanity requires careful planning to avoid misalignment and leaks. Think of the process like installing a large puzzle piece—precision is key. Begin by turning off water supply valves, then measure and mark the position, ensuring the vanity is level using a spirit level. Secure the unit to the wall with brackets, making sure it’s flush and stable. I once installed a vanity in my bathroom, which involved adjusting shims for perfect alignment, resulting in a sleek, professional look. Want a step-by-step? Visit this guide.
Use Storage Solutions to Optimize Every Nook
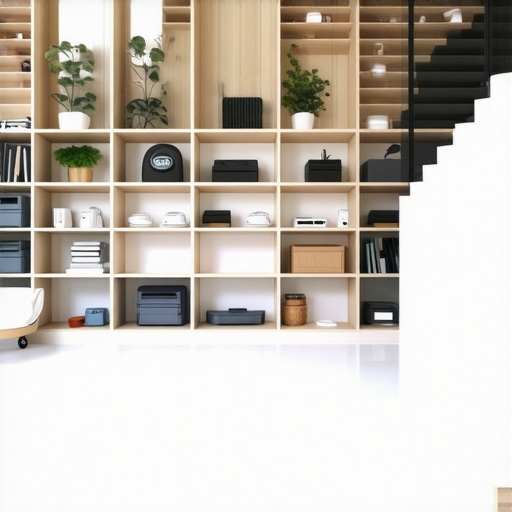
Maximize space by adding storage in overlooked areas like underneath stairs or above doorways. Think of these as bonus zones—untapped potential waiting to be harnessed. Use baskets, pull-out drawers, or vertical organizers to keep items tidy and accessible. For example, in my living room, I installed shallow shelves above door frames to hold seasonal decor, transforming wasted space into practical storage. For innovative ideas, check this article.
Secure Your Installations with Expert Tips
Precision is essential for durable, clean installations. Use appropriate tools—drills, stud finders, levelers—to speed up work and avoid mistakes. When installing a large cabinet, I used a stud finder to locate wall supports, then secured mounting brackets into these points for maximum stability. Patience and checking measurements at every step prevented costly reworks. For professional advice, review these tips.
Tackle Clutter with Constant Maintenance
Even the best storage solutions require regular upkeep. Schedule weekly tidying sessions—think of it like tuning a musical instrument—to keep clutter at bay and your space harmonious. When I committed a few minutes daily to organize items after use, my home stayed neat without daily overhaul. Incorporate storage bins and labels to streamline cleanup. Need ideas? Explore this resource for sustainable organization strategies.When it comes to installing built-in storage solutions and vanities, many homeowners fall into subtle yet costly traps that undermine their efforts. Contrary to popular belief, simply buying a kit or following generic instructions often isn’t enough for a seamless, professional finish. Your actual success hinges on understanding nuanced factors like precise measurements, structural considerations, and material compatibility. For nuanced tips, check out this expert guide.
Why The Devil Is in the Details In Installation
Many people assume that installation is just about fitting the pieces together. That’s a dangerous oversimplification. Small miscalculations—like overlooking wall stud locations or ignoring moisture resistance—can lead to warped surfaces or unstable fixtures. For instance, installing a vanity without accounting for wall support can result in unnecessary movement or damage over time. Advanced mistakes often involve ignoring load distribution or neglecting environmental factors, which, according to a 2022 study by the Building Science Corporation, can drastically reduce durability and lifespan. The key is meticulous planning and understanding structural nuances. Interested in how to avoid these pitfalls? Explore this comprehensive guide.
Uncovering Myths About DIY Versus Professional Installation
A pervasive myth is that DIY installation always saves money and guarantees a perfect fit. In reality, many amateurs underestimate the complexity, leading to errors that necessitate costly corrections later. Professional installers, on the other hand, bring experience with hidden nuances—like understanding framing, optimizing space, and managing unforeseen obstacles—that DIY can’t match. For example, improperly installed built-ins can cause cosmetic imperfections or functional issues such as uneven doors or misaligned drawers. A 2021 survey by the Home Improvement Institute reveals that 65% of homeowners who attempted DIY installations faced avoidable issues that professionals would have prevented. So, is cutting corners really worth it? Consider this before your next project. Need expert assistance? You might find this resource helpful.
Keep these insights in mind, and you’ll avoid many common pitfalls that plague even experienced renovators. What’s your biggest challenge when planning your storage or vanity upgrades? Share your experience—I’d love to hear your story.
Ensuring Your Installations Stand the Test of Time with Proper Maintenance
Investing in high-quality built-ins and vanities is just the beginning; maintaining them effectively ensures they continue to serve your space beautifully for years. Regular inspections, like checking for loose screws or shifting panels, can prevent small issues from becoming costly repairs. I recommend creating a maintenance checklist every six months, which includes cleaning, tightening fixtures, and assessing for signs of moisture or damage. For instance, silicone seals around vanities should be inspected regularly and replaced as needed to prevent water leaks. Staying proactive not only preserves your investments but also keeps your space looking pristine.
Essential Tools to Keep Your Storage Solutions in Prime Condition
Having the right tools on hand simplifies maintenance tasks and ensures professional results. I personally swear by a cordless multi-tool—it’s perfect for subtle repairs like re-securing shelves or trimming minor adjustments without fuss. A quality level is indispensable for verifying that shelves or built-in units remain perfectly aligned over time. Additionally, a digital moisture meter helps monitor humidity levels in bathrooms where vanities are installed, preventing wood warping or molding. These tools empower you to perform quick, effective fixes and catch issues early before they escalate.
How do I ensure my built-ins stay functional for the long haul?
While tools are vital, cultivating good habits is equally important. Regularly update your storage organization to avoid overloading shelves, which can stress joints and hardware. Use protective coatings or sealants on wooden surfaces to ward off moisture. When tackling repairs, always consult manufacturer guidelines or expert resources—like this comprehensive guide—to ensure compatibility and durability. Additionally, consider incorporating soft-close hinges and runners, which reduce wear and tear, extending their lifespan significantly.
Future Trends: Smart Maintenance and Automated Care
Looking ahead, the integration of smart sensors and IoT technology holds exciting potential for maintenance. Imagine built-in moisture sensors that alert you on your smartphone when humidity levels threaten to damage your cabinetry, or automatic lubricating systems for hinges that prolong their life without manual intervention. Embracing these innovations can significantly streamline upkeep and reduce unexpected failures. To get started, prioritize installing durable hardware and adopting proactive inspection routines based on expert advice. Want to try an advanced tip? Invest in a digital moisture meter today and set reminders to monitor your bathroom environment—small steps that safeguard your investments and keep your spaces flawless for years to come.

Over the years, I’ve learned that achieving a truly organized space is as much about mindset as it is about technical know-how. The toughest lesson? There’s no one-size-fits-all solution; every room, every home, every person’s needs are unique. I’ve seen DIY projects turn into costly headaches simply because of overlooked structural details or choosing the wrong materials. The real secret? Listening to your space—reading between the lines of its quirks and opportunities—and trusting experienced insights that go beyond generic advice.
Lessons From the Trenches of Installation and Design
- Don’t rush the measurement phase: Precision early on prevents a cascade of adjustments later. It’s easy to assume a space is standard, but every wall and corner can surprise you. I once installed a vanity only to find out the wall was slightly bowed, which required custom shimming. Learning to double-check measurements saved me hours and frustration. This step-by-step guide was invaluable in that process.
- Invest in structural support: Your beautiful built-ins need a solid backbone. Neglecting wall support can lead to warping or even failure over time. I learned this the hard way when a floating shelf sagged because it was mounted into drywall alone. Using wall studs and appropriate anchors isn’t just safer—it guarantees longevity.
- Pay attention to environmental factors: Moisture, temperature, and light all influence materials. An outdoor-inspired bathroom secret? Applying sealants and choosing moisture-resistant finishes can prolong the life of vanity cabinetry and prevent mold. When I upgraded my bathroom, these precautions made all the difference.
- Don’t underestimate professional expertise: While DIY is tempting, certain steps—like complex built-in integrations—are best left to specialists. I once attempted a custom closet install myself, only to realize I lacked the proper support brackets. A professional installer ensured everything stayed put for the long haul. Reviewing this expert guide clarified many pitfalls.
Tools and Resources That Turn Ideas Into Reality
- Level and laser distance measurer: Critical for ensuring accuracy, saving you from crooked fixtures and uneven surfaces. I trust my laser measurer to double-check every dimension before drilling.
- Heavy-duty anchors and wall supports: Not all hardware is created equal; investing in quality anchors can make or break your project’s durability.
- Design software or sketchbook: Visualize your plan beforehand. Sketching out the idea helps detect potential issues early. I used simple software to mock up my built-ins, which was a game-changer.
- Consult trusted guides and expert tutorials: The resources at this comprehensive guide and others are gold mines for ensuring your solutions stand the test of time.
Seize the Moment and Transform Your Space
Remember, the journey to a clutter-free, stylish home begins with a single step—armed with the right knowledge and tools, that step becomes a leap. Believe in your ability to create a space that’s both beautiful and functional. Each installation, each tweak, is an investment in comfort and peace of mind. So why wait? Dive into your next project with confidence, and watch your home blossom into the sanctuary you’ve always envisioned.
What’s the most challenging part of your storage or vanity upgrade? Share your story—I’d love to hear how you’re planning to make your space more stylish and organized!
Related Posts
Top Storage Solutions & Built-ins: Expert Installation Tips in 2025
Ever opened a closet or bathroom vanity and felt that…
Smart Storage Solutions & Built-in Cabinets for Seamless Home Organization 2025
My Journey to Seamless Home OrganizationLiving in a bustling household,…

Effective Storage Solutions & Built-ins for a Modern Home Makeover
My Home Makeover: The Power of Smart StorageLast year, I…