Have you ever opened a closet or drawer and felt overwhelmed by clutter? That sinking feeling when your carefully organized space slips back into chaos? I’ve been there. Just last year, I realized that no matter how many storage bins I bought, my home remained cluttered. The turning point came when I finally understood that the solution wasn’t just about more storage, but smarter, seamless integration of it into my home’s design. That’s when I discovered the power of expert installation of storage solutions and built-ins. It transformed my space from chaos to calm, making my home more functional and beautiful.
Why Storage Solutions & Built-ins Are a Game-Changer in Home Design
In today’s fast-paced world, our homes serve multiple purposes: a sanctuary, a workspace, and a social hub. Achieving this balance requires more than just furniture; it demands innovative storage solutions that blend seamlessly with your decor. Built-ins are a perfect example. They provide customized, space-efficient storage that maximizes every inch of your home, reducing clutter and enhancing aesthetics. According to a recent study, homes with well-designed built-in storage can boost property value by up to 10%, making it a smart investment for any homeowner.
Question Header: Is Expert Installation of Storage & Built-ins Actually Worth the Hype?
I admit, when I first considered installing built-ins, I was skeptical. Would it really make a noticeable difference? My early mistake was trying to DIY the project. Not only did I underestimate the complexity, but I also ended up with uneven shelves and gaps that looked unprofessional. This taught me a crucial lesson: expert installation isn’t just about aesthetics; it’s about precision, durability, and truly maximizing space. When professionals handle the job, you get a seamless, tailored solution that lasts for years and looks flawless. Want to learn how to avoid common pitfalls? Check out this step-by-step guide for beginner-friendly tips on installation and design.
So, if clutter has been a constant struggle in your home, it’s time to consider custom, professionally installed storage solutions. In the sections ahead, I’ll share what you need to know to transform your space effortlessly, ensuring every corner is optimized and stylishly organized.
Start with Precise Measurements and Planning
My first step was always measuring the space carefully, like I did when I transformed my cluttered closet into a sleek storage area. Use a tape measure to record every inch, including height, width, and depth. Sketch a rough layout, noting where electrical outlets, windows, and doors are located. This step prevents surprises during installation and ensures your built-ins fit perfectly. For more detailed planning, consult resources like this comprehensive guide.
Choose the Right Materials and Design
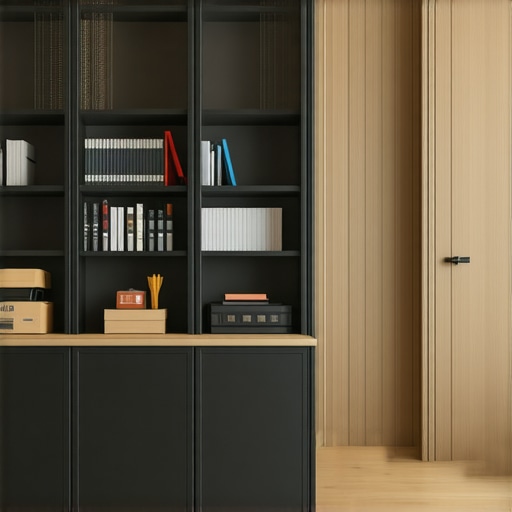
Picking quality materials is crucial for durability. I recommend hardwoods for frames and high-quality plywood or MDF for panels. Think about your style—modern, rustic, or traditional—and select finishes that complement your decor. When I installed a custom bookshelf in my living room, I opted for a sleek matte finish that matched my furniture. Use design tools or consult a professional to visualize your choices, like exploring this innovative design resource.
Prepare Your Space and Gather Tools
Before starting, clear the area and cover nearby surfaces. Gather tools such as a drill, level, stud finder, saw, and screws. I once overlooked the importance of a level, resulting in crooked shelves. Using a laser level or a high-quality spirit level ensures everything aligns perfectly. Having all tools ready saves time and avoids mid-project trips to the hardware store. Check out this article for handy installation hacks.
Locate Wall Studs Accurately
Stud finder in hand, I marked the wall where I planned to anchor my built-ins. Studs provide the necessary support, preventing future sagging or damage. Mark their locations clearly with a pencil. For example, in my bathroom renovation, finding the studs was essential to securely mounting a heavy mirror. For more tips on this step, see this guide.
Frame and Secure the Built-ins
Build the frame on the ground first, then lift it into place. Use a helper if needed, as I did when installing a large cabinet. Secure the frame to the wall using screws driven into the studs. Ensure everything is level before fastening fully. I learned the hard way that rushing this step leads to uneven shelves. Take your time, double-check measurements, and use shims if necessary. For detailed instructions, refer to this beginner-friendly guide.
Finish and Seal the Installation
Once secured, attach shelves, doors, and hardware. I painted and sealed my built-ins for a polished look. Proper sealing protects against moisture and wear, especially in bathrooms. Adjust hinges for perfect door alignment and test each component. This final step makes your storage seamless and functional. For expert tips on finishing touches, see this professional guide.
Many homeowners and even seasoned DIY enthusiasts believe that installing built-ins and storage solutions is a straightforward task, often underestimating the complexities involved. Let’s dig deeper into this misconception and explore the nuanced realities that can make or break your project. One common myth is that precision isn’t crucial—many think that a simple level and some basic tools are enough. However, expert installation demands meticulous measurements, understanding of structural integrity, and an eye for seamless aesthetics. Missteps here can lead to uneven shelves, creaking joints, or even damage to your walls.
Another trap many fall into is choosing the wrong materials for their specific needs. For example, opting for inexpensive plywood in high-moisture areas like bathrooms can cause warping or deterioration over time, despite initial savings. Experts recommend durable, moisture-resistant materials such as high-quality MDF or hardwoods, especially for long-term investments. It’s a common oversight to overlook these nuances, which leads to costly repairs or replacements down the line.
Now, let’s address a more advanced question:
Why do some professionally installed built-ins seem to last longer and look better even years later?
In my experience, the secret lies in the detailed understanding of load distribution, anchoring techniques, and finishing touches. Professional installers know how to anchor heavy cabinets into studs, use shims for perfect alignment, and apply finishes that protect against moisture and wear. This expertise ensures longevity and a flawless appearance, which DIY projects rarely achieve without extensive experience or trial and error. According to expert sources, such as the Effortless Storage Solutions, mastering these advanced techniques can significantly elevate your project’s durability and aesthetic appeal.
Have you ever fallen into this trap? Let me know in the comments. It’s essential to recognize that expert installation isn’t just about aesthetics, but about understanding the subtle technical nuances that ensure your storage solutions stand the test of time. Remember, investing in professional help or deepening your knowledge can save you money and frustration in the long run.
Maintaining your custom-built storage solutions and built-ins is crucial to ensure they continue functioning flawlessly for years to come. Proper upkeep not only preserves their appearance but also safeguards your investment in a clutter-free, stylish home. In this article, I’ll share my go-to tools and maintenance strategies that I personally rely on to keep my storage solutions in top shape.
How do I maintain my storage solutions over time?
Regular cleaning is the foundation of maintenance. I use a microfiber cloth and a gentle, non-abrasive cleaner to wipe down surfaces weekly. For deeper cleaning, especially in humid areas like bathrooms, I recommend using a mild disinfectant that won’t damage finishes. This prevents mold, mildew, and grime build-up, ensuring your cabinets stay fresh and hygienic. Additionally, inspecting hardware such as hinges and handles every few months helps catch any loose screws or wear before they become bigger issues. Applying a light lubricant like silicone spray to hinges keeps them operating smoothly and quietly.
For minor scratches or surface blemishes, I use a touch-up pen that matches the finish of my built-ins. This quick fix keeps everything looking pristine without the need for complete refinishing. Remember, the choice of tools matters—investing in quality cleaning supplies and maintenance products makes a noticeable difference in longevity.
Tools I recommend for ongoing maintenance and minor repairs
- Magnetic screwdriver set: I prefer magnetic screwdrivers for their ease in tightening or replacing hinges and handles without losing small parts. A good set with Phillips and flat-head options covers most needs.
- Microfiber cleaning cloths: These are gentle on surfaces and trap dust effectively. I keep several on hand for quick clean-ups.
- Silicone spray lubricant: Essential for hinges, drawer slides, and locks. It prevents squeaking and ensures smooth operation over time.
- Touch-up marker pens: Matching the finish of your cabinetry helps conceal scratches and imperfections discreetly.
- Vacuum with brush attachment: Regular dust removal from corners and crevices prevents buildup that can damage surfaces or hardware.
Future trends in maintenance tools
Looking ahead, I predict that smart maintenance tools will become more prevalent. Devices with integrated sensors could monitor humidity, temperature, and structural integrity, alerting homeowners to potential issues before they escalate. For example, IoT-enabled hinges could notify you when lubrication is needed or if a hinge has become loose.
Incorporating these advanced tools into your routine can extend the lifespan of your built-ins significantly. If you’re interested in the latest innovations, check out this resource on smart storage solutions for 2025.
Final tip: Schedule regular maintenance
Set a reminder every 6 months to inspect, clean, and lubricate your storage solutions. Consistency is key to avoiding costly repairs and keeping your home looking its best. Remember, well-maintained built-ins are an investment that pays off in durability and style, providing seamless organization for years to come.
The Hardest Lesson I Learned About Built-ins and Storage Solutions
One of the biggest surprises I encountered was realizing that even minor miscalculations during installation could lead to long-term issues like sagging shelves or misaligned doors. It taught me that patience and precision are crucial, and rushing through measurements or ignoring structural support details can undermine the entire project.
3 Myths About Built-in Storage That Held Me Back
I used to believe that DIY installation was always cost-effective and sufficient for a sleek look. I also thought that choosing cheaper materials wouldn’t impact longevity. These myths cost me time and money, and I learned that professional help and quality materials are investments that pay off in durability and aesthetics.
What Experts Won’t Tell You About Long-lasting Built-ins
Experts often emphasize the importance of anchoring heavy cabinets into studs and applying moisture-resistant finishes. These subtle details ensure longevity, but they’re easy to overlook. The secret is understanding load distribution and environmental factors, which significantly influence your storage solutions’ lifespan.
Curated Resources to Elevate Your Storage Game
My Essential Toolkit for Storage Projects includes a high-quality laser level and a reliable stud finder, trusted because they help me achieve perfect alignment and secure mounting. I also rely on comprehensive guides that demystify installation steps and prevent costly mistakes. Lastly, I trust design resources for inspiration and innovative ideas that make my space both functional and beautiful.
Your Next Step in Mastering Storage Solutions
Now it’s your turn to transform your space with expert-installed storage solutions. Remember, the journey begins with careful planning and a willingness to learn from experience. The more you understand the nuances of installation and materials, the more confident you’ll be in creating a clutter-free, stylish home. Take action today, and don’t hesitate to experiment and seek guidance when needed. Your dream home of seamless organization is within reach—start now!
Have you ever faced challenges during your storage installation process? Share your experiences below, and let’s learn from each other’s journeys to a more organized home.
3 Replies to “Expert Installation of Storage Solutions & Built-ins for Seamless Space”
Leave a Reply
Related Posts
Effective Storage Solutions & Built-ins: Top Installation Tips 2025
Ever spent hours rummaging through cluttered cabinets, only to realize…
Smart Storage Solutions & Built-ins for Space Efficiency in 2025
My Journey into Space-Saving Home DesignLiving in a cozy apartment…
Effective Built-in Cabinets & Storage Ideas for Seamless Organization
Ever opened a closet or bathroom cabinet and felt overwhelmed…
I completely agree with the importance of professional installation for built-ins. I tried tackling a similar project myself and quickly learned how critical precise measurements and proper support are. My shelves ended up uneven despite using a level, which was frustrating and looked unprofessional. Since hiring a pro, everything looks seamless and sturdy, and I’ve had no issues. It’s a reminder that investing in expert help can save time and potential headaches later on. I’ve also found that choosing moisture-resistant materials like high-quality MDF makes a huge difference, especially in areas prone to humidity. Has anyone found particular materials that worked well long-term in different parts of the house? I’m curious about how others approach durability in their custom storage solutions.
I completely resonate with the importance of expert installation highlighted in this post. When I first attempted to add built-ins in my living room, I underestimated how crucial precise measurements and anchoring into wall studs really are. My shelves, although seemingly level, started to sag after a few months because I didn’t secure them properly or support the weight evenly. Since then, I’ve hired professionals for a similar project, and the difference in the finish and durability is night and day. It’s clear that the subtleties, such as load distribution and finish sealing, make a significant impact over time. My question for others—have you found that specific finishes or materials, like certain hardwoods or moisture-resistant panels, tend to hold up better depending on the room’s environment? I want to ensure my next project is both beautiful and built to last, especially in high-humidity areas like the bathroom or kitchen. Would love to hear your insights or suggestions from experience.
Reading through this detailed guide really resonated with me, especially since I recently installed some built-ins in my home. I learned the hard way that proper planning and accurate measurements are everything. I also underestimated how vital it is to reinforce the structure properly, especially in high-traffic areas where the weight can add up quickly. One thing I did differently was choosing moisture-resistant MDF for my bathroom shelves—so far, so good, and it’s held up well against humidity. I’ve been curious about others’ experiences with different materials—what have you found to be the most durable or aesthetically pleasing for long-term use? And regarding maintenance, I’ve started scheduling bi-annual check-ups for my hardware and surfaces. Do you all have any tips or tricks for keeping built-ins looking brand new? It seems like a lot of small details, but they really make a big difference in longevity and style.