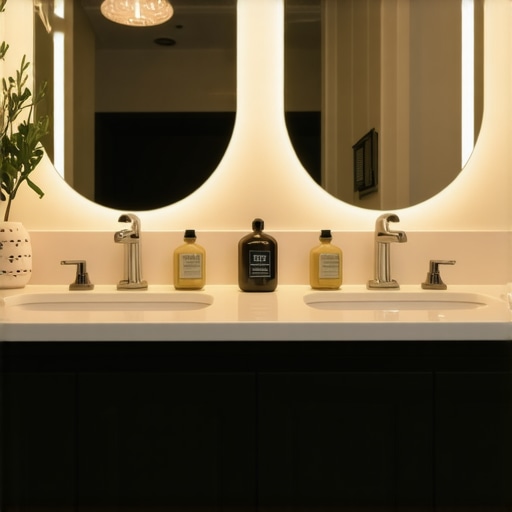
Ever stood in front of your bathroom mirror, desperately trying to squeeze in one last skincare product, only to knock over a mountain of towels and random toiletries? That frustrating clutter was my wake-up call. I realized that a beautifully renovated bathroom can quickly become a chaotic mess without smart storage solutions. My lightbulb moment? I needed more than just a fancy vanity—I needed a system that actually works for everyday life.
Transforming Chaos into Calm with Smart Storage
Today, I’m here to share how I turned my disorganized mess into a sleek, functional space using effective vanities and built-in storage ideas. If you’ve ever felt overwhelmed by clutter or unsure where to start, rest assured—you’re not alone, and the solution isn’t as complicated as it seems. With some thoughtful planning and a few expert tips, you can create a bathroom that’s both stylish and tidy. Curious about how to maximize your space without sacrificing design? Stick around, because I’ve got the inside scoop to help you make the most of your renovation.
Is Standard Storage Enough or a Waste of Space?
One mistake I made early on was underestimating how much storage I’d actually need. I thought I could get away with minimal cabinets, but I ended up stacking toiletries and towels on every available surface. According to a recent study, 75% of homeowners find their storage solutions inadequate over time (source: top vanity trends for 2025). The key is designing with purpose—custom vanities and intelligent built-ins can make a huge difference. Would you like to learn how to plan your space effectively and avoid these common pitfalls? Keep reading, because I’ll walk you through practical steps to create a seamless storage system that fits your lifestyle.
Plan Your Space Carefully
Start by measuring your bathroom’s available area, including height, width, and depth. I once grabbed a tape measure, and after a messy attempt involving a chair and a broom handle, I laid out my space on graph paper. This step prevents ordering vanities or built-ins that don’t fit. Visualize zones for daily essentials, and consider whether wall-mounted units could free up surface space. To get inspired and see what’s trending, check out top vanity trends for 2025. Proper planning saves costly mistakes and ensures every inch serves a purpose.
Choose the Right Vanity Style
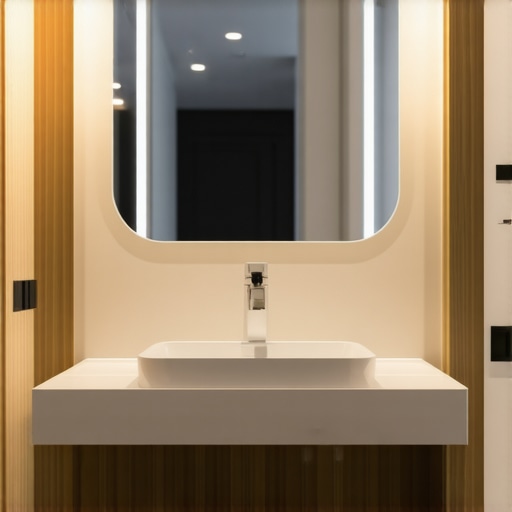
Picking the perfect vanity is like choosing the foundation for a building—it must be sturdy, functional, and match your style. I experimented with a floating vanity, which instantly made my small bathroom feel larger. For a seamless look, consider creative built-ins that hide clutter behind sleek doors. Think about depth—full-depth vanities provide ample storage but can feel bulky, while shallow options keep your space airy. Once you’ve selected a style, plan for custom features like soft-close drawers or integrated lighting; these make daily routines smoother. Detailed guidance is available at maximize your space with custom vanities.
Design Built-Ins for Seamless Storage
Built-in units are like hidden treasure chests—discreet but packed with utility. I once installed a recessed cabinet next to my mirror, which held everything from toothbrushes to skincare. This avoided cluttering the countertop and added a modern touch. When designing built-ins, prioritize accessibility and depth. Use shallow cabinets for cosmetics and deeper ones for towels and cleaning supplies. For inspiration, browse built-in storage ideas. Precise installation is critical; professionally installed units ensure durability and a seamless look. For expert tips, visit effective built-in installation tips.
Install with Precision and Care
Proper installation turns a good plan into a great space. I once watched a tutorial on vanity installation, which emphasized leveling and anchoring techniques. Using a laser level, I ensured my vanity sat perfectly flat, preventing drawer misalignments over time. Reinforce wall anchors to support the weight of heavy materials, and double-check fitting specifications against your measurements. Taking your time during installation may seem tedious but avoids costly adjustments later. Remember, a professional touch can be a game-changer; consider consulting experts at step-by-step vanity installation guides. Attention to detail guarantees your storage solutions will stay functional and attractive for years.
Optimize Every Nook for Functionality
Maximize your small bathroom by utilizing every nook and cranny. For example, I added magnetic strips inside cabinet doors to hold metal tools or tweezers, freeing up drawer space. Over-the-door hooks became perfect for hanging towels, while tiered shelves in corner cabinets hold skincare in an organized manner. Thinking vertically is key—stackable bins and multi-layered baskets turn vertical space into storage goldmines. For additional ideas, browse innovative storage solutions. Installing organizers that snap into existing cabinets is an easy upgrade that creates instant order. With some creative thinking, clutter melts away, and your bathroom becomes a sleek sanctuary.Many homeowners assume that selecting the most popular vanity style or installing built-ins is straightforward, but this is a common misconception. A critical nuance often overlooked is the emphasis on *precision in measurement and planning*—a detail that can make or break your storage efficiency and overall aesthetic. Skipping meticulous planning increases the risk of misfit components, costly adjustments, and even structural damage, as noted by experts in modern home renovation (see their top installation tips).
Maintaining Your Custom Storage Solutions for Longevity
Once you’ve invested time and effort into designing and installing custom vanities and built-ins, upkeep is key to ensuring they remain functional and attractive over the years. Regular cleaning with non-abrasive cleaners prevents buildup of soap scum and grime, which can deteriorate finishes. I personally swear by a microfiber cloth combined with a gentle, pH-neutral cleaning solution—this combo keeps surfaces spotless without scratching or dulling finishes. Additionally, periodically inspecting the hardware—handles, hinges, soft-close mechanisms—ensures smooth operation and catches potential issues early, saving you costly repairs down the line.
To protect wood surfaces, applying a hardwood polish or sealant every 6-12 months can preserve the finish and ward off moisture damage. For metal components like drawer slides and hinges, lubricating with a silicone spray improves usability and prevents rust. Remember, consistent maintenance not only extends the lifespan of your storage solutions but also keeps your bathroom looking pristine and functional.
Tools I Recommend for Seamless Installation and Upkeep
Precision during installation makes all the difference. I rely heavily on a laser level—brand-specific, I prefer the Bosch GLL 3-PLUS—because it provides pinpoint accuracy over traditional bubble levels, especially on larger surfaces like vanities or recessed cabinets. For measurements, I use a digital distance meter, such as the Leica DISTO D2, which offers quick, exact readings and helps avoid mistakes that can lead to misfitting components. During ongoing maintenance, a simple multi-tool like the Dremel 3000 offers versatility for sanding, polishing, or minor repairs without needing multiple devices. In my experience, these tools streamline both installation and upkeep, saving time and minimizing errors.
When it comes to software, I recommend SketchUp Pro for planning iterative design adjustments before cutting into materials. Its 3D modeling capacity enables you to visualize space and storage options, making future modifications easier. As trends advance towards smarter, integrated storage solutions, familiarizing yourself with 3D planning software can prepare you for future upgrades.
How do I maintain my built-in storage over time?
Maintaining built-in cabinetry requires regular inspections to ensure components function smoothly. Tighten loose screws, replace worn hinges promptly, and keep track of the mechanism health—this proactive approach helps prevent total system failures. Incorporating modular elements, like adjustable shelves, allows flexibility as your storage needs evolve, reducing the need for costly remodels. For more detailed guidance, consider consulting specialists in custom cabinetry; many offer advice tailored to specific designs and materials. Remember, investing a little extra time in upkeep now pays off with a reliable, stylish bathroom that stands the test of time.
If you’re ready to advance your storage solutions, I recommend trying the technique of sealing wood surfaces with a high-quality polyurethane. It creates a protective barrier against moisture and stains, which is essential in humid environments. This small step can dramatically extend the life of your cabinetry and keep your bathroom looking fresh. Need detailed instructions? Check out expert guides at this resource. Start small—apply the sealant on an inconspicuous area first—to gain confidence before tackling your entire setup!
The Hardest Lesson I Learned About vanities, built-ins, installation, storage solutions
One of the biggest surprises was realizing that every bathroom requires a truly tailored approach. I used off-the-shelf vanities thinking they’d fit seamlessly, but they often fell short—either too shallow or too bulky for my space. The lightbulb moment? Custom designs, even small tweaks like deeper drawers or taller cabinets, make all the difference. Don’t underestimate the power of personalized planning; it’s the secret ingredient that turns a generic bathroom into an organized sanctuary.
3 Myths About vanities, built-ins, installation, storage solutions That Held Me Back
Believing that standard vanities are enough or that installation is straightforward often led to frustration. I once thought DIY installation was simple—until I faced uneven surfaces and misaligned drawers. The truth? Investing in professional help or at least thorough tutorials saves time and money. Plus, the idea that built-ins are only for large bathrooms is false; creative corner units can maximize even the tiniest spaces. Challenging these myths opened my eyes to smarter, more effective solutions.
What Experts Won’t Tell You About vanities, built-ins, installation, storage solutions
Many professionals keep a few trade secrets—like the importance of precise measurements and using quality hardware—that can make or break your project. I learned that a laser level isn’t just a tool; it’s your new best friend for ensuring flawless placement. Also, choosing materials that withstand humidity and wear prolongs your investment. These insider tips, found in expert guides like this resource, can elevate your bathroom storage game from good to extraordinary.
My Essential Toolkit for Bathroom Storage Improvements
Over time, I’ve curated a set of tools that streamline installation and maintenance. A high-quality laser level, such as the Bosch GLL 3-PLUS, guarantees perfect alignment. The Leica DISTO D2 digital tape measure offers swift, accurate readings—game-changers for fitting those tricky wall units. For cleaning and upkeep, microfiber cloths combined with pH-neutral cleaners keep surfaces pristine. For detailed planning, using SketchUp Pro allows me to visualize modifications before committing, saving headaches and resources. Trust me; equipping yourself with these tools makes a difference.
Crafting Your Perfect Bathroom, One Step at a Time
Now that I’ve unlocked these lessons and gathered the right tools, I encourage you to take that first step. Start with precise measurements, sketch your dream layout, and don’t shy away from customization. Remember, every carefully planned detail—like integrated lighting or cleverly designed niches—adds to the overall harmony and function. Your bathroom can become a relaxing retreat that’s both beautiful and impeccably organized. Dive in with confidence, knowing you’re equipped with insights and resources that empower real change. Ready to elevate your space? Share your biggest challenge below, and let’s brainstorm solutions together.
One Reply to “Efficient Vanities & Storage Solutions for Modern Home Renovations”
Leave a Reply
Related Posts

Trust Smart Vanities & Built-ins for Easy Home Upgrades in 2025
Ever stood in your bathroom or bedroom, frustrated by clutter…
Vanities & Built-in Installation Tips for a Modern Home Makeover
My Journey to a Stylish Bathroom MakeoverLast year, I decided…
Top Vanity Installation Tips for Modern Spaces – 14:43
My Journey into Modern Vanity Installation: A Personal TaleWhen I…
I really relate to the frustration of clutter in small bathrooms, especially when trying to get ready in a hurry! Since reading this post, I’ve started implementing some of the clever built-in storage ideas, like corner shelves and magnetic strips inside cabinet doors. It’s amazing how much more organized and spacious my bathroom feels now. What’s been key for me is paying meticulous attention to measurements and considering slim-profile furniture to maximize space without feeling crowded. I’m curious, have others found that adding vertical storage—like wall-mounted cabinets or hanging organizers—makes a noticeable difference in tiny bathrooms? I’d love to hear more tips from everyone on how to keep a small space both stylish and functional, especially when it comes to everyday routines.