

I’ll never forget the metallic twang that echoed through my garage at 2:00 AM, just seconds before my heavy plastic bins decided to relocate themselves onto the roof of my sedan. It was a classic rookie move. I had trusted the ‘heavy-duty’ lag bolts that came in the box, assuming my studs were perfectly spaced and my drywall was invincible. Spoiler alert: they weren’t, and it wasn’t. That morning, staring at a cracked windshield and a pile of shattered Christmas ornaments, I realized that standard mounting brackets are often a recipe for disaster. If you have ever felt that pit in your stomach watching a rack slowly tilt away from the ceiling, you know exactly what I am talking about. Today, I am going to show you how to bypass the frustration of missed studs and crumbling drywall using the plywood ledger trick—a method that turns a flimsy overhead setup into a rock-solid storage fortress.
Stop Putting Your Faith in Tiny Steel Screws Alone
We have all been there, squinting at a stud finder that seems to be lying to us. One of the biggest mistakes I made early on was assuming that a single lag bolt into a 2×4 was enough to counteract the leverage of a four-foot rack arm. It isn’t just about the weight; it is about the pull. When you are dealing with why your garage shelves are pulling away from the wall, the culprit is almost always a lack of surface area. By using a plywood ledger, we create a massive ‘bridge’ across multiple studs, giving us a solid sub-surface to bolt into anywhere we want. This is the same logic used in the structural fix for sagging garage ceiling racks, and it is a total game-changer for DIYers who don’t want to play ‘stud roulette’ with their expensive power tools. According to structural engineering principles, a ledger board effectively converts point loads into a continuous line load, which drastically reduces the shear stress on any single fastener.
Does a hunk of plywood really make it safer?
I know what you are thinking: ‘Is adding more wood to the wall really the answer?’ It sounds counterintuitive to add weight to solve a weight problem, but it is all about distribution. When you use tactics for mounting heavy garage racks without hitting a stud directly with the rack’s bracket, the plywood acts as a secondary structural skin. This ‘trick’ allows you to hit three or four studs with the ledger, and then mount your rack precisely where you need it on the plywood, even if that spot is in a dead-space between studs. Have you ever had a shelf or rack start to pull away from the wall despite your best efforts? I’d love to hear your horror stories because, believe me, I’ve lived through them all. Before we grab the circular saw, let’s talk about why the 3/4-inch thickness is your best friend in this scenario.
Think of Your Wall Like a Frozen Lake
The secret to why this works is simple physics. Imagine walking across a frozen pond in stilettos; you are going straight through the ice. But if you put on snowshoes, you stay on top because your weight is spread over a larger area. Your garage wall works the same way. When you use tactics for mounting heavy garage racks without hitting a stud directly with the manufacturer’s bracket, you are effectively wearing stilettos. By installing a 3/4-inch plywood ledger first, you are putting on the snowshoes. This board acts as a bridge, grabbing onto three or four studs and distributing the downward pull across the entire surface of the wood. This is the exact same logic we use for the hidden plywood cleat for mounting heavy tool walls, ensuring that the sheer weight of your gear doesn’t just rip a hole in the drywall.
Finding the Center of the Stud Every Single Time
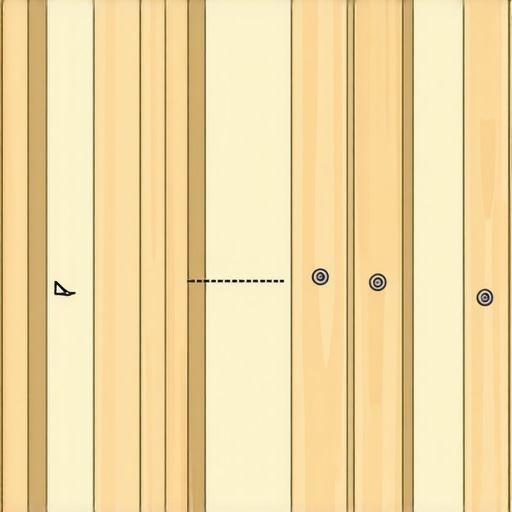
I learned the hard way that ‘close enough’ isn’t good enough. About five years ago, I was rushing to hang a heavy-duty shelf and thought I’d found the stud center. I drove my lag bolt in, heard a satisfying crunch, and assumed I was golden. Ten minutes later, I noticed a tiny drip on the floor. I hadn’t hit the center; I had grazed the side of the stud and pierced a copper water line hidden behind the wall. It was a $400 mistake for a $40 shelf. Now, I use a finish nail to ‘probe’ the edges of the stud through the drywall before I even think about lifting the plywood. Once you find the exact 1.5-inch width of the wood, mark it clearly. You want your ledger to span at least three studs. If your rack is four feet wide, your plywood should be at least 48 to 52 inches long to give you plenty of meat to bite into. This prevents the kind of structural failure that requires the structural fix for sagging garage ceiling racks down the road.
Why Pre-Drilling is Not a Suggestion
Once your studs are marked, it is time to prep the ledger. Never drive a lag bolt into a 2×4 without a pilot hole. If you skip this, the bolt acts like a wedge and can split the stud, which turns your load-bearing lumber into kindling. I recommend using 3.5-inch GRK rugged structural screws or lag bolts. You want at least two inches of thread buried deep in the heart of the stud. This is the same level of security needed when you are learning how to fix shaky garage workbenches with cantilever brackets. The plywood doesn’t just hold the rack; it provides a ‘grip’ for the bracket that spans the gap between the studs. I once tried to skimp by using 1/2-inch plywood, and the wood actually bowed outward under the tension. Always stick to 3/4-inch ACX or cabinet-grade plywood for that extra rigidity. It is the same principle applied when using the steel plate fix for sagging fireplace mantel shelves—you need a material that refuses to flex under pressure.
Why Over-Anchoring Is a Silent Killer
Common wisdom suggests that if a cabinet or rack is heavy, you should just keep driving fasteners until it stops moving. But here is the contrarian truth: over-fastening is a silent killer for custom installs. Wood is a living, breathing material. According to the USDA Forest Products Laboratory, wood can expand or contract significantly based on relative humidity changes in a home. If you ‘over-anchor’ a large unit without allowing for small amounts of seasonal movement, you are not making it stronger—you are creating internal tension. This structural stress is exactly why your built-in face frames are separating from the wall after the first winter. Instead of pinning everything down like a specimen in a lab, you need to use strategic mounting points that allow the carcass of the cabinet to flex slightly while the face remains flush.
How do you handle walls that are never actually flat?
I have never seen a perfectly flat wall in twenty years of building. If you bolt a long built-in or a wide vanity tight against a bowed wall, the cabinet will eventually follow the curve of the drywall, leading to doors that won’t close and drawers that bind. This is where most people get it wrong: they try to fill the gap with caulk. The pro move is scribing. By using the scribing secret for perfect built-ins on rounded drywall corners, you are actually removing material from the back of the cabinet to mirror the wall’s imperfections. It sounds terrifying to take a sander to a finished unit, but it is the only way to achieve a seamless, high-end look without relying on ‘caulk-and-pray’ methods. Have you ever spent hours leveling a unit only to find a massive gap the next morning? Drop a comment below; I want to see if it is the same seasonal shift I have been battling for years.

The “Level Floor” Trap That Ruins Plumbing
One of the biggest ‘oops’ factors I see is the ‘Level Floor Fallacy.’ You might spend three hours getting your bathroom vanity perfectly level, but you forget that floors are often sloped toward a drain or slightly crowned. If you don’t use the leveling move for vanities on slanted bathroom floors, the entire weight of the unit ends up hanging on the wall anchors rather than being supported by the floor. When that 100-pound quartz top is installed, the cabinet will ‘creep’ forward just enough to cause disaster. In fact, this slight shift is a primary reason why your vanity plumbing is leaking into the cabinet base—it pulls the P-trap out of alignment. If you are upgrading to heavy stone, you should also consider tactics for supporting heavy quartz counters on standard wood vanities to prevent the sides from bowing outward over time.
Don’t Ignore the Floor-to-Wall Gap
Finally, let’s talk about the ‘shadow gap.’ Most DIYers assume that if the top of a cabinet is level, the bottom will naturally sit right. However, houses settle at different rates. If you anchor the top first, you often find a massive gap at the base that looks like a mistake. This is why most floor-to-ceiling cabinets gap at the top or bottom. You have to anchor from the center out, using shims that are hidden behind your toe-kick or crown molding. By understanding these nuances, you move from just ‘hanging things’ to creating structural additions that will last for decades without a single creak or crack.
Ditch the Tape Measure for a Laser
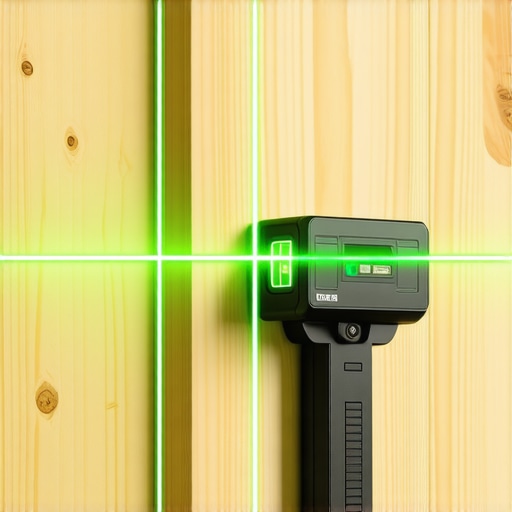
If you are still trying to hold a four-foot bubble level against a wall while balancing a heavy plywood ledger, you are working too hard. I personally switched to a self-leveling cross-line laser about three years ago, and it changed my entire workflow. For projects like creative built-ins for seamless storage and home aesthetics, precision isn’t just about looks; it’s about structural integrity. When your mounting points are perfectly level across a ten-foot span, the load is distributed exactly as the engineers intended. This is especially critical when you are implementing the hidden steel bracket for massive bookshelf spans, where even a sixteenth of an inch of tilt can cause the steel to bind against the wood over time.
How can I make sure my built-ins stay level for decades?
Maintenance is the part of DIY that nobody likes to talk about, but it is the difference between a lifetime fix and a five-year failure. Every spring and fall, when the humidity shifts, I take five minutes to inspect my heavy installs. Look for hairline cracks in the caulk or any slight separation at the ceiling line. If you notice a gap, it is often a sign of why your built-in cabinets are pulling away from the wall. You might need to tighten your structural screws or add internal steel stiffeners if the shelves are starting to take a permanent set. Don’t wait for the unit to sag; if you catch the movement early, you can often correct it with a simple turn of a driver.
Your Fastener Choice is a Structural Decision
I stopped using standard lag bolts from the big-box bins years ago. Instead, I almost exclusively use Simpson Strong-Tie SDWS structural screws. According to the Simpson Strong-Tie Engineering Letter L-F-SDWS22-R, these fasteners offer higher shear strength and a lower profile than traditional lags, meaning they won’t split your studs and they sit flush under your trim. This is the same level of hardware I recommend for the steel cantilever fix for floating garage workbenches. When you are hanging three hundred pounds of tools, you don’t want a bolt that might snap under a sudden load. Using the right hardware ensures that horizontal steel bracing actually does its job instead of just being a decorative element.
The Future of Modular Heavy Storage
I predict we are moving away from purely static built-ins toward ‘hybrid’ systems that combine the look of a permanent install with the flexibility of a track system. We are already seeing this with the heavy-duty wall track for organizing garden tools. Soon, your high-end custom vanities will likely feature internal steel skeletons that allow the entire unit to be adjusted or swapped without ripping out the drywall. For now, the best way to future-proof your work is to focus on moisture protection. Use the moisture-proof shim strategy even in dry rooms, because you never know when a pipe might leak or an HVAC unit might fail. I challenge you to try the ‘laser and ledger’ combo on your next project; once you see how much more stable your custom built-in doors stay when the frame is perfectly square, you’ll never go back to the old way.
The Structural Mistakes That Taught Me Everything
After years of installing everything from garage racks to creative storage solutions for vanities, I have realized that the most common failure point isn’t the wood—it is the hubris of the installer. One of my biggest lightbulb moments was realizing that hardware matters more than the shelf itself. I used to think a screw was just a screw, but after seeing standard lag bolts shear off under the weight of a heavy pantry, I switched to structural fasteners exclusively. Another hard-earned lesson: never trust your eyes over a probe. I always use a tiny finish nail to find the physical edges of a stud; it saves you from the nightmare of a ‘near miss’ that feels solid but fails two months later. Finally, remember that wood moves. If you are learning vanity installation for beginners, give your units a little room to breathe by using shims rather than forcing a cabinet to bend against a bowed wall.
The Load-Bearing Kit I Never Leave Behind
I have a specific ‘structural bucket’ that comes with me on every job. Inside, you will always find 3/4-inch ACX plywood because it is the only material I trust for a ledger; anything thinner lacks the screw-holding power needed for heavy loads. I also swear by the Simpson Strong-Tie SDWS screws—they are the gold standard when you need to stop wobbly custom built-ins from shifting. For layout, a self-leveling cross-line laser is non-negotiable. It turns a frustrating two-person job into a precise solo project. Lastly, keep a pack of composite shims on hand; they don’t compress like cedar, making them perfect for leveling heavy bases on damp garage or bathroom floors.
#IMAGE_PLACEHOLDER_E#
Ready to Build Something That Actually Stays Put?
There is a unique sense of peace that comes from knowing your overhead racks or wall-mounted cabinets are anchored into a structural system rather than just a few lucky hits on a stud. By using the plywood ledger trick, you are not just hanging a shelf; you are engineering a permanent home for your gear. Whether you are tackling a massive garage overhaul or just trying to organize a small room, focusing on the distribution of weight will always pay off in the long run. Go ahead and grab that circular saw—you’ve got the foundation now to build storage solutions that will outlast the house itself. Have you ever had a mounting bracket fail on you unexpectedly? I’d love to know what went wrong and how you fixed it in the comments below.