

I remember the exact sound of my heavy-duty tool cabinet deciding it didn’t want to be a wall-mounted unit anymore. It was a slow, sickening groan of metal pulling away from masonry. At the time, I thought I was being clever by using standard plastic plugs. I mean, they held up my spice rack, right? Wrong. Within three months, three hundred pounds of wrenches and power tools were leaning at a precarious fifteen-degree angle, threatening to crush my favorite miter saw. It was a classic rookie mistake that almost cost me a fortune. I’ve learned the hard way that when you are dealing with the sheer weight of professional-grade storage, hope is not a strategy. Today, I’m going to show you how to move past the flimsy hardware and embrace the concrete wedge anchor. We are going to solve that nagging fear of your shop walls ‘spitting out’ your expensive cabinets, ensuring your gear stays exactly where you put it—forever.
My Tool Cabinet Nearly Flattened My Workbench
The day I realized my mounting system was failing was a wake-up call. I had spent hours maximizing space with innovative built-in solutions, only to watch it literally pull apart at the seams. My biggest error was underestimating ‘pull-out’ force. When you load a drawer full of heavy socket sets and pull it out, that cabinet acts like a giant lever, trying to pry itself right out of the wall. If you aren’t using the right heavy-duty garage rack bolts, gravity is going to win every single time. Concrete is a beast to work with, but it’s also the best foundation you could ask for. Unlike wood studs that can strip or drywall that just crumbles, concrete offers a structural grip that is basically unmatched—if you use the right hardware. I used to think a sleeve anchor move for wall cabinets was enough, and for some light-duty stuff, it is. But for the cabinets that hold your life’s collection of tools? You need the wedge.
Are wedge anchors actually overkill for a home shop?
You might be thinking that drilling a deep hole and hammering in a steel bolt feels like you’re building a skyscraper, not a hobby space. I used to think the same. But here is a surprising fact: according to the American Concrete Institute (ACI), the mechanical interlock created by expansion anchors is critical because concrete’s tensile strength is only about 10% of its compressive strength, making the anchor’s ability to distribute load vital. If you’ve ever seen a chunk of your wall pop out because you used the wrong fastener, you know exactly what I mean. This isn’t just about over-engineering; it’s about safety. I’ve seen garage shelves pulling away from the wall just because the owner didn’t want to spend an extra five dollars on proper anchors. It’s a small price to pay for the peace of mind that comes with knowing your concrete wedge anchor move will hold for decades. Have you ever noticed your storage units starting to gap at the top, or found a fine dusting of concrete powder on the floor below your anchors? That’s the first sign of a disaster waiting to happen. Tell me, have you ever had a mounting job fail on you when you thought you did everything right? Now, before we get our hands dirty with the hammer drill, let’s talk about why the physics of the wedge anchor makes it the undisputed king of the garage.
Stop Guessing and Match Your Anchor to the Load
When you’re mounting a cabinet that holds a couple of hundred pounds of steel, the 1/4-inch anchors you used for your garden hose reel aren’t going to cut it. I generally reach for 3/8-inch or 1/2-inch wedge anchors. Think of the diameter of the bolt as the ‘insurance policy’ for your expensive equipment. I remember helping a buddy install a massive library unit where we used a hidden sub-frame hack, but the real strength came from the floor-to-ceiling anchoring. If you go too small, you risk the steel snapping under shear stress when you load up those bottom drawers. You need to account for the static weight plus the dynamic force of drawers opening and closing.
Let the Hammer Drill do the Heavy Lifting
Using a standard rotary drill on concrete is like trying to cut a steak with a plastic ruler. You need a hammer drill—specifically an SDS-plus if you can get your hands on one. The ‘hammer’ action literally pulverizes the stone while the carbide bit clears the path. I learned this the hard way years ago when I spent forty-five minutes trying to drill one hole with a cheap cordless unit, only to smell the motor frying and the bit glowing red. Now, I use a piece of blue painter’s tape on the bit to mark my depth. You want to drill at least half an inch deeper than the anchor will sit. This gives any leftover dust a place to go so it doesn’t bottom out your bolt early, which is a nightmare to fix once the anchor is already hammered in.
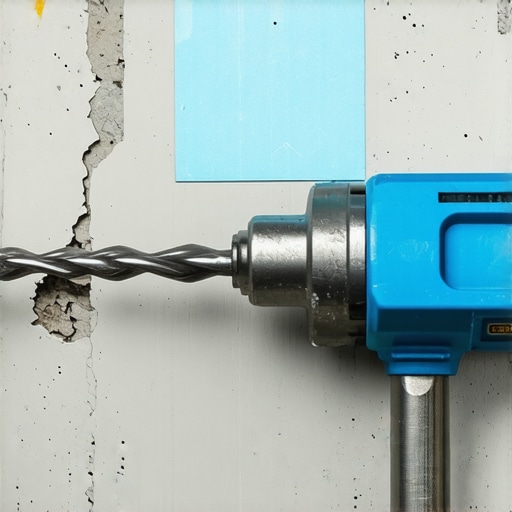
Blow Out the Grit Before You Bolt
This is the step everyone skips because it’s messy and creates a cloud of dust. However, if you leave concrete dust in that hole, your wedge anchor won’t bite the sidewalls; it will just slip on a layer of fine powder. It’s like trying to walk on ice with smooth shoes. I use a blow bulb or even a piece of flexible tubing to get deep into the hole and clear it out. Once it’s clean, you’re ready for the ‘mechanical marriage.’ If you’re dealing with an uneven garage surface, you should definitely check how to level garage cabinets on sloped concrete floors before you finalize the anchor positions. A tilted cabinet puts uneven torque on your anchors, which is exactly what we want to avoid.
Seat the Bolt Without Mushrooming the Threads
Here is a pro tip that will save you a trip to the hardware store: never hammer the top of the anchor directly. Thread the nut on until it’s flush with the very top of the bolt. This protects the threads from deforming under the hammer strikes. If you ‘mushroom’ that steel, you’ll never get the nut off to hang the cabinet or tighten it down later. I’ve had to angle-grind off more than one ruined anchor because I got impatient with a three-pound sledge. Drive it in until the washer is tight against your hidden plywood cleat or the structural rail of the cabinet itself.
The Magic Happens During the Final Turn
The wedge anchor works on a simple but brilliant bit of physics. As you tighten the nut, the mandrel of the bolt pulls upward, forcing the expansion clip at the bottom to flare out and bite into the concrete walls. It becomes a permanent part of the structure. I usually give it three to five full turns past finger-tight. You can feel the resistance change and get significantly heavier—that’s the anchor saying, ‘I’m not going anywhere.’ This is why it’s the superior concrete wedge anchor move for high-stress storage. Unlike screws that rely on friction alone, the wedge creates a physical mechanical interlock that laughs at gravity.
Don’t Turn Your Concrete Wall into Swiss Cheese
While that mechanical interlock I mentioned earlier is incredibly strong, there is a dangerous misconception that ‘more anchors equal more safety.’ In fact, over-anchoring is one of the fastest ways to compromise a structural wall. I once walked into a garage where the owner had placed five 1/2-inch wedge anchors in a six-inch span. He thought he was being extra secure, but he had actually created a ‘perforation’ line. When he loaded the cabinet, the concrete didn’t just fail at the bolts; a massive three-foot slab of the wall face simply sheared off. According to the Concrete Fastening Systems guidelines, the industry standard for spacing should be at least ten anchor diameters apart. If you’re using 1/2-inch bolts, they need to be five inches away from each other to prevent their ‘stress cones’ from overlapping and weakening the substrate.
Can you really trust a floating vanity on a single-stud wall?
This is the question that keeps professional installers up at night. As we move from the garage to the bathroom, the stakes change from concrete to wood and drywall. Many people think they can just hit a single stud and use wings for the rest, but that is a recipe for a sagging disaster. If you are working with modern, heavy stone tops, you need to look into how to stop floating vanities from dipping with steel plates. The hidden nuance here is that a floating unit isn’t just hanging; it’s under constant rotational torque. You are fighting the wall’s tendency to bow outward at the top and compress at the bottom. This is why I always recommend an expert guide to flawless vanity installation tricks before you drill your first hole, especially if you can’t open the wall to add internal blocking.

Another ‘trap’ is ignoring the moisture profile of the wall itself. If you’re mounting a heavy unit against an exterior concrete wall that hasn’t been properly sealed, those steel wedge anchors can eventually act as heat sinks, causing localized condensation. Over a decade, that moisture can lead to ‘spalling,’ where the concrete around the anchor starts to flake away, loosening the grip. It’s worth checking out the moisture barrier strategy for below grade vanities to see how to prevent this slow-motion failure. Even the most perfect mechanical bond can’t survive if the material it’s biting into turns to mush over time.
The Torque Trap that Ruins Your Hardware
Finally, let’s talk about the ‘oops’ factor of the final tighten. Many DIYers think they need to crank the nut until they can’t move their arm anymore. Over-torquing a wedge anchor is actually worse than under-torquing it. If you exceed the manufacturer’s torque rating, you risk snapping the mandrel or, worse, cracking the internal ‘cone’ of the concrete. You want that ‘sweet spot’ where the anchor is set but the steel isn’t under permanent elastic deformation. If you find yourself struggling with alignment on the fly, mastering the scribing trick for cabinets against uneven masonry will save you from having to over-tighten anchors just to close a gap. Have you ever fallen into this trap of over-engineering a project only to have it backfire? Let me know in the comments—I’d love to hear your ‘lesson learned’ moments.
If you are serious about moving past amateur-level DIY, you need to stop using that entry-level cordless drill for masonry. I personally swear by a dedicated SDS-plus hammer drill with active vibration control. It is the difference between a clean, circular hole and an elongated, oval-shaped disaster that simply won’t hold a wedge anchor. I’ve spent too many afternoons fixing wall blowouts because a cheap bit wandered off-center. When I’m setting up heavy storage, I also keep a digital torque wrench in my kit. It might seem like overkill for a garage, but hitting the exact foot-pounds specified by the manufacturer prevents the ‘mandrel snap’ that ruins a perfectly good afternoon. Investing in these tools is how you move toward effortless storage solutions for a tidy stylish home that don’t require a repair kit every six months.
How do I keep my heavy-duty anchors from failing over time?
Maintenance is the part of the job that nobody likes to talk about, but it’s what keeps your cabinets from eventually sagging. Every year, I perform a ‘stress check’ on my heavy-duty installs. I look for the ‘telltale dust’—that fine white powder at the base of an anchor that suggests the bolt is vibrating or slipping. If you’re working with moving parts, you should also check why your soft-close drawers are slamming and the tension fix to ensure the dynamic weight isn’t hammering your anchors loose. According to technical documentation from Simpson Strong-Tie, mechanical anchors in concrete should be checked for ‘relaxation’—a process where the concrete slightly compresses under the constant load, potentially requiring a quarter-turn to re-establish the design tension. 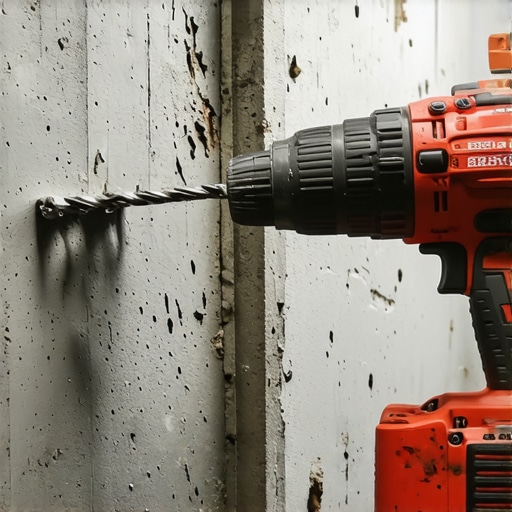 For bathroom installs, your maintenance routine must include a check of the seals. I always suggest the waterproof sealant move for vanity backsplashes to prevent steam and splash-back from reaching the structural wall. Once moisture gets behind the cabinet, it can cause the wood to swell and pull against the anchors with thousands of pounds of force. If you’re just starting out, don’t be intimidated; following a step-by-step guide to vanity installation for beginners will get the foundation right, but the long-term win is in these small, yearly inspections. Looking ahead to 2025 and beyond, I predict we will see ‘smart’ mounting brackets with integrated load sensors. We are already seeing moisture sensors in high-end units, and it won’t be long before your phone alerts you if a heavy-duty rack starts to shift by even a millimeter. For now, the best sensor you have is a good level and a watchful eye. I want you to go out to your garage right now and check the top seam of your heaviest cabinet. If there is a gap wider than a nickel, it’s time to re-tighten those anchors before gravity takes over.
Hard-Won Secrets from My Near-Disaster Installation
Looking back at my workshop failures, the most painful lesson wasn’t the broken tools—it was the wasted time. One thing I learned early on is that concrete is an organic material in many ways; it expands and breathes. If you drill too close to an edge, you’ll blow out a corner regardless of how expensive your anchor is. Another ‘lightbulb moment’ happened when I realized that most people don’t account for the leverage of an open drawer. A 100lb cabinet becomes a 500lb pry bar when you pull those sliders out. This is why I eventually moved away from standard hardware and perfected my concrete wedge anchor move. Also, never ignore a ‘dusty’ bolt. If you see white powder appearing below a mounting point, it’s a red flag that your mechanical bond is failing. If you’re tackling indoor projects, the same principles apply, whether you’re using a steel bracket hack for floating entryway benches or mounting a heavy pantry.
The Gear That Keeps My Cabinets from Falling
I don’t gatekeep the gear that keeps my shop standing. First, I never touch a concrete wall without an SDS-Plus hammer drill. A standard drill will just glaze the masonry and burn out your motor. Second, a digital torque wrench is non-negotiable for me now; it prevents the dreaded mandrel snap. #IMAGE_PLACEHOLDER_E# I also highly recommend keeping a ‘maintenance log’ for your heavier units. If you are just starting out and concrete feels intimidating, you might want to practice your layout skills with a step-by-step guide to vanity installation for beginners. For those aiming for effortless storage solutions for a tidy stylish home, having a reliable hole-cleaning brush and blower is a small investment that saves massive structural damage.
Your Blueprint for an Indestructible Shop
Taking the time to do a heavy-duty installation correctly is the ultimate gift to your future self. There is a profound sense of peace that comes from walking into a garage and knowing that even if there’s a minor tremor, your equipment isn’t going anywhere. You’ve moved past the ‘hope and pray’ method of plastic plugs and entered the world of professional-grade anchoring. Whether you are fixing loose pull-out pantry tracks or securing a massive tool wall, remember: the strength of the cabinet is only as good as the bolt holding it to the wall. Go forth, drill deep, and build with confidence.
Have you ever had a heavy shelf or cabinet pull right out of the wall, and what was the ‘hardware culprit’ that failed you? Let me know in the comments below!