

It was 2 AM when I heard it—the slow, agonizing screeeech of metal grinding against drywall. I didn’t even have to get out of bed to know what happened. My “over-engineered” garage shelving system was finally surrendering to gravity. I walked out in my pajamas, flashlight in hand, to find my heavy-duty racks leaning at a precarious 15-degree angle, shedding white drywall dust like a miniature snowstorm. It’s a heart-sinking feeling to see your tools and seasonal bins slowly retreating from the wall. You thought you did it right, but the house is literally rejecting your handiwork.
Your Shelves Are Failing Because You Trusted the Wrong Support
[IMAGE_PLACEHOLDER]
I’ve been there, staring at a gap between the wall and the shelf bracket that seems to grow by the millimeter every day. Usually, we blame the shelves, but the real culprit is almost always the connection point. I used to think that “heavy-duty” plastic anchors were a gift from the DIY gods. I was wrong. I once loaded up a shelf with my old circular saw and a stack of oak offcuts, only to find the entire assembly bowing within a week. That’s because garage walls are notoriously fickle; whether it’s thin drywall or old masonry, your standard hardware often isn’t enough. If you’ve noticed a slight tilt, you need to act before those heavy-duty garage rack bolts snap under the tension. Today, I’m going to show you how to diagnose the “why” and walk you through the structural fixes that actually hold.
Can You Really Fix This Without Starting Over?
Many folks worry that a pulling shelf means the drywall is ruined and the project is a total loss. I’m here to tell you that’s a myth. While you might need to patch a few holes, the solution is often about shifting your weight distribution or using steel stud tactics that actually bite into the framing. The problem is often that we miss the studs or use fasteners that aren’t rated for the leverage a deep shelf creates. According to the Gypsum Association, the structural integrity of drywall significantly diminishes when subjected to constant pull-out force rather than simple downward shear. This is why your shelves don’t just fall; they “pull.” Have you ever walked into your garage and noticed a gap at the top of your cabinets that wasn’t there last month? Drop a comment and tell me—I want to know if I’m the only one who has suffered through the “midnight creak.”
In my early days, I made the classic mistake of thinking I could skip the stud finder and rely on “pro-grade” toggles for everything. I learned the hard way that when you’re dealing with vibration and heavy loads, there is no substitute for a mechanical connection to the home’s skeleton. We’re going to look at better ways to secure your gear, like anchoring tool cabinets correctly and using better bracing methods. We’ll even touch on specialized situations, like using a concrete sleeve anchor move for those of you dealing with block walls. Let’s get that garage back in order before your shelving decides to take a permanent nap on your car’s hood.
Stop the Pull with Horizontal Steel Bracing
Think of your garage wall as a skeleton. If you’re just pinning things to the skin—the drywall—it’s eventually going to tear. To stop the sag, you have to bridge the gap between those vertical studs. I learned this the hard way when I tried to mount a full set of heavy cordless tools on a single sheet of pegboard. Within two months, the top screws had enlarged the holes in the drywall to the size of quarters. The fix wasn’t more anchors; it was using horizontal steel bracing. By running a horizontal member across three or four studs, you distribute the pulling force across the entire wall assembly rather than a single point of failure.
Find the Framing Before the Shelf Finds the Floor
Your first move is always the most boring one: finding the studs. But don’t just find the center; find the edges. I once mounted a set of cabinets in a rush, thinking I was close enough to the stud center. Three weeks later, the cabinet tilted because the screws had just grazed the side of the 2×4, eventually splintering the wood and letting go. When you are anchoring tool cabinets to wood stud walls, use a 3-inch structural screw with a built-in washer. These act like a vice, clamping the cabinet back to the framing so tightly that the wall would have to come down for the cabinet to fall.
The Secret of the Horizontal Ledger
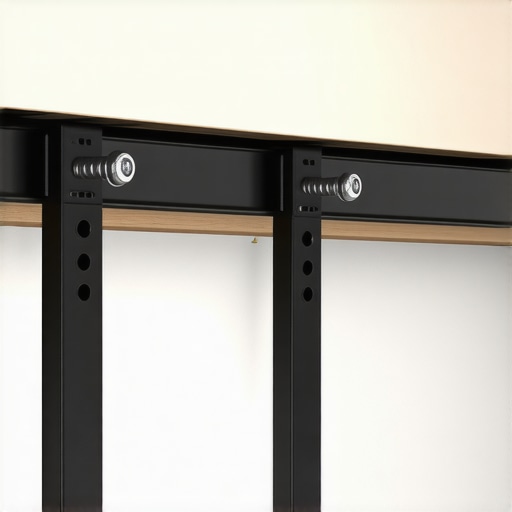
If your studs are spaced weirdly or you’re dealing with a heavy cantilevered load, a ledger is your best friend. A ledger is just a strip of 3/4-inch plywood or a steel rail screwed into every stud along the length of your installation. You then mount your shelves or cabinets directly to that ledger. This is how I finally managed to fix shaky garage workbenches with cantilever brackets in my own shop. The workbench felt like it was floating on Jell-O until I tied the brackets into a solid horizontal span of plywood. It turned a vibrating, noisy mess into a surface I could actually hammer on without fearing for my toes.
Switch to Concrete Sleeve Anchors for Block Walls
For those of you with cinder block or solid concrete walls, the rules change completely. Drywall screws and plastic plugs are useless here. You need mechanical expansion. I remember helping a neighbor hang a massive heavy-duty rack system on his foundation wall. We started with tap-con style screws, but the old concrete was too brittle and kept stripping out. We switched to a concrete sleeve anchor move, which uses a metal sleeve that expands as you tighten the nut. It’s like an internal wedge that refuses to budge. If you’re worried about the weight of your winter tires or engine parts, pairing these with heavy-duty garage rack bolts is the only way to sleep soundly at night. If you’re dealing with modern construction, you might even need to look into steel stud tactics if your garage isn’t framed with traditional timber.
Most people assume that as long as they hit the stud, the job is done. But here’s the contrarian truth: your fasteners are rarely the weak link—your cabinet’s ‘spine’ is. I’ve seen beautiful floating vanities literally unzip from their own back panels because the installer didn’t account for the leverage of a heavy quartz top. If you’re following an expert guide to flawless vanity installation, you’ll notice the pros always emphasize vertical support over just horizontal fastening. When you add a 100-pound stone top, you aren’t just dealing with weight; you’re dealing with torque. This is why I always use a hidden sub-frame move to bridge the gap between the wall and the front edge of the cabinet. Without it, the front of your vanity will inevitably dip, creating a gap at the backsplash that no amount of caulk can hide.
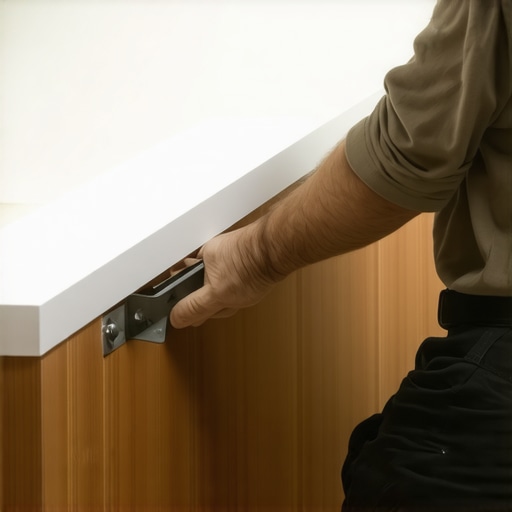
One ‘oops’ factor that kills more projects than anything else is over-driving screws into manufactured wood. People think ‘tighter is better,’ but once you crush the internal fibers of MDF or particle board, the holding power drops significantly. According to technical data from the Structural Board Association, over-torqued fasteners in composite materials create micro-fractures that lead to sudden failure under load. This leads to what I call ‘invisible failure,’ where the shelf looks fine today but will collapse in six months under a static load. This is exactly why particle board shelves sag even when they aren’t technically overloaded—the material is literally dying from the inside out due to poor initial fastening habits.
Is Your Vanity Actually Strong Enough for That Quartz Top?
The short answer is: not without internal reinforcement. Advanced installers know that material ‘creep’ is your biggest enemy. If you’re building out a library or a bathroom, you need tactics for supporting heavy loads that go beyond simple brackets. You need to introduce a ‘stiffener’—usually a solid wood cleat or a steel edge—to the front of the shelf or cabinet rail to resist that long-term bowing. I’ve found that using the hidden sub-frame hack is the only way to ensure a floor-to-ceiling unit doesn’t develop those ugly ceiling gaps over time. Have you ever fallen into the trap of trusting a ‘heavy-duty’ rating only to watch your shelves slowly turn into smiles? Let me know in the comments; I’ve definitely replaced enough ‘smile’ shelves to last a lifetime.
I’ve spent the better part of a decade trying to outsmart physics, and if there’s one thing I’ve learned, it’s that the “set it and forget it” mentality is a recipe for a 3 AM crash. Maintenance isn’t just about cleaning; it’s about structural vigilance. Most people don’t realize that wood and metal are in a constant dance with your home’s humidity levels. If you live in a climate with four seasons, your studs are expanding and contracting, which can slowly loosen even the best fasteners. This is exactly why your built-in cabinets are pulling away from the ceiling and the fix requires more than just more screws—it requires understanding movement.
How do I stop my heavy built-ins from sagging after five years?
The secret is a biannual “torque check.” Every six months, I take a screwdriver and physically test the tension on my mounting bolts. If you find one that turns easily, you’ve got a problem. You also need to watch out for environmental factors. If you’re installing in a basement or a humid bath, you need to follow the moisture barrier rule for cabinets on cold outer walls to prevent the wood from swelling and pushing itself off the wall. I’ve seen gorgeous projects ruined because the owner didn’t stop cabinet doors from warping in humid bathrooms by using the right sealants and ventilation. According to the Architectural Woodwork Institute (AWI) Quality Standards, ignoring these environmental shifts can lead to a total failure of the joinery within 24 months, as wood moves at different rates than the metal fasteners holding it in place.
Tools that turn a wobbly weekend project into a permanent fixture
I stopped guessing the moment I bought a self-leveling green beam laser. Bubbles in a vial are great for hanging pictures, but when you’re trying to level garage cabinets on sloped concrete floors, you need a line that doesn’t lie. I also swear by using high-density plastic shims instead of cedar ones. Cedar is organic and compresses over time under heavy loads; plastic is inert and maintains its thickness forever. We successfully fixed a tilted floating vanity with hidden leveling shims made of non-compressible composite, and it hasn’t budged a millimeter in three years.
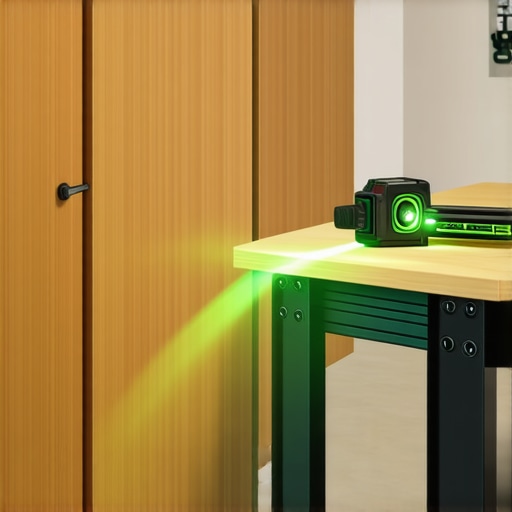
Looking ahead, I suspect we’re only a few years away from “smart” brackets equipped with load-sensing piezoelectric tech that pings your phone when a shelf is overloaded or shifting. But until then, your best defense is high-quality hardware and a bit of routine vigilance. I want you to try this right now: go to your heaviest garage shelf and check the top-most bracket for any daylight between the metal and the wall. If you see even a sliver of white drywall behind that bracket, it’s time to reinforce it before the “midnight creak” becomes a full-blown collapse.
The Hard Truths About Why Your Installation Might Still Fail
After years of fixing ‘expert’ installs, I’ve realized that the biggest mistake is overestimating the wall’s strength. Just because you used a heavy-duty bolt doesn’t mean the wood behind the drywall can handle the torque. I’ve seen particle board shelves sag even when the anchors were solid because the material itself reached its limit. Always prioritize plywood or reinforced composites for high-load areas.
Another lightbulb moment for me was realizing that deep shelves are essentially giant crowbars. Every inch of depth increases the pull-out force on your top screws. If you’re tackling a step-by-step guide to vanity installation for beginners, remember that the vanity isn’t just sitting there; it’s trying to rotate forward. This is why I now lean heavily on a steel cantilever fix for floating garage workbenches to counteract that natural rotational stress.
Tools I Never Start a Cabinet Project Without
I’ve wasted too much time with cheap tools that lied to me. If you want a professional finish, you need gear that eliminates the guesswork. I personally trust the following:
- Self-Leveling Green Beam Laser: Red lasers are hard to see in a bright garage. A green beam gives you a perfectly level line across the entire wall, ensuring your ledgers are spot-on.
- Structural Screws: Stop using standard gold screws. Structural screws have much higher shear strength and won’t snap when the house settles.
- Composite Shims: Unlike wood, these won’t rot or compress. They are essential for a leveling move for vanities on slanted bathroom floors.
- Horizontal Steel Channels: These are a game changer to stop garage tool wall sag by distributing weight across multiple studs effortlessly.
Go Build Something That Lasts
It’s easy to feel overwhelmed when your first attempt at storage solutions starts to tilt, but every failure is just a lesson in structural physics. By shifting your focus from ‘just hanging things’ to ‘engineering supports,’ you’ll create a space that stays solid for decades. Don’t let a little drywall dust discourage you—grab the right anchors and get back out there. You’ve got the knowledge to fix wobbly built-ins with hidden steel plate tactics and make your garage the envy of the neighborhood.
Which part of your garage is currently giving you the most ‘lean’—the shelving or the workbench? Let me know in the comments below!