I remember the first time I tried installing a custom vanity in my bathroom. It was a chaotic mix of measurements, tools, and a growing sense of doubt. I ended up with a crooked sink, a bruised ego, and a vow to never DIY again without proper guidance. Fast forward to today, and I’ve learned that the right knowledge can turn a stressful project into a rewarding transformation.
Why Modern Vanity Installation Matters More Than Ever
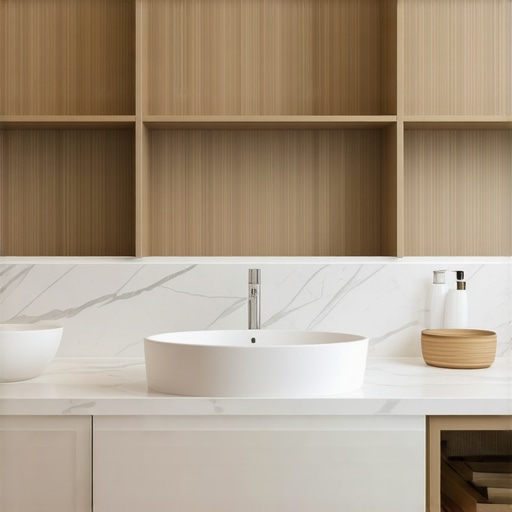
In 2025, our bathrooms are no longer just functional spaces—they’re personal retreats. The demand for stylish, space-efficient vanities has skyrocketed, especially with smaller homes and the rise of smart storage solutions. But here’s the catch: many homeowners still approach vanity installation with outdated methods, risking costly mistakes and subpar results. According to a recent industry report, improper installation is the leading cause of vanity failures within the first year. This means that understanding the latest techniques isn’t just about aesthetics; it’s about durability and value.
So, why should you care? Because your bathroom deserves a vanity that not only looks stunning but also functions flawlessly for years to come. Whether you’re upgrading your current space or designing a brand-new bathroom, mastering modern installation techniques will save you time, money, and frustration. And trust me, with the right approach, you’ll enjoy a sleek, clutter-free vanity that elevates your entire home aesthetic.
If you’ve ever faced the nightmare of a wobbly sink or uneven countertops, you’re not alone. I’ve been there, and I know how overwhelming it can feel. But don’t worry—this guide is designed to help you avoid those pitfalls. We’ll dive into proven hacks, expert tips, and innovative solutions that make installation straightforward and stress-free. Curious if your bathroom setup is compatible with these new trends? Keep reading, and I’ll show you how to make your space both beautiful and smartly organized.
Is Vanity Installation Still a DIY Dream or a Nightmare?
Early on, I made the mistake of rushing through measurements and ignoring the importance of proper support. That led to a sinking sink and a lot of unnecessary rework. Since then, I’ve discovered that a little planning and the right tools can make all the difference. Want to avoid my mistake? Check out some vanity installation hacks that save time and money, and help you get it right the first time.
Now, let’s get into the practical steps that will turn your vanity project into a smooth, satisfying success story. Ready to transform your bathroom with confidence? Let’s go!
Start with Precise Measurements
Before grabbing a drill or a level, take detailed measurements of your bathroom space. Use a tape measure to record the width, depth, and height where the vanity will sit. Remember, a sloppy measurement is like building a house on quicksand—unstable and prone to wobbling. I once rushed through this step and ended up with a sink that was too wide for the niche, forcing a rework that cost me hours. To avoid this, double-check your measurements and mark your wall with a pencil for reference.
Use a Level for Alignment
Align your vanity perfectly by using a high-quality spirit level. Imagine trying to balance a glass of water on a wobbly table—without a level, your vanity will be uneven, causing water to pool on one side or the sink to look crooked. When I installed my vanity, I clamped a temporary guide on the wall to ensure everything was perfectly straight, which saved me from future headaches.
Secure the Mounting System
Modern vanities often come with mounting brackets or cleats. Attach these securely to the wall studs, not just drywall, to support the weight of the vanity and prevent sagging. Use a stud finder to locate the studs, then drill and anchor the brackets accordingly. Once, I accidentally mounted the bracket into drywall alone, and the vanity shifted after a few days. Don’t be like me—use proper anchors and ensure your mounting points hit solid wood or metal studs.
Level the Vanity Before Securing
Place the vanity temporarily on the brackets and check the level again. Adjust as necessary before tightening everything down. This is your last chance to correct any misalignment. I learned this the hard way when I tightened the screws first and then found my countertop was slightly tilted—an easy fix if caught early, but a mess to redo later.
Connect Plumbing Efficiently
Modern vanities often include pre-drilled holes for plumbing. Use flexible PEX or braided hoses for easier connections. When I connected my sink, I made sure the water supply lines had enough slack for movement, preventing stress on the fittings. Properly securing the drain and supply lines reduces leaks and makes future maintenance easier. Don’t forget to seal around the edges with a quality silicone caulk to prevent water seepage—trust me, a small leak can cause major damage over time.
Test for Leaks and Stability
Turn on the water and check all connections for leaks. Gently wiggle the vanity to ensure it’s firmly mounted. I once overlooked this step and discovered a tiny drip after a week, which turned into a costly mold problem. Regularly inspecting your work ensures longevity and peace of mind.
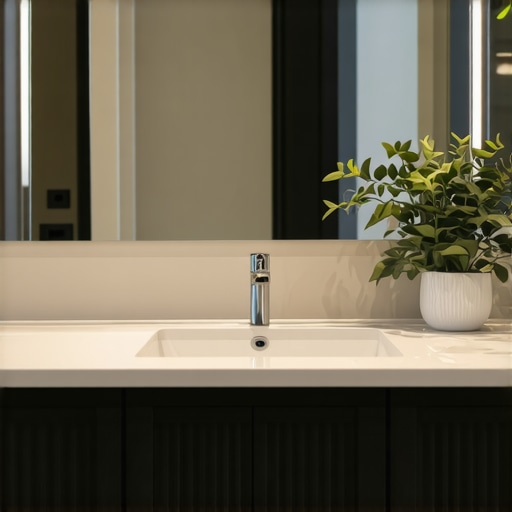
Finish with Stylish Details
Once everything is secure and leak-free, add finishing touches like decorative hardware or a backsplash. Modern trends favor sleek, minimalist handles and smart storage integrations, which can be installed with minimal effort. Remember, a well-mounted vanity isn’t just functional—it sets the tone for your entire bathroom aesthetic. For smart storage ideas, check out Effortless Storage Solutions.
Most homeowners believe that installing a bathroom vanity is a straightforward task that anyone can handle with basic tools. However, this oversimplification often leads to costly mistakes and subpar results. Let’s dig deeper into some common misconceptions and reveal the hidden nuances that can make or break your project.
Why the Timing of Measurements Matters More Than You Think
Many assume that quick measurements at the beginning of the project are enough. In reality, measurements should be taken multiple times at different stages to account for wall irregularities, settling, or slight shifts. For example, walls are rarely perfectly straight, and relying on a single measurement can result in misaligned fixtures or uneven surfaces. Professionals double-check and re-measure throughout the process, which is something DIYers often overlook. This can prevent issues like countertops that don’t sit flush or plumbing misalignments. Want to save yourself the headache? Learn more about the importance of precise measurements and how to avoid common pitfalls by visiting vanity installation hacks.
Using Studs for Support Is Not Optional
It’s a widespread myth that drywall anchors are sufficient to support a heavy vanity. In truth, the weight of a fully loaded vanity can reach hundreds of pounds, and drywall alone cannot bear that load over time. The secret is to attach mounting brackets directly to wall studs, which are the structural elements behind your drywall. Failing to do so can lead to sagging, tilting, or even detachment of the vanity, causing damage and safety risks. Remember, a sturdy support system based on true load-bearing points is critical for long-term durability. For detailed guidance, check out expert installation tips.
Advanced Question: How Can I Ensure My Plumbing Is Future-Proof?
Many homeowners focus on the aesthetic aspects of vanity installation but overlook the importance of planning for future plumbing maintenance or upgrades. Properly installed flexible supply lines, quick-disconnect fittings, and accessible shut-off valves are often neglected but are crucial for minimizing future disruptions. Also, consider the placement of plumbing fixtures relative to the wall and cabinetry to allow easy access for repairs. Skimping on these details can lead to expensive and disruptive plumbing work down the line. For innovative storage and plumbing solutions, explore storage innovations that seamlessly integrate plumbing access into your vanity design.
Have you ever fallen into this trap? Let me know in the comments. Remember, understanding these nuances can save you time, money, and frustration while ensuring a beautiful, durable vanity installation that truly stands the test of time.
Keeping your bathroom vanity in top shape requires more than just proper installation; it demands ongoing maintenance and the right tools to ensure longevity. Over the years, I’ve refined my toolkit to include specific items that make routine upkeep easier and more effective. Investing in quality equipment not only prolongs the life of your vanity but also saves you money by preventing costly repairs down the line.
Invest in a Digital Level for Precise Alignment
While traditional bubble levels work, a digital level provides more accuracy and ease of use, especially in tight spaces. I personally prefer a digital model like the Bosch GIM 120 because it gives an exact reading to the millimeter, ensuring your vanity is perfectly level and preventing issues such as water pooling or uneven surfaces. Regularly checking alignment with this tool helps catch small shifts before they become major problems.
Use a Multi-Function Oscillating Tool for Repairs
An oscillating tool, like the Fein MultiMaster, is invaluable when it comes to repairs or modifications. Whether you’re replacing a worn-out sealant or trimming cabinetry for a perfect fit, this versatile tool makes quick work of detailed tasks. I recommend having one in your toolkit because it’s precise and minimizes damage to surrounding materials, making maintenance safer and more efficient.
Routine Checks with a Leak Detection Solution
To prevent water damage, I use a leak detection solution such as a UV dye kit, which quickly highlights any leaks in plumbing connections. Applying this periodically, especially after installation or repairs, helps catch issues early. Regular inspections with this method are essential for protecting your investment and avoiding mold or structural damage over time.
Lubricate Moving Parts with Quality Silicone Spray
Over time, hinges, drawer slides, and other moving components can seize or become squeaky. I recommend a high-quality silicone spray, like the WD-40 Specialist Silicone Lubricant, for smooth operation. Applying a light coat every few months keeps everything functioning flawlessly, reducing wear and tear.
Plan for Future Upkeep with Smart Storage Solutions
Storing your tools efficiently ensures quick access for maintenance tasks. Consider installing built-in storage like those described in effortless storage solutions. Keeping your maintenance tools organized minimizes downtime and encourages regular upkeep, which extends your vanity’s lifespan.
Looking ahead, as smart home integrations become more prevalent, tools that support IoT-enabled plumbing or automated leak detection are likely to grow in importance. Staying updated with innovations like app-controlled leak sensors could revolutionize how we maintain our vanities, making proactive care more accessible than ever.
How do I maintain my vanity’s plumbing over time?
Regularly inspecting connections and using advanced leak detection methods can save you from major headaches. Installing quick-disconnect fittings and accessible shut-off valves allows for easier repairs and upgrades, reducing disruption. For detailed guidance, visit innovative storage solutions that include plumbing access features. Don’t forget to schedule periodic checks—using a UV dye kit or smart sensors—to catch leaks early and keep your vanity functioning flawlessly for years to come.
Lessons I Didn’t Expect to Learn About Vanity Setup
One of the biggest surprises was realizing that even minor misalignments during installation could lead to significant issues down the line. I once skipped rechecking my measurements after the initial setup, only to find my vanity was slightly tilted after a few weeks—causing water to pool and creating a headache. That taught me to double and triple-check everything, especially with modern vanities that have sleek, seamless designs. Additionally, I learned that investing in quality tools like a digital level can dramatically improve accuracy, saving time and frustration. Lastly, I discovered that understanding the support points—like attaching brackets directly to wall studs—is crucial for durability, something many DIYers overlook in their haste.
Related Posts
Trusted Vanities & Built-ins: Top Installation & Storage Tips 2025
My Journey into the World of Vanities and Built-insWhen I…

Trust Smart Vanities & Custom Built-ins for Seamless Home Upgrade in 2025
Imagine standing in your bathroom or bedroom, frustrated because the…
Top Vanity Installation Tips for Modern, Space-Saving Designs
My Journey into Modern Vanity Installations: A Personal PerspectiveWhen I…